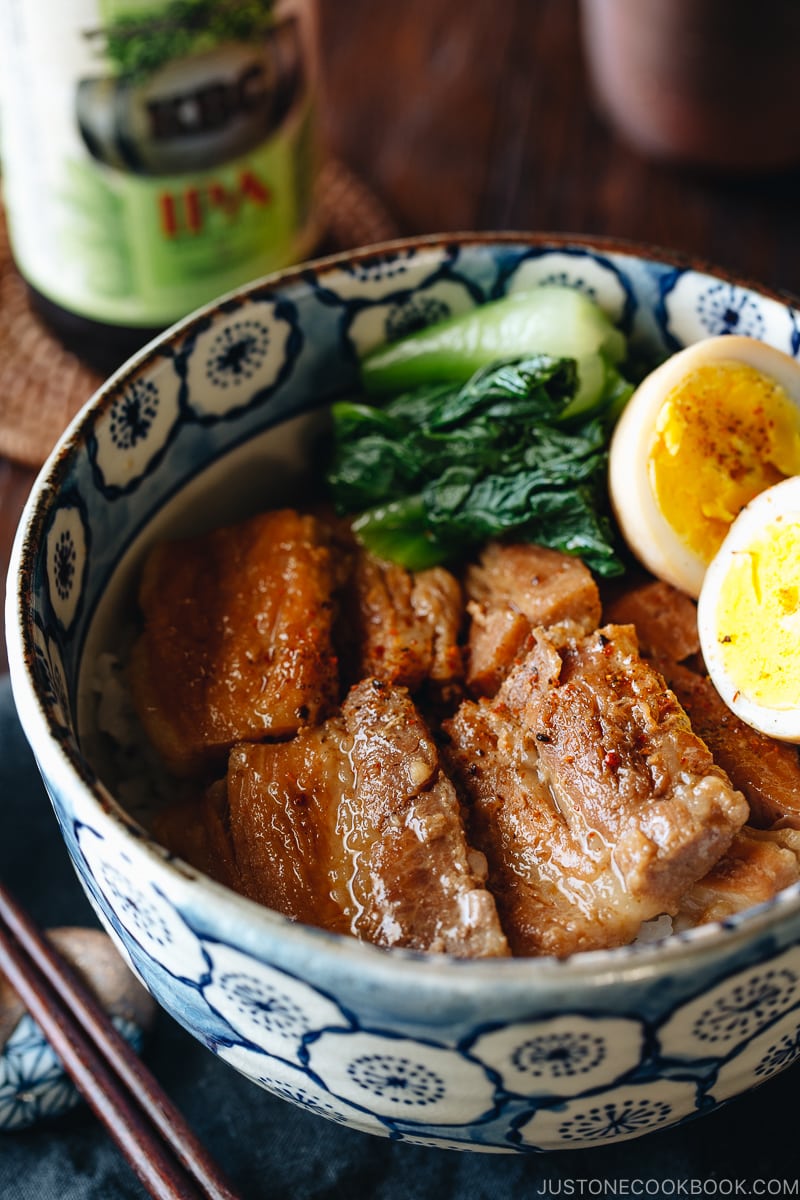
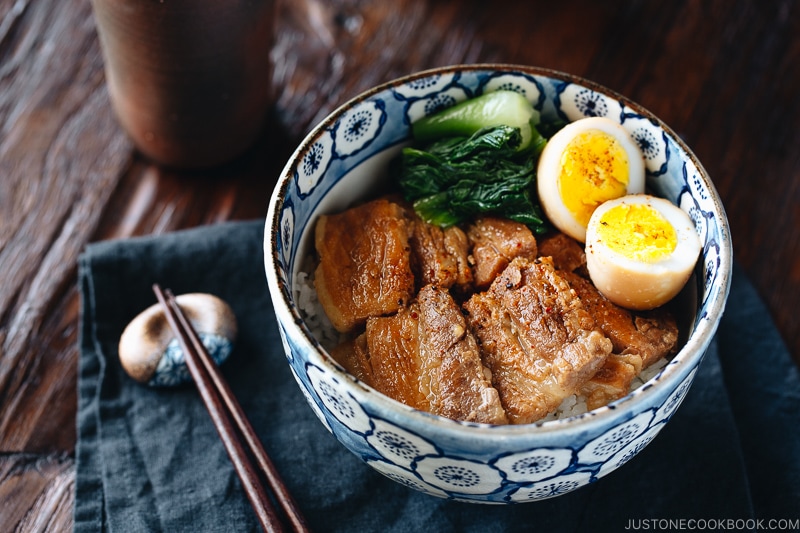
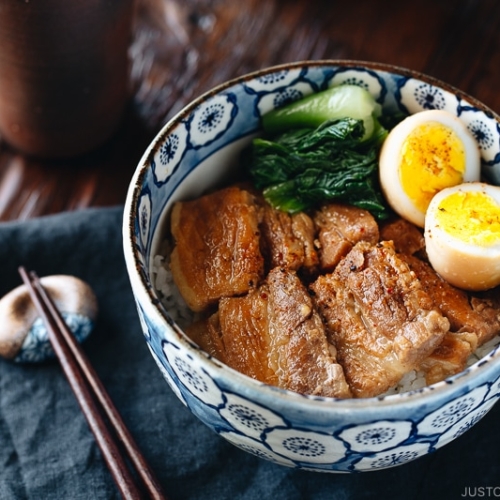
Use your Instant Pot to make this melt-in-your-mouth Pressure Cooker Pork Belly (Kakuni) recipe! Serve the tender morsels over a Japanese steamed rice bowl with the savory sauce drizzled on top. Make this time-saving dish your family‘s new favorite for dinner!
I received many requests for more Instant Pot recipes after I shared my Slow Cooker Chicken Wings recipe. I love my Instant Pot. This electric cooker has both a pressure cooker and s slow cooker function.
Today I’m sharing one of my favorite and super delicious Instant Pot recipes, Pressure Cooker Pork Belly (Kakuni)! I really hope you’ll enjoy this recipe as much as my family does.
If you’ve never had a Japanese pork belly dish called Kakuni (角煮)… oh my gosh, where should I begin? It’s my favorite Japanese pork dish. The tender pork cooking for hours simply melts in your mouth and the sweet and savory sauce…ah, it’s hard not to drool thinking about it. Seriously.
Making Kakuni with a Pressure Cooker
Whether you’re already familiar with how to make Kakuni on the stovetop or have never made it before, I highly recommend making Kakuni with a pressure cooker. Why? Because you can cook it FAST. Much, much, faster than on a stovetop. This special dish that you used to prepare once in a while will soon become a weeknight repertoire. When you cook pork belly over the stovetop, it takes a while (hours) to get the pork super tender and you need to constantly monitor the temperature and amount of liquid remaining in the pot. With a pressure cooker, these worries go away and the process is very simple.
Still hesitant about buying a pressure cooker because of the memories of your mom’s old-fashioned pressure cooker? I was. My mom has this stovetop pressure cooker that makes everyone nervous when it makes a hissing, whistling, and rattling sound. I was used to hearing the sound, yet for the longest time (and still), I didn’t feel safe using it by myself in my kitchen.
Instant Pot Pressure Cooker
However, having the Instant Pot changed me. This electric pressure cooker is very easy and user-friendly. Even though it is both a slow cooker and a pressure cooker, I actually use the pressure cooker function more often than the slow cooker function. Why? It cuts down cooking time significantly, and it’s a perfect cooking gadget for busy cooks!
In case you’re interested, I put the recipe below for my regular Kakuni recipe you can make using the stovetop.
I hope you enjoy my Kakuni recipe using a pressure cooker. I have never used other types/brands of pressure cookers so for instructions on how to use your device, please refer to the manual.
Wish to learn more about Japanese cooking? Sign up for our free newsletter to receive cooking tips & recipe updates! And stay in touch with me on Facebook, Pinterest, YouTube, and Instagram.
Pressure Cooker Pork Belly (Kakuni)
Video
Ingredients
- 3 green onions/scallions (use only the green part)
- 1 knob ginger (1 inch, 2.5 cm per knob)
- 1 Tbsp neutral oil
- 2 lb pork belly block (or use 3–4 lb, 1.35–2 kg and increase the seasonings by 50%; Japanese grocery stores sell pork belly without the rind; if needed, ask your butcher to remove it)
- water (for cooking the pork belly)
- 4 soft or hard-boiled eggs (you can use my soft-boiled or hard-boiled egg recipes)
- shichimi togarashi (Japanese seven spice) (for a spicy kick)
Instructions
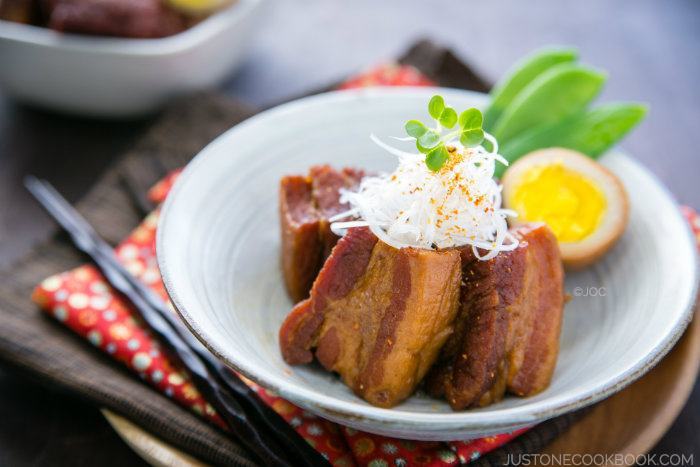
- Gather all the ingredients. My pork belly was from a Korean market and pre-cut into ¼ inch (6 mm) slices. If you buy a pork belly block, you can freeze the meat for 30–60 minutes and cut it with a sharp knife (see my post on how to slice meat). You could also cut it into cubes 2 x 2 inches or 5 x 5 cm, which is a typical Japanese pork belly (kakuni) shape.

- We will only use the green part of 3 green onions/scallions. Cut the green part in half. (Reserve the white part for another dish like Homemade Miso Soup to serve with this Kakuni.) Peel 1 knob ginger and slice it thinly.


To Cook
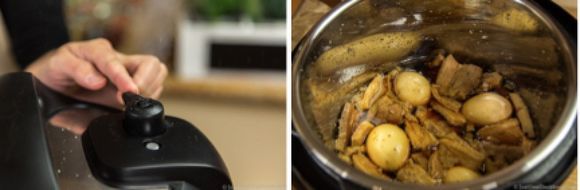
- Press the Sauté button on your Instant Pot (I use a 6 QT Instant Pot) or heat your stovetop pressure cooker. Heat 1 Tbsp neutral oil. Add 2 lb pork belly block in a single layer, searing both sides. You may need to work in batches. If so, transfer the seared pieces to a plate and sear the next batch. When finished, put all the seared pork belly back into the pot. Tip: You can skip the searing process to cut down your cooking time, but this step will render more fat and make the dish tastier.

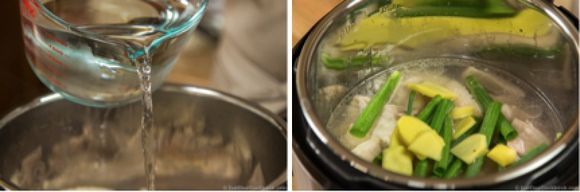
- Pour in just enough water to cover the meat. Then, add the green parts of the green onions and the sliced ginger. Cover and lock the lid. Make sure the steam release handle points at Sealing. Press the Keep Warm/Cancel button on the Instant Pot to stop sautéing. Press the Manual button to switch to the Pressure Cooking mode. Change the cooking time to 35 minutes and start cooking.

- For a Stovetop Pressure Cooker: Lock the lid and cook on high heat until high pressure is reached. Then, reduce the heat to low to maintain high pressure for about 30 minutes. To cook in a regular pot on the stove, see the end notes.
- When cooking is completed, the Instant Pot will switch automatically to the Keep Warm mode. Either slide the steam release handle to the Venting position to quick release the steam OR let the pressure release naturally (about 15 minutes). Unlock the lid. Drain the cooking water and discard the green onion and ginger. Rinse the pork belly under warm water.
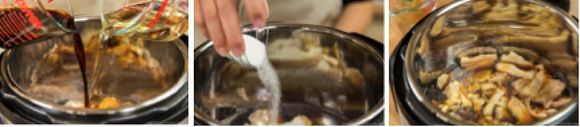
- Put the pork belly back into the Instant Pot. Add ½ cup water, ¼ cup sake, ½ cup mirin, ½ cup soy sauce, and ¼ cup sugar. Mix the seasonings. Add 4 soft or hard-boiled eggs (peeled). Press the Sauté button on the Instant Pot and press the Adjust button to increase the heat. Bring it to simmer to let the alcohol evaporate (only a minute). Then, press the Keep Warm/Cancel button to turn off the Sauté mode. Cover and lock the lid. Make sure the steam release handle points at Sealing. Press Manual and set the cooking time to 10 minutes for sliced pork belly and 20 minutes for pork belly cubes.

- When cooking is finished, the Instant Pot will switch automatically to the Keep Warm mode. Slide the steam release handle to Venting to let out steam until the float valve drops down. Unlock the lid. Optionally, press the Sauté button and simmer on low heat until the liquid in the cooker reduces by half.


To Serve
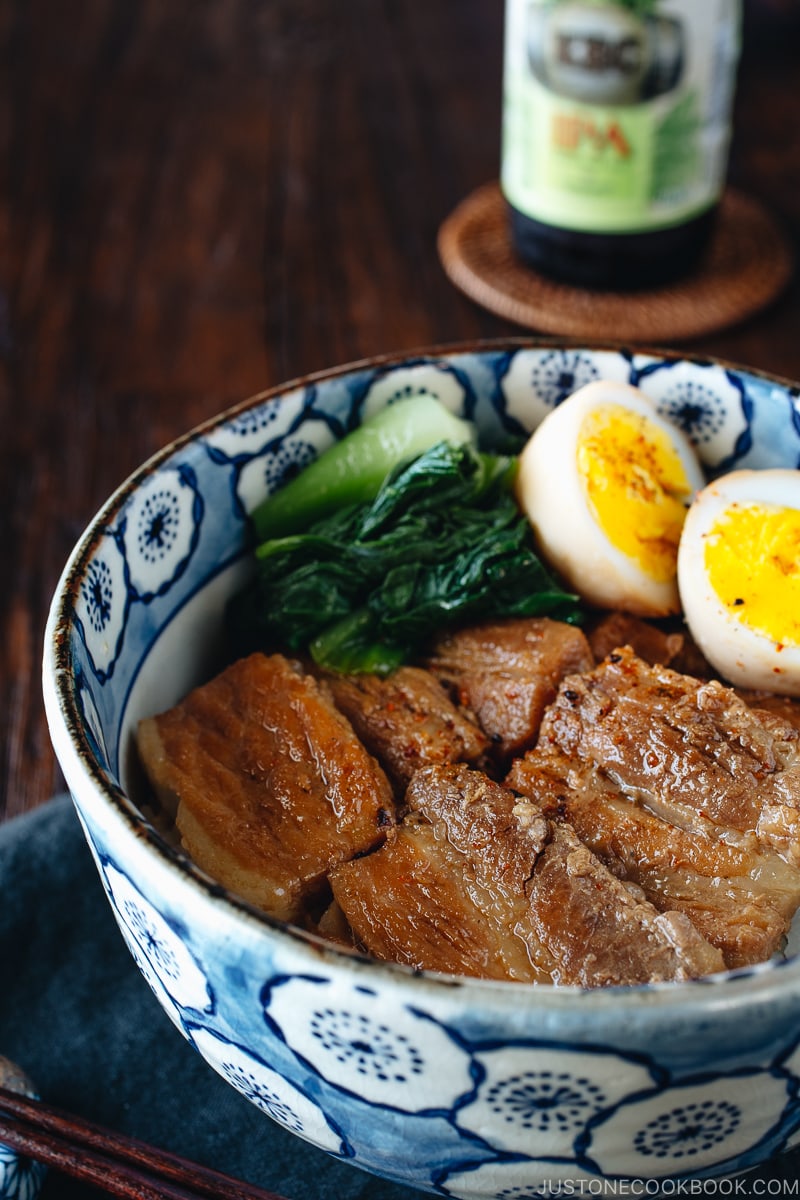
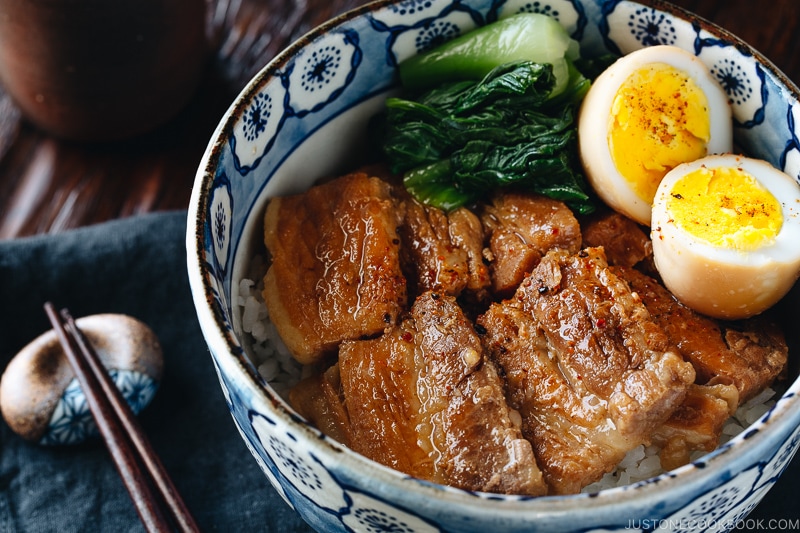
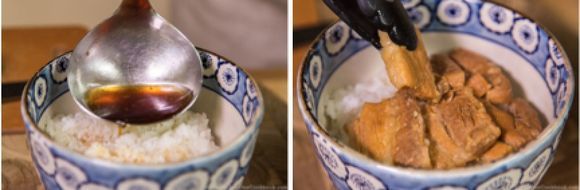
- Serve the rice in a individual donburi (large) bowls and pour some sauce from the pot on top. Place the pork belly and egg on top (add some blanched green vegetables, if you‘d like). Pour additional sauce over the meat and serve immediately. If you like it a bit spicy, sprinkle with shichimi togarashi (Japanese seven spice). Enjoy!
To Store
- You can keep the leftovers in an airtight container and store in the refrigerator for up to 4 days and in the freezer for a month.


Hi Nami,
I’m either not doing this right or there’s a typo in the recipe instructions, which I followed precisely. I used the 1/4 inch pork belly slices and put them in my InstantPot as instructed for 35 minutes, which in my experience with the InstantPot is a pretty long time for most meats. When I took them out, the pork had rendered all of the fat so that only the meat was left, and when I did the second 10-minute cook in the sauce, the pork came out even leaner and quite broken down. The final result looks nothing like yours. I’m wondering if the initial cook should be a shorter time to preserve the integrity of the pork belly. Please advise. Thanks!
Hi Weston! Thank you so much for trying this recipe! I actually cook this recipe often, and I do not have the issue you had. Seeing my ingredients picture at Step 1, do you think your pork belly has a lot more fat than mine? If you look at this video recipe, you see how mine looks. It’s tender, but not broken into pieces… If you think 35 minutes is too long, you can definitely cut down to adjust and I hope that will help. 🙂
This was so good ! Just like my mom used to make. I also put Daikon.
Hi Naoko-san! I’m so glad to hear that. Thank you for trying this recipe!
I made this tonight for the second time and my husband loves this! Your recipe is super easy to follow and it’s really delicious. Thank you!
Hi Jean! Thank you so much for trying this recipe! I’m so glad you and your husband enjoy this dish! Thank you!!
I just wanted to say thank you!! I used your method to make some Okinawan shoyu pork to top my ramen and it was out of this world! I don’t have an instapot, but I have a Ninja Foodi and your directions worked great for it as well! Definitely saving and I look forward to trying more of your recipes! After being stationed in Okinawa, I’m always on the hunt to replicate the most amazing food I’ve had in my life! Love Japanese food!
Hi Amanda! I’m so happy to hear you enjoyed this recipe. Thank you for trying this recipe! I hope you find some recipes that you enjoyed while you lived in Okinawa. 🙂 Thank you for your kind feedback! xoxo
HiHi 🙂
Is Sake & Mirin suitable for 15month old? I love to cook Japanese dishes – always referring to your blog. But not sure if I can use the above 2 ingredients when I cook for my boy? Thank u!
Hi Fen! If the recipe requires cooking the sake and mirin, sure! Alcohol is all evaporated from cooking, so there is no alcohol. If you don’t smell the alcohol then it’s already gone. All you have left is non-alcohol liquid (with umami and sweetness from fermented rice). If the recipe calls for sake/mirin and no need to cook, don’t use it. 🙂
Great! I’m going to get sake & mirin now. Thanks Nami 😘
You’re very welcome! Good luck! 🙂 xo
Nami, you may want to revise this as alcohol does not evaporate in the IP.
Hi Neelie! Please read Step 6: Bring it to simmer to let the alcohol evaporate (no more than a minute).
Ah yes, I did miss that. And I want to reply, of course, only to bring awareness to this issue as this is something I’ve had to research myself, having two young kids to cook for.
For simplicity, I’ll just cut and paste from Food Network, but a quick Google across different platforms will give the same basic conclusion:
“The longer you cook, the more alcohol cooks out, but you have to cook food for about 3 hours to fully erase all traces of alcohol. … After an hour of cooking, 25 percent of the alcohol remains, and even after two and a half hours there’s still 5 percent of it.”
I’ve had to modify so much of my cooking to try to accommodate the kiddos.
In any case, I love your recipes. I often use them and am always assured that they turn out yummy and well-received.
– A Fan from Across the Bay 🙂
Hi Neelie! Because sake (and mirin) is a big part of Japanese cooking just like soy sauce, we do have a lot of discussions online on this matter (on Japanese websites) too. The official doctor’s recommendation in Japan is to wait until 12 months to introduce sake/mirin to the kids, and we have to make sure to cook (boil) it before using it.
It also depends on how much alcohol in the recipe, too. In general, Japanese recipes use a few tablespoons of sake and mirin to make sauce or season the simmered dishes. Since sake and mirin are pretty much in all recipes, and we do not omit them for kids (unless it’s for a baby under 1 year old). This is just how we’re typically advised in Japan. However, it’s best to use your own judgment for your children and do what’s best for them. 🙂
I also should mention that we pre-make alcohol-evaporated sake or mirin and use it for recipes (without worrying about evaporating). We can still use the sake/mirin effect without alcohol. You would cook sake (or mirin) in a pot, bring it to a boil, and let it cook until alcohol is evaporated. Then you keep that in a jar etc and use in whatever recipes that require sake (or mirin). So that’s another option.
Thanks so much for the discussion!
Nami, thanks so much for sharing that! I’ve been wondering what the standard practice is in other countries, and whether the recommendation in the States to leave out alcohol might not be universal.
Anyway, thank you also for the discussion 🙂
Hi Neelie, the pleasure was all mine. Thank you!
Hi Nami, do you use pork belly with skin or without skin for this recipe?
Hi Yi-Nan! Without skin. Japanese don’t use skin-on pork belly so ones you can get from Japanese grocery stores are all no-skin. 🙂
To double this recipe, do we double the cooking times? I’ve made this before, and it’s fabulous! Thanks!
Hi Nikolai! No, unless it’s a significant amount difference, it should be the same cooking time. 🙂
Thanks Nami! Actually I live in Japan, and my girlfriend was quite impressed by this recipe. BTW I did double it, and it went fine even with the extra ingredients (which, btw, brought it just over the “fill” line on my 6 Quart Insta Pot).
Hi Nikolai! Thank you for the feedback! Oh! You have an Instant Pot in Japan! How is it in the Japanese kitchen? I can imagine this machine is gigantic. 😀 I’m so happy to hear you two enjoyed the recipe!
Well of course my kitchen is pretty small, but I have a decent sized place so it is separate from the rest of my living room. I keep it stored away under my floor when I am not using it 🙂
I meant I keep my InstaPot under the floor in my kitchen that is haha.
Hi Nikolai! Yes, I understood. 🙂 In winter months, I keep my IP on the counter all times! 😀
Hi. I was comparing your Kakuni traditional recipe vs instant pot version and I have a question about the size of the pork belly. On the traditional recipe you cut the pork to 2”x2” squares/cubes while the instant pot recipe are cut to 1/4” slices. How much time would you add to the instant pot method if using the 2”x2” cube size? Would you increase in both the first part boiling the pork in water and the 2nd part boiling with all the seasoning? Any adjustments to the amount of seasoning? How would you adjust the instant pot recipe? Thanks so much. Can’t wait to try it. I just bought a pack of belly from Costco 😃
Hi Karen! The pork belly for the instant pot recipe was from a Korean market which was pre-sliced. You will not need to increase the cooking time for the first part (blanching the pork), but for the simmering part, I would increase the time a bit (cook 15-20 mins) to so that the flavor will go in more. If you’re using 2 lbs, you should not need to increase the seasoning. 1.5 x would be okay… but I don’t think it’s necessary. 🙂
Thank you so much for the quick reply! Happy Labor Day weekend 😉
You too, Karen!
[…] in your mouth and the sweet and savory sauce…ah, it’s hard not to drool thinking about it. Instant Pot […]
[…] Pressure Cooker Pork Belly (Kakuni) […]
Hi Nami-san, I made kakuni with instant pot for the first time tonight. Your recipe worked so well! My family loved it. I have a question, but how thinly do you cut the pork belly block? I do not think you mentioned about it in your recipe. Thank you for creating all the easy-to-follow delicious recipes!
I just read the other comments and found that you said that you buy pre-sliced meat from Korean grocery store. I have never shopped at Korean grocery store. Which store do you recommend in SF? Thank you for your advice!
Sorry I just read this comment. One in Sunnyvale, Hankook Supermarket. 🙂 There is one in Daly City too.
Thank you for your reply! I will try those stores next time I make kakuni!
Hi Fumiko-san! I’m glad this recipe worked out for you! Thank you for trying this recipe.
Ah thanks for bringing to my attention. I used a pre-sliced pork belly from the Korean market for this recipe. It was roughly 1/4 inches. I updated the recipe. 🙂
[…] Kakuni (Pork Belly) […]
[…] this recipe: Pressure cooker pork belly (Kakuni) from Just One […]
[…] 7. Kakuni […]
Hi Nani, I love all your recipes and a big hello from Australia. I have a question about this pork dish. I have just bought a instant pot and I’m going to try this recipe tomorrow.
If I blanched the pork in boiling water before pressure cooking, can I skip the step of draining water and washing it after cooking? Can I put all the seasoning and water into the half cooked and washed pork? ( Australian pork has a game smell and I usually blanch it with boiling water and ginger,n wash it before stewing.
Thank you very much.
Hi Jasmine! I’m sorry for my late response. Thank you for trying out my recipes. 🙂
So what you’re saying is that you will boil the water first, add in the pork to blanch (which means just short cooking), and then wash. Well, it comes down to preference, but it doesn’t render fat enough in such a short cooking time and then later you will be cooking in a fatty sauce. In Japanese cooking, we prefer more “clean” taste and this pre-cooking time is actually important before seasoning. But again, this is all preference. 🙂 Hope that helps!