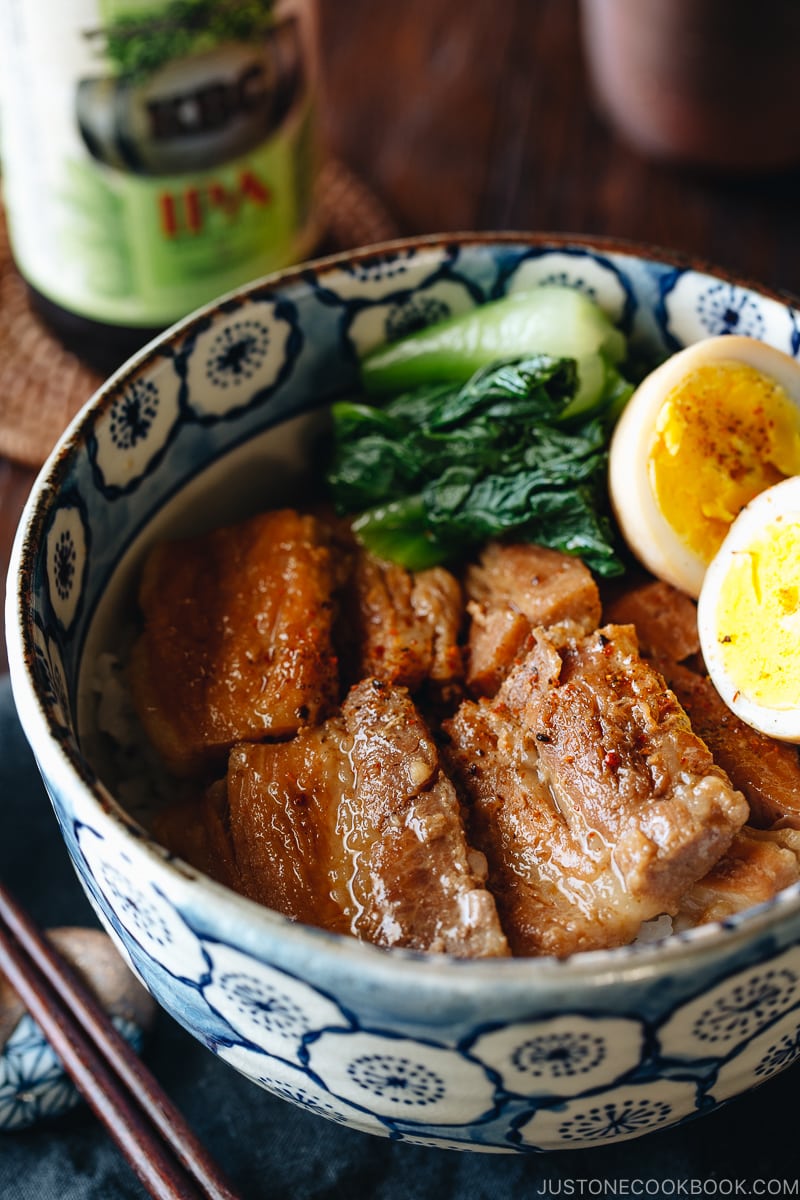
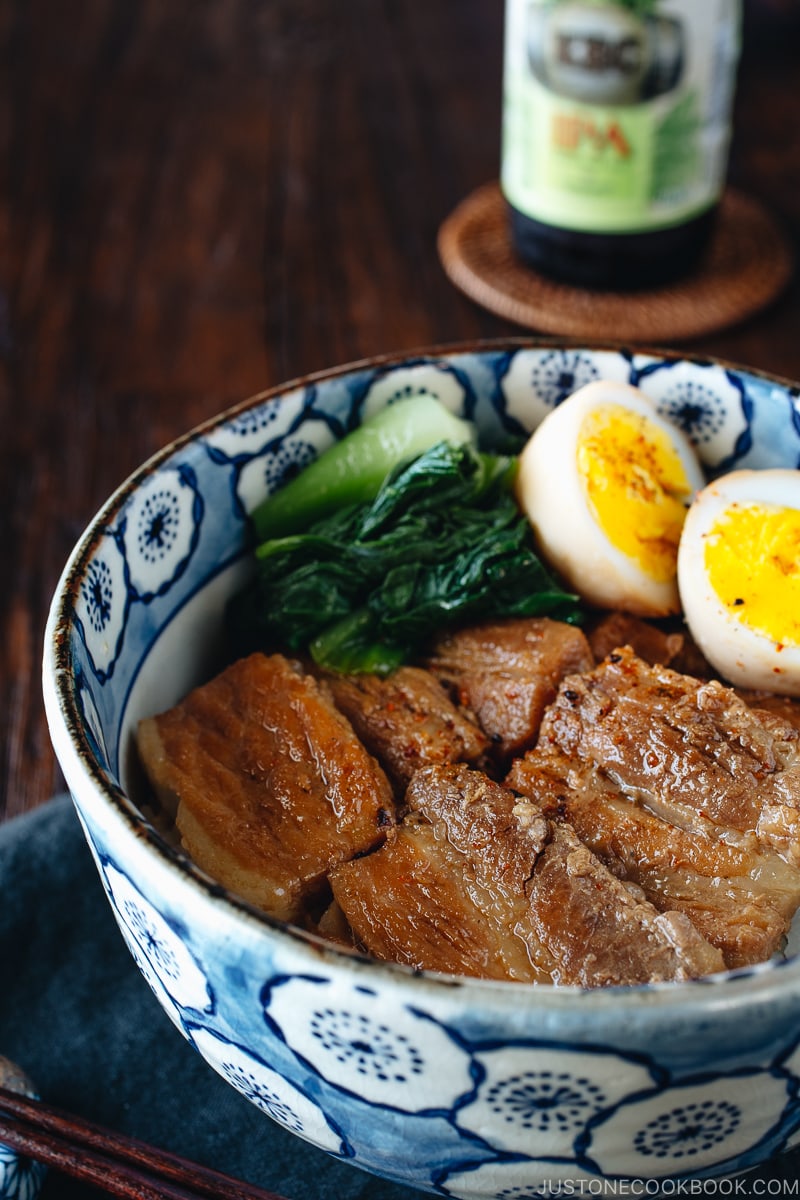
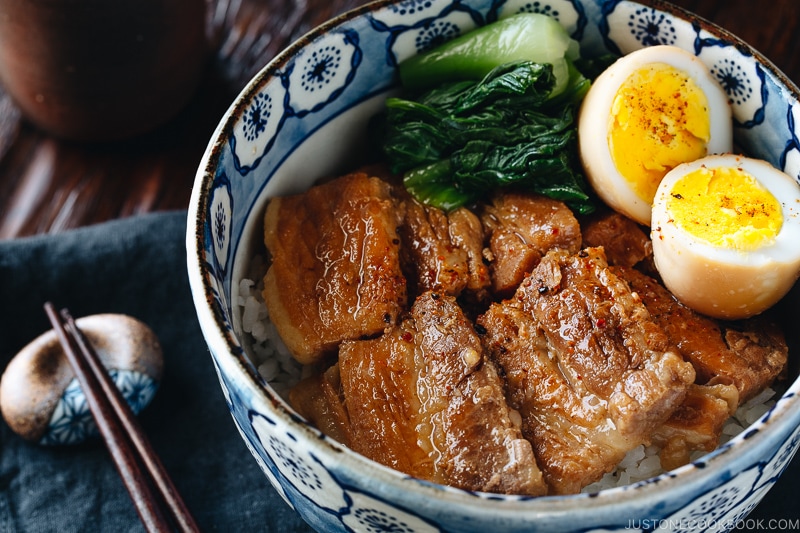
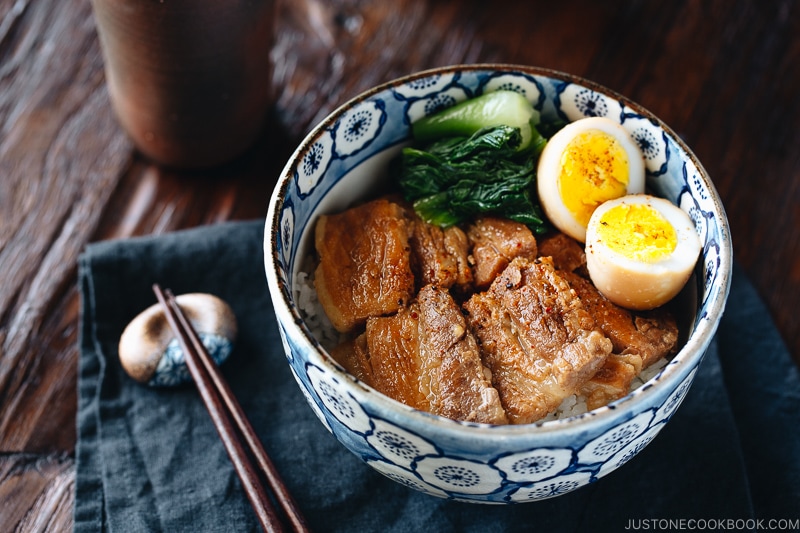
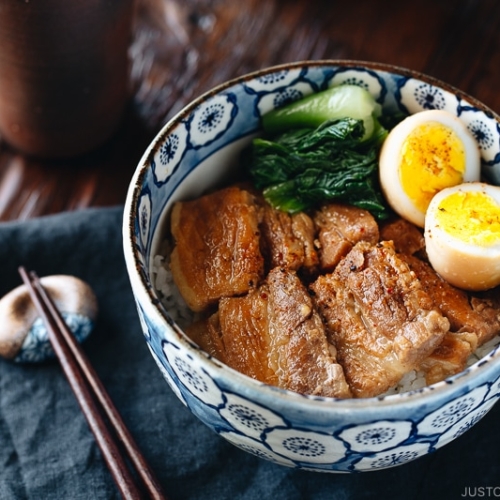
Use your Instant Pot to make this melt-in-your-mouth Pressure Cooker Pork Belly (Kakuni) recipe! Serve the tender morsels over a Japanese steamed rice bowl with the savory sauce drizzled on top. Make this time-saving dish your family‘s new favorite for dinner!
I received many requests for more Instant Pot recipes after I shared my Slow Cooker Chicken Wings recipe. I love my Instant Pot. This electric cooker has both a pressure cooker and s slow cooker function.
Today I’m sharing one of my favorite and super delicious Instant Pot recipes, Pressure Cooker Pork Belly (Kakuni)! I really hope you’ll enjoy this recipe as much as my family does.
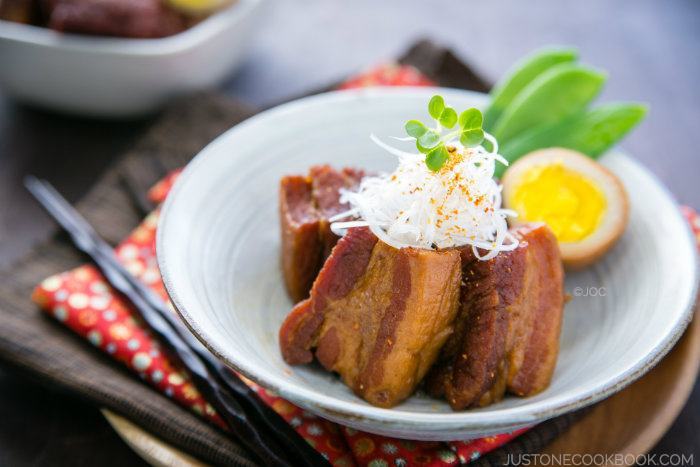
If you’ve never had a Japanese pork belly dish called Kakuni (角煮)… oh my gosh, where should I begin? It’s my favorite Japanese pork dish. The tender pork cooking for hours simply melts in your mouth and the sweet and savory sauce…ah, it’s hard not to drool thinking about it. Seriously.
Making Kakuni with a Pressure Cooker
Whether you’re already familiar with how to make Kakuni on the stovetop or have never made it before, I highly recommend making Kakuni with a pressure cooker. Why? Because you can cook it FAST. Much, much, faster than on a stovetop. This special dish that you used to prepare once in a while will soon become a weeknight repertoire. When you cook pork belly over the stovetop, it takes a while (hours) to get the pork super tender and you need to constantly monitor the temperature and amount of liquid remaining in the pot. With a pressure cooker, these worries go away and the process is very simple.
Still hesitant about buying a pressure cooker because of the memories of your mom’s old-fashioned pressure cooker? I was. My mom has this stovetop pressure cooker that makes everyone nervous when it makes a hissing, whistling, and rattling sound. I was used to hearing the sound, yet for the longest time (and still), I didn’t feel safe using it by myself in my kitchen.
Instant Pot Pressure Cooker
However, having the Instant Pot changed me. This electric pressure cooker is very easy and user-friendly. Even though it is both a slow cooker and a pressure cooker, I actually use the pressure cooker function more often than the slow cooker function. Why? It cuts down cooking time significantly, and it’s a perfect cooking gadget for busy cooks!
In case you’re interested, I put the recipe below for my regular Kakuni recipe you can make using the stovetop.
I hope you enjoy my Kakuni recipe using a pressure cooker. I have never used other types/brands of pressure cookers so for instructions on how to use your device, please refer to the manual.
Wish to learn more about Japanese cooking? Sign up for our free newsletter to receive cooking tips & recipe updates! And stay in touch with me on Facebook, Pinterest, YouTube, and Instagram.
Pressure Cooker Pork Belly (Kakuni)
Video
Ingredients
- 3 green onions/scallions (use only the green part)
- 1 knob ginger (1 inch, 2.5 cm per knob)
- 1 Tbsp neutral oil
- 2 lb pork belly block (or use 3–4 lb, 1.35–2 kg and increase the seasonings by 50%; Japanese grocery stores sell pork belly without the rind; if needed, ask your butcher to remove it)
- water (for cooking the pork belly)
- 4 soft or hard-boiled eggs (you can use my soft-boiled or hard-boiled egg recipes)
- shichimi togarashi (Japanese seven spice) (for a spicy kick)
Instructions
- Gather all the ingredients. My pork belly was from a Korean market and pre-cut into ¼ inch (6 mm) slices. If you buy a pork belly block, you can freeze the meat for 30–60 minutes and cut it with a sharp knife (see my post on how to slice meat). You could also cut it into cubes 2 x 2 inches or 5 x 5 cm, which is a typical Japanese pork belly (kakuni) shape.

- We will only use the green part of 3 green onions/scallions. Cut the green part in half. (Reserve the white part for another dish like Homemade Miso Soup to serve with this Kakuni.) Peel 1 knob ginger and slice it thinly.


To Cook
- Press the Sauté button on your Instant Pot (I use a 6 QT Instant Pot) or heat your stovetop pressure cooker. Heat 1 Tbsp neutral oil. Add 2 lb pork belly block in a single layer, searing both sides. You may need to work in batches. If so, transfer the seared pieces to a plate and sear the next batch. When finished, put all the seared pork belly back into the pot. Tip: You can skip the searing process to cut down your cooking time, but this step will render more fat and make the dish tastier.

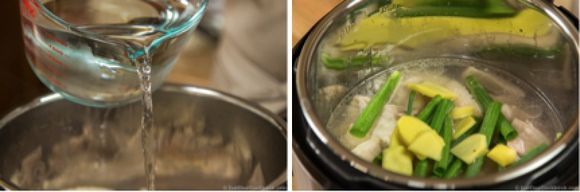
- Pour in just enough water to cover the meat. Then, add the green parts of the green onions and the sliced ginger. Cover and lock the lid. Make sure the steam release handle points at Sealing. Press the Keep Warm/Cancel button on the Instant Pot to stop sautéing. Press the Manual button to switch to the Pressure Cooking mode. Change the cooking time to 35 minutes and start cooking.

- For a Stovetop Pressure Cooker: Lock the lid and cook on high heat until high pressure is reached. Then, reduce the heat to low to maintain high pressure for about 30 minutes. To cook in a regular pot on the stove, see the end notes.
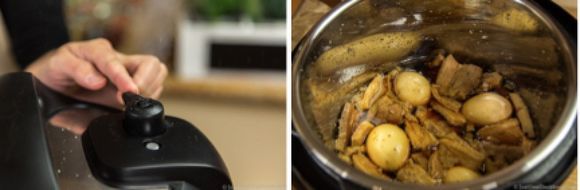
- When cooking is completed, the Instant Pot will switch automatically to the Keep Warm mode. Either slide the steam release handle to the Venting position to quick release the steam OR let the pressure release naturally (about 15 minutes). Unlock the lid. Drain the cooking water and discard the green onion and ginger. Rinse the pork belly under warm water.
- Put the pork belly back into the Instant Pot. Add ½ cup water, ¼ cup sake, ½ cup mirin, ½ cup soy sauce, and ¼ cup sugar. Mix the seasonings. Add 4 soft or hard-boiled eggs (peeled). Press the Sauté button on the Instant Pot and press the Adjust button to increase the heat. Bring it to simmer to let the alcohol evaporate (only a minute). Then, press the Keep Warm/Cancel button to turn off the Sauté mode. Cover and lock the lid. Make sure the steam release handle points at Sealing. Press Manual and set the cooking time to 10 minutes for sliced pork belly and 20 minutes for pork belly cubes.

- When cooking is finished, the Instant Pot will switch automatically to the Keep Warm mode. Slide the steam release handle to Venting to let out steam until the float valve drops down. Unlock the lid. Optionally, press the Sauté button and simmer on low heat until the liquid in the cooker reduces by half.


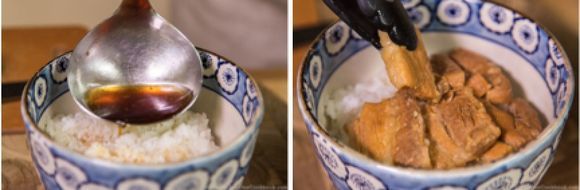
To Serve
- Serve the rice in a individual donburi (large) bowls and pour some sauce from the pot on top. Place the pork belly and egg on top (add some blanched green vegetables, if you‘d like). Pour additional sauce over the meat and serve immediately. If you like it a bit spicy, sprinkle with shichimi togarashi (Japanese seven spice). Enjoy!
To Store
- You can keep the leftovers in an airtight container and store in the refrigerator for up to 4 days and in the freezer for a month.


I made this recipe twice this week because it was so good and super easy to prepare!
Hi Ann, Thank you very much for trying this recipe! We are so happy to hear you enjoyed this dish!😊
This looks and sounds great. I am not against cooking with fatty meats, as long as I can remove a lot of it easily. I really don’t like to eat it though. It looks like pork belly is 50% or more fat. It makes my heart hurt just looking at it. Could I cut off some more of the fat before cooking without loosing too much flavor?
Hi MS INGE, Sure, you may cut off some fat, but we recommend leaving a little bit of fat. The fat makes the meat very tender, and without it, it will be a very different texture. As for flavor, it should be close to ones with fat, but it may lose a little bit of deep sweetness from the fat. We hope this helps!
Hello Nami!
I have an 8qt InstantPot. Do you know if I need to adjust the cooking times due to the difference in volume from the 6qt IP you used? Additionally, I read your post about soy sauce (very informative!), would you recommend using the koichuchi shoyu for this recipe?
I’ve followed your recipes for several dishes now, and they have all turned out delicious. Thank you for creating such holistic content for everyone to enjoy authentic Japanese cooking 🙂
Thanks!
Shi Ya
Hi Shi Ya Ni,
Thank you very much for trying Nami’s recipes and for your kind feedback.
In most of the recipes, cooking time doesn’t need to be changed for 8qt Instant Pot. However, it requires at least 2 cups of liquid to pressurize, so it may take a little longer to pressurize.
For soy sauce, Koikuchi soy sauce is the most common Japanese soy sauce used for recipes, and Nami used “Koikuchi” in this recipe.
We hope this is helpful, and you enjoy this delicious Kakuni!🙂
What’s the best way to reheat the pork belly the next day?
Hi Lauren!
If you have a lot of Kakuni left in the pot, it’s easier to reheat in the pot so that it’s reheated through.
The microwave sometimes has hot spots and is not thoroughly reheated. However, if you only need to reheat just one piece of Kakuni, microwaving is easier.
Hope this helps!
Is it ok to keep the pork skin on?
Hi Evelyn,
We usually make Kakuni without skin. However, Okinawan Rafute, which very similar to Kakuni, is cooked with skin-on. Here is the recipe link for Rafute. https://www.justonecookbook.com/rafute/
If you prefer cooking this Kakuni with skin, we recommend pre-boil the meat to reduce the fat and unwanted smell first as we do in the Rafute recipe.
We hope this helps!
The meat was tough and fibrous. The sauce tasted very good though. In the end I had to mince the meat so that we could eat it with ease. I later noticed that in the video you clicked “meat/stew” but in the directions you pressed “manual. Is there a difference?
Hi Justine! Thanks for trying this recipe and I’m sorry it didn’t come out the way it should. I wonder why the meat was tough and fibrous…
– Could you tell me how thick was your pork belly?
– Was there enough fat for the block/slices you got? Pork belly has good amount fat, which is great for braising. You should get tender meat, not tough or fibrous.
– You cooked high pressure for 35 minutes, right? “Meat/Stew” vs “Manual” doesn’t matter as long as you cook the same time. Pre-Program mode (like Meat/Stew) makes it easier for users with one button, if you don’t change the cooking time, etc.
I followed the cook times. The meat was about one inch by two inches thick. I cooked it according to the recipe you posted. The only difference I could think of is that after the first 35 minutes on Manual, it stayed in there for another 40 minutes because I was out of the house. Could it be that?
Thank you,
Justine
Hi Justine! The pork belly is 1 x 2 inch… that’s good! When you were out, was the meat in the sauce or exposed? Even so, when you reheat and pour the sauce over etc, it should not be tough or fibrous. Fibrous or tough meat happens to the different cut of meat like tenderloin and loin… I’m really not sure why pork belly gets dry. 🙁
Hi Nami, the pork belly block I purchased at the Chinese market has skin on top. Should I remove the skin for this recipe?
Thank you!
Hi Jen! Yes, please remove the skin/rind. In Japan (or Japanese markets here), pork belly is sold skin-less. I’ll mention in the recipe. 🙂
Made it last night and was a huge hit. The broth is amazing. It’s definitely a keeper! Thank you!
Hi Jen! So happy to hear you enjoyed this recipe. Thank you for your kind feedback!
On the YouTube video you press “Meat/Stew” but in the instructions you put “Manual.” Which one should it be or does it even make a difference?
Hi Justine! The preset mode is helpful if you don’t have to adjust (just one click) but if you adjust the timer, it’s same as. using manual… so it’s up to you how you want to use it. 🙂
This is absolutely yummy and I’m so glad I found it. We have had Kakuni in our fav restaurant (Kura) in Ak, New Zealand but we live in Portland, OR now and it’s not a good time to go to restaurants of course. Making this just made me feel so accomplished, it really was meltingly delicious. It was hard to throw away the first cooking liquids and onions and ginger but I’m glad I did. The second batch of cooking and reducing really brought everything harmoniously together. I added some carrots and just a few garlic bulbs. I think I could’ve skipped the garlic but the carrots were soft and delicious! Thanks! Julia
Hi Julia! Aww I’m so glad you enjoyed this recipe! Thank you so much for your feedback, and I’m happy you got to enjoy this at your home during this pandemic.
I made this with no variations to the recipe. It was marvelous. Gochisou sama deshita.
Hi Bkhuna! Wonderful! I’m so glad to hear you enjoyed this recipe! Arigato!!
I can’t wait to try this recipe. The only this is I don’t have any scallions. I have onions and Korean chives. Would either of those work as a substitute? Or can I leave it out without losing flavor? Thank you!!
Hi Sylvia! The scallions or negi (long green onion) is to remove the unwanted flavor from the pork, not too much for flavoring. You can use onion, leeks, shallot, as a substitute. 🙂
This was great! I left out the Japanese five spice and only had 1/4 cup Mirin so substituted the remainder with 1/4 cup rice vinegar and 1/8 cup sugar. It was so easy and the pork was soft and delish as promised. The egg sits in the sauce while it reduces to soak in the flavour so my egg was definitely hard boiled, which was fine too.
Hi Sarah! Thank you so much for your kind words and feedback. Thanks for trying this recipe and I’m so glad you enjoyed it! 🙂
This looks so good! I want to make this for my family, but the block of pork belly I have is fully frozen. Do you have any recommendations for cooking kakuni from frozen pork belly?
Hi Jonathan! You will still need to defrost most of it so you can properly sear. Otherwise, the moisture will come out while you’re searing and you probably have a hard time searing it correctly. 🙂
Hi!
Just wondering if you use less pork in this recipe, say half of the recipe amount or less, should we reduce the pressure cooking time from 35 minutes? Thank you!
Hi Cathy! I would start just following my recipe (see this post: https://www.thekitchn.com/instant-pot-cook-time-half-recipe-22932622) but check the result and see if you can adjust based on how it’s cooked. 🙂
I see you’ve updated the recipe! Good stuff! Question, about how long will the left over sauce last in the fridge? Thanks!
Hi Nikolai! The amount of recipe should be the same, right? I edit instructions by improving my sentences to make it clear (especially if someone has trouble understanding my English). xD
I’d say up to 3-4 days? Or freeze it if you want to keep longer. 🙂