Add a Japanese flavor to your breakfast with these moist and delicious Red Bean Pancakes. If you love sweet red bean paste (anko) like I do, then you‘ll enjoy this new red bean treat! It‘s great as a snack, too.
If you love Japanese red bean sweets such as Daifuku, Taiyaki, Anpan, and Dorayaki, you will love this Red Bean Pancakes! These pancakes may look like ordinary pancakes, but they are moist, light and fluffy, with just a hint of sweet red bean paste. If you can’t’ get enough of delicious red bean paste in your sweets, why not also have it for breakfast!
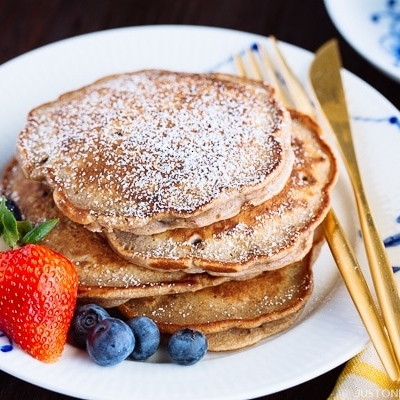
Red Bean Pancakes for Breakfast
Full confession, these red bean pancakes are not “common” pancakes in Japan. I’m sure people may make these pancakes at their home, but my mom never made them. I don’t quite remember how I ended up making these pancakes in the first place. Most likely I had leftover red bean paste in the refrigerator and decided to add it to the pancake batter one morning.
What not to like, right? I love pancakes for breakfast and we make different variations at home. Since I love anything that has red bean in it, this became an instant hit even among my family members.
Since then whenever I have some leftover red bean paste in the container (you just need one cup), I whip up these red bean pancakes for breakfast (or snack).
Red Bean Pancakes – Deconstructed Dorayaki
The red bean paste gives nice moist texture to the pancake batter. It’s kind of like deconstructed dorayaki. But as red bean flavors are spread out into the batter, the “red bean” flavor is not as strong as dorayaki. It’s definitely easier to make these pancakes at home compared to dorayaki.
As red bean paste is already sweet, and even sweeter if you buy pre-made red bean paste. Dilute the red bean paste with water in the saucepan first to easily incorporate into the batter.

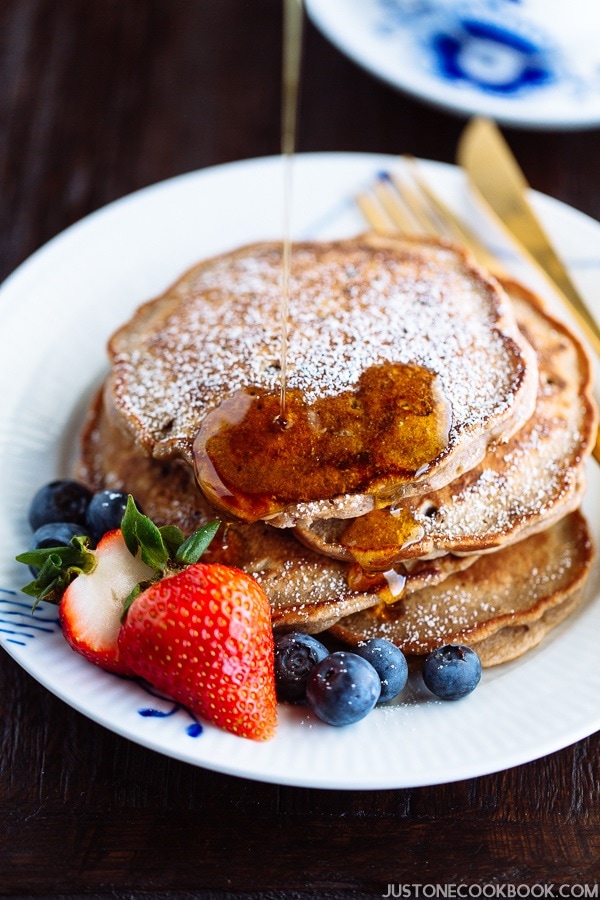
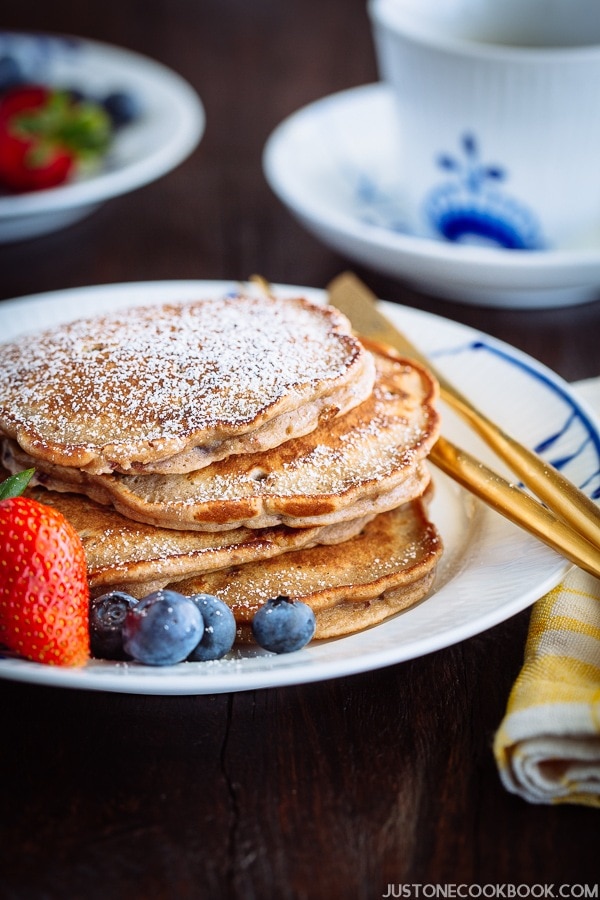
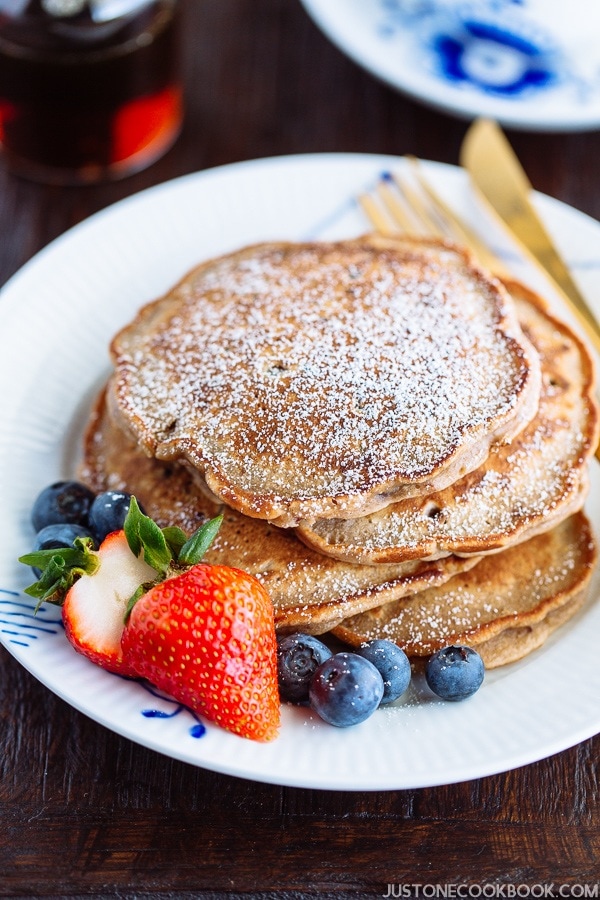
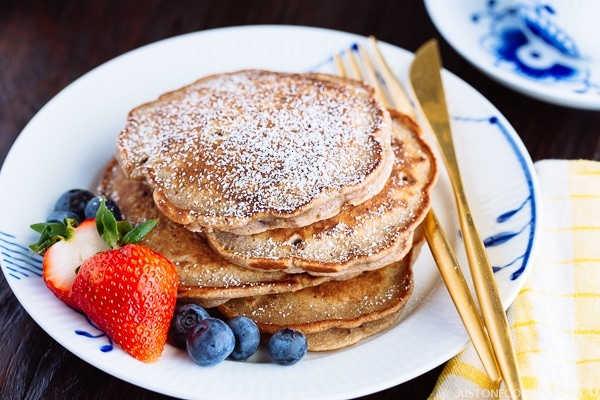
As far as toppings and sauces go, I like how maple syrup matches perfectly with red bean pancakes. Even though it’s already a bit sweet from the red bean, I still like to drizzle just a little bit on mine. For the looks, I also sprinkle a bit of powder sugar.
It’s a little Asian twist on basic pancakes and I hope you give it a try, especially if you have some small amount of red bean paste in your refrigerator and don’t want it to go to waste.
Wish to learn more about Japanese cooking? Sign up for our free newsletter to receive cooking tips & recipe updates! And stay in touch with me on Facebook, Pinterest, YouTube, and Instagram.
Red Bean Pancake
Ingredients
For the Red Bean Paste
- 1 cup sweet red bean paste (anko) (10 oz; I use tsubuan (coarse paste); you can make homemade Anko)
- 2 Tbsp water
For the Pancake Batter
- ¼ cup sugar (4 Tbsp)
- 2 large eggs (50 g each w/o shell)
- 1 cup whole milk
- 1 tsp pure vanilla extract
- 2 cups all-purpose flour (plain flour)
- 1 tsp baking powder
- 1 pinch Diamond Crystal kosher salt
To Cook the Pancakes
- 4 Tbsp unsalted butter
To Serve
- confectioners’ sugar
- maple syrup
- fruits of your choice
Instructions
To Prepare the Red Bean Mixture
- Add 1 cup sweet red bean paste (anko) and 2 Tbsp water to a small saucepan and simmer until the paste loosens up. Turn off the heat and let cool.
To Make the Pancake Batter
- In a large bowl, whisk together ¼ cup sugar and 2 large eggs (50 g each w/o shell). Then, add 1 cup whole milk, 1 tsp pure vanilla extract, and the red bean mixture.
- Add 2 cups all-purpose flour (plain flour), 1 tsp baking powder, and 1 pinch Diamond Crystal kosher salt in a fine-mesh sieve and sift over the mixing bowl. Mix well to combine but do not overmix, which will develop gluten and cause a tough pancake texture.
To Cook the Pancakes
- In a nonstick frying pan, heat ½ Tbsp butter on medium heat. Pour a ladleful of the mixture on the pan and cook until you see bubbles form on the pancake. Then, flip over and cook until both sides are nicely golden brown. Continue to make pancakes with the rest of the batter and butter.
To Serve and Store
- Serve immediately. You can sprinkle with confectioners’ sugar or top with maple syrup and fruits of your choice. I usually add with just maple syrup as the pancakes are already sweet. To save for later, wrap 2 pancakes in a single layer with aluminum foil and put it in a freezer bag. Store in the freezer for up to a month. Use the oven toaster or oven to reheat before you serve.
Nutrition
Editor’s Note: The post was originally published on March 16, 2011. The images, the content, and the recipe have been updated in June 2017.


These are yummy! Made some for breakfast and put leftovers in the fridge for quick breakfast before I go to work.
Hi Chris! We are glad to hear you enjoyed Red Bean Pancakes!
Thank you so much for trying Nami’s recipe!
Thank you so much for the delicious recipes! I just made your Anko recipe and for breakfast the Anko pancakes and I’m in love! I did make one little exception and substituted the plain flour with half Mochiko and half Teff flour, since I’m sensitive to wheat. And WOW! Best pancakes I’ve ever made!
Hi Nancy! Thank you so much for trying Nami’s recipe and sharing your cooking experiment with us.
We are so happy to hear you enjoyed the Red Bean Pancakes!
Happy Cooking!
Congratulations, I really like your site and I am more inspired by you for my own creativity. I wanted to thank you for a number of useful and tasty recipes. Most recently, I used this recipe to make breakfast for my family. Ohhhh- Husband and children are delighted. Thanks for the help. After changing a couple of categories in the recipe, I also created my own, I hope you will appreciate and understand what has become my muse and passion in cooking! Thank.
Hi Stacy! Nami and all of us at JOC are so glad to hear that you’ve been enjoying the recipes and everything else that we share.
Thank you very much for your kind feedback!
Yay! My weekend recipe to try. Reminds me of your dorayaki, which I’ve made several times. I’m thinking whipped cream with these pancakes like your Ogura toast. Mmmmm 😋 Thank you for all of your inspirations!
Hi Barbara! We hope you enjoyed the Red Bean pancake with whipped cream! 😋
Thank you very much for reading Nami’s posts and trying her recipes!
Happy Cooking!
Hi! Do you think this recipe would work with oat flour? I’m eating gluten-free, so was wondering about a substitute for all-purpose flour. Thanks in advance!:)
Hi Lili! Thank you very much for reading Nami’s post and trying her recipe!
Oat flour should work, but the texture of the pancake will be a little different.
We hope this helps!
When I tried to make this, the batter ended up being really thick and I had to mix it a lot to incorporate the ingredients. I feel like it ruined the recipe. Any tips?
Hi Quinn, Thank you very much for trying Nami’s recipe!
Did you use a kitchen scale to measure the ingredients? Or follow how to measure with the cup? https://www.justonecookbook.com/how-to-measure-flour/
The thick batter could be from extra flour. We hope this could be the case.🙂
So do we mix the red bean paste in with the pancake batter and cook it together? Sorry I didn’t see that in the directions. I like to follow directions exactly as in the recipe to get the right taste and texture. If I don’t follow the recipe, it almost always ends up in failure.
Hi Juls! Yes, you add the red bean mixture to the batter at step 2: Add the milk, vanilla, and red bean mixture.
My kids love pancakes, but never tried red bean pancakes yet. I have homemade anko always ready, so I sure will give it a try.
Thanks!
Hi Hayan! I hope they will enjoy a new flavor of pancakes! 🙂 Thank you for your comments!
What a great idea! Looks lovely, I too love red bean paste.
Thanks Emy! Hope you’d give it a try! 🙂
Hi – I usually shop at H-Mart & buy dorayaki – now that you have a recipe, I’ll just make my own. Domo Arigato! Theresa
Hi Theresa! Homemade is always the best! I like that I can control how sweet it is (store-bought tends to be sweeter). Hope you enjoy! 🙂
The first time I went to try this recipe, I didn’t have enough red bean paste, so I substituted half with chunky peanut butter. I highly recommend this!!
Just today I decided to repeat the peanut butter red bean pancakes, but again was missing an ingredient, this time maple syrup. My substitute, 2 Tbs honey, 2 Tbs molasses. Awesome!!!!!
Hi Corrine! Ohh thanks so much for your recommendation on chunky peanut butter! 😀 And thanks again for introducing the additional flavor. This is awesome! Thanks for sharing!