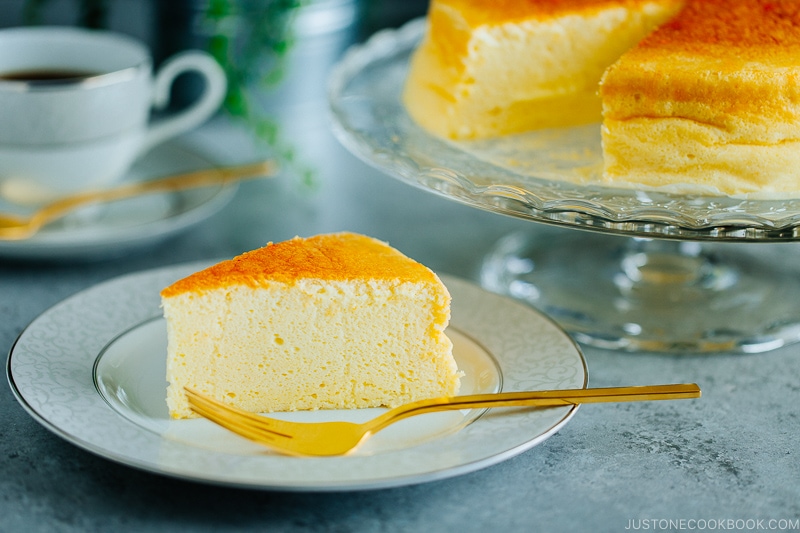
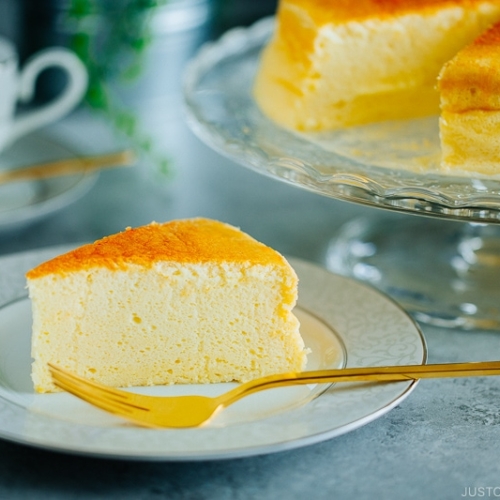
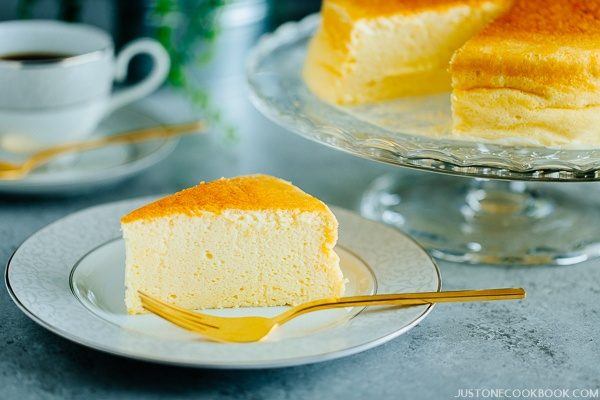
Light, jiggly, and fluffy, Japanese Cheesecake (Soufflé Cheesecake) is seriously the most delicious dessert to serve a crowd. It has the melt-in-your-mouth combination of creamy cheesecake and airy soufflé. A second serving (or more) is a guarantee!
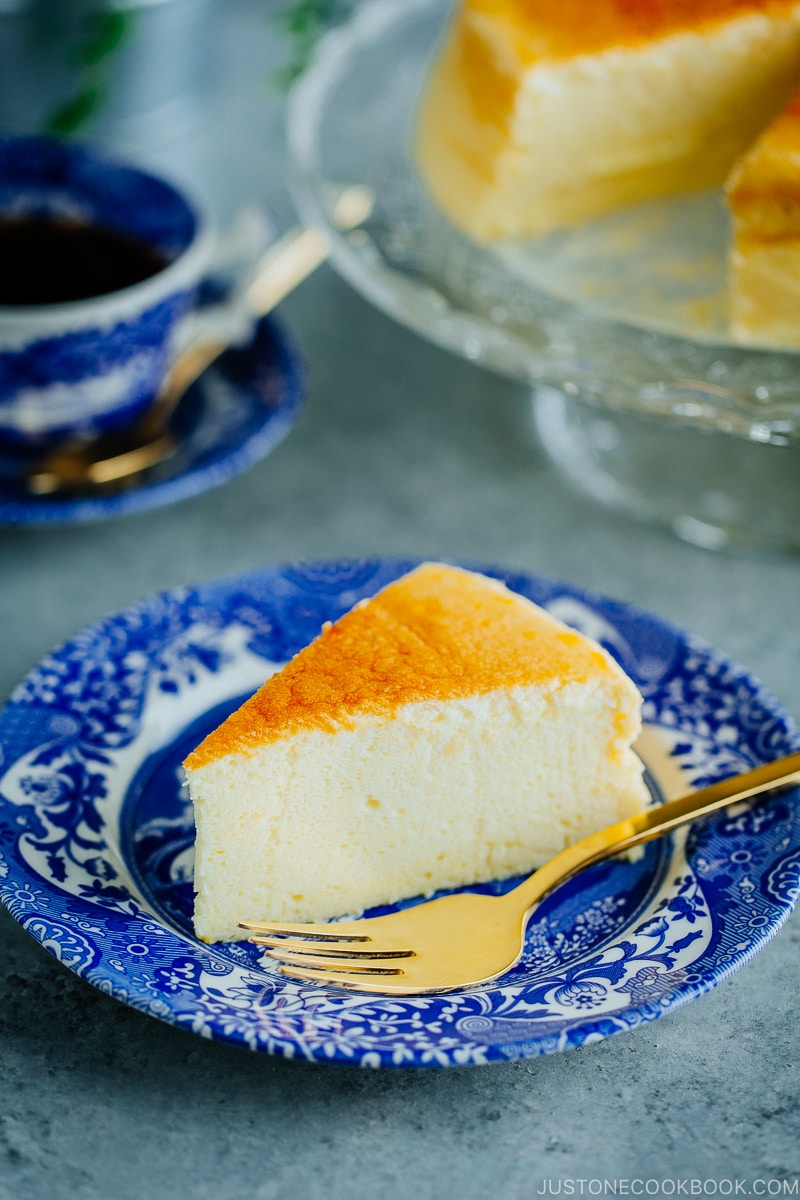
Japanese cheesecake (also goes by soufflé cheesecake) is a glorious dessert known for its ultra-creamy, super luxurious, slightly tangy flavor and airy, soufflé-like character. It has swept the food world by storm and almost every dessert fanatic goes wild for it.
Why is it so popular? What’s the difference between Japanese cheesecake and regular cheesecake? For a start, I think it has the ideal texture that appeals to everyone. With elements of both a rich velvety custard and a cottony sponge cake, the dessert simply hits all the right notes. It is not heavy and a lot less sweet than typical Western-style cheesecakes. Even those who are not into cheesecake will fall head over heels for this delicious treat.
Here, I’ll show you how to make the best Japanese cheesecake and we’ll cover these topics:
- What (exactly) is Japanese cheesecake
- A little background on cheesecakes in Japan
- Ingredients & equipment you’ll need
- Helpful tips & tricks
The recipe, while having several different steps, is simple enough to execute. Let’s get started!
What is Japanese Cheesecake?
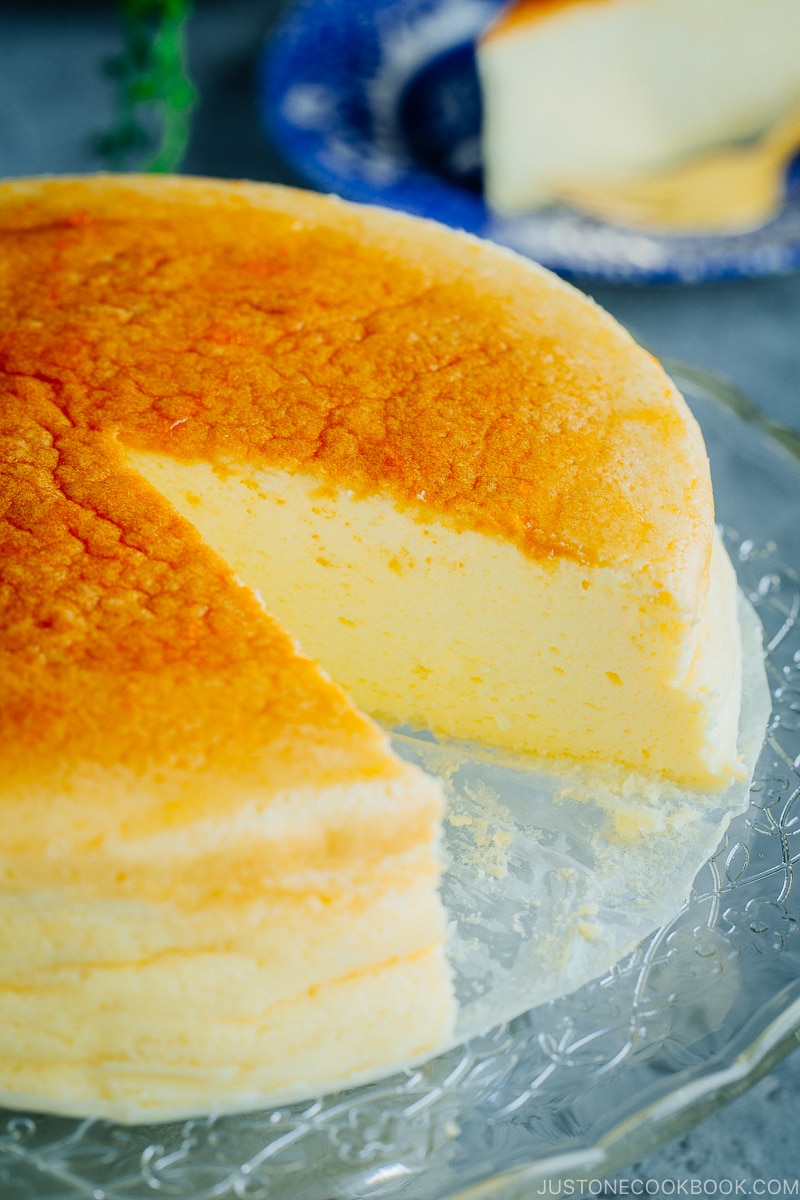
This particular Japanese cheesecake recipe is a soufflé-style cheesecake that incorporates whipped egg whites in the cake mixture and is baked in a bain-marie (water bath), which results in its characteristically light and fluffy texture. Yes, it is basically the cheesecake version of the Japanese soufflé pancakes!
As there are a few varieties of cheesecakes in Japan, we call this cheese soufflé or soufflé cheesecake. Outside of Japan, however, it becomes synonymous with the generic “Japanese cheesecake”. Because of its unique texture, it is also called jiggly cake or Japanese cotton cheesecake. I agree, that’s a lot of names for a cheesecake!
Cheesecakes in Japan
While this has become the de facto ‘Japanese cheesecake’, I do want to mention that there are 3 main types of cheesecakes available in Japan:
- Baked cheesecake (ベイクドチーズケーキ)
- Rare cheesecake (レアチーズケーキ)
- Soufflé cheesecake (スフレチーズケーキ)
Baked cheesecake is the typical cheesecake. It has eggs, cream cheese, heavy cream, and flour and it’s baked in the oven. Some may have a biscuit crust on the bottom, and some don’t.
Rare cheesecake is the “no-bake cheesecake”. The cream cheese and heavy cream are mixed with gelatin or lemon juice, then poured over the biscuit crust, and cooled to set inside the refrigerator. Eggs are not used in this version. This type of cheesecake is often served with berries or other types of fruits.
Soufflé Cheesecake is the one we’re making today and originated in Japan. The technique is created by Yasui Juichi (安井寿一), a pastry chef at the patisserie of the Plaza Hotel.
How to Make the Best Japanese Cheesecake
Ingredients You’ll Need
First, let’s go over the ingredients and equipment you will need to make this amazing cheesecake. I wrote this section so it’s helpful for beginner bakers. If you bake often, please skip this section.
1. Unsalted butter: When a baking recipe calls for unsalted butter or is written as just “butter”, that means the salt is not required. As baking is chemistry, I recommend using only unsalted butter.
2. Eggs: An American large egg is about 50 grams without shell (56.7 g with shell).
3. Cream Cheese: Buy two Philadelphia Original Cream Cheese 8 oz. boxes instead of the round container type. You will need one full box (8 oz.) and 2.5 oz. from the second box (there is the measurement on the package in case you don’t have a kitchen scale).
4. Heavy (Whipping) Cream: Heavy cream or heavy whipping cream is the richest type of liquid cream with a fat content of at least 36%. You can also go light and use whole milk in this recipe.
5. Granulated Sugar: I often receive questions about sugar whether you can use a substitute or reduce the amount of sugar. As I mentioned before, the amount of sugar affects the baking results. My recommendation is to follow the recipe first before adapting so you will know what works and what not. I use regular white granulated sugar for my baking unless stated otherwise.
6. Cake Flour: I use the King Arthur cake flour blend, but if you don’t have the cake flour in hand, you can always make it yourself. All you need is all-purpose flour and corn starch. To get 1 cup cake flour, take one level cup of all-purpose flour, remove 2 tablespoons, then add 2 tablespoons of corn starch back in, and sift to combine.
7. Lemon: To me, it’s important to include the lemon juice for a touch of tanginess and the zest for the fragrance.
8. Apricot Jam: Typical soufflé cheesecake is covered with apricot jam. It gives the right amount of tanginess and sweetness as well as a shiny sheer on the cake. I highly recommend getting a jar (my favorite brand is Bonne Maman).
Equipment You’ll Need
1. Cake Pan: I use this 9-inch cake pan with a 4-inch height. If your 9-inch cake pan is not 4-inch tall, you can still use it with parchment paper to support the rising cake. If you have a smaller or bigger cake pan, please adjust your ingredients as I used one egg as a unit of calculation.
- 1 large egg (50 g without shell)
- 50 g cream cheese
- 10 g unsalted butter
- 33 g (33 ml) heavy whipping cream
- 10 g granulated sugar
- 13 g cake flour
- 1 tsp. lemon juice + some zest
- 17 g granulated sugar for beating egg whites
I used to use a springform pan for my soufflé cheesecake, and most of the time I didn’t have any water seepage issues (I used a heavy-duty 8″ long aluminum foil to secure). However, I discovered a better solution (read below) with this new cake pan, so now I don’t use my springform pan for making this cheesecake.
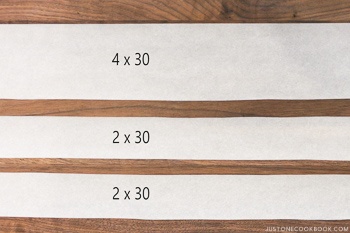
2. Parchment Paper: You will need to pull out 30 inches of parchment paper. You will need one 30″ x 4″ (height of cake pan) sheet, and two 30″ x 2″ strips which are used to lift up the cake. To save time, I recommend this 9-inch round parchment paper liner for the bottom of the cake.
3. Mixing Bowls: You need 2 large mixing bowls for the cake batter, and a third one to beat egg whites (or a stand mixer bowl if using a stand mixer).
4. Fine Mesh Strainer: It’s important to sift the cake flour for the perfect texture. If you are going to make your own cake flour, then it’s even more important to have a fine-mesh strainer. We also use it to pass through the cake batter to achieve an extra refined texture.
5. Whisk: I use a whisk (I love this one) instead of a silicone spatula to incorporate air in the egg whites into the batter.
6. Stand Mixer or Electric Mixer: Have you beaten egg whites with your hand? It’s a real workout for your arm. I’ve done it before and let’s say I’m thankful for my stand mixer. You can use a hand mixer too; however, the speed level will be different, so trust your eyes.
7. Large Baking Sheet: You will need an oven-safe container to keep your 9-inch cake pan inside along with 1 inch of water. I use a large baking sheet.
Note: I know it looks like a lot to prepare, but these are basic things you’ll need for any baking. And you’ll definitely make this cheesecake more than once (because it’s so good)! Let’s talk about techniques next.

10 Helpful Tips to Bake Japanese Cheesecake
The instructions for this cheesecake are straightforward yet it does require some skills and care. The common difficulties include shrinking and cracking, which are mostly caused by the outcome of beating egg whites or the wrong oven temperature.
I had enough of my share of trials and errors before I finalized the recipe. So please take time to read through the tips and follow the directions closely so you’ll have a perfect outcome in your first try!
1. Measure Everything First

This sounds basic, but you must measure all the ingredients and prepare everything before you start making the cake.
Timing is very important here. Any missteps can easily alter the outcome of the cake batter and egg whites.
2. Make Parchment Paper “Strips”
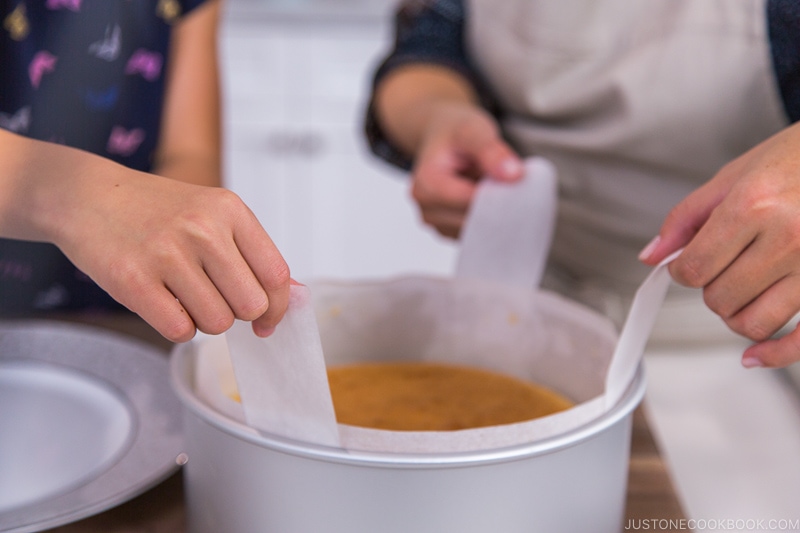
These strips of parchment paper are for pulling the cheesecake out of the cake pan after it comes out from the oven. Normally you will just flip and take the cake out, but it gets tricky for a cake with a jiggly, soufflé-like texture. With this trick, you don’t have to worry about the cake collapse on you.
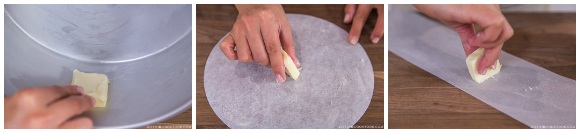
3. Grease The Pan and Parchment Paper
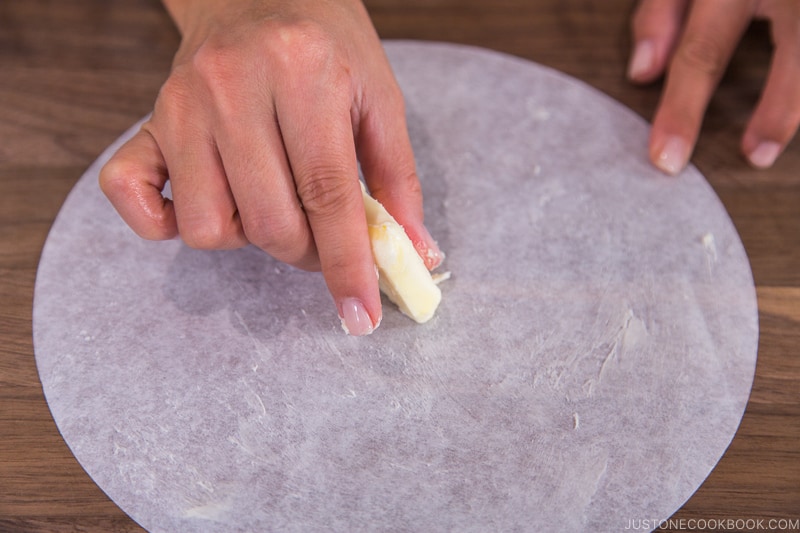
Grease the inside of the cake pan so that the parchment paper will stick to it nicely. And you will also need to grease the parchment paper that will touch the cake batter.
If the cheesecake is stuck with the parchment paper while rising, the cake will be pulled and end up cracking.
4. Use Double Boiler
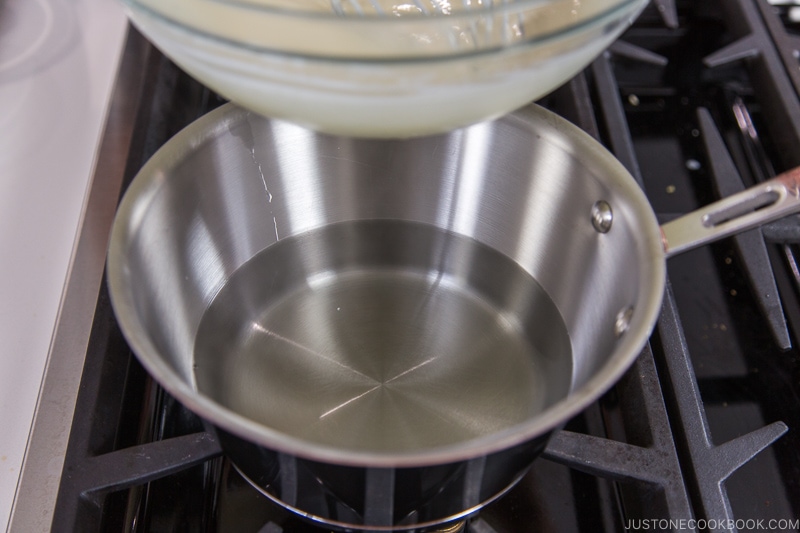
The double boiler method allows you to speed things up. You do NOT need to bring your ingredients (cream cheese, heavy cream, and egg yolks) to room temperature before making the cake!
Ingredients such as egg yolks mix better with the batter and rise more easily at room temperature. If you’re like me who tends to forget to take the ingredients out from the refrigerator ahead of time, you can count on a double boiler for mixing the batter.
5. Use Cold Egg Whites
The Japanese method always uses cold egg whites (we even chill the bowl) to achieve a refined texture. I noticed American recipes call for room temperature egg whites to achieve the fullest volume instead. Maybe we look for different things? You can decide if you prefer cold or room temperature egg whites.
Some recipes call for cream of tartar but it is not a common product in Japan, so we do not use it for this recipe.
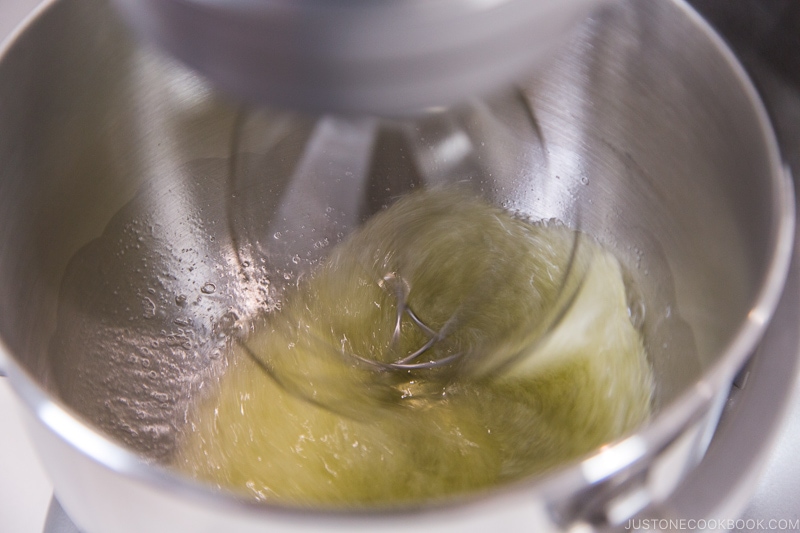
6. Beat Until a Firm Peak

This is the most important (trickiest) part of making Japanese cheesecake. The beaten egg whites generate small air pockets in the structure of the cake, keeping the cake airy and fluffy.
When you beat egg whites, there are 3 stages: a soft, firm, and stiff peak. For this recipe, we are aiming for a firm peak.
When you lift the whisk and turn it upside down, the egg whites still cling to the whisk and hold their shape fairly well, but the tip of the peak folds back on itself.
I used to whip until a stiff peak formed and it worked fine. However, once in a while when I whipped a tiny bit too much, the cheesecake became a bit lopsided and cracked. Overall, it was a bit harder to control. Many soufflé cheesecake recipes in Japan call for both a firm peak or a stiff peak, so find what works for you, knowing this variable.
7. Fold in The Egg Whites
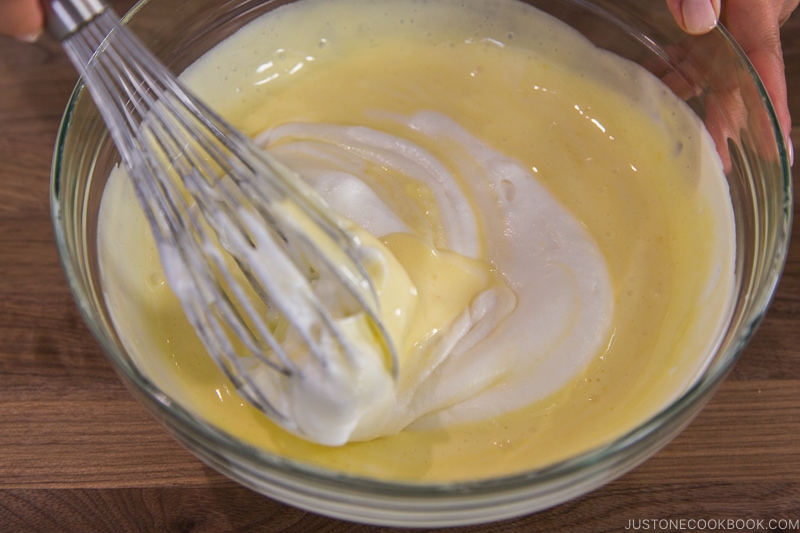
I learned that a whisk does a better job than a silicone spatula when you gently fold the egg whites into the batter. It’s very important to keep the small air bubbles so that the cake will rise higher without flopping.
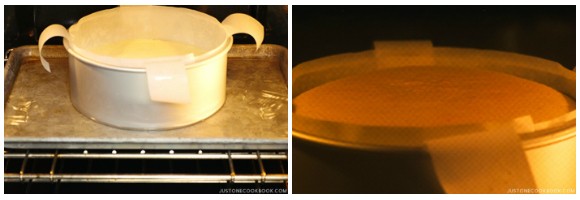
8. Bake in Bain-Marie
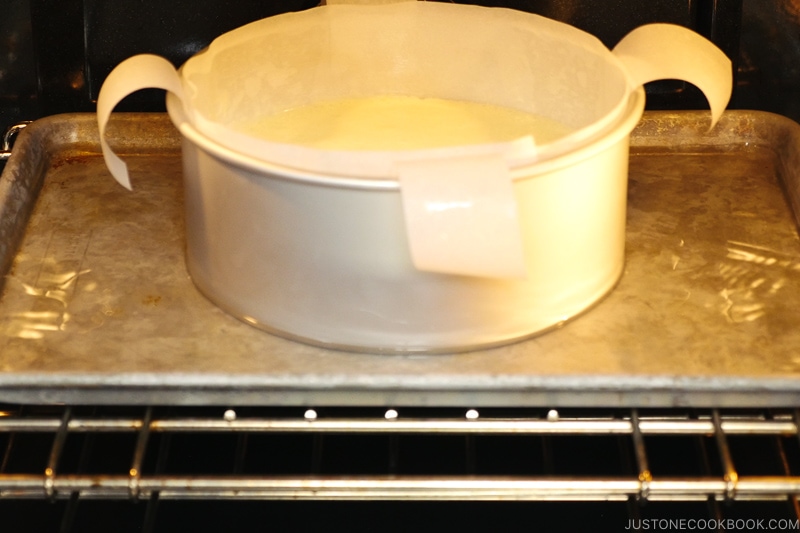
A bain-marie (ban mah-REE) is the fancy term for a water bath. We use this cooking technique to cook delicate foods like soufflé and custards. The hot water creates a gentle and uniform heat around the food as well as provides moisture inside the oven.
9. Bake at 2 Different Temperatures
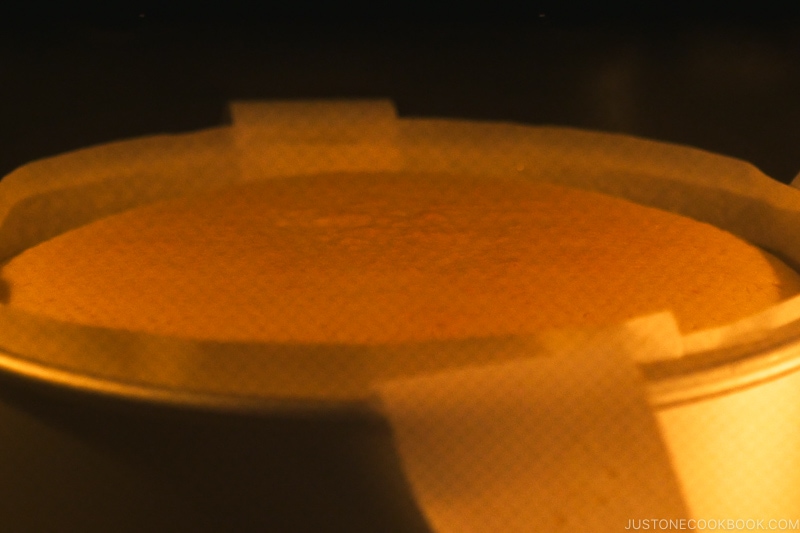
The oven temperature is probably the second most important factor for a successful Japanese cheesecake.
If the oven temperature is too high, the cheesecake will rise too fast, break the structure, and eventually crack. If the heat source is too close to the cake, the cake will also get big cracks. The taste will be fine, and after the cake cools down, the big cracks will be less obvious.
I preheat the oven to 350 ºF (180 ºC) first, but this is not the temperature for baking the cheesecake. Every time you open the oven to set up bain-marie or put the cake into the oven, the temperature drops significantly. Therefore we set the temperature higher.
Then when we put the cheesecake in the oven, we start baking at 320 ºF (160 ºC) and then reduce to 300 ºF (150 ºC) to make sure the cake is cooked through. My current oven is much bigger than my previous oven, and I had to test a few times to get the right baking time. If your oven is smaller than mine, you will probably need to reduce the baking time to 60 minutes. I have a “convection bake” option, but I used regular “bake” in this recipe so I could test the baking time for the majority of recipe users.
10. Cool Down Slowly
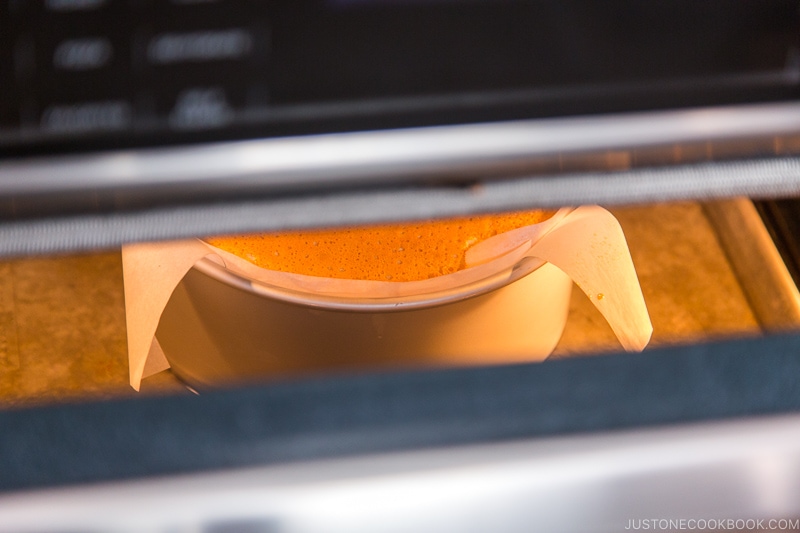
After baking in the oven, do not take out your cheesecake immediately. Let it cool down gradually by leaving the oven door ajar for a while.
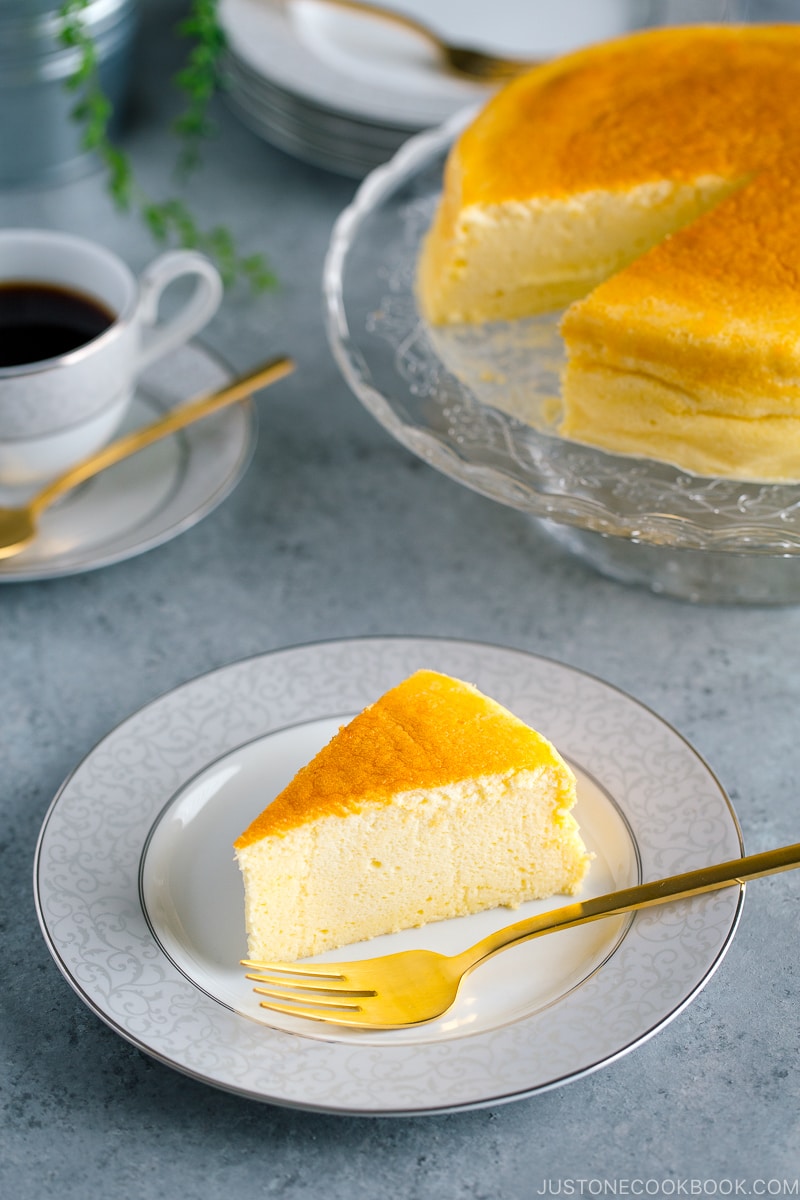
This prevents a sudden change in temperature that could cause the cake to shrink or collapse. You want the cake to slowly come down to half the height, from 4 inches (tallest point) to 2 inches.
I’ve made the cheesecake countless times for parties or potlucks and it never fails to impress. It is truly a crowd-pleasing dessert that everyone loves. I hope you enjoy it too!
More Japanese Dessert Recipes You’ll Love
- Basque Burnt Cheesecake
- Matcha Basque Cheesecake
- Blueberry Cheesecake
- Pon de Ring Donuts
- Matcha Tiramisu
- Castella Cake (Honey Sponge Cake)
- Japanese Strawberry Shortcake
Disclaimer: In order to achieve the best SEO (search engine optimization) practice, we can no longer keep my original Japanese Cheesecake post (published on September 24, 2012) as it has the same recipe name as an updated version. Now the original post is redirected to this post. The original Cheesecake post has over 500 comments which will be very difficult for readers to go through when they look for an answer to similar questions they have. Therefore, we decided to create a brand new post. For those of you who really enjoyed my original Cheesecake recipe, you can still read the post by clicking here (and zooming in to read).
Wish to learn more about Japanese cooking? Sign up for our free newsletter to receive cooking tips & recipe updates! And stay in touch with me on Facebook, Pinterest, YouTube, and Instagram.
Japanese Cheesecake
Video
Ingredients
- 1 Tbsp unsalted butter (for greasing the pan and parchment paper)
- 6 large eggs (50 g each w/o shell) (10.6 oz, 300 g without shell)
- 10.6 oz cream cheese
- 4 Tbsp unsalted butter
- ¾ cup heavy (whipping) cream (¾ cup + 4 tsp, to be precise)
- 4½ Tbsp sugar (for the cream cheese mixture)
- ⅔ cup cake flour (weigh your flour or use the “fluff and sprinkle“ method and level it off; you can make your own Homemade Cake Flour)
- ½ lemon (for the zest)
- 2 Tbsp lemon juice (from ½ large lemon)
- ½ cup sugar (for beating the egg whites)
- 2 Tbsp apricot jam (for the glaze)
- 2 tsp hot water (for the glaze)
Instructions
Before You Start
- I highly encourage you to weigh your ingredients in metric using a kitchen scale for this recipe. Click on the “Metric“ button at the top of the recipe to convert the ingredient measurements to metric. If you‘re using a cup measurement, please follow the “fluff and sprinkle“ method: Fluff your flour with a spoon, sprinkle the flour into your measuring cup, and level it off. Otherwise, you may scoop more flour than you need. Please read the blog post for more detailed information that I shared about this recipe.
To Prepare the Cake Pan
- Use a 9-inch (23-cm) cake pan that is 4 inches (10 cm) high. Cut parchment paper to line the bottom and sides of the cake pan. Cut one circle 9 inches (23 cm) in diameter for the bottom and one rectangular strip 4 x 30 inches (10 x 76 cm) for the sides of the cake pan. In addition, cut two strips of paper 2 x 30 inches (5 x 76 cm) each. We will use these as “straps” to lift the baked cake from the pan.

- With 1 Tbsp unsalted butter, grease the cake pan and the parchment paper (for the bottom and the sides only; grease the paper on one side). You don‘t need to use all the butter.

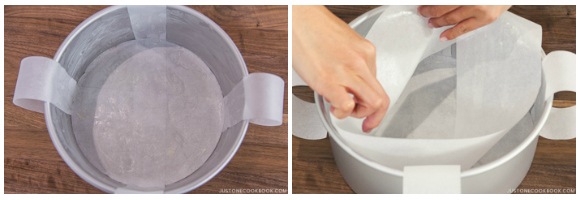
- Place the two parchment paper “straps” crisscross on the bottom of the cake pan so they form an “X.” Allow the excess paper to hang over the sides. Then, line the bottom and sides with the greased parchment paper. The greased side of the paper circle should face up, and the greased side of the rectangular strip should face in toward the center of the pan.

To Preheat the Oven and Prepare a Double Boiler
- Preheat the oven to 350ºF (180ºC). For a convection oven, reduce the cooking temperature by 25ºF (15ºC). Note: You will be baking at 320ºF (160ºC). However, when you open the oven to place the cheesecake, you’ll lose some heat, so we’ll start off a bit higher.
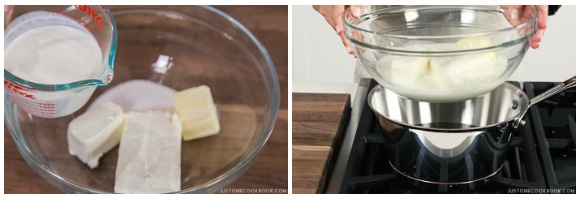
- Prepare a double boiler: Set a medium saucepan filled with 2 inches (5 cm) of water over high heat and bring to a simmer. Once simmering, cover and reduce the heat to maintain a steady simmer.
To Gather the Ingredients
- Gather all the ingredients. Please note that it is very important to measure all your ingredients before starting. Separate 6 large eggs (50 g each w/o shell) into yolks and whites. Refrigerate the egg whites.

To Make the Cake Batter
- In a large bowl, add 10.6 oz cream cheese, 4 Tbsp unsalted butter, ¾ cup heavy (whipping) cream, and 4½ Tbsp sugar. Rest the bowl on the saucepan above the simmering water.
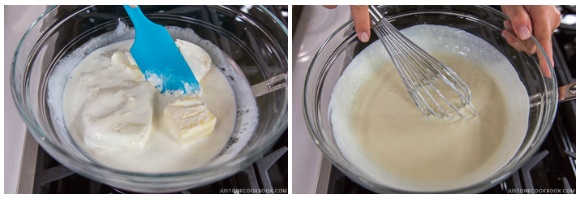
- Using a silicone spatula, mash the cream cheese and butter. Once they are melted, use a whisk to blend everything together. Remove from the heat.
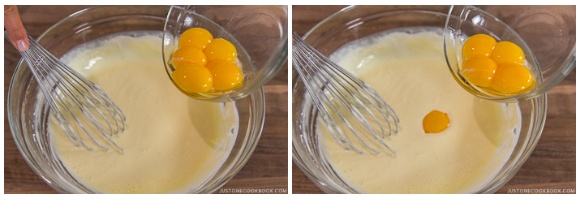
- While whisking, add the egg yolks into the warm cream cheese mixture, one at a time. Make sure each yolk is blended well with the cream cheese mixture before adding the next one.
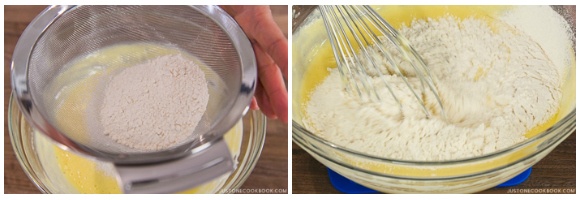
- Using a fine-mesh strainer, sift ⅔ cup cake flour into the batter. Whisk and blend together.
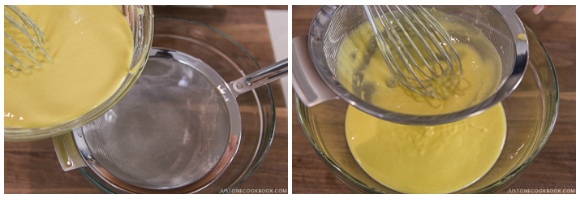
- Then, pass the batter through the same fine-mesh strainer into a clean large bowl. This creates a silky texture for the batter.
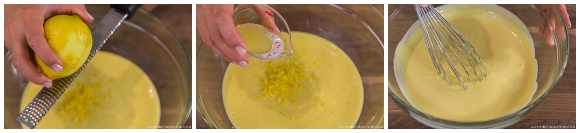
- Add the zest of ½ lemon into the batter. Make sure you only zest the flavorful yellow part and not the bitter white pith. Into a separate small bowl, squeeze the juice from the lemon. Measure 2 Tbsp lemon juice and add it to the batter. Whisk well to blend and set aside.
To Set Up the Bain-Marie
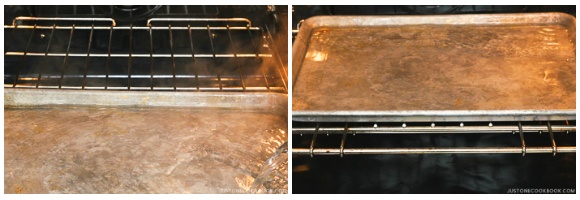
- Put the baking sheet inside the preheating oven and pour in hot water until it is halfway up the sides or ½ inch deep. Close the oven door.
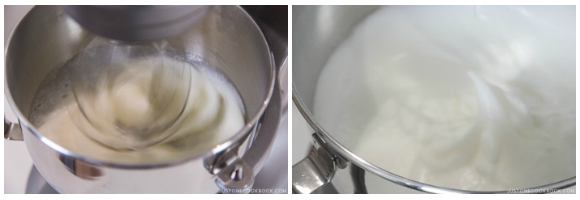
To Beat and Incorporate the Egg Whites
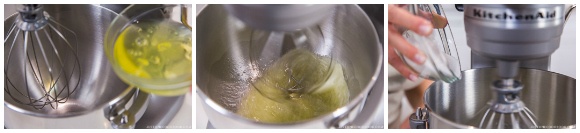
- Add the cold egg whites into the dry, clean mixing bowl of a stand mixer. Make sure there is no oil or water in the bowl. If you have space in your refrigerator, I highly recommend keeping the mixing bowl cold until you’re ready to use it. Start whisking on medium speed (Speed 4) until the egg whites become opaque, foamy, and bubbly, about 2 minutes. Then, slowly add ½ cup sugar, one-third of it at a time, while the mixer runs.
- Once you’ve added all the sugar, increase the mixer speed to high (Speed 8–9) and beat the egg whites until you have firm peaks. When you lift the whisk and turn it upside down, the egg whites should still cling to the whisk and hold their shape fairly well, but the tip of the peak folds back on itself.
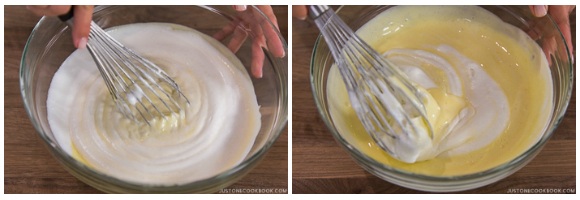
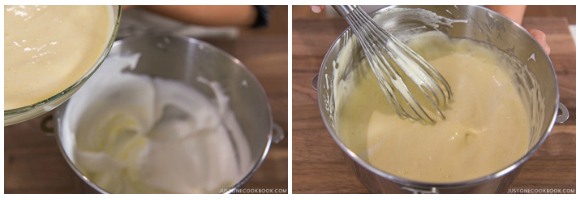
- Using a hand whisk, mix one-third of the egg whites into the cream cheese mixture until incorporated. Then, gently fold another one-third into the mixture.
- Lastly, pour the mixture back into the mixer bowl (with the last one-third of the egg whites still in it) and fold very gently until just combined.
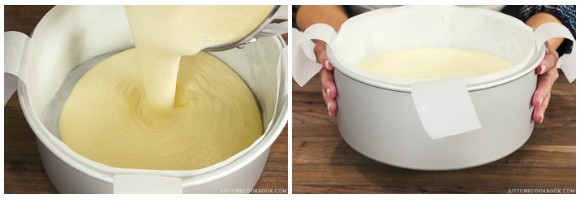
- Pour the mixture into the cake pan all at once, avoiding air pockets while pouring. Tap the cake pan a few times on the kitchen counter to release any air pockets in the batter.
To Bake the Cheesecake
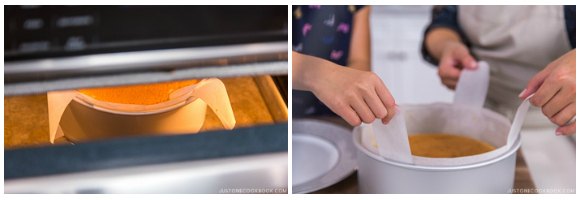
- Open the oven and place the cake pan onto the baking sheet with the bain-marie. Reduce the oven temperature to 320ºF (160ºC)—25ºF (15ºC) lower for a convection oven—and bake for 70–75 minutes. Then, reduce the oven temperature to 300ºF (150ºC) and bake for another 10 minutes, or until the top is golden brown. To test if the cake is done, open the oven door slightly and insert a skewer into the cake. If it comes out without a wet liquid batter, it‘s done.
To Cool
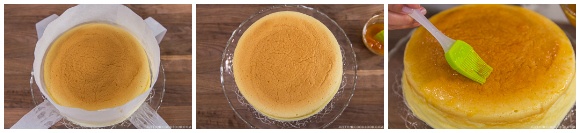
- Turn off the oven and leave the oven door slightly ajar for 15–20 minutes with the cake inside. If you take the cake out immediately to the kitchen counter, the sudden change in temperature could cause the cake to collapse. You want the cake to slowly shrink down to half the height, roughly from 4 inches to 2 inches high. After 15–20 minutes, remove the pan from the oven. Gently pull out the cake from the cake pan using the two parchment paper straps (with help from another set of hands).
- Place the cake on a plate. Remove the parchment paper around the sides of the cake (but leave the bottom paper). Combine 2 Tbsp apricot jam and 2 tsp hot water in a small bowl. Brush the apricot mixture over the top of the cheesecake. Let cool to room temperature.
To Serve
- You can serve the cake at room temperature (fluffiest!) or chill the cake for 1–2 hours before serving.

To Store
- You can store the cake in the refrigerator for up to 3–4 days or in the freezer for 3–4 weeks. Defrost the cake overnight in the refrigerator. The cold cheesecake is dense, so leave it on the counter until just chilled or at room temperature before serving.
Notes
- Make sure your beaters and mixing bowl are clean and dry. A speck of oil, water, or egg yolk on either one can minimize the volume of the beaten egg whites.
- Avoid plastic bowls—even clean ones may hold oily residue that can affect the successful whipping of the egg whites.
- Use a bowl that’s wide enough to keep the beaters from being buried in the egg whites.


Wow, so detailed recipe, i will try to do it this week end
Grea job
Arigato
Hi Fabrizio! Hope you enjoy!
Thanks Nami! It was so good. I didn’t have any 9″ cake pan. So I used my 8″ pan instead, and made two cakes.
By the way I am from Japan, live in US for 18years. I love your site.
Hi Miho! So happy to hear yours came out well! Ahh having two cheesecakes sounds very nice. 😀 Wow, our background is so similar! Thank you for reading my blog. 🙂 xo
Hi Nami 🙂 I made this according to your recipe, it tastes ABSOLUTELY AMAZING! All the people whom I gave them this said they love it but there’s one thing I want to confirm with you, is this cheesecake supposed to be a little bit wet when it’s just baked and cooled a bit? I didn’t bake it with springform pan as you suggested yet the under side was still wet. However it turned out to be just fine when I ate it after I left it in in the refrigerator for more than 6 hours. Is it normal?
Anyway thank you for sharing your wonderful recipe ^^
Hi Debby! So happy to hear you and your friends liked this recipe! Thank you for your kind feedback. 🙂
I’ve made this cheesecake so many times, I should remember. I have slice a piece of cheesecake after it’s cool (pre-refrigerator). As the texture is way fluffier then than after chilled (you can hear the “air” in the cake when you cut the cake with a fork!). I don’t remember my slice being “wet” as you describe. I would probably notice if it was. Right? Was it obvious? I wonder if it’s cooked through? Or it’s not that kind of wet? Was it still like “batter” or it was more like sponge that was wet? Do you think it was part of your grease? Oh, that reminds me – when I remove the strips of parchment paper, the paper is kind of wet. But I think it’s same for the parchment paper on the bottom of the cake. The cake wasn’t that wet though, but the paper was… maybe moisture built up inside the cake pan? And it evaporates as you remove the cake tin (which is why you do it at this stage). What do you think?? Wish I can help you more!
Hi Nami! Thank you for replying ❤️
Ah… I see, maybe it’s because the moisture was trapped in the bottom of the cake pan since it wasn’t like batter “wet” but more like a wet sponge texture as if it absorbed the moisture but just on the bottom of the cake, the rest of the cake was fine though.
Anyway it was a hit and I’ll be making this cake again for this upcoming Chinese New Year. My friends and my family loved it and requested it to be served on that day. Wish me luck! 😀
Hi Debby! Okay, good to know. Probably steam trapped inside. Good luck baking again for CNY, and hope everyone will enjoy it! Happy Chinese New Year to you and your family!
I was wondering why the recipe looked different! I had printed out the original version a while back and finally made it over the holidays. My family all enjoyed it, especially the kids. I’m not a big cheesecake fan personally, but I did like this one because it’s so light & fluffy and not too sweet. Thank you!
Hi Grace! I think it came down to preference. Some of my recipe taster prefers old “more creamy and rich” recipe, while majority likes this current one with less cream cheese in it. Not a huge difference, but when you compare side by side, you can tell. I cannot keep two recipes on the blog post for blog’s SEO reason, but kept the screen shot for anyone who prefers previous version. 🙂
Hi Nami,
Thanks for the recipe and detailed instructions. I baked this last night and it turned out well even though I forgot the flour and only folded it in after the egg whites! I only used 250g cream cheese because I only have one block and it’s still delicious. Love how the lemon enhanced the cake flavour and made it not plain tasting. At 68 mins the cake was cooked but the top not brown enough so I turned on the broiler for about half a minute before turning off the oven. It did the trick, the top turned golden brown 🙂
How do I change this cake to a matcha cheesecake? What about coffee flavour? Thank you!
Hi KY! Thanks so much for your feedback! It’s good to know you folded the flour after the egg whites (it happens to anyone!). 🙂 . Yeah, less or more cream cheese works too as my previous one used more cream cheese. One of my friends who was the tester for my cheesecake recipe testing and he claimed his favorite was the previous one because it’s rich and creamy. So I guess it all depends how creamy you like. Also, thanks so much for the boiler trick. I also tried that and it created small bubbles on my surface, so it didn’t work for me. 🙁 It depends on the oven size, and where the rack is etc… so I have to keep testing to see how I can turn it more golden brown. 🙂 . As for matcha and coffee, you can add matcha powder and cacao powder into the flour. I haven’t tested yet so I’m not sure how much is good though. Thank you for trying this recipe!
To incorporate matcha or any other powders, I suggest dissolving the powder with water first to get rid of the lumps. Matcha takes a bit of work to make it nice and smooth. I added the matcha water mixture after the eggs and flour , before sifting the mixture. I tried to just mix it with the flour but it created lumps of matcha that wasn’t appealing. FYI I used 2-4 tbsp (depending on how strong you like) of matcha.
This is a great recipe. I’m still trying to figure out my oven.. I think it may not be calibrated correctly so I need an extra oven temperature sensor. Last time I cooked it at 320 and it didn’t rise or cook through in 80 min. This time I put it at 375 preheat, 350 for 30 min, 325 for 45 min, 300 for ten, it finally rose up to 4 inches.
Hi Shirlene! Thank you so much for sharing your tip! It’s very valuable information for all of us! Thank you!
I am actually trying your Japanese Cheesecake right now. My question is if I don’t have a 9×4 round pan and just used the smaller round pans, should i decrease the time in baking?
Maria
Hi Maria! Yes, you will need to decrease the baking time. Sorry I wasn’t able to get back to you quickly…
Nami! Nami! Nami!! Im Capricorn, who have been seeking ur advice on you tube. I’m sooooooo excited!!!! I tried ur recipe again. This time round using a smaller pan and using ur 1 egg calculation to reduce the overall ingredient qty. this time round, I have enough water in my water bath, baked at 120C for 60 mins. U have taught me that each oven bakes differently and hence I watch over it like a hawk. And this time round, it’s baked to perfection!!!! I’m sooooo happy. Thank u very much. U have been such a wonderful teacher. Lovvvvvve it!!!
Hi Capricorn (or Beck)! I remember your comment! 🙂 . I’m so happy to hear you used my 1 egg calculation and your cake came out well! Haha, “watching over it like a hawk”. That’s what I do too when I’m testing my recipes. I need to know what’s going on inside! LOL. Thank you for your sweet feedback, and I’m so happy for you too that your cheesecake came out well!
I love this recipe, I’ve made the Japanese Cheese cake at least 3 times and it has always been a hit among family and friends. I’m now trying dessert recipes removing the sugar. Have you ever tried this replacing the sugar with something else?
Do you have any recommendation related with the consistency of the batter if I replace the sugar with maple syrup?
Thank you Nami.
Hi Diana! Thank you so much for your kind words about this recipe. 🙂 I’m not expert in sugar-less or low sugar dieting/baking so I’m not sure what works best and keep this cake as close to the original recipe. Sugar is important in baking (baking known as science), and I am not familiar enough to swap the sugar with something that would work. I like to keep our diet healthy and take less sugar but my approach is to control the consumption of the cake and learn to (endure and) enjoy a small portion of the really good stuff… Hence I have never worked with replacing the sugar with other alternative. I’d LOVE to hear from anyone who makes good alternative souffle cheesecake if it can work without sugar. I’m sorry Diana, I’m not very helpful, but I’m not knowledgeable about this field…
Hello Nami, I love your cheesecake and have tried it many times and everyone in my family enjoys it too. However , i am thinking of baking this in a cupcake size using a paper cupcake holder… the question is now how would i bake in water bath? I have thought of putting the cupcake in a baking pan and then the water bath.. will this work? Will the cake have the same result? And for the left over, how long can I keep it outside in room temp before baking?
Hi Alice,
Thank you very much for trying this recipe many times!
We have never baked this cheesecake in the cupcake size before… How about use the aluminum foil ramekin and use the paper cupcake holder inside that, then place it in the water bath. In that case, the heat will distribute better than placing the paper cupcake holder in the baking ban. What do you think?
As for leftovers, we do not recommend leaving them outside. Instead, used up or made a small batch.
We hope this is helpful.
Hello, this is a great recipe! I only have a 8in cake pan, how do I convert this 9in cake pan recipe into an 8in cake pan recipe? Thank you for reading this!
I don’t know the formula for converting and I don’t know how to calculate it. Please help!
Hi Kelly! Thank you for your kind words. I don’t like changing the amount of ingredients in the recipe that works (unless you can clearly divide ingredients, not like 2.5 eggs kinda thing). I would probably use this recipe for your 8 inch, and make a small cake with the leftover batter. Or you can use the ratio chart that I included in my post to see if you can figure out what works for your 8 inch. Sorry I don’t have a good answer.
It’s okay! thank you so much 🙂
Hi, Kelly! I just made this in an 8″ x 4″ cake pan with the exact directions. Turned out fine!
Hi Nami,
I really like your website and all your recipes. I’m really inspired to make this Souffle cheesecake.
I made a similar cake using buttermilk (http://bakingbites.com/2013/04/buttermilk-magic-cake/) instead of cream cheese and heavy cream, have you tried that? I’m also very health conscious and wondering if you can replace buttermilk with either cream cheese or heavy cream in this recipe? Would it change make of the end result? Thank you!
Jessie
Hi Jessie! Buttermilk is not very common in Japan, so I’ve never seen souffle cheesecake made with buttermilk. I can’t tell how it will work out with buttermilk as I’ve never tried, and it gives different result from this “souffle cheesecake”. If you try, let us know!
Hi Nami,
I was wondering whether I could make the cheesecake in muffin tins? (Because I need to use some cream cheese and heavy cream quickly before it expires ????)
Thanks
Also what would be the baking time
Hi Faith! Hmm I’ve never tried it in muffin tins but it might be worth trying it out? 🙂
Thank u for sharing your recipes which is greatly appreciated. Have a nice day.
Thank you Ann! Hope you enjoy! 🙂
Hi! I just made this cake! It is currently still in the oven! How can i prevent the top from cracking?
Hi Rachel! You can cover the top with aluminum foil to prevent from burning the top. Cracking – possibly the temp is too high or the cake top is too close to the heat source.
Hi Nami,
Can you bake 2 9″ cake pans at once? Do I have to adjust the temperature and time?
If I cannot fit the 2 pans in the Bain Marie pan, how long can I leave the 2nd pan of batter in room temperature for?
Thank you for your help,
Laura
Hi Laura! If your oven is big enough to bake 2 9″ cake pans, sure! Make sure it has enough space for heat to go around. You have a good question, I don’t think it’s good idea to keep the cake batter at room temperature for more than 1 hour… I would probably make the second batch while baking one??? Sorry I wish I know the answer…
It’s ok. Thank you for your help! Like always, your recipe are so delicious! ????
Laura
Thank you Laura! xo
Hello Nami!
I hope you had a lovely New Year! You certainly made ours much better, as I used your delicious Osechi Ryori recipes for our party!
Souffle Cheesecake is one of my absolute favourites, and I am eager to try out this recipe. I just had a quick question: I love the strong cheese flavour in…don’t judge me…the pre-packaged ones found at 7-11 in Japan. Do you have any advice on how to enhance the cheesiness to replicate this taste?
Thank you in advance!
Hi Lauren! Happy New Year! Thank you for trying my Osechi recipes! I’m happy to hear you enjoyed them. 🙂
Strong cheese flavor… If you don’t add lemon juice, it’s more cheesy flavor, but I’m not sure if you have “enough” cheesy flavor with that… you can add more cream cheese, but is that what you’re looking for? It’s more rich flavor, but I’m not sure what 7-11 one tastes like… 😀