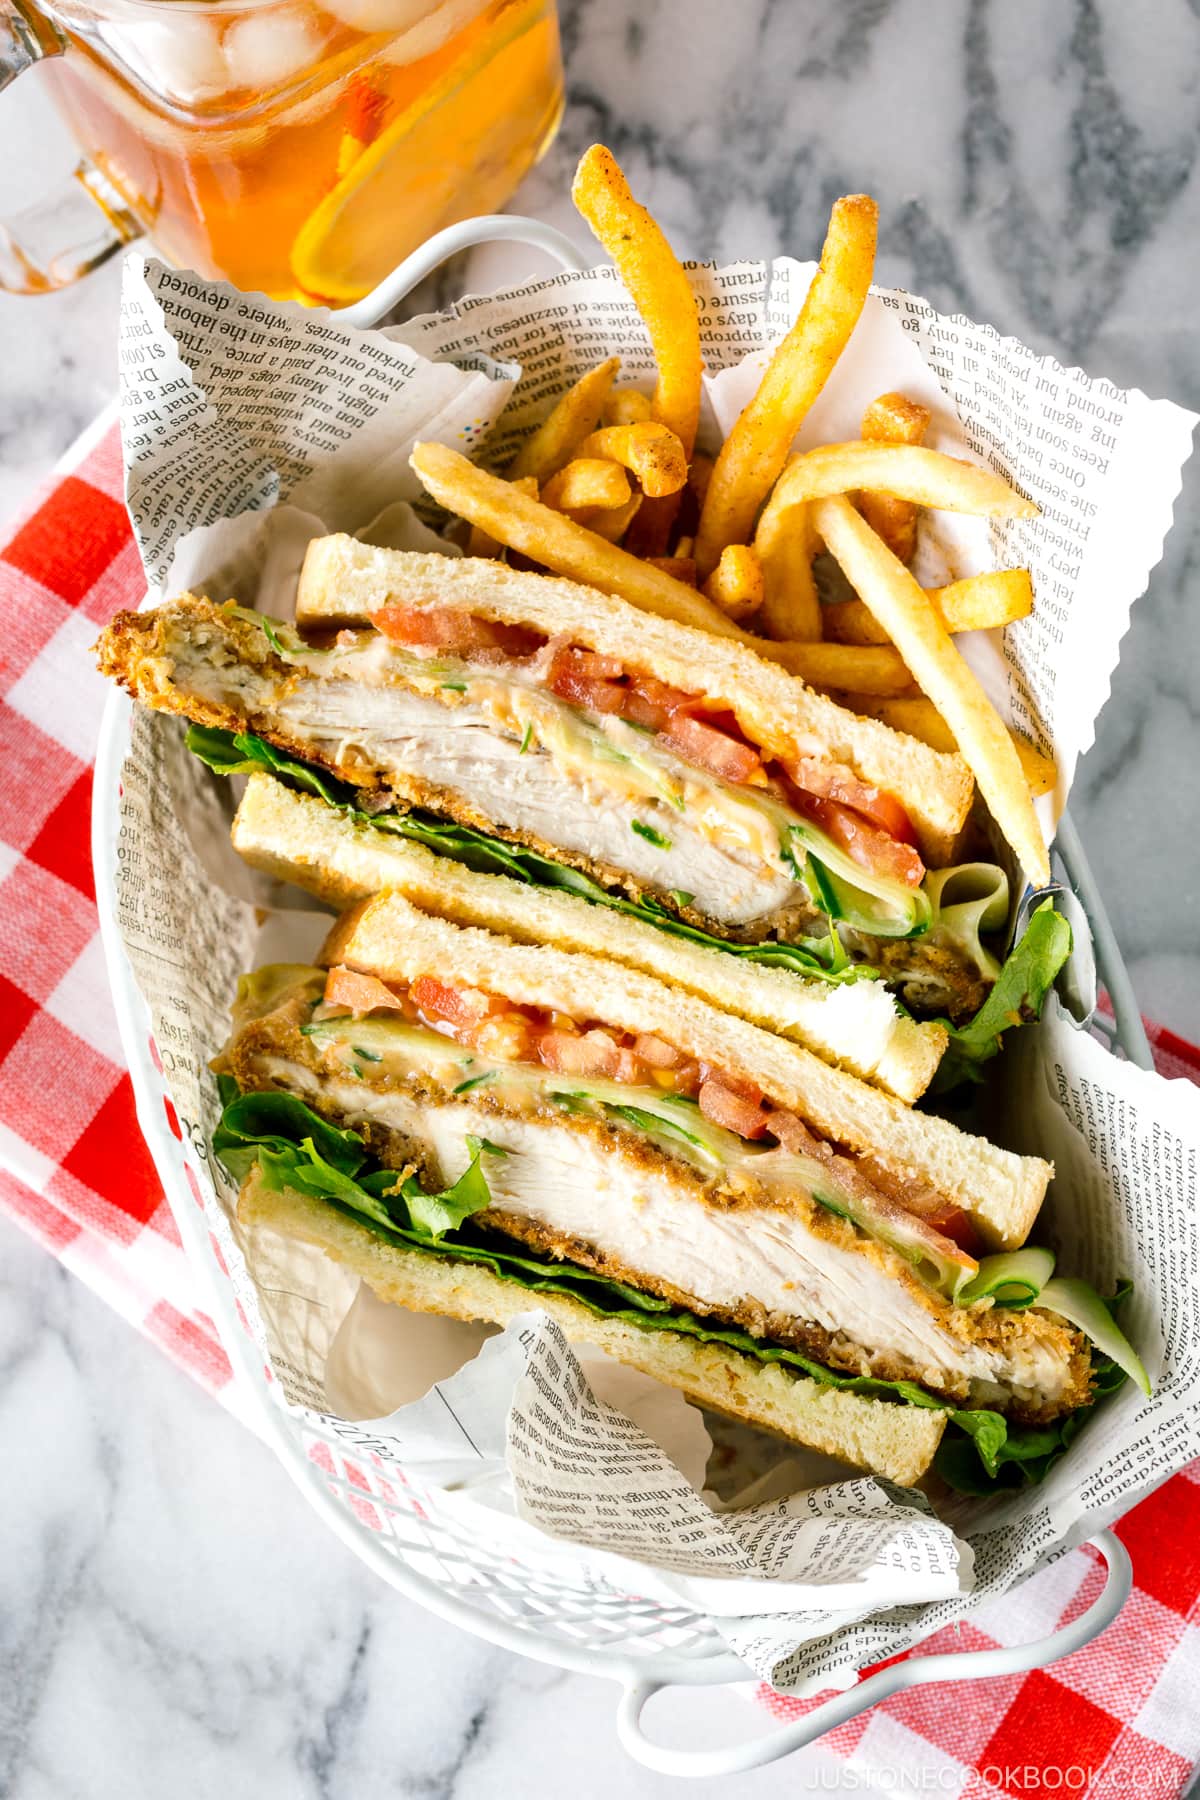
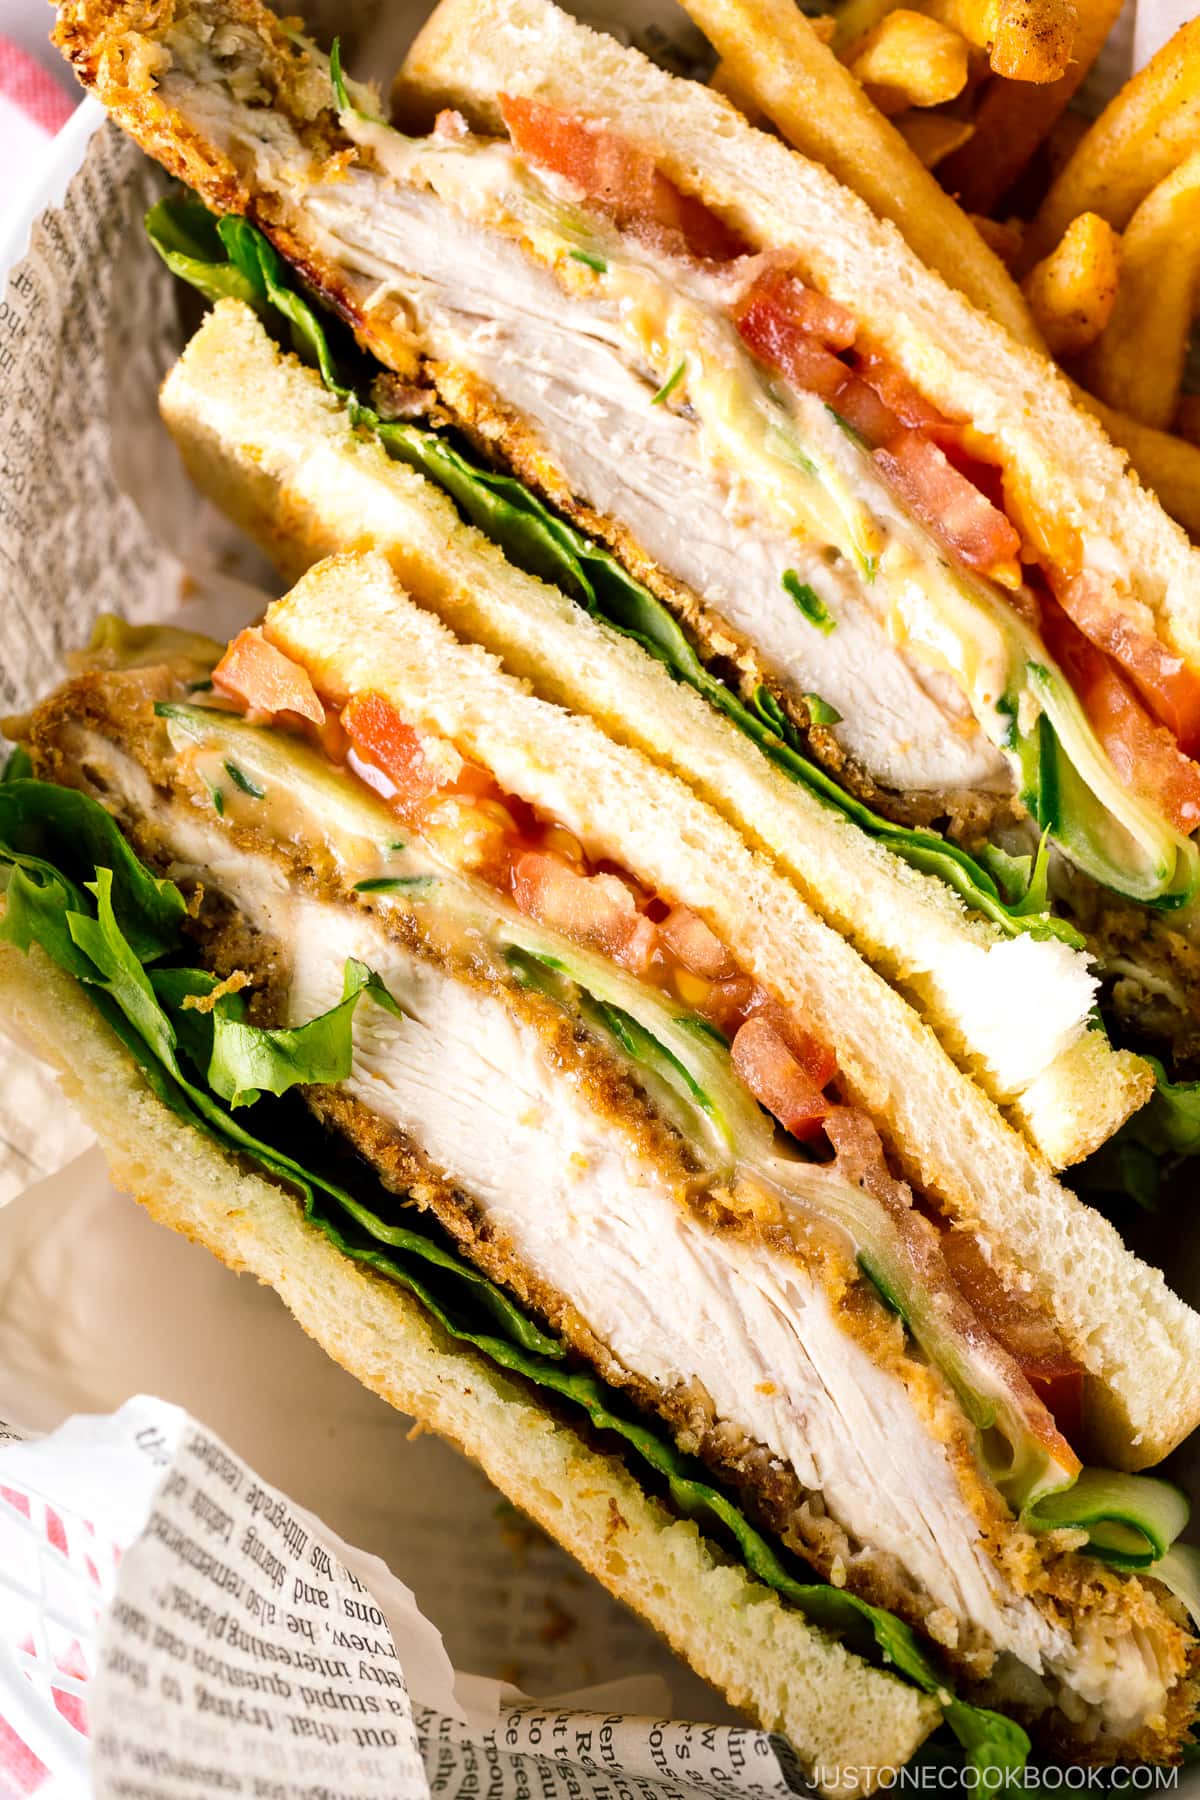
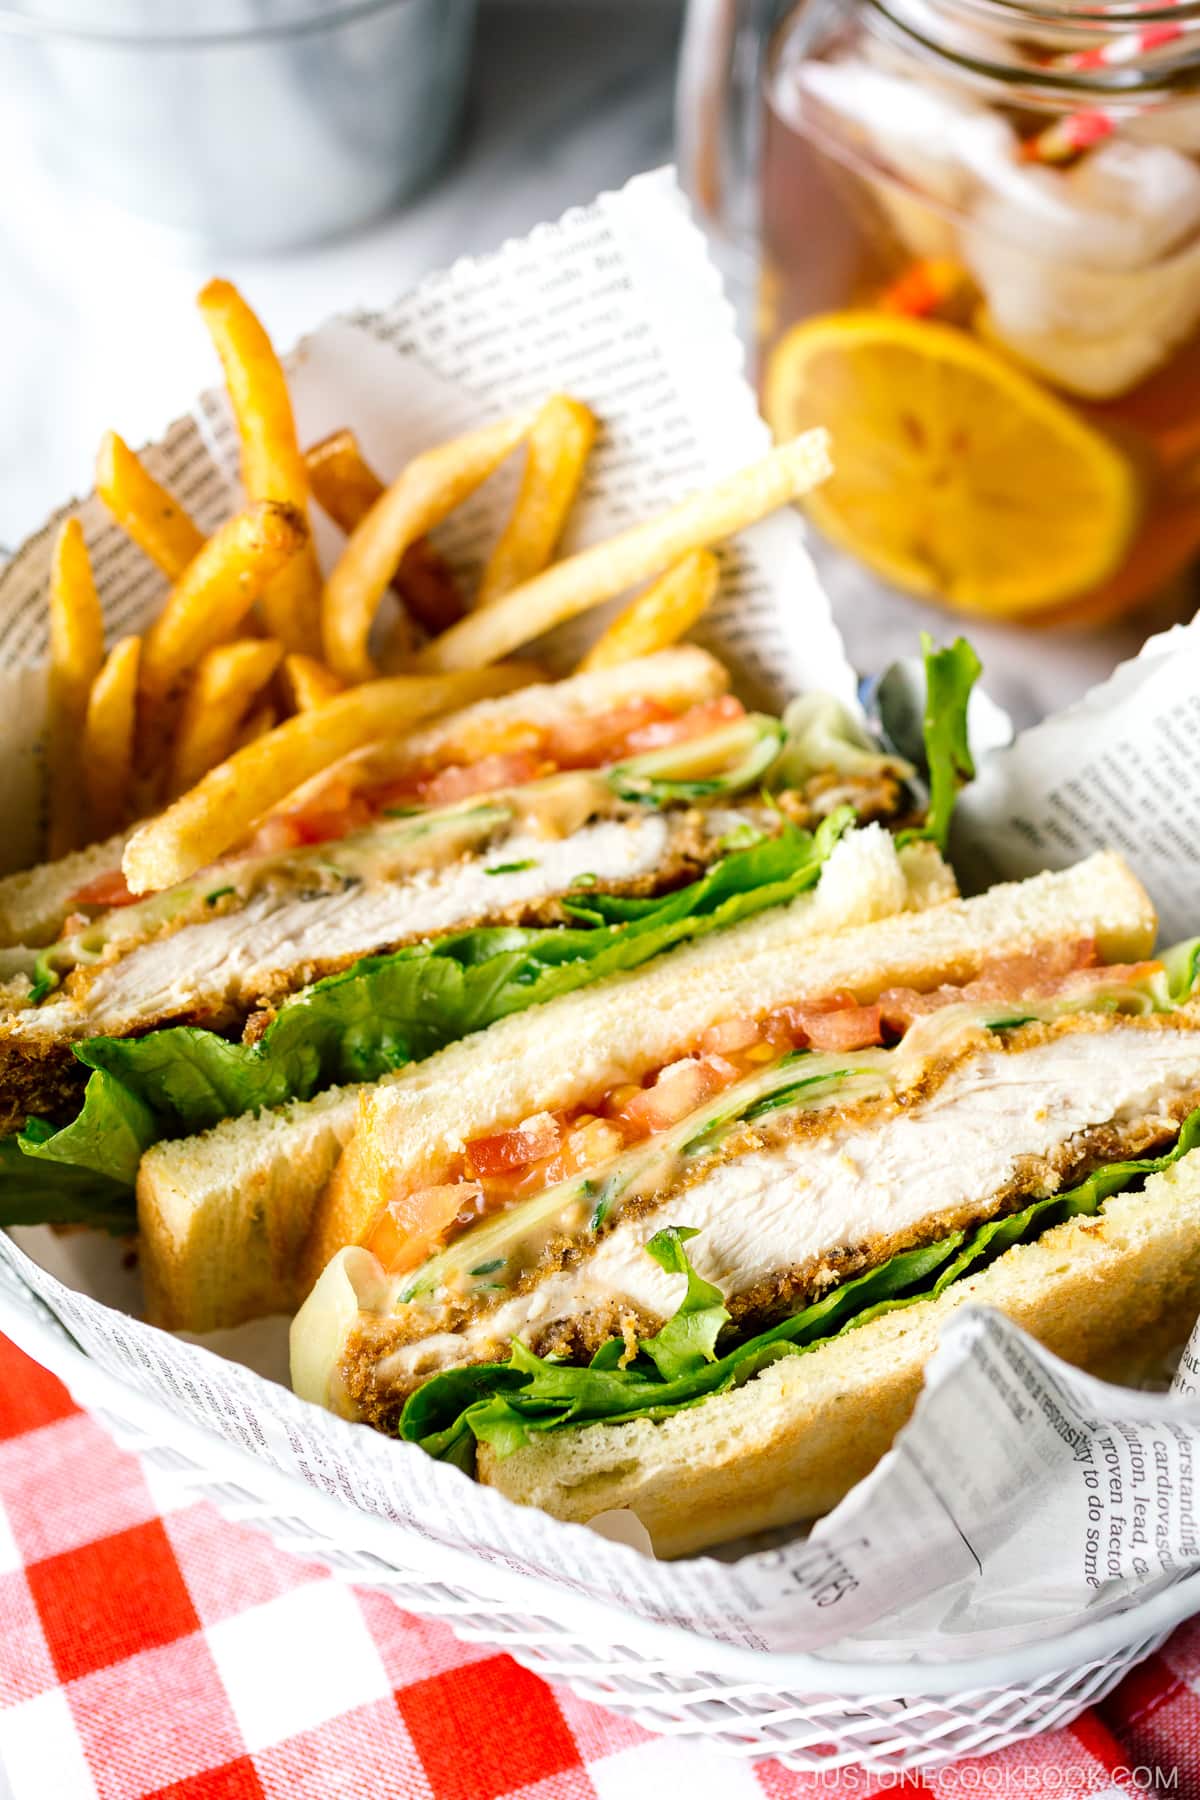
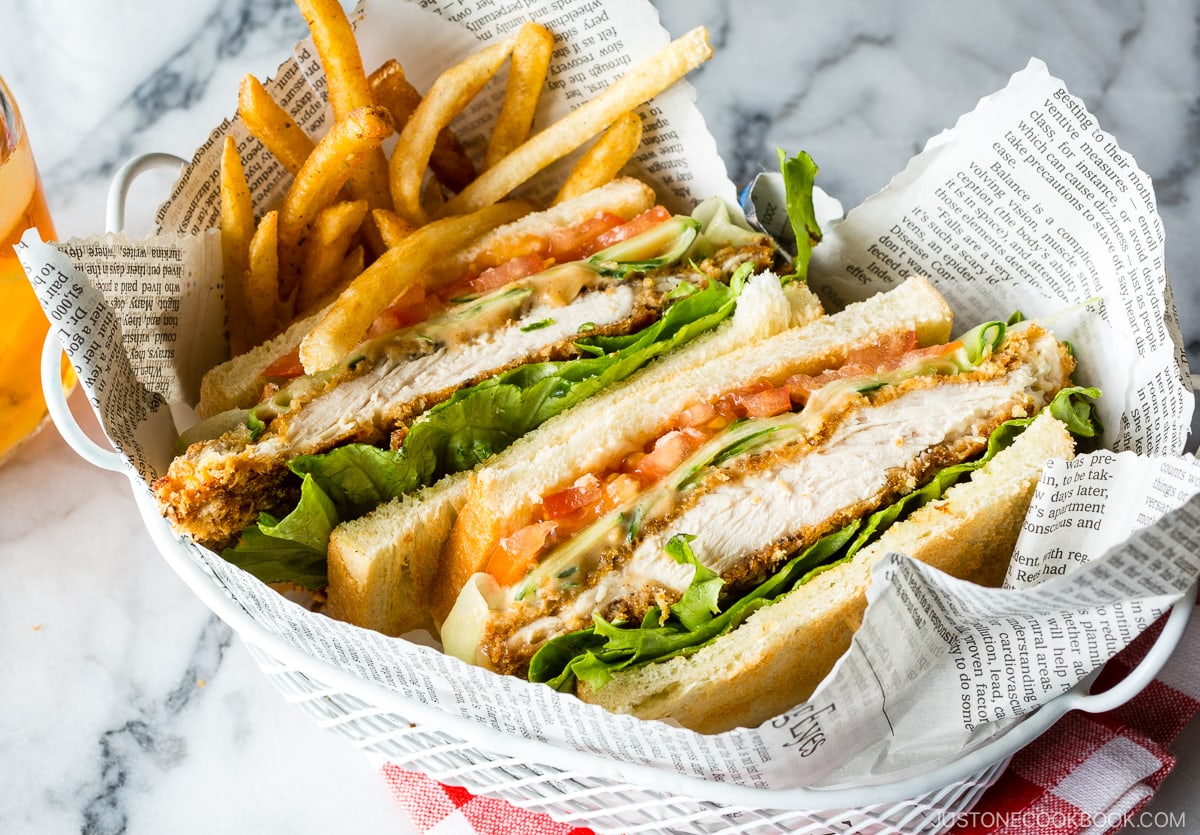
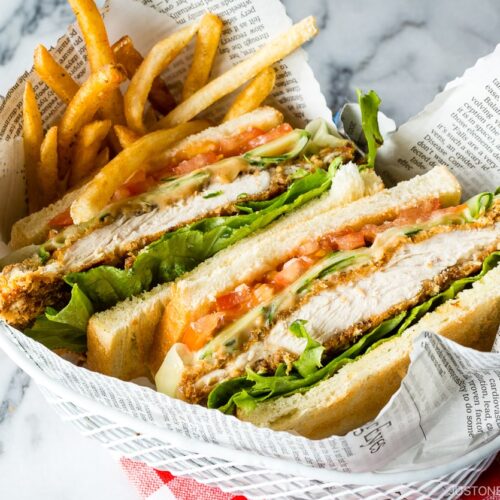
This Baked Chicken Katsu Sandwich will rival anything you can get at a fast food place! Load it up with garlic tonkatsu sauce, tomato, cucumber, and crisp lettuce for perfection. In Japan, we call this Chicken Katsu Sando.
What’s the best part about deep-fried Chicken Katsu? Of course the golden crispy katsu shell with the juicy chicken! I am getting hungry just thinking about it. When I have some leftovers, I make Chicken Katsu Sandwich (チキンカツサンド).
Have you had it before? Maybe in Japan? I look forward to eating the katsu sandwich the following day after cooking and I always make sure that we have enough leftovers so that everyone in my family gets to enjoy it. It’s so good and totally worth waiting for.
But deep frying can be totally in pain (even for me). Too much oil goes to waste, the house smells horrible, the stove top gets greasy, and I know, you want to stay healthy by avoiding as many deep-fried foods as possible. I make deep-fried foods once in a while at home because homemade ones taste much better than ones in restaurants.
No Mess and Easy Chicken Katsu Sandwich
However, remember my Baked Chicken Katsu recipe? You can actually use that recipe to make this amazing sandwich. In fact, you can go straight to make this Chicken Katsu Sandwich without eating katsu by itself because it’s so easy to make. How great is that!
Now if you are a traditionalist, Katsu Sandwich in Japan (カツサンド) uses Tonkatsu. If you prefer pork, you can use my Baked Tonkatsu recipe instead. The traditional Katsu Sandwich uses just a few shredded cabbage between the sandwich bread and some don’t even include cabbage at all. My chicken katsu sandwich with lettuce, tomatoes, and cucumber is starting to look like a rebel. But a pretty one!
Roasted Garlic on Chicken Katsu Sandwich
Not only that, I made Roasted Garlic Mayo Tonkatsu Sauce and spread it over the katsu instead of simple Tonkatsu Sauce. That’s the best thing about homemade. You can change it up depending on how you like it. I make regular Katsu Sandwich too, but honestly, it won’t look as pretty as this with just white bread, golden baked chicken, and a tiny bit of green color from cabbage.
If there is a Japanese or Asian bakery or grocery store, you can purchase a square Japanese milk bread or what we call shokupan (食パン), which is sliced into 2 – 2½ cm thickness. That’s typically used for Katsu Sandwich. And if you are still up for a traditional katsu sandwich, don’t toast your bread as I did.
I hope you like my rebel Katsu Sandwich. If you’re a traditionalist, again, buy thick sandwich bread, don’t toast it, spread butter and mustard on the bread, then put a tiny bit of shredded cabbage and tonkatsu on top, and spread regular tonkatsu sauce over katsu. Very simple, either way.
Wish to learn more about Japanese cooking? Sign up for our free newsletter to receive cooking tips & recipe updates! And stay in touch with me on Facebook, Pinterest, YouTube, and Instagram.
Chicken Katsu Sandwich
Video
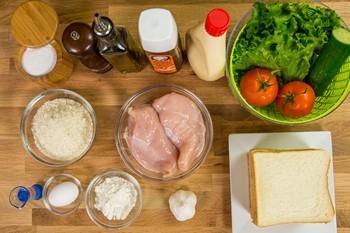
Ingredients
- 1 cup panko (Japanese breadcrumbs)
- 1 Tbsp extra virgin olive oil
- 1 lb boneless, skinless chicken breast (2 pieces)
- Diamond Crystal kosher salt
- freshly ground black pepper
- 1 large egg (50 g each w/o shell)
- 1 Tbsp water
- ¼ cup all-purpose flour (plain flour)
- ½ English cucumber
- 2 tomatoes
- unsalted butter
- 4 toasts (I use Japanese milk bread called shokupan)
- lettuce leaves
For the Garlic Tonkatsu Sauce
- 1 head garlic
- 1-2 Tbsp tonkatsu sauce (you can make homemade Tonkatsu Sauce)
- 1-2 Tbsp Japanese Kewpie mayonnaise
Instructions
- Gather all the ingredients.

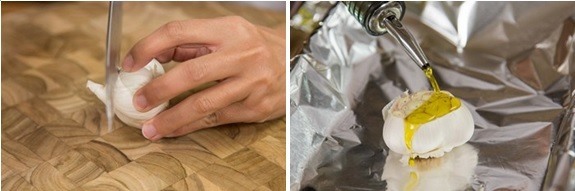
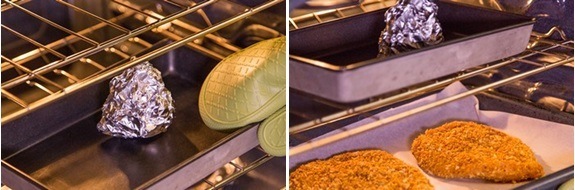
- Preheat the oven to 400ºF (200ºC). For a convection oven, reduce cooking temperature by 25ºF (15ºC). Set a rack in the middle position. Make the Garlic Tonkatsu Sauce. Using your fingers, peel away most of the loose outer layers around 1 head garlic. Trim about ¼ inch (6 mm) off the top of the head of garlic. Drizzle about 1–2 tsp of olive oil over the exposed surface of the garlic and let the oil sink into the cloves.

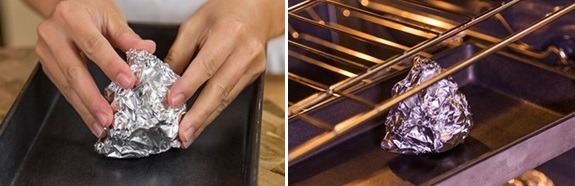
- Wrap the garlic in aluminum foil and roast in the oven for 40 minutes (depending on the size of your garlic). The garlic is done when a center clove is completely soft when pierced with a paring knife. You can leave it in the oven a little longer for a more caramelized flavor. Roasted garlic can be refrigerated for up to 2 weeks.

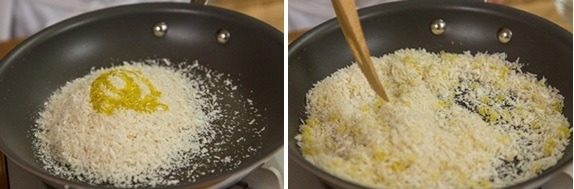
- Meanwhile, combine 1 cup panko (Japanese breadcrumbs) and 1 Tbsp extra virgin olive oil in a frying pan and toast over medium heat until golden brown. Try not to break the panko pieces with your spatula (I know it’s hard) and try shaking the frying pan instead of overmixing.

- When the panko is nice golden brown, transfer to a bowl (or tray) to let cool.

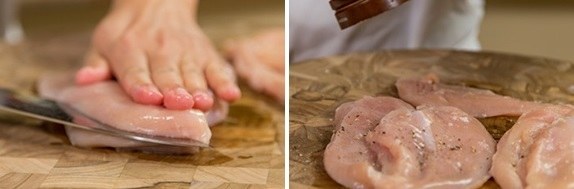
- Butterfly 1 lb boneless, skinless chicken breast. Butterflying is a really useful technique to create a uniform thickness throughout a piece of meat so that it will cook more quickly and evenly. With the edge of a knife parallel to the cutting board, cut the length of the side of the breast. Carefully slice the breast in half widthwise almost to the other edge. Keep the edge intact and open the breast along the fold. Season the chicken with Diamond Crystal kosher salt and freshly ground black pepper.
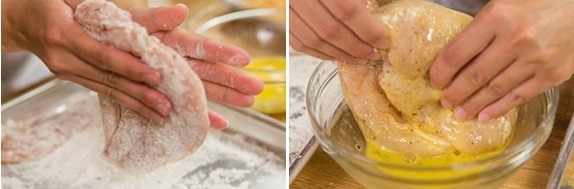
- Crack 1 large egg (50 g each w/o shell) into a medium bowl and add 1 Tbsp water. Whisk well to combine.

- Put ¼ cup all-purpose flour (plain flour) in a bowl or large tray. Dredge the chicken in flour and shake off the excess, and then dip in the egg mixture.
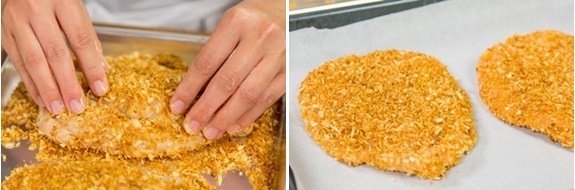
- Then, dredge the chicken in the toasted panko. Place it on a rimmed baking sheet lined with parchment paper.

- If your garlic is not done yet by this time, move it to a higher rack or place it in an open space inside the oven. Bake the chicken at 400ºF (200ºC) for 30 minutes, or until it’s done.
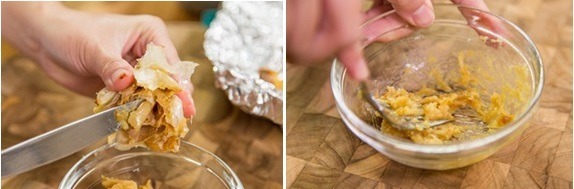
- When the garlic is done, let it cool slightly and press on the bottom of a clove to push it out of its paper. You can use a knife to take it out as well. Put all the roasted cloves in a small bowl and mash with a fork.
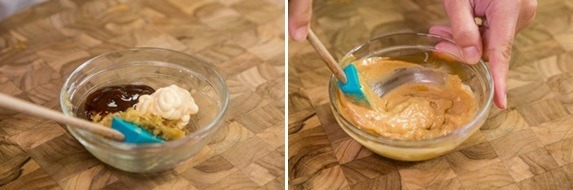
- Add 1-2 Tbsp tonkatsu sauce and 1-2 Tbsp Japanese Kewpie mayonnaise and mix all together.

- Slice ½ English cucumber with a peeler and cut 2 tomatoes into thin slices.

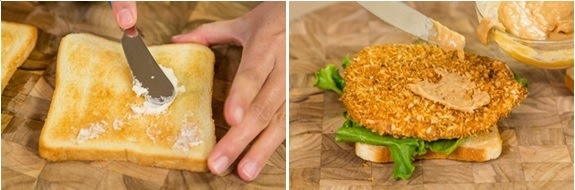
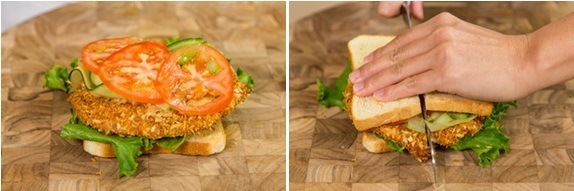
- Toast the sandwich bread (optional) and spread with unsalted butter. Put the lettuce leaves and the chicken katsu on top. Spread generous amount of Garlic Tonkatsu Sauce on the chicken.
- Put the cucumber, tomato slices and another toast on top. Cut the sandwich in half and serve immediately.


To Store
- You can store the leftovers in an airtight container and store in the refrigerator for a day.
Nutrition


Very tasty and healthy alternative to fried Chicken Katsu. Definitely a keeper! I loved how the cucumbers were cut for the sandwich! Will use that for other sandwiches as well. Thank you!
Thank you for trying Nami’s recipe! We’re thrilled to hear you loved her tip on cutting cucumbers. 😃
Absolutely delicious.
Easy preparation and fantastic flavours.
A beautiful light crumb on the chicken.
Hi Katrina! Yay! We are so happy to hear it turned out delicious!
Thank you very much for your kind feedback.