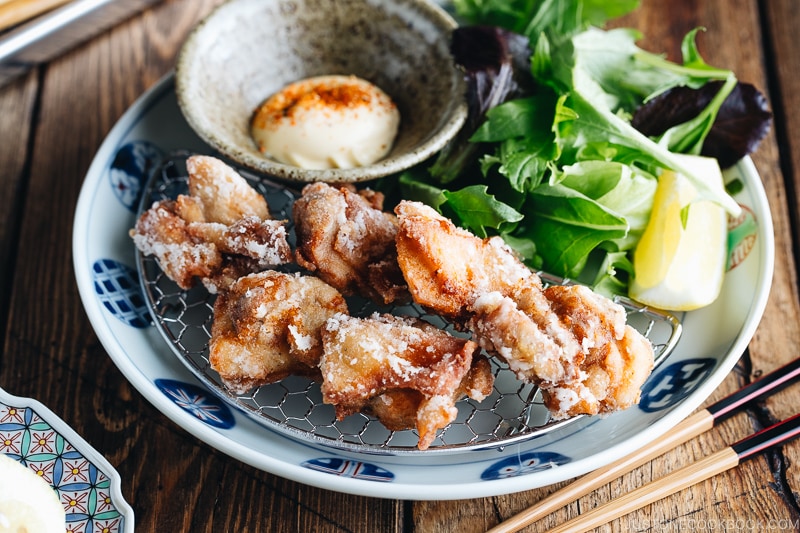
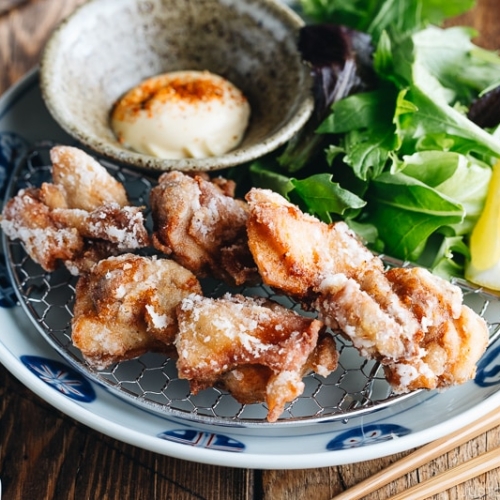
Karaage (Japanese Fried Chicken) is easily one of the greatest types of fried chicken in the world. It’s exceptionally flavorful, juicy, ultra-crispy, and absolutely worth hanging out at the stove for! Learn the simple techniques and fry up some glorious chicken at home today.
Karaage (唐揚げ), or Japanese fried chicken, is a classic dish you can find at any Japanese home, bento lunch box, street-side stalls, restaurants, or diners. Come in bite-size nuggets, anyone who has tried the fried chicken can tell you how deliciously addicting it can be.
I grew up eating a countless number of karaage, and mom’s version was always the best. Just like any Japanese home cook in her generation, mom never shied away from deep frying, especially when it comes to a dish worthy to make for the family. The chicken always turned out with cracker-crisp skin and the meat absolutely something you want to indulge with great abandon. Thanks to mom, I’m able to share the fried chicken love with you. And I promise: it’s going to be really good!
What is Karaage?
Pronounced as ‘ka-RA-AH-geh’, the word karaage refers to a Japanese cooking technique in which an ingredient is lightly coated with flour and deep-fried in oil. When you hear “karaage”, most of us assume it’s chicken karaage, but it can also be fish or vegetables.
For chicken karaage, it’s essentially bite-size pieces of chicken thigh dusted with flour and deep-fried in hot oil. With tender and juicy marinated chicken coated in a crispy shell, karaage is a staple in Japanese home-cooked meals.
You may find this delicious Japanese fried chicken being served at:
- home – it can be a main dish or appetizer.
- diner and restaurant – karaage teishoku is a popular set meal.
- Izakaya and bar – served as an appetizer to go with a drink.
- supermarket, convenience store, and depachika (B1F – the gourmet food galore in the basement of a department store).
- bento shop – karaage bento is a popular choice
Frequently Asked Questions
What is the difference between karaage and katsu?
Katsu refers to deep-fried cutlet and commonly uses chicken breast that’s been breaded with panko before frying, while karaage uses bite-size chicken thighs that are coated potato or corn starch. We serve katsu with a sweet-savory brown sauce called tonkatsu sauce. For karaage, we usually serve it with Japanese mayonnaise and a squeeze of lemon juice.
How about tatsutaage?
Tatsutaage (竜田揚げ) is another dish that is similar to karaage. The chicken is marinated in soy sauce and mirin, coated with potato starch (katakuriko), and then deep-fried till golden brown.
Wait, isn’t it almost identical to Karaage?
As mentioned earlier, karaage originally implies that the food was simply coated with flour and then deep-fried. There was no marinating involved. However, in recent years, the Japanese use these terms interchangeably. Karaage has more variations when it comes to seasonings and a lot more flexibility in how it’s being prepared, while tatsutaage has a signature method to go by.
4 Key Ingredients for Karaage
1. Chicken
In Japan, karaage is typically made with skin-on boneless chicken thighs, which has more flavor than chicken breasts. However, if you really want to use breasts, that’s okay.
Here in the US, skin-on chicken thighs are always sold with bones. To save time, I usually ask my friendly butcher to remove the bones for me. Why do we need to use skin-on? The skin keeps the karaage crispy on the outside and the meat juicy inside.
2. Marinade/Seasonings
There are so many variations of marinade/seasonings available for Karaage, and this is really up to you. I make mine slightly different all the time. However, the primary base should always include soy sauce, sake, and ginger.
Sake helps tenderize the meat while ginger gives zing and removes the gamey taste.
Some variations for the seasonings include:
- garlic
- sesame oil
- mirin
- oyster sauce
- curry powder
- egg yolk
- Japanese mayonnaise (I haven’t tried it…)
Feel free to experiment with the ingredients and see what you like!
3. Coating
This is another flexibility you can work with by testing out different ratios:
- Flour – you can decide cake flour (lighter shell) or all-purpose flour (easily available in the US)
- Potato starch
- Flour + potato starch
- Rice flour + potato starch (see this recipe) – this is gluten-free!
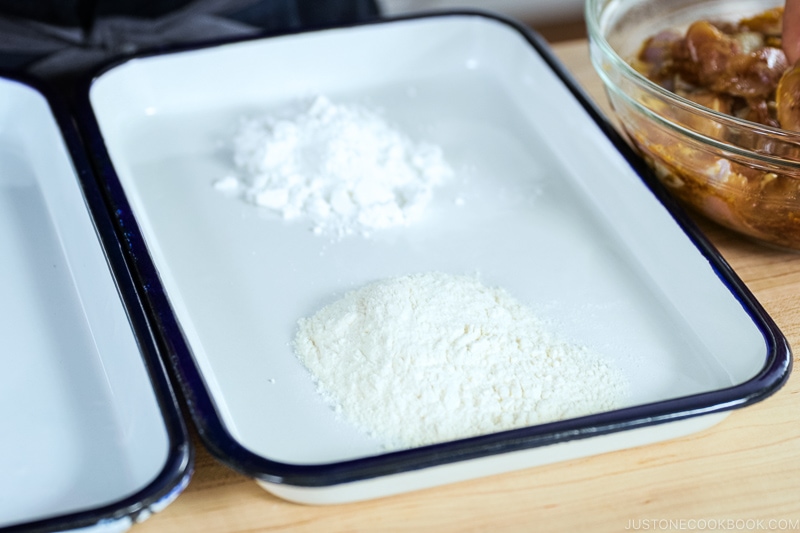
In this recipe, I use equal parts of all-purpose flour and potato starch. I first dredge the chicken in flour and then potato starch. The flour will trap the marinade and seasonings inside the shell, and potato starch will create a crisp texture on the outside. You can premix the flour and starch, but I actually like dredging in 2 stages for the best result!
Potato starch vs. Corn starch
In Japan, potato starch (or katakuriko 片栗粉) is most commonly used as a coating for frying foods. Here in the US, corn starch is much easier to access in regular grocery stores, so that is a close substitute if you have trouble finding potato starch.
As a comparison, I found that karaage made with potato starch yields a crispier skin and texture. If you compare these two starches by rubbing them between your fingertips, you will notice the difference.
Potato starch is available on Amazon and larger grocery stores. I think it’s worth looking for it to make delicious Karaage.
Are potato starch and potato flour the same?
No, they are not the same. Potato starch is made from the dried starch component of peeled potatoes while potato flour is made from whole (raw or cooked) potatoes being dried then ground into flour.
4. Deep-Frying Oil
My recommendation for deep frying oil includes:
- Canola oil (キャノーラ油)
- Safflower oil (べに花油)
- Rice bran oil (米油)
4 Helpful Tips to Remember
- Cut the chicken into same size pieces – It’s very important that each chicken is similar in sizes so you can cook evenly.
- Don’t marinate too long! – 30 minutes is ideal for the chicken to soak in the flavors.
- Lightly coat the chicken. – Remove the excess flour. It will make the oil cloudy and doesn’t give a good texture to the chicken.
- Double fry! – Fry at a lower temperature first, let it cook with remaining heat, and lastly make it crisp at the higher temperature.
Because they are bite-size, Karaage is utterly doable at home. It may require some extra oil, but you know you would be dishing out some glorious fried chicken at home!
More Chicken Recipes on Just One Cookbook
- Karaage Don (Karaage Rice Bowl)
- Nagoya Style Fried Chicken Wings
- Chicken Karaage with Sweet Chili Sauce
- Gluten-Free Karaage
- Teba Shio (Salted Chicken Wings)
- Baked Chicken Katsu
Wish to learn more about Japanese cooking? Sign up for our free newsletter to receive cooking tips & recipe updates! And stay in touch with me on Facebook, Pinterest, YouTube, and Instagram.
Karaage (Japanese Fried Chicken)
Video
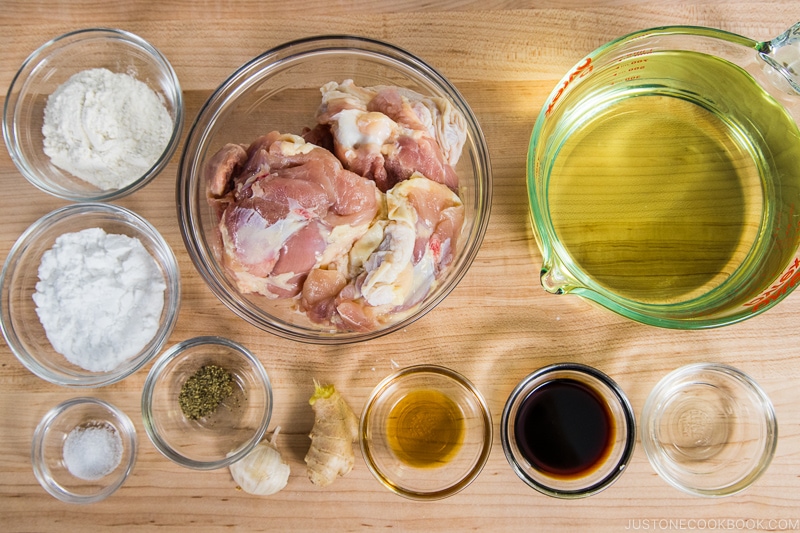
Ingredients
- 1½ lb boneless, skin-on chicken thighs (4–6 pieces; read the blog post)
- ½ tsp Diamond Crystal kosher salt
- freshly ground black pepper
For the Marinade
- ½ tsp ginger (grated, with juice)
- 1 clove garlic
- ½ Tbsp soy sauce
- ½ Tbsp sake (or substitute with dry sherry, Chinese rice wine, or omit)
- ½ tsp toasted sesame oil
For Deep-Frying
- neutral oil (about 4 cups, 960 ml)
- 2 Tbsp potato starch or cornstarch (plus more, if needed)
- 2 Tbsp all-purpose flour (plain flour) (plus more, if needed)
For Serving (optional)
Instructions
- Gather all the ingredients.

To Marinade the Chicken
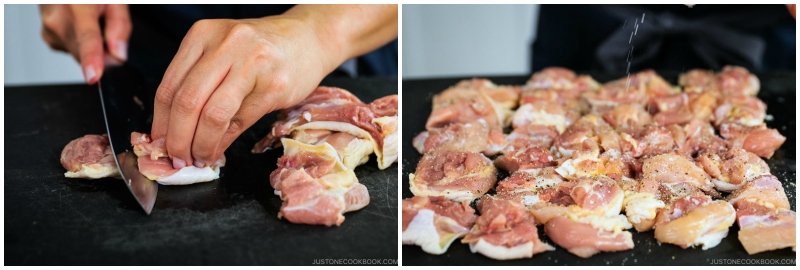
- To prepare 1½ lb boneless, skin-on chicken thighs, cut each chicken thigh into 2-inch (5-cm) pieces. Season with ½ tsp Diamond Crystal kosher salt and freshly ground black pepper.

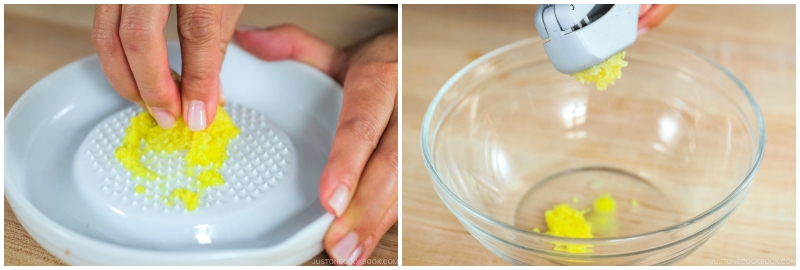
- Now, grate the ginger (I use a ceramic grater). Take ½ tsp ginger (grated, with juice) and add them to a large bowl. Next, mince or press 1 clove garlic (I use a garlic press) and add it to the bowl.
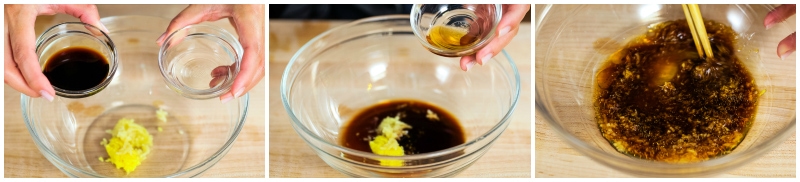
- Add ½ Tbsp soy sauce, ½ Tbsp sake, and ½ tsp toasted sesame oil to the bowl with the ginger and garlic. Whisk it all together.

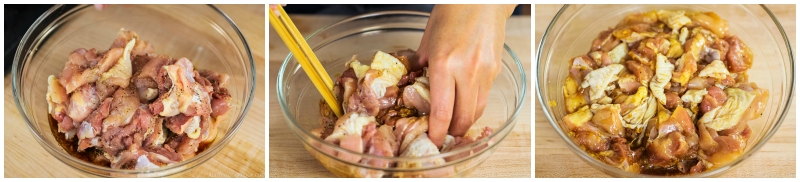
- Add the chicken to the bowl with the marinade and mix it with your hands. Cover and keep in the refrigerator to marinate for 30 minutes.
To Prepare the Deep Frying Oil
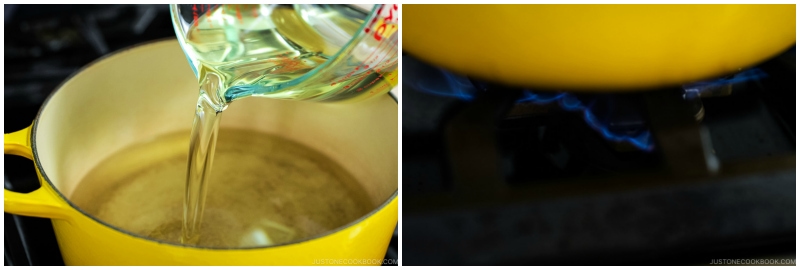
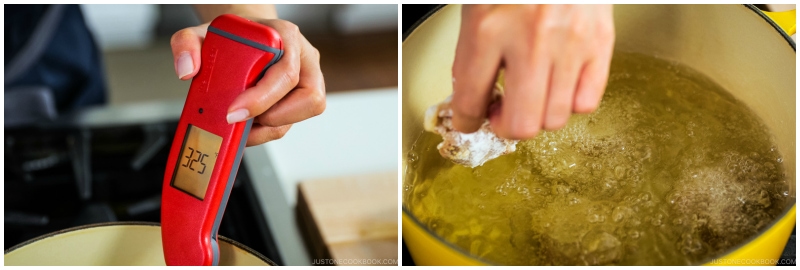
- While the chicken is marinating, prepare the oil for deep-frying. Pour about 4 cups (960 ml) neutral oil into a heavy-bottomed pot (I used a Dutch oven) and heat it to 325ºF (160ºC) on medium heat.
To Dredge the Chicken
- While the oil is heating up, dredge the chicken. Prepare 2 Tbsp all-purpose flour (plain flour) and 2 Tbsp potato starch or cornstarch in separate piles.
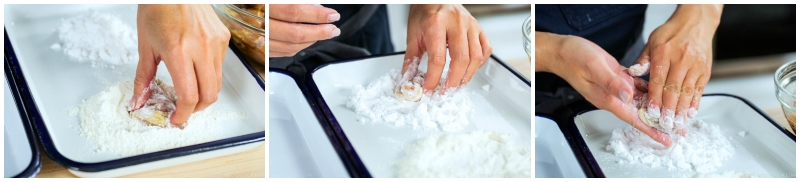
- Lightly dredge a marinated chicken piece in the flour and dust off the excess flour. Then, dredge in the potato starch and remove the excess starch.
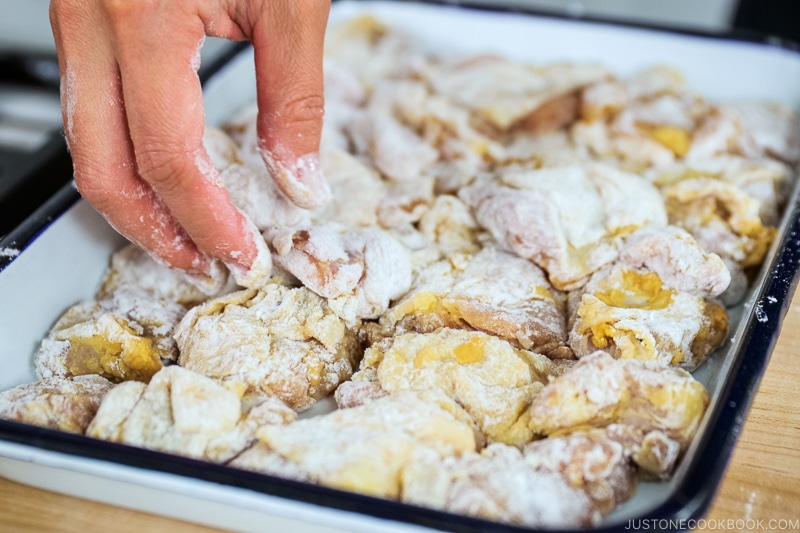
- Continue with the remaining chicken pieces.
To Deep-Fry
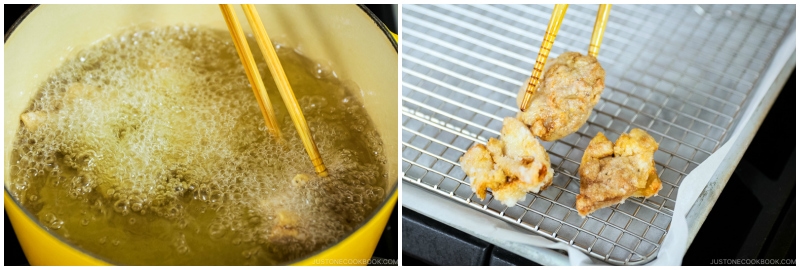
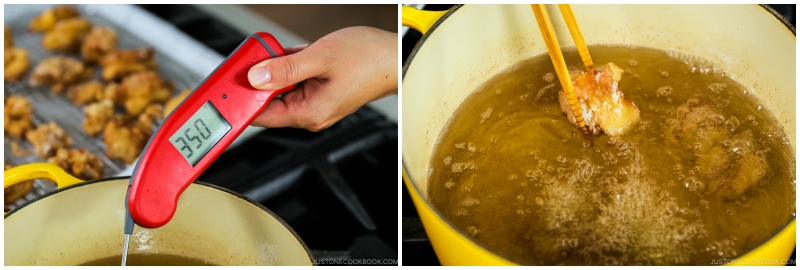
- Check that the oil temperature has reached 325ºF (160ºC). Tip: If you don‘t have an instant read thermometer, insert a wooden chopstick into the oil; you‘ll know it‘s hot enough if small bubbles start to appear around the tip. For more details, see my post How to Deep-Fry Food.When the oil is hot enough, gently submerge 3 to 5 chicken pieces in the oil at a time; do not overcrowd the pot. Tip: If you put too many pieces in at once, the oil temperature will drop quickly, and the chicken will end up absorbing too much oil.
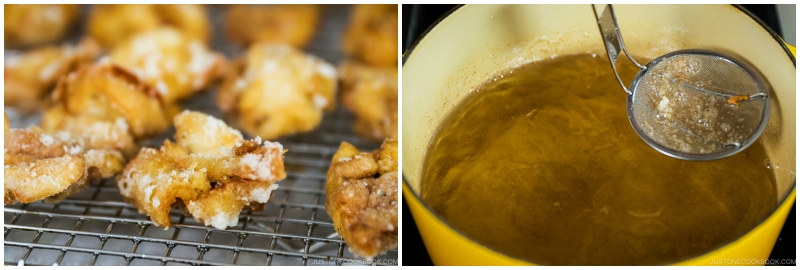
- First Deep-Frying: Deep-fry for 90 seconds, or until the outside of the chicken is a light golden color. If the chicken browns too quickly, then the oil temperature is too high. Either put a few more pieces of chicken in the oil or lower the heat. Controlling the oil temperature at all times is very important for deep-frying. Transfer the chicken pieces to a wire rack to drain the excess oil.
- The residual heat will continue to cook the chicken as it rests on the wire rack. Continue deep-frying the remaining chicken pieces. Between batches, pick up and discard the crumbs in the oil with a fine-mesh sieve. This keeps the oil clean and prevents it from becoming darker.
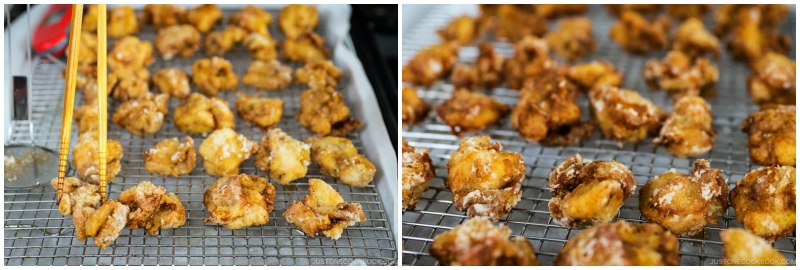
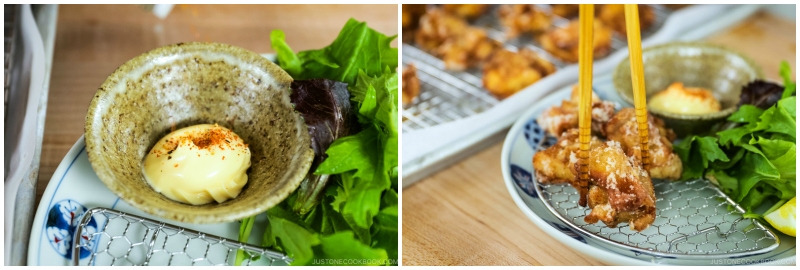
- Second Deep-Frying: Now, heat the oil to 350ºF (180ºC). Place 3 to 5 pieces of the resting chicken back into the oil and deep-fry for 45 seconds, or until the skin is golden brown and crispy. Transfer them to a wire rack to drain the excess oil. Continue with the remaining chicken pieces.
- The left photo shows the chicken pieces after the first frying and the right photo shows them after the second frying. You can see the chicken pieces on the right are slightly darker in color.
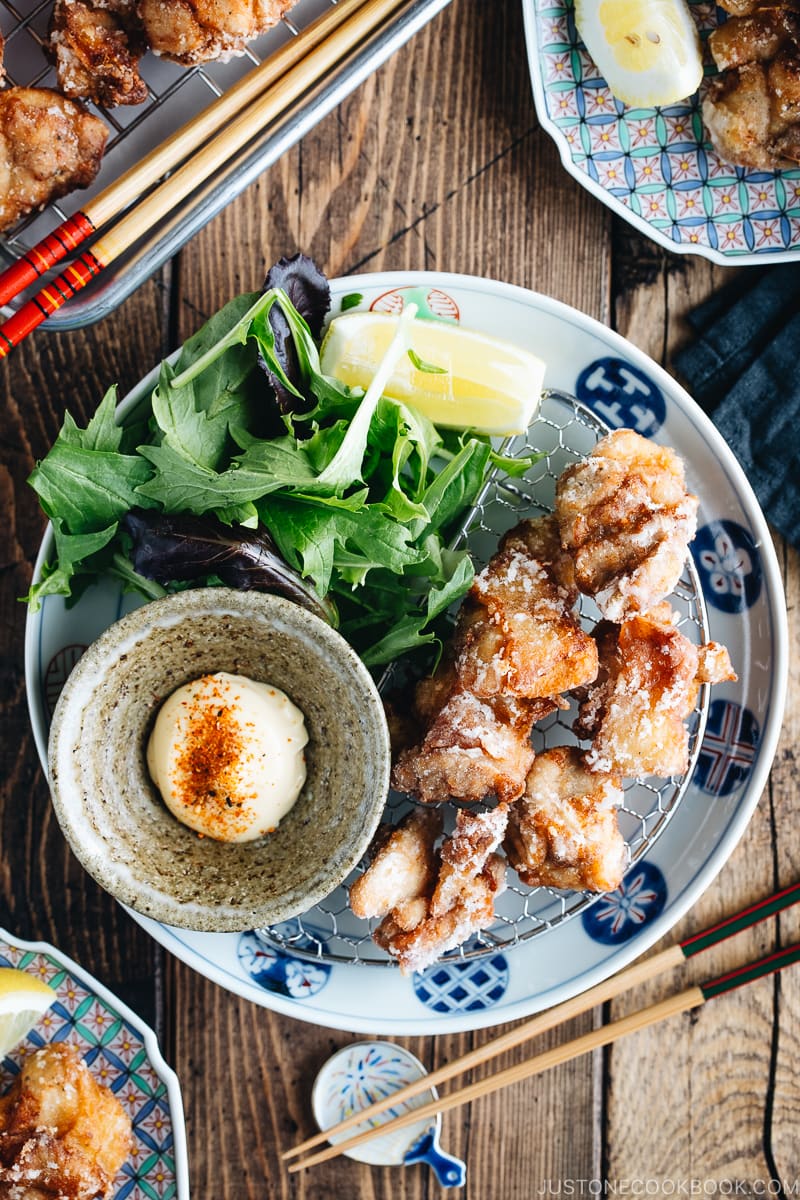
To Serve
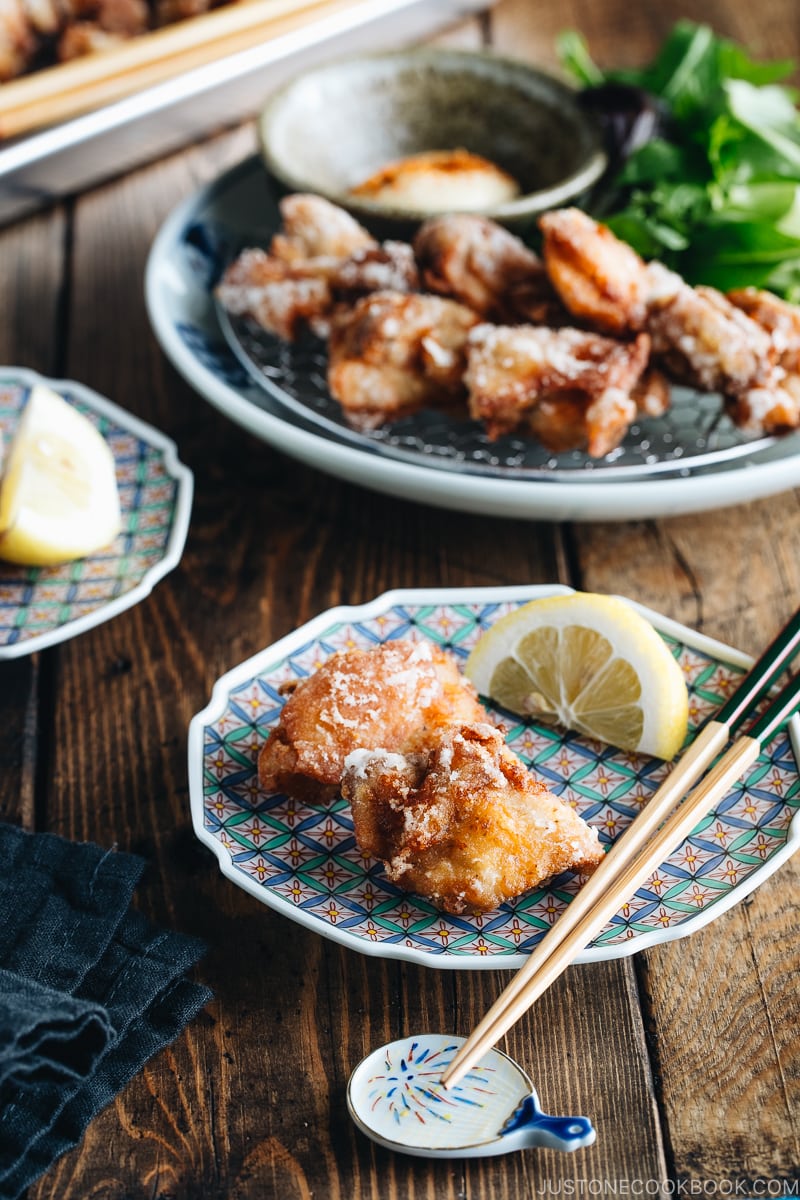
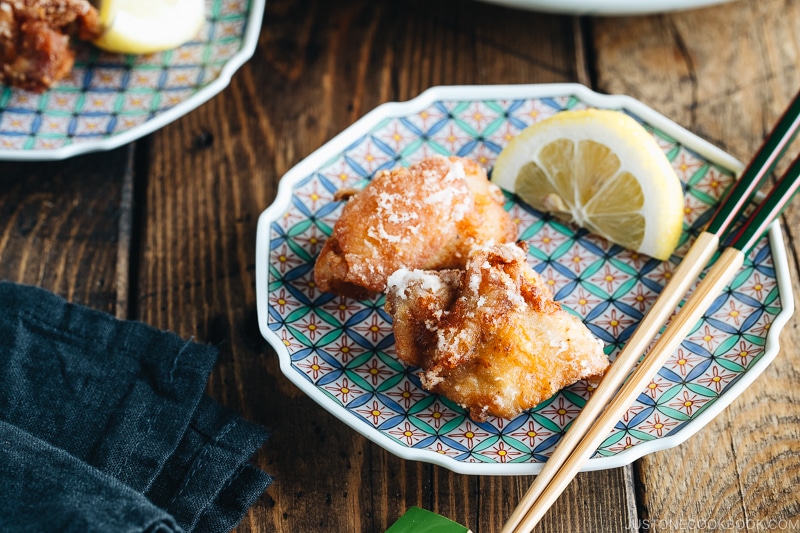
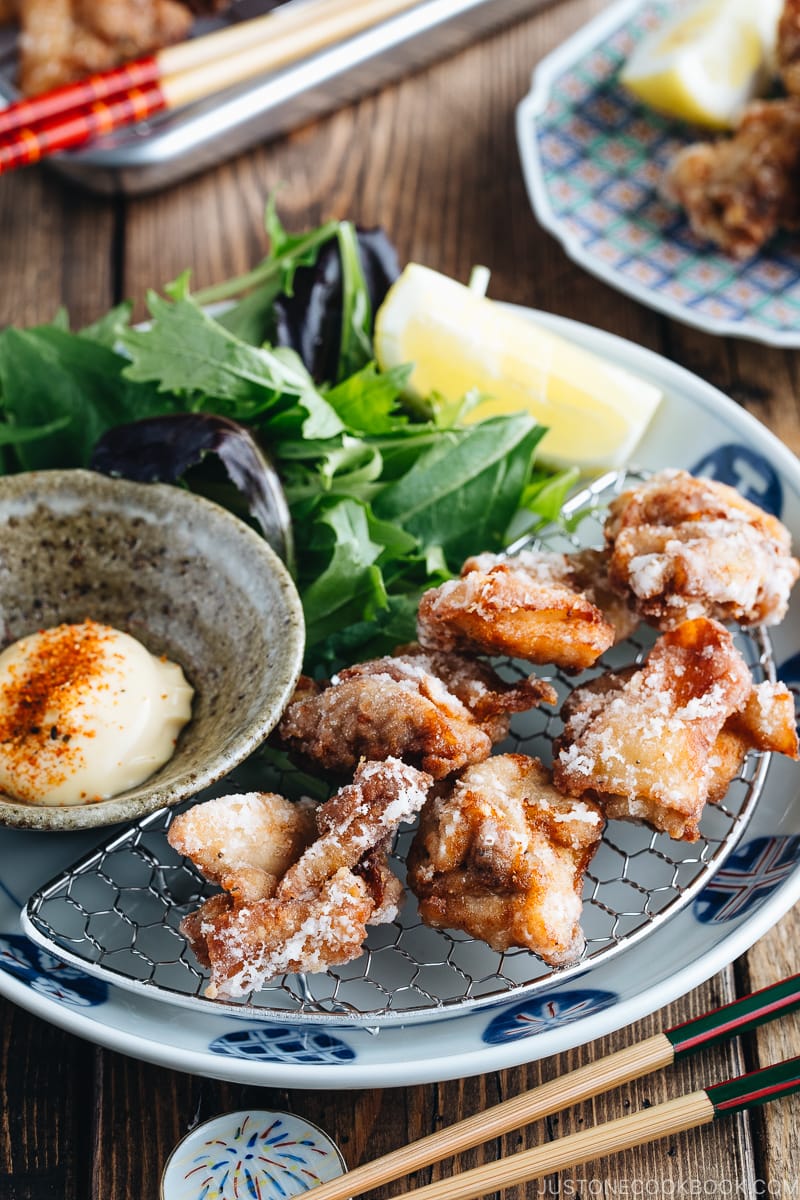
- Serve the chicken hot. We often serve Karaage with lemon wedges and dip it in Japanese Kewpie mayonnaise (you can make it homemade). Sprinkle shichimi togarashi (Japanese seven spice) on top for a bit of spice, if desired.
To Store
- Let cool completely, and keep in an airtight container. You can store it in the refrigerator for up to 3 days and in the freezer for up to a month.
Nutrition
Editor’s Note: This post was originally published on October 10, 2012. The new video is added and the images have been updated in October 2019.


I am digging through my pantry and found a bag of tapioca starch – can I use this instead of potato starch? Very excited to make this for my husband’s birthday!
Hi Judi! As far as I heard, tapioca starch and potato/cornstarch are different… let me know how it went if you ended up trying. 🙂
Delicious recipe and the easiest time I’ve had deep-frying in my cast-iron yet! Didn’t have sake and mixed up the coating process (cornstarch first then flour), but man did they turn out delicious and perfectly cooked, tender, and crispy. And the flavor of the marinade comes through so well! Will be making this again next time I want fried chicken.
Nami, thank you for your chiken karagi recipe, I love chiken karagi. You have change the way I cook chicken.
Hi Alan! Thank you so much for your kind feedback! I’m so glad you enjoy this recipe! 🙂
Hello Nami San,
I will be making this Karaage tonight, can’t wait (!!); however, where can I buy the half circle wire basket used to serve the chicken? It fits perfectly on the dish! Thank you
Hi Carol! I got them in Japan (Kappabashi: https://www.justonecookbook.com/tokyo-kappabashi-kitchenware-town/). It’s for placing Tonkatsu and all the deep-fried foods. So convenient!
Absolutely delicious!!!
Thanks so much for trying my recipe, Tessa! So glad you enjoyed it. 🙂
Hi! Can’t wait to try this recipe!
Where did you get the white plate/tray with navy blue rim? I’ve been looking for something like that!
Hi Jen! It’s called a butcher tray and I got them on Amazon.
https://amzn.to/3gNae3z
Hi Nami! I couldn’t open that link. Is this one similar?
https://www.amazon.com/dp/B07NWDSTHK/ref=cm_sw_r_cp_awdb_t1_6Y.3EbQPC0R58
Hi Jen! That says “serving tray” and it might be bigger than what I have. This is the right size I have: https://amzn.to/2BQFVcF and this one not Amazon prime: https://amzn.to/3gNCW3c
Thanks Nami! 🙂
I love this recipe. Made this a few times and shared it with family and friends and they all love it. My sister even made it into a sandwich like the tonkatsu sandwich. I’m really glad I discovered this website! I’ve made quiet a few recipes off here and they’re all becoming meal staples.
Aww!! Thank you for trying out many of my recipes and it meant so much to me!!! Hope you continue to enjoy cooking Japanese food at home. And please let your sister know that I like the Karaage Sandwich. YUM!!
Hi Nami San,
Making Chicken Karaage from your recipe now…
Can we keep on frozen for uncooked Chicken Karaage? Should we keep them before or after 1st deep fry?
Hi Michelle! I apologize for my late response. No, we should deep fry first then let cool before freezing them. 🙂
How do you suggest to freeze this?
Hi Aimee! Deep fry, let cool completely, and then put in an airtight container to store in the freezer. 🙂
Hi – I know I’m posting this comment a few months after this recipe’s release, but I was just wondering if you can make this recipe with skinless chicken thighs – as the only boneless thighs I can buy are also skinless, and I’m not sure if I’d have the time to de-bone standard skin-on thighs. Thanks in advance if you can reply 🙂
Hi Jude! You can use skinless chicken thighs if you prefer. You can also ask the butcher to debone for you, which I always do (they debone faster than me and it’s free service!). 🙂
Does your recipe work on 10 lb bag uncooked chicken wings?
Hi Mabel! I’m posting a fried chicken wing recipe next week. You can use wings for this recipe if you like. If you get a chance, please check my tips on chicken wings when I publish next week. 🙂
Thank you for sharing this recipe! It was delicious, and I plan to make it again. (Each of your recipes that I have tried turn out delicious!) Many thanks. =)
Hi Kaitlin! I’m so glad to hear that! Thank you for your kind words about my recipes. 🙂
Nami-san
I really enjoy your blog and making delicious Japanese food. Can I deep fry karaage one day a head of time and then heat up in the oven before serving?
Hi Joe! Sure you can do that. Don’t reheat for too long to keep the chicken moist. Always best, right after deep fry while it’s still moist and crunchy… but I know it’s not always possible. 🙂
Any way to make crispier? Just made this and the flavors were perfect (used potato starch), but it was a little less crispy than I’m used to. For serving, I put this on top of rice with some pickled vegetables and a soft boiled egg, really solid meal.
Hello P! Thank you for trying this recipe! I think you need to deep fry at a higher temperature. It won’t get crispy if the oil is not an optional temperature. Hope this helps! 🙂
Needed to use almost twice the amount of flour and starch recommended. Also, the chicken wasn’t super crispy even after the second fry. The skin crisped up nicely but the rest of the chicken piece didn’t. However overall the chicken inside was very good. I think next time I might try a higher temperature for the 2nd fry.
Hi Ismail! Thank you so much for trying this recipe!
From the way you describe, it seems like your deep-frying oil was a bit too low like you mentioned. It should become crispy all around. I measure the flours (and all ingredients) precisely, but if your chicken’s surface area is more than mine, it’s possible that you need more (As I stated in the recipe, but roughly it should be similar amount. You have to remove excess flour so your oil won’t get cloudy from the flour). 🙂