Let’s make fresh and tender Gyoza Wrappers from scratch! All you need is salt, water, and flour. That’s it! Watch the video tutorial and enjoy the fun and rewarding process.
Gyoza wrappers are not one of those things that I usually make from scratch. While everything homemade is best in the ideal world, who has the time when you can easily buy them from grocery stores?
It wasn’t until when I took upon the challenge of making homemade gyoza wrappers that I realized it wasn’t as daunting and difficult as I’d thought. You’ll need only salt, water, and flour! The experience is so rewarding that I know you’ll enjoy making your own gyoza wrappers too.
Table of Contents
What Are Gyoza Wrappers?
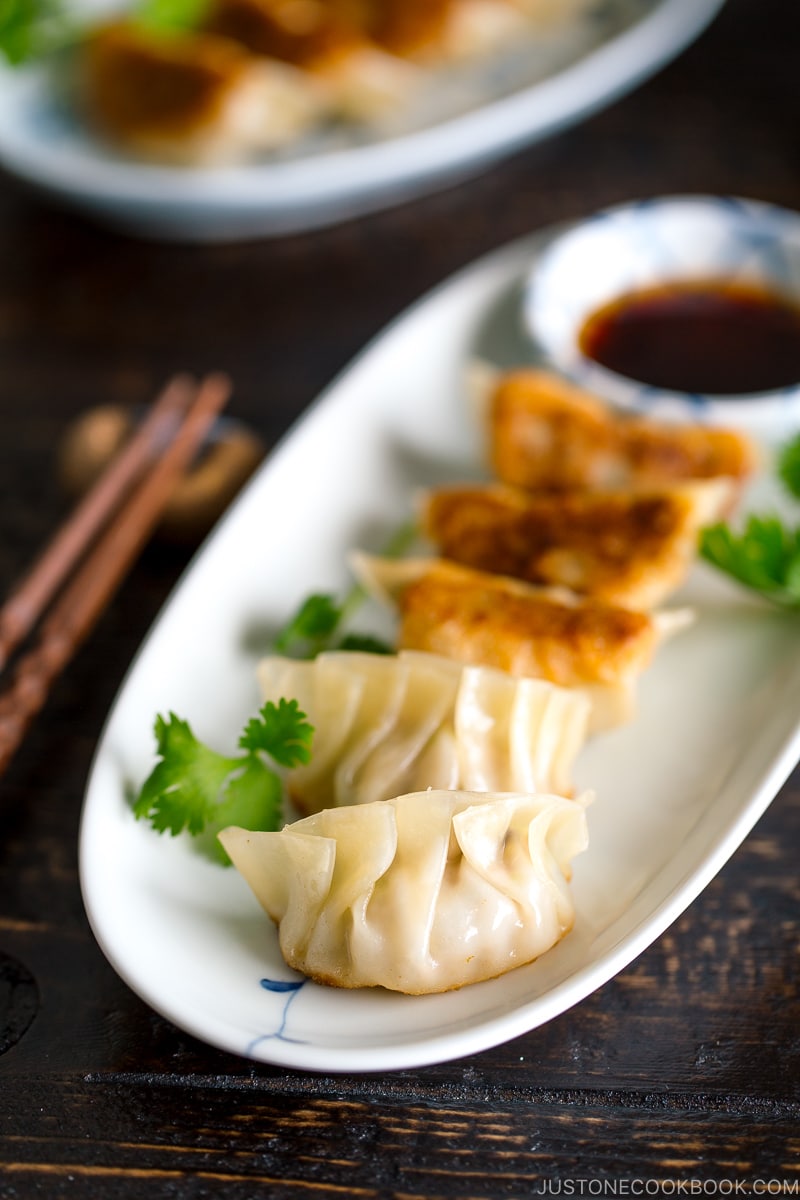
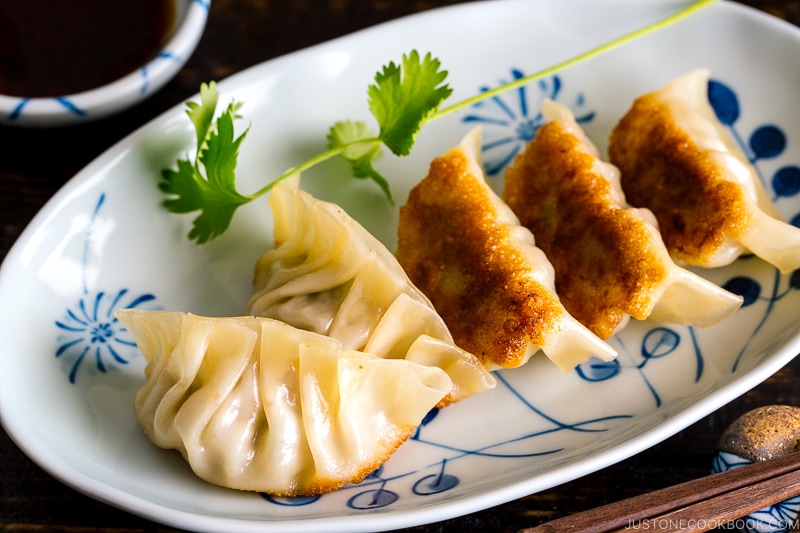
Gyoza wrappers are a thin and round flour pastry that wraps around the filling of gyoza or Japanese potstickers. The dough is made of wheat flour, water, and a pinch of salt. They get crispy when pan-fried or deep-fried and become a soft and tender, pasta-like texture when boiled.
How to Make Gyoza Wrappers
The Ingredients You’ll Need
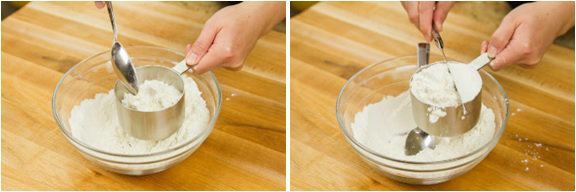
- All-purpose flour – Weigh your flour or use the “fluff and sprinkle“ method and level it off.
- Kosher salt
- Water
- Potato starch (cornstarch)
The Steps
- Mix all the ingredients in a large bowl.
- Knead the dough for 10 minutes, shape it into logs, and rest for 30 minutes.
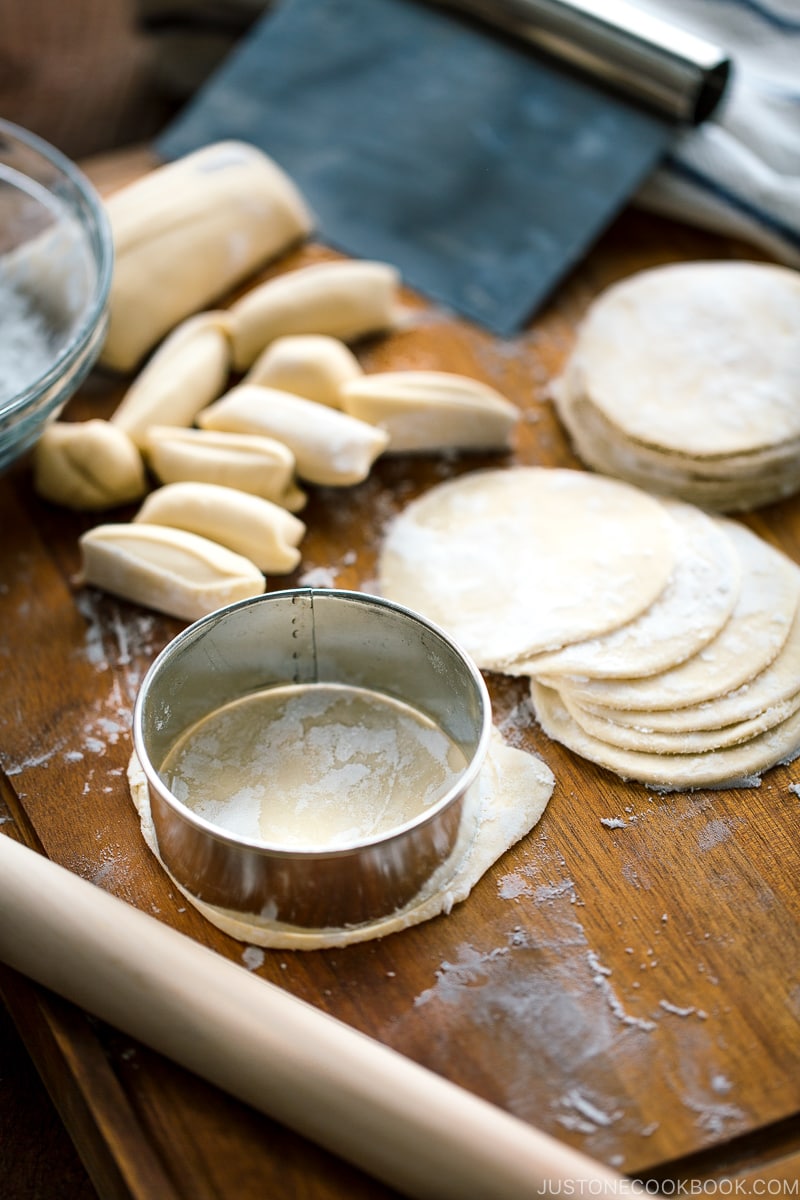
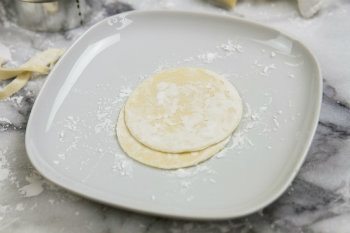
- Cut the dough into small pieces, flatten, and cut out into a circle shape using a cookie cutter.
Japanese Gyoza & Chinese Potstickers
Japanese gyoza is very similar to Chinese potstickers. The main differences are in the size and thickness of the dumpling wrappers. Chinese potstickers’ skin is typically thicker and the dumplings themselves are larger than gyoza.
If you are able to buy gyoza wrappers locally and want to save time, you can hop straight over to my gyoza recipes:
Homemade vs. Store-Bought Gyoza Wrappers
Homemade gyoza wrappers can be time-consuming, but I find the process extremely fulfilling and calming. Save it for the weekend or on an unhurried evening when you can enjoy the experience. Or make it a fun activity to do with family or friends. Gyoza party, anyone?
The beauty of the homemade wrappers is they are tender and fresh tasting, making them so much pliable to fold your filling. Also, there are no preservatives you have to worry about.
Seeing my family devouring the gyoza I made from scratch pleases me more than anything. It’s worth the time!

Ways to Use Gyoza Wrappers

Wish to learn more about Japanese cooking? Sign up for our free newsletter to receive cooking tips & recipe updates! And stay in touch with me on Facebook, Pinterest, YouTube, and Instagram.

Gyoza (Japanese Potsticker) Wrappers
Video
Ingredients
- 2 cups all-purpose flour (plain flour) (weigh your flour or use the “fluff and sprinkle“ method and level it off; you can substitute 1 cup, 120 g bread flour + 1 cup, 120 g cake flour)
- ½ tsp Diamond Crystal kosher salt
- ½ cup water (just-boiled hot water; plus more, as needed)
- potato starch or cornstarch (for rolling and dusting; or substitute flour if you‘re not freezing them)
Instructions
Before You Start
- I highly encourage you to weigh your flour using a kitchen scale for this recipe. Click on the “Metric“ button at the top of the recipe to convert the ingredient measurements to metric. If you‘re using a cup measurement, please follow the “fluff and sprinkle“ method: Fluff your flour with a spoon, sprinkle the flour into your measuring cup, and level it off. Otherwise, you may scoop more flour than you need. 1 US cup of flour weighs 4.25 oz (120 g).

- Gather all the ingredients.


To Make the Dough
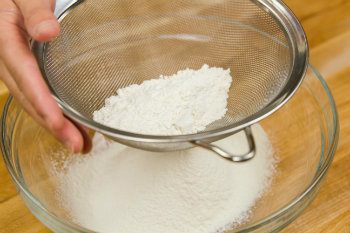
- Sift the flour into a large bowl.
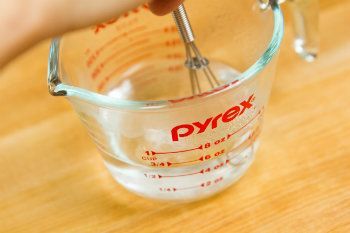
- Add the salt to the just-boiled hot water and stir until completely dissolved.
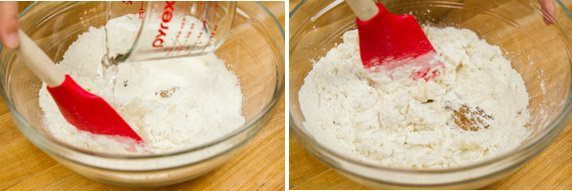
- Add the hot water to the flour, a little at a time, stirring with a rubber spatula. Mix until the flour and water are combined completely. If the flour is still not incorporated, add more hot water, ½ Tbsp at a time, until you can form the mixture into a ball. You will eventually need to use your hands to do this. Tip: different brands of flour absorb water differently, so use more hot water as needed; I used about 120–150 ml.

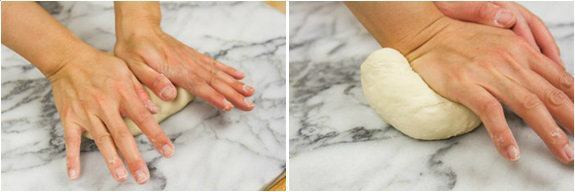
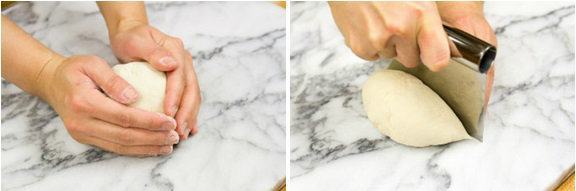
- Transfer the dough to a work surface and knead the dough for 10 minutes.

- After 10 minutes, the texture of the dough will be much smoother. Use a dough scraper to cut the ball of dough in half (doesn‘t have to be an equal size).

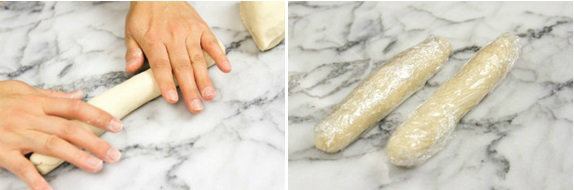
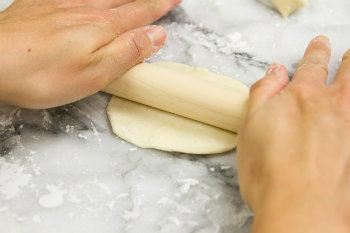
- Shape each half into a long log about 1½ inches (3.8 cm) in diameter, although it doesn‘t have to be perfect, especially if you use a cookie cutter later. Wrap each log with plastic wrap. Let it sit for 30 minutes.

To Roll the Wrappers
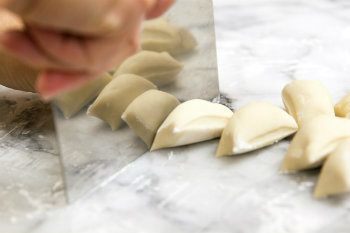
- Unwrap the dough. Sprinkle a little potato starch on the work surface and cut each log crosswise into ¾ inch (2 cm) wide pieces. Since we’ll be using a cookie cutter, don’t worry if each piece of dough is a slightly different size. Tip: If you plan to freeze the wrappers, please use potato starch or cornstarch for dusting and rolling, as the wrappers tend to stick to each other if you use flour.
- It‘s super important to cover the dough with a damp kitchen towel at all times to prevent it from drying.
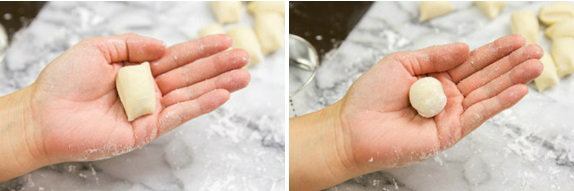
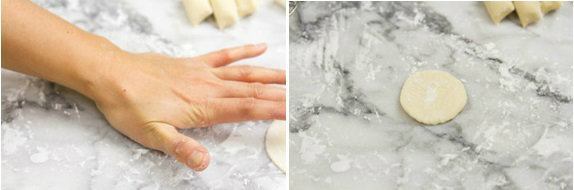
- Roll each piece of dough into a ball shape.

- Press the ball onto the work surface.
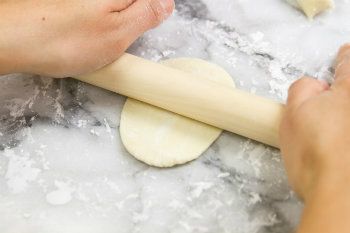
- Using a rolling pin, roll out the dough, but DO NOT flatten the TOP and BOTTOM edges. This is the trick to making a nice round shape.
- Rotate the dough 90 degrees and repeat rolling the dough. Try to roll out the dough into a thin circle. If the dough is hard to roll out or shrinks back, let it rest a bit to relax the gluten and try again.
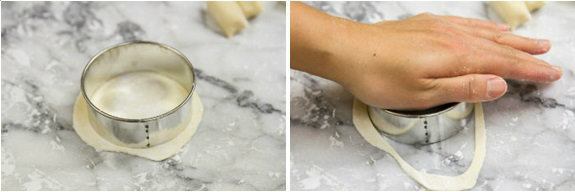
- Cooker cutter (optional): If you want a perfectly round shape for your wrappers, cut your rolled dough circle with a 3-inch (8 cm) cookie cutter. If the dough rolls back, leave it for a few seconds, then try again to cut the dough. Remove the excess dough scraps and cover them with a damp towel. Later, combine all the scraps if they still squish together and haven’t dried out. Re-roll the scraps and repeat the process.
- Sprinkle each wrapper with potato starch and stack the wrappers. Make sure to cover them with a damp kitchen towel as you continue rolling the remaining dough. Once you‘ve rolled out all the wrappers, they are ready to use. You can also freeze or refrigerate the wrappers to use later.

To Store the Wrappers for Later
- Wrap the stacked gyoza wrappers with plastic wrap and store in the refrigerator for about 3–4 days and in the freezer for up to a month. Prior to use, defrost in the refrigerator overnight or on the counter for 60 minutes (depending on the amount and room temperature). Do not defrost in the microwave.
To Make Gyoza
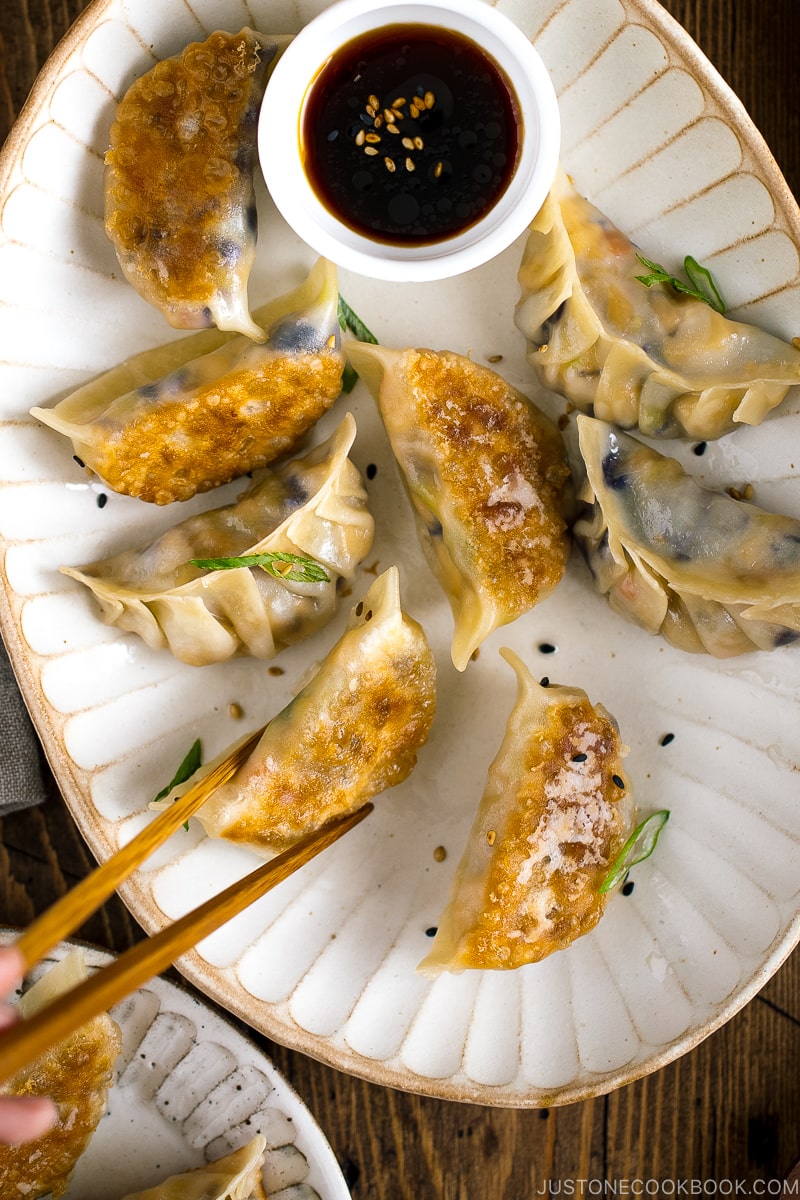
- You can use these Homemade Gyoza Wrappers to make Gyoza, vegetarian/vegan Vegetable Gyoza, Chicken Shiso Gyoza, Gyoza with Wings (Hanetsuki Gyoza) and Korean-style Kimchi Gyoza. If you‘re new to making Japanese potstickers, see my tutorial on How to Fold Gyoza.

Nutrition
Editor’s Note: The post was originally published on February 19, 2014. It’s been updated and republished in July 2020.


This recipe did not work at all. Wasted 30 minutes messing with the dough and then tossed it because it did not work out as the recipe dictates. Not very happy at all.
Hi Ethan! I’m sorry to hear yours didn’t come out well. Which part was the issue? I’ll be happy to check what went wrong.
I just use leftover pasta dough for mine. Much of the rolling is done by my pasta roller attachment for my KitchenAid.
Hi Douglas! Good idea to make two kinds with one dough! 🙂
Couldn’t find G.zoa dough at the store, or the wrappers. After going on the internet, I found your easy recipe for making them. I will not chase around in stores, will make yours. Thanks
Hi Susan! I’m so happy to hear you tried making the wrappers from scratch! I hope you enjoy making gyoza. 🙂
If I wanted to buy gyoza wrappers in a store, which ones do you recommend? I love making them by hands but sometimes I’d like them premade.
Hi Cine! I use this gyoza wrappers (https://www.justonecookbook.com/pantry_items/gyoza-wrappers/) or Myojo gyoza wrappers that are slightly bigger…
https://www.instacart.com/russo-s/products/162201-myojo-gyoza-potsticker-wrappers-10-oz
Hi Nami
I made the first batch of wrappers yesterday and my family enjoyed it so much that I do not think I can ever go back to store-bought wrappers!
My 2nd batch is proofing as I write!
Thank you for introducing us to the recipe!
Regards, Aileen
Hi Aileen! I’m so happy to hear you and your family enjoyed the recipe! Thanks so much for writing your kind feedback. 🙂
I just made this, and they were yummy, but I only got 24 wrappers. Did I miss something?
Hi Janna! Probably our thickness is different. I used 8 cm (3 inch) diameter cookie cutter, and I roll out pretty thin (Can you see in step 14?), and I do not throw away the leftover dough. I use the enter dough without throwing away. 🙂
thank you for posting this recipe ! it is difficult to find halal gyoza in london, therefore i am planning to make them from scratch. in order to save time, can i roll out the dough into a big circle and then use a round cutter ?
Hi Brinacyl! Yes, you can do that. and if you have a pasta machine, I think it can be done fast too. 🙂 Hope you enjoy!
Trying to figure out how you get 42-44 wrappers.
When I do the “math” i see 2 logs getting cut into 12 pieces. That equals 24. Are you also cutting each piece in half?
( I saw one commenter got 35 wrappers – so again, I’m mystified.)
Hi Isabelle! As I mentioned in the recipe, you can try to cut each log into 12 pieces but the number may vary depending on the log length and width (one log might be 15, the other might be 14 for example). Also, I keep re-rolling the dough until the last piece of dough is completely used (I never throw away dough). I roll out the best I could to make thin wrappers as Japanese gyoza wrappers are pretty thinner than Chinese potsticker wrappers. When I make recipes, I always measure and count and take notes, so I’m confident I made 44 wrappers, but I think the last 2 were not “ideal” wrappers, so I wrote 42-44. If I could roll out thinner on some of the dough, I might have made 44 nice wrappers. 🙂 Hope “mystery” was solved. 🙂
made these last night. Delicious (not to mention that I impressed the pants off my family!)
I got 32, but my rounds were probably about 4 inches in diameter. – I started out with the cookie cutter, but ditched it quickly (I found re-rolling the scraps cumbersome) & used the rolling out method I’ve seen on a few other videos (rolling in to half way, turning and repeating).
I’ll just cut my chunks smaller in the future.
Thanks for the video & reply!
Awesome!! Great job! I think you’re way more advance. Cookie cutter technique is for beginners (so they know they can make a round shape), but what you saw on other videos are traditional way. When I made steamed bun (Nikuman) recipe, i didn’t use the cookie cutter, and I think everyone got a bit worried if they can make it into round shape. For homemade, it doesn’t have to be perfect. 🙂 I’m happy to hear you impressed your family! 🙂
And by the way – I Instagrammed my gyoza and used the hashtag #Justonecookbook 😀
I saw it!! They look perfect! Thank you Isabelle!
Hey, Nami! I have those exact plates that your gyoza are pictured on (the Japanese ‘cracked torquiose’ plate set). I eat my sashimi on that set. Looks amazing, doesn’t it. 🙂
Can’t wait to eat gyoza again! I want to try and make a gluten free version for my friend, but I’m not sure how to do this at the moment.
HI Natalie! Ohh that one is from Sur La Table maybe I purchased 2-3 years ago. I have the soy sauce dipping dish too! I love turquoise color… 🙂
I’m not expert in GF gyoza wrappers. I don’t know if the same recipe works with GF flour. I wish I could tell… I think you might need to play with the flour and see if you could make a similar dough…
Beautiful instructions and presentation! I’m making these tonight and can’t wait to get started. Thank you!!!!! xoxo Arigatou gozaimasu!
Hi Simone! Hope your Gyoza turned out well. Arigato for your kind words and for trying my recipe! 🙂
Is there any reason not to just roll out all the dough and cut all the circles quickly (like ravioli) instead of one at a time? I was under the impression Japanese cooks do them one at a time because they don’t cut them, but rather roll them to size individually (this is what my Japanese mom does but it’s hard to perfect and takes forever). My dad is Italian and the ravioli method would be so much faster!
Hi Suri! Thank you for your question. It made me realize that my instruction wasn’t clear so I edited my recipes at Step 13 and 14. Normally, if you don’t care about the perfect circle shape of the wrappers, you don’t have to go through the cookie cutter process. You just roll out to a circle-like shape, and move onto Step 15. However, I wanted to suggest if they want to make a nice shape, you can cut out with a cookie cutter. Therefore, we don’t do ravioli style. 🙂 Plus, technically, the outer layer of the circle should be thinner than center. That’s how dumpling wrappers should be… not equal thickness. But that’s more advanced. 🙂
Thank you for this recipe! Since we moved to a countryside it’s hard to get wrappers from Asian supermarket 😀 so had to make them myself. The dough was very pleasant to work with. I’ve used pasta roller to save some time (double batch) and was cutting the rounds out from 4 layers at a time. I had to put some starch between the layers to stop sticking so when I collected the scraps there was some starch worked into the dough. After cooking the gyozas the dough on few of them tasted a little ‘dry’ and more crunchy which I think we’re those with extra starch in the dough. Is there a way to avoid that?
Hi Anya,
Thank you so much for trying this recipe and for your kind feedback!
To avoid having extra starch in the dough, I recommend brush off the starch from each layer before you collect the scraps.
You may also make/cut the wrappers in square shape using a pizza wheel if you want to save more time.😉
I hope this is helpful.
Thank you for the recipe. It is very instructive and informative.
I made my gyoza wrapper following to your instruction. Make two logs and each log is cut int to 12 pieces as your instruction says. How these become 42-44 wrappers? I made only 27 or 30 at most. I think it would be better to cut each log into 20 pieces for making 8cm wrappers, not 12 in first place. However, will these become too thin? ( I don’t know )12 pieces make gyoza very thick so I made 9cm wrappers.
I used strong flour and plain flour half and half and measured them precisely. Even after collecting scraps, I don’t think it makes double amount. the calculation doesn’t make sense. The amount of preparing the filling is based on this?
I really enjoyed your recipe.
Thank you very much.
Junko
Hi Junko! I write precise recipes and always measure. I still measure ingredients even after I post it (and I make just for my family) so that my recipe is always accurate. I’m thinking my wrappers are thinner and I use all my dough without wasting it (just keep rolling out the leftover dough). At step 14, I cut out into perfect round shape by a cookie cutter and this is 8 cm. I don’t roll out to be 8 cm, the end product is 8 cm gyoza wrappers. Hope this helps? Dough might be tougher if moisture evaporate more (like I’m in California and it’s pretty dry), so water might need to be adjusted if you are in different climate (which is why I put 120-150ml – i can’t be same everywhere).
Thanks so much for your feedback. I’m glad you enjoy my recipes! 🙂
This is amazing. I never knew the recipe would be so easy. But in my region it’s quite hard to find potato starch, can i replace it with other flour? Corn starch or tapioca perhaps? Since it’s just for dusting, does it have to be potato starch? I’ll be so glad if you can answer my question. Thank you ☺
Hi Hikari! Yes you can use corn starch instead of potato starch. Hope you enjoy!
Ditto to the other comments I read; thanks. I did enjoy the video’s.
Thanks so much John!!
Hi Nami,
I made few attempts so far to make gyoza wrappers but only after followig your recipe it was successful. I got 68 wrappers all together. Using pasta machine made it even easier to get them extra thin. Thank you!
Hi Kasia! That’s awesome! Thank you so much for your kind feedback, and I’m really happy to hear yours came out well! Thank you!
where can i buy a cheap cookie cutter?
Hi Emma! I bought a round cookie cutter set a long long time ago, probably from Sur La Table. But you can find it anywhere including Amazon. If you don’t want to spend money for one time use, you can use a can (like tomato can, etc) etc. It’s pretty good size. 🙂