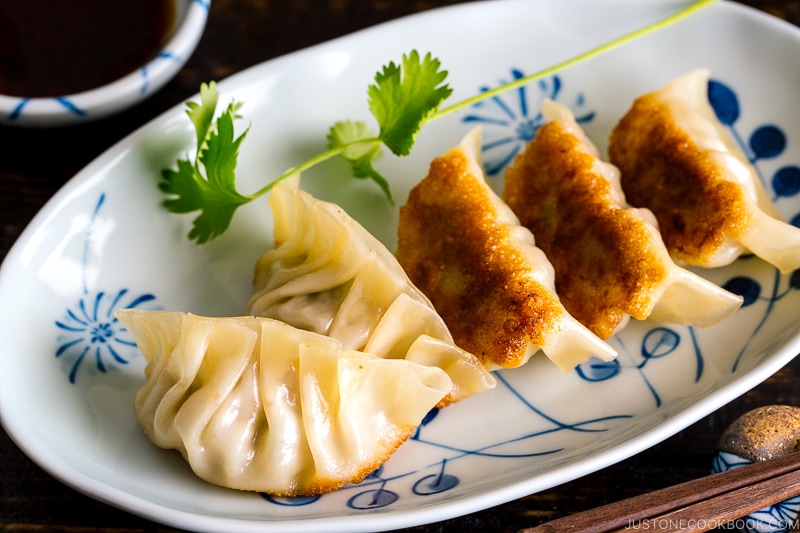
Let’s make fresh and tender Gyoza Wrappers from scratch! All you need is salt, water, and flour. That’s it! Watch the video tutorial and enjoy the fun and rewarding process.
Gyoza wrappers are not one of those things that I usually make from scratch. While everything homemade is best in the ideal world, who has the time when you can easily buy them from grocery stores?
It wasn’t until when I took upon the challenge of making homemade gyoza wrappers that I realized it wasn’t as daunting and difficult as I’d thought. You’ll need only salt, water, and flour! The experience is so rewarding that I know you’ll enjoy making your own gyoza wrappers too.
Table of Contents
What Are Gyoza Wrappers?
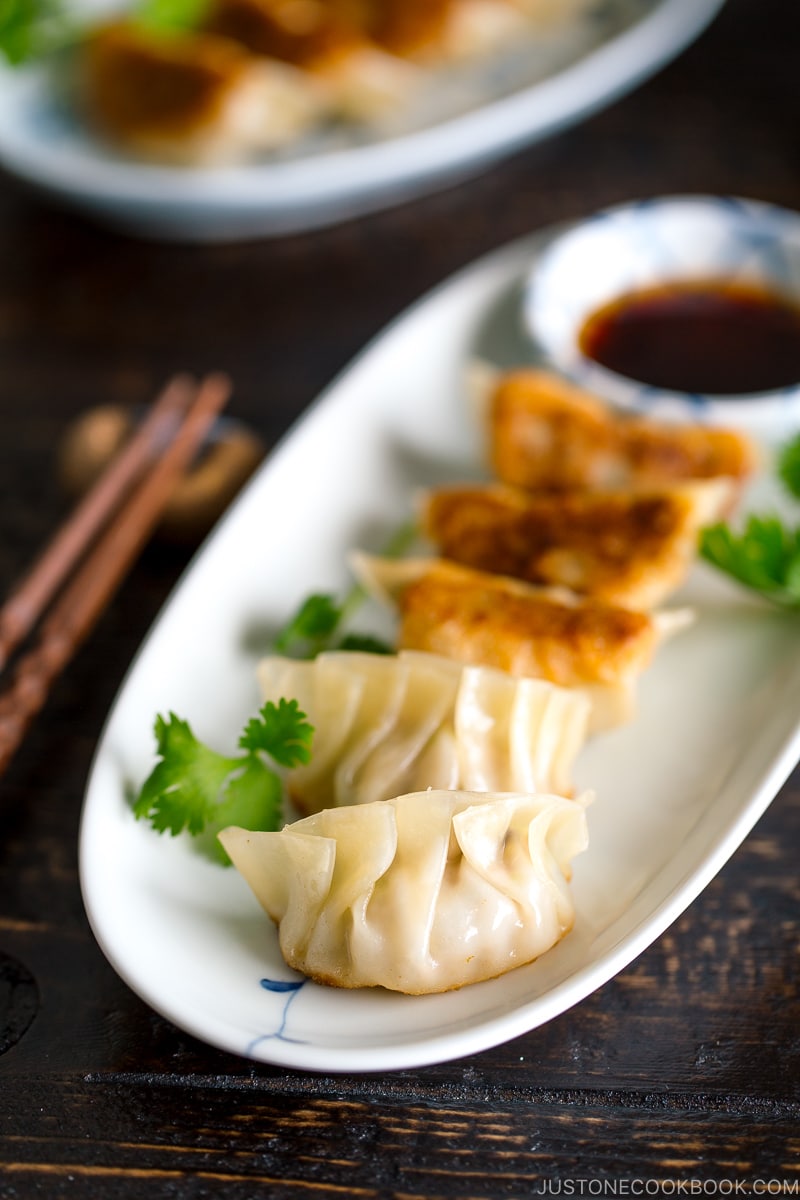
Gyoza wrappers are a thin and round flour pastry that wraps around the filling of gyoza or Japanese potstickers. The dough is made of wheat flour, water, and a pinch of salt. They get crispy when pan-fried or deep-fried and become a soft and tender, pasta-like texture when boiled.
How to Make Gyoza Wrappers
The Ingredients You’ll Need
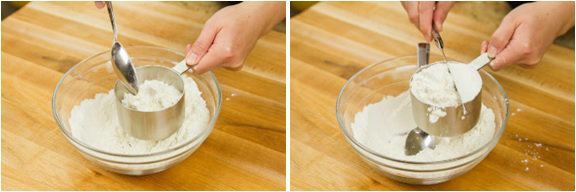
- All-purpose flour – Weigh your flour or use the “fluff and sprinkle“ method and level it off.
- Kosher salt
- Water
- Potato starch (cornstarch)
The Steps
- Mix all the ingredients in a large bowl.
- Knead the dough for 10 minutes, shape it into logs, and rest for 30 minutes.
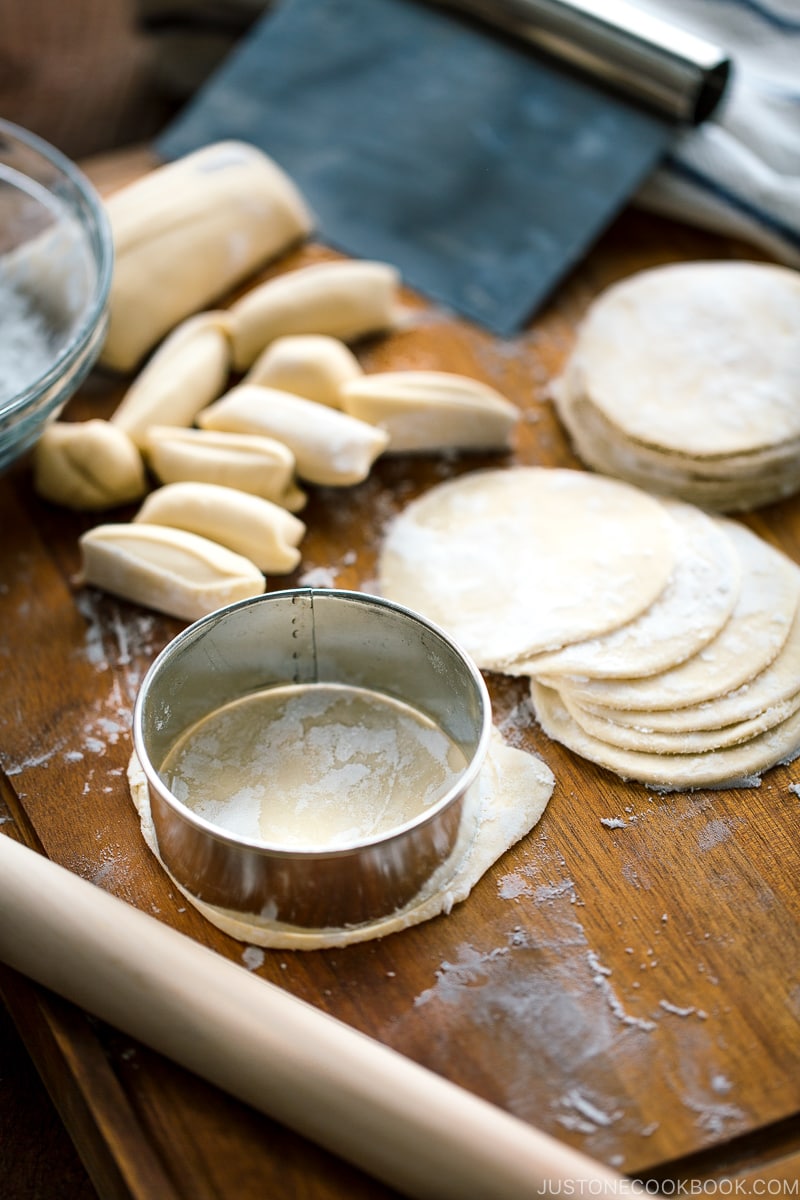
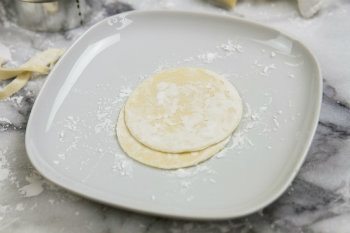
- Cut the dough into small pieces, flatten, and cut out into a circle shape using a cookie cutter.
Japanese Gyoza & Chinese Potstickers
Japanese gyoza is very similar to Chinese potstickers. The main differences are in the size and thickness of the dumpling wrappers. Chinese potstickers’ skin is typically thicker and the dumplings themselves are larger than gyoza.
If you are able to buy gyoza wrappers locally and want to save time, you can hop straight over to my gyoza recipes:
Homemade vs. Store-Bought Gyoza Wrappers
Homemade gyoza wrappers can be time-consuming, but I find the process extremely fulfilling and calming. Save it for the weekend or on an unhurried evening when you can enjoy the experience. Or make it a fun activity to do with family or friends. Gyoza party, anyone?
The beauty of the homemade wrappers is they are tender and fresh tasting, making them so much pliable to fold your filling. Also, there are no preservatives you have to worry about.
Seeing my family devouring the gyoza I made from scratch pleases me more than anything. It’s worth the time!

Ways to Use Gyoza Wrappers

Wish to learn more about Japanese cooking? Sign up for our free newsletter to receive cooking tips & recipe updates! And stay in touch with me on Facebook, Pinterest, YouTube, and Instagram.

Gyoza (Japanese Potsticker) Wrappers
Video
Ingredients
- 2 cups all-purpose flour (plain flour) (weigh your flour or use the “fluff and sprinkle“ method and level it off; you can substitute 1 cup, 120 g bread flour + 1 cup, 120 g cake flour)
- ½ tsp Diamond Crystal kosher salt
- ½ cup water (just-boiled hot water; plus more, as needed)
- potato starch or cornstarch (for rolling and dusting; or substitute flour if you‘re not freezing them)
Instructions
Before You Start
- I highly encourage you to weigh your flour using a kitchen scale for this recipe. Click on the “Metric“ button at the top of the recipe to convert the ingredient measurements to metric. If you‘re using a cup measurement, please follow the “fluff and sprinkle“ method: Fluff your flour with a spoon, sprinkle the flour into your measuring cup, and level it off. Otherwise, you may scoop more flour than you need. 1 US cup of flour weighs 4.25 oz (120 g).

- Gather all the ingredients.


To Make the Dough
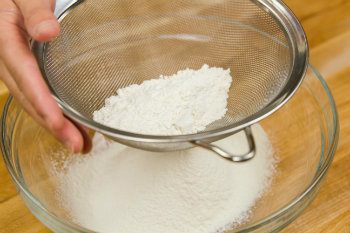
- Sift the flour into a large bowl.
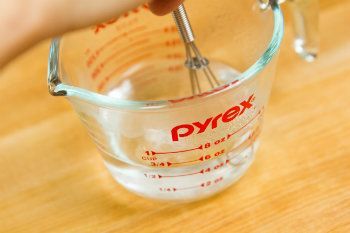
- Add the salt to the just-boiled hot water and stir until completely dissolved.
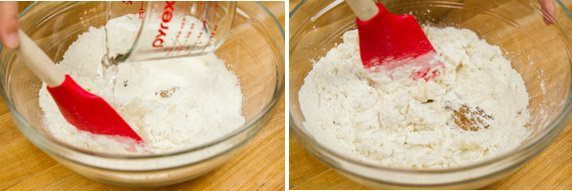
- Add the hot water to the flour, a little at a time, stirring with a rubber spatula. Mix until the flour and water are combined completely. If the flour is still not incorporated, add more hot water, ½ Tbsp at a time, until you can form the mixture into a ball. You will eventually need to use your hands to do this. Tip: different brands of flour absorb water differently, so use more hot water as needed; I used about 120–150 ml.

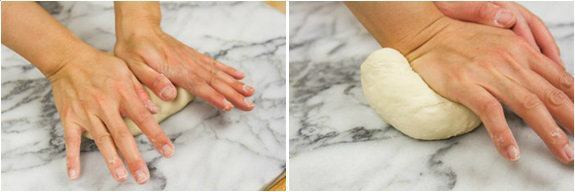
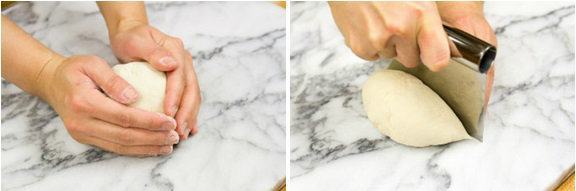
- Transfer the dough to a work surface and knead the dough for 10 minutes.

- After 10 minutes, the texture of the dough will be much smoother. Use a dough scraper to cut the ball of dough in half (doesn‘t have to be an equal size).

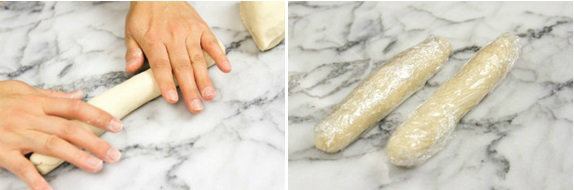
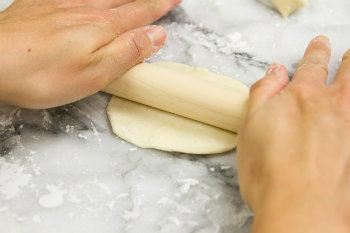
- Shape each half into a long log about 1½ inches (3.8 cm) in diameter, although it doesn‘t have to be perfect, especially if you use a cookie cutter later. Wrap each log with plastic wrap. Let it sit for 30 minutes.

To Roll the Wrappers
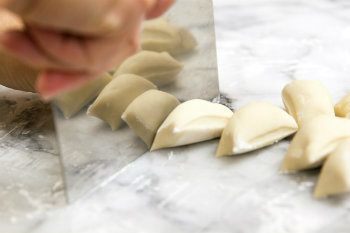
- Unwrap the dough. Sprinkle a little potato starch on the work surface and cut each log crosswise into ¾ inch (2 cm) wide pieces. Since we’ll be using a cookie cutter, don’t worry if each piece of dough is a slightly different size. Tip: If you plan to freeze the wrappers, please use potato starch or cornstarch for dusting and rolling, as the wrappers tend to stick to each other if you use flour.
- It‘s super important to cover the dough with a damp kitchen towel at all times to prevent it from drying.
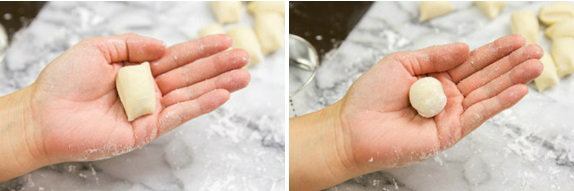
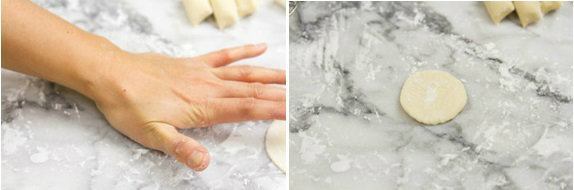
- Roll each piece of dough into a ball shape.

- Press the ball onto the work surface.
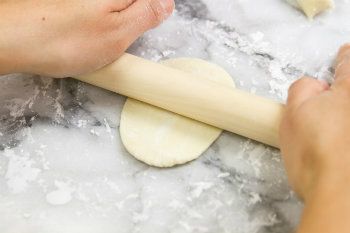
- Using a rolling pin, roll out the dough, but DO NOT flatten the TOP and BOTTOM edges. This is the trick to making a nice round shape.
- Rotate the dough 90 degrees and repeat rolling the dough. Try to roll out the dough into a thin circle. If the dough is hard to roll out or shrinks back, let it rest a bit to relax the gluten and try again.
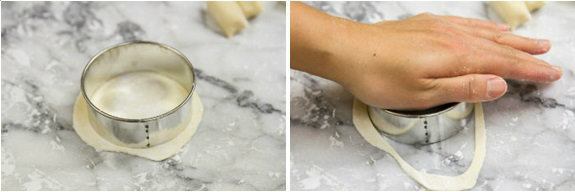
- Cooker cutter (optional): If you want a perfectly round shape for your wrappers, cut your rolled dough circle with a 3-inch (8 cm) cookie cutter. If the dough rolls back, leave it for a few seconds, then try again to cut the dough. Remove the excess dough scraps and cover them with a damp towel. Later, combine all the scraps if they still squish together and haven’t dried out. Re-roll the scraps and repeat the process.
- Sprinkle each wrapper with potato starch and stack the wrappers. Make sure to cover them with a damp kitchen towel as you continue rolling the remaining dough. Once you‘ve rolled out all the wrappers, they are ready to use. You can also freeze or refrigerate the wrappers to use later.

To Store the Wrappers for Later
- Wrap the stacked gyoza wrappers with plastic wrap and store in the refrigerator for about 3–4 days and in the freezer for up to a month. Prior to use, defrost in the refrigerator overnight or on the counter for 60 minutes (depending on the amount and room temperature). Do not defrost in the microwave.
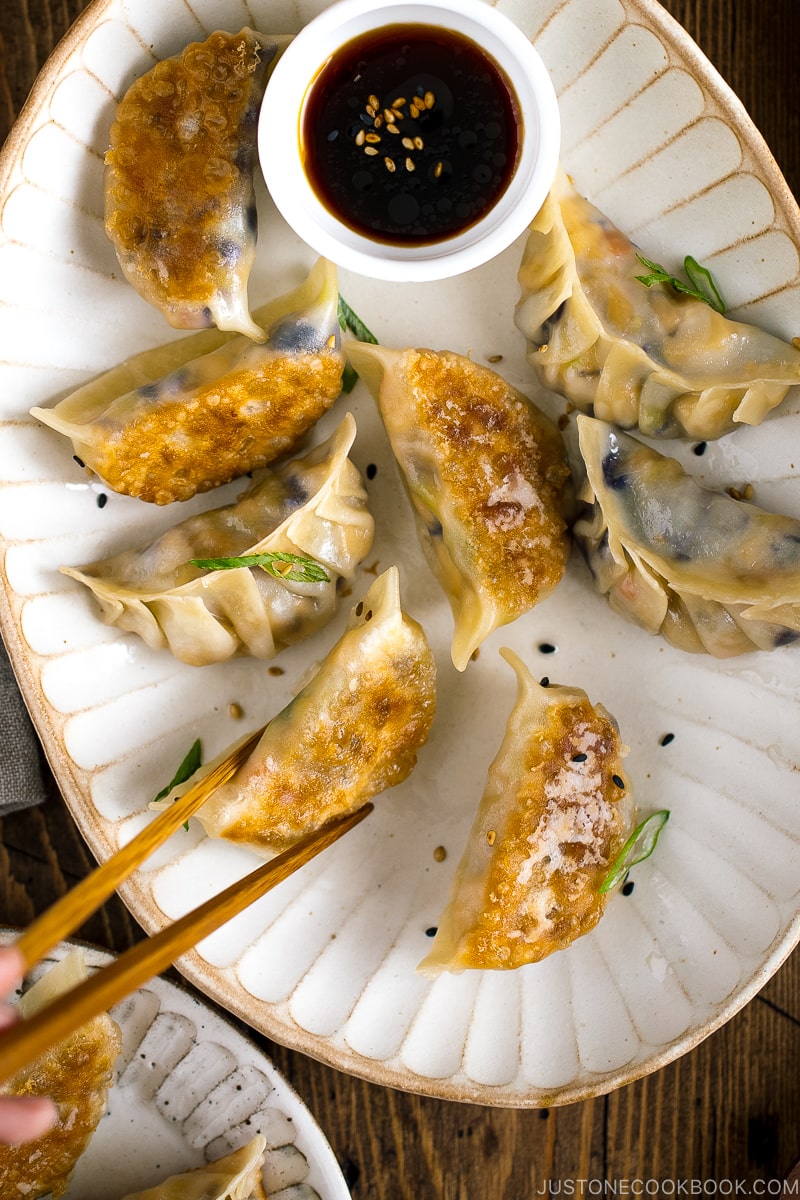
To Make Gyoza
- You can use these Homemade Gyoza Wrappers to make Gyoza, vegetarian/vegan Vegetable Gyoza, Chicken Shiso Gyoza, Gyoza with Wings (Hanetsuki Gyoza) and Korean-style Kimchi Gyoza. If you‘re new to making Japanese potstickers, see my tutorial on How to Fold Gyoza.

Nutrition
Editor’s Note: The post was originally published on February 19, 2014. It’s been updated and republished in July 2020.


Watching your video on how to make Gyozas makes it look so simple. We live in the South of France and Gyozas is one of the things I miss most of our time abroad. Thanks for sharing, I will be following your instructions and having a go for sure. Maite.
Hi Maite! I hope you enjoy making homemade gyoza! The gyoza skin is much softer than packaged one (as it’s freshly made dough), but the process is very easy and I hope you enjoy making this! Thank you so much for your feedback! 🙂
this is pretty cool. I am going to try to make some, and freeze ahead. As with Ukrainian Pirohi wrappers, made a little differently…but the cornstarch between the layers is a good point for them too. Half the work of things with a lot of labour is making one part before hand, then you only have to make the fillings, and it goes together really fast. Its nice that the ingredients are so handy also, already in the pantry.
Hi Evelyn! I usually make everything at once, so I haven’t actually frozen the wrappers myself, but I heard it works. 🙂 I love Pirohi too!
wow never thought you ‘could’ make these wrappers from scratch….lol….but only because it hadn’t really occurred to me…..love this…will try this….and love all the details and pictures.
Hi Teresa! Isn’t it great? I also never thought of making the wrappers from scratch as I can get them easily in Japanese supermarkets. However, it’s fun, delicious, and preservative-free when you make them from scratch! 🙂 Hope you enjoy this recipe!
add more water like 1 cup to the dough instead of just the half cup (120ml-150ml) the dough doesnt stick together with the half cup but with the whole cup it actually looks like dough 🙂
Glad to hear that worked out for you! 🙂
Thank you SO MUCH for posting this! I used your recipe for the wrappers and filling. My husband was bowled over by these gyoza and said they were just like the ones his Japanese grandma makes! I’d say anyone with some cooking skills can make them well. Yay for gyoza!
Hi Sarah! I’m so happy to hear you liked this recipe! I’m flattered that your husband enjoyed this recipe and thought the gyoza are just like his grandma! Thank you for your kind feedback. 🙂
Hello Nami-san! I LOVE your website! I was never really able to follow my grandmother or mother’s cooking while growing up (plus too interested in eating than cooking back then) because they always told me to 目で量りなさい measure with my eyes, when I asked them how much of each ingredient. And recipes in Japanese are such a chore to read! Thank you so much for taking the mystery out of everything!
As I live in the South of France, gyoza skins are not that easy to come by, though only recently I have found some Chinese frozen ones that are similar. I have tried your recipe twice, using different flours and I changed your technique the second time. May I tell you of the results?
For the first time, I used Chinese “high gluten” flour, supposedly used for dumplings. I also kneaded the dough for 10 min as your recipe says. It was hard to roll out because the dough was so elastic that it kept retracting. And it was impossible to make thin. The gyozas I make had the consistency of thick and chewy mochi.
The second time, learning that kneading the dough develops gluten, which makes it elastic, I opted to use all-purpose flour (which is naturally lower in gluten) and NOT knead it the 2nd time. I just wrapped it into logs and let it sit before cutting into pieces. This time it was SO easy to roll out super thinly!! Delicious!
You’ll see that it is not necessary to knead and the results might be even better.
Thanks for your website!!
Hi Megumi-san! Thank you so much for your kind feedback, and I’m sorry for my late response.
My mom was the same way – she never measured ingredients precisely too, so I remember how she prepared and cooked them, how did they taste, etc. That’s one of the reasons why I started my blog – to record all my recipes for my children as I didn’t have such “family cookbook” from my mom.
Glad to know you tried making gyoza skin! Living in California where Asian food/ingredients are pretty easy to find in a local store, it’s hard to imagine what kind of food/ingredients are hard to find elsewhere. I actually received many requests for gyoza wrappers, which is why I decided to learn myself from the websites (link in Note section). Otherwise, I probably didn’t even think about making gyoza wrappers from scratch.
Thank you so much for sharing your tips!! They are helpful for me and other readers here. I learned from other European readers that flours are very different in Europe. Bread flour here is very different there, etc. I’m not sure what All Purpose Flour means in European countries, but it’s the most common flour we use here. If you see the Japanese link (in Note section), they recommend 中力粉. I only kneed one time at Step 5 and don’t kneed twice. Do you mean that kneading 10 minutes is long?
Yes! After I made the ball, I wrapped it up into logs WITHOUT kneading them at all! Then I followed the rest of your instructions. Here in France, Type 55 is all-purpose with low gluten. Type 45 is pastry flour with more gluten. It’s better to use the type 55 and not knead to easily roll out non-elastic, thin skins.
Now, I am going to try to find azuki beans to try more of your recipes! 🙂
Thanks so much for letting me know! I have to try it out next time.
Hope you enjoy making anko! 🙂
Thank you for this recipe. I already make my homemade gyoza wrapper because there is no Asian store close to where I live, but I didn’t know we could freeze the wrappers !
Do you just wrap all the wrappers in a plastic bag or do you separe each gyoza skin with plastic wrapper to prevent for sticking ?
Hi Queina! I have so many requests for this recipe before I shared it. They couldn’t find gyoza wrapper in their area so that’s how I tried making this recipe. 🙂 If you use enough potato starch/corn starch, it should not stick each other – that’s how store gyoza wrappers are sold too. Make sure to remove the air before you wrap the wrappers – air contains moisture and you don’t want to include it in the package. Hope this helps! 🙂
Thank you Nami ! This time the wrappers were quite dry, not sticky at all, so I coated them with all purpose flour and freeze them in a pile, in a freezer bag. Next time I’ll try your method.
Can’t wait to make gyoza !
I hope you enjoy making Gyoza! 🙂 Thank you for your response!
tried this today even though it was a lot of work the end result was amazing! the wrappers are actually better than the ones that are sold in the shops, even husband was saying that they are delicious!
will definitely make them again, when i have more time!
wish i can get the wrapper even thinner though, i only managed about 35 wrappers using the same measurements…
thank you Nami for your always awesome receipes!
Hi Azusa! I’m so happy to hear you enjoyed homemade gyoza wrappers! I think the second time will be a bit faster as you already know the trick/technique. With practice, your gyoza wrappers will be thinner. Don’t worry! I’m glad to hear your husband enjoyed it too! Thank you so much for trying my recipes! xo
Hi Nami, I was scratching for ideas for dinner tonight, with limited ingredients I had in my veggie crisper and pantry, decided on gyoza, which I had wanted to try for a long time but always put off thinking it too time consuming and difficult, until I chanced upon your gyoza wrapper recipe!
Your beautiful and easy to follow video gave me the inspiration to give it a go- and tonight my husband, son and I enjoyed homemade gyoza for dinner! I loved the end result- and thoroughly enjoyed making the wrappers from scratch. It is now bookmarked as my go to gyoza recipe. I will also be trying out your other scrumptious looking recipes! Thank you!
Hi Judy! Thank you for writing such a sweet and kind comment! I really appreciate your feedback. I’m very happy to hear you and your family liked the gyoza recipe and tried making it from scratch. Hope you enjoy other recipes from my blog too! Thanks so much once again!
This is the recipe that introduced me to just one cookbook.com. when I tried this recipe for the first time they did come out a little bit hard but after trying and trying again and tweaking the cooking method ( from cooking them in the oven to frying the bottoms of The dumpling in oil and then pouring in water in ) it came out very similar to restaurant dumplings in my opinion ( now I just have to perfect the filling lol) this has been my go-to recipe for dumplings and pierogies and I just want to get say thank you so much my siblings love when I cook this 💗
Hi Giatana!
Thank you very much for trying many recipes from JOC!
We are so happy to hear this is your go-to recipe now, and you and your family enjoyed it.😊
Thank you for writing to us.
Can you freeze the gyoza wrappers? Also, how long can you freeze it for?
Hi Aileen! You can keep gyoza wrappers for about 3-4 days in the refrigerator and up to a month in freezer. 🙂
Nothing like making your own skins. So much better than store bought. Thank you for a simple and easy recipe!
Hi Cindy! Yeah that’s true! Thank you so much for reading my blog. 🙂
Thanks so much! These were so easy to make and totally worth it! My Japanese fiancé likes Japanese cooking, but I’m just learning. When I can impress him with something like homemade Gyoza it feels great! He loved them!
Hi Leah! I’m so glad you tried this recipe and liked it. Thank you so much for your feedback! 🙂
Looks great!
May I ask that can this be made with a pasta maker? I mean can I roll the dough using a pasta maker then using cutter to cut it and then re-roll the left over and continue? Would it be too thick for gyoza?
Thank you very much 😀
Hi Trang! Sure, as long as you can roll out very thin. I don’t own a pasta maker so I can’t tell. It will be much easier if this works! 🙂
Yes! You can use a pasta maker, in fact , it works much better to get that thinner roll. And bonus, if you make too much or extra, on purpose, you can turn the rest into pasta!
Thanks for the recipe Nami! It worked out great!
Love gyoza!! My mom who is full blooded Japanese would by the pre-packaged wrappers though. I guess it was just easier for her. Still was delicious. I will have to give these homemade ones a try.
Hi Patty! My mom neither, and I even didn’t think about trying to make wrappers from scratch. My focus had been always on the fillings. Hope you will give this recipe a try and enjoy these wrappers! 🙂
Nami: This is a wonderful recipe! I’m gluten free, so adapting to GF is going to be interesting! I also try mostly to be vegetarian (lacto-ovo) (very little meat, except Chicken & Turkey- NO PORK and beef is a treat ONLY). Too expensive on Social Security, that’s for sure!
Basically, I do Temple food, but, extremely hard to obtain tofu in this neighborhood (Spanish, Italian, some Irish- OLD QUAKER TOWN 1600’s (PA) got quite a history and I live in the “historic district” The apartment I rent in a house is over 150 years old).
** I agree with Minnie – tortillas & beans are wonderful food! Love THAT TOO!
LOVE your site; Love Japanese food! Keep up the good work; you’re one FINE COOK! Thank you SO MUCH for all your hard work! Respectfully, Pat
Hi Pat! In the past I researched on GF version of gyoza wrappers and came across to this site, which seems like a great GF recipe.
http://www.vietworldkitchen.com/blog/2011/10/gluten-free-pot-stickers-recipe-2.html
Thank you so much for your kind words and for following my blog. 🙂