Looking for a fun cooking project with your children? Try Mochi ice cream! The popular Japanese dessert is easier to make than you think. Imagine your kids smiling faces when they bite into their favorite ice cream inside the soft mochi shell.
Sweet little rice dumpling balls with creamy ice cream filling, mochi ice cream is the cool treat of the summer! After making its first debut in Hawaii in 1994, it didn’t take long for this unique and delicious treat to become the trendy frozen dessert item that took the world by storm.
In the US, you can find mochi ice cream at Costco, Trader Joe’s, Whole Foods, and of course, at Asian grocery stores. The original brand of mochi ice cream, Mikawaya, offers many creative flavors such as green tea, chocolate, and mango, making them so fun to eat.
But did you know you can make mochi ice cream at home? If you enjoy making ice cream at home, this is a super fun project to tackle as a family. It’s relatively simple, so let’s make this sweet dessert truly your own today.
Table of Contents
What’s Mochi Ice Cream?
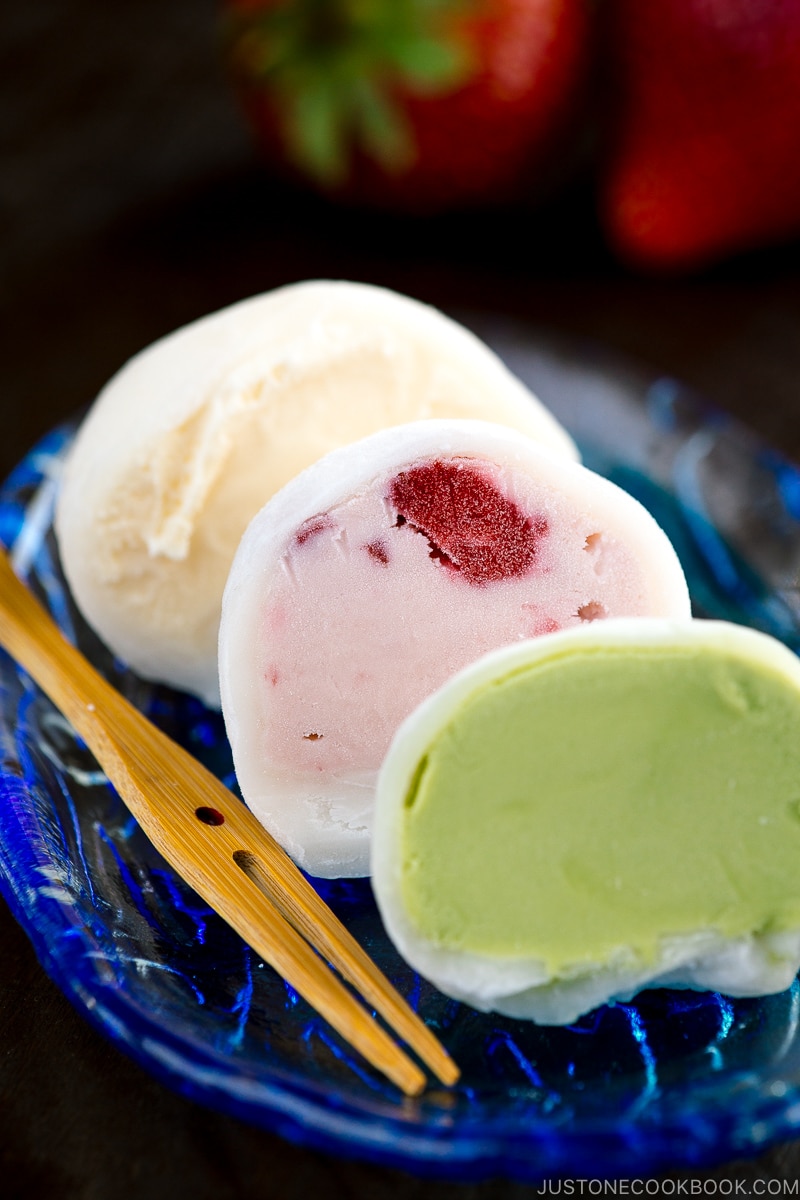
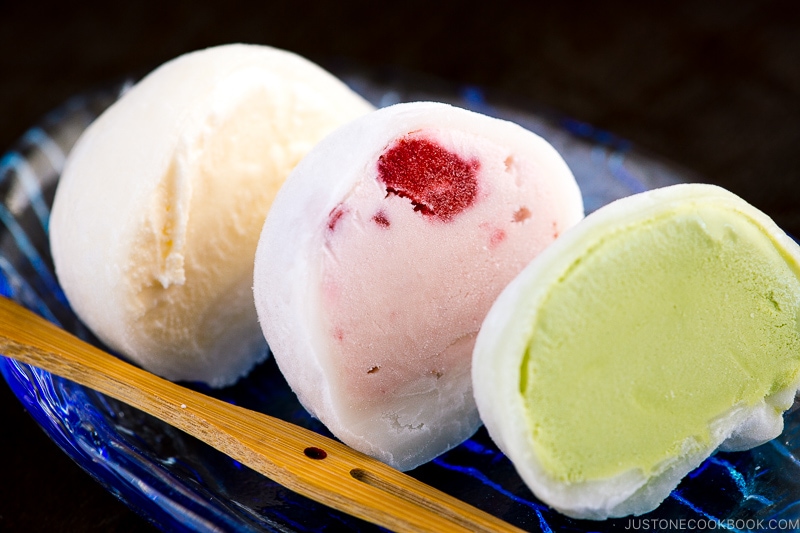
Mochi ice cream is small, round shaped confection made of sticky rice dumpling with an ice cream filling. The rice dumpling is called mochi (餅), a traditional Japanese pounded rice cake made of mochigome (糯米) —a short-grain glutinous rice—known for its sticky, elastic, and chewy texture.
As a mochi-loving child, I loved eating Yukimi Daifuku (雪見だいふく), which is a vanilla ice cream wrapped in gyuhi, a type of mochi. It was a popular Japanese dessert back in the 80s and I was addicted to it.
In the early 1990s, a Japanese American named Frances Hashimoto, who was the former president and CEO of Mikawaya, expanded on the idea of traditional mochi sweets and invented mochi ice cream.
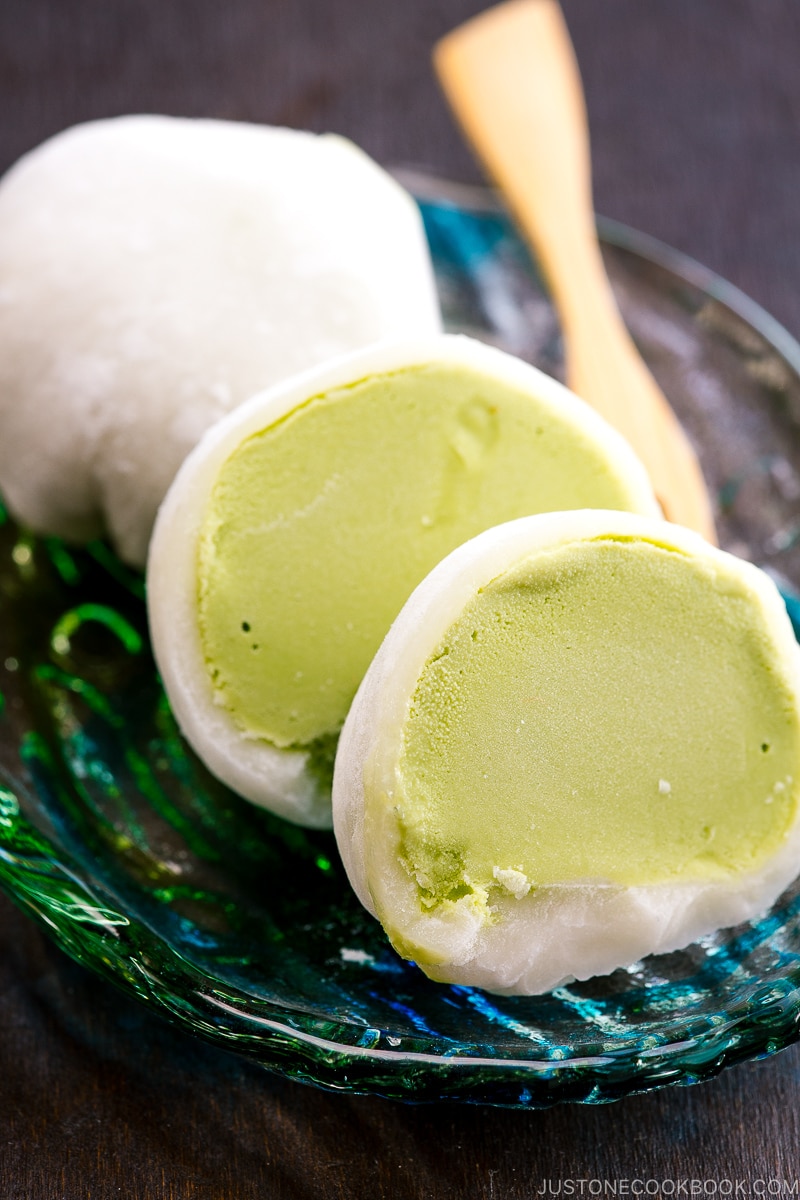
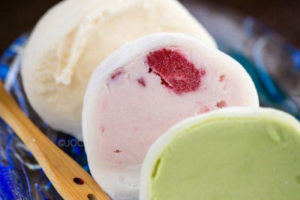
This handheld and super kawaii (cute) dessert is indeed a delicious result of fusion creation! When you bite into the pillowy and delicate sweet rice dough with its creamy ice cream filling, it’s happiness in the mouth! The dreamy combo is what makes mochi ice cream so irresistible, and it’s hard to stop at one!
Ingredients You’ll Need
- Glutinous rice flour (sweet rice flour) – I used shiratamako as it yields the best texture. You can now buy shiratamako on Amazon. If you can only find mochiko, you can use it. More on the sweet rice flours below.
- Water
- Sugar
- Potato starch or cornstarch – I used Bob’s Red Mill Potato Starch
- Ice cream of your choice – store-bought or homemade
Glutinous Rice Flour: Shiratamako vs. Mochiko
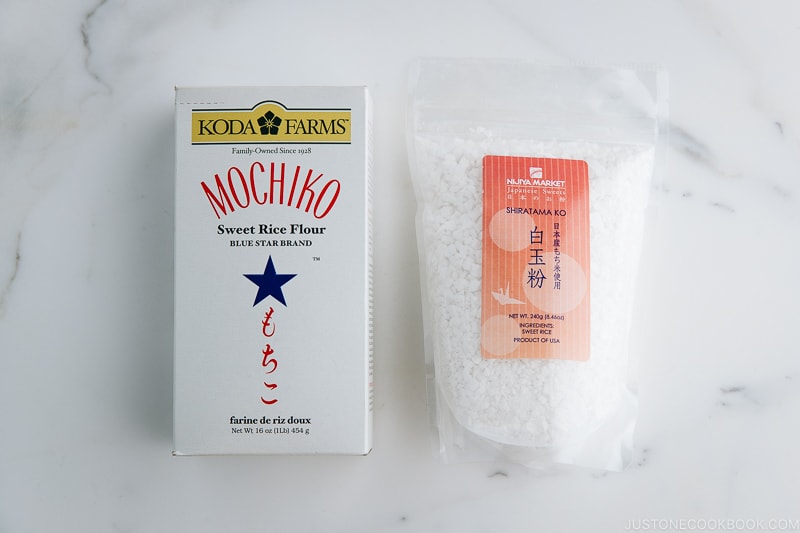
There are two different types of Japanese glutinous rice flours used to make mochi: shiratamako (白玉粉) and mochiko (もち粉).
Both flours are known for their stickiness and chewy texture and are used to make Japanese pastry and sweets. However, the flours do differ in texture and flavor.
When it comes to making best-tasting mochi, I always prefer using shiratamako as it is easier to work with and has a better elasticity and consistency. Amazon and Japanese grocery stores sell shiramtako. However, if you can’t find it, you can find mochiko sweet rice flour by Blur Star Brand.
As part of my recipe testing process, I’ve made mochi ice cream with both kinds of glutinous rice flour to see the difference. When I asked my friends for their feedback, the majority agreed that the texture and flavor of mochi ice cream made with shiratamko are far superior. So if you can get shiratamako at a Japanese grocery store or online, I highly recommend it.
To learn the difference between these two types of glutinous rice flour, please hop over to shiratamako page to read more details.
Important Tips for Making Mochi Ice Cream
I know you probably don’t believe me when I say it’s not that hard to make … but you have to trust me! If you follow my tips below, you CAN make decent mochi ice cream even at the first try!
DOs:
- Keep your kitchen cool when you are working with ice cream.
- Get this cookie scoop (portioning scoop) for creating the same portions and nice half-round-shaped ice cream for mochi filling.
- Use a generous amount of potato/corn starch on your hands and working surface to prevent sticking.
- Use a cookie cutter (or small bowl) to cut out mochi into a round shape. A round shape (instead of square cut) seals the mochi neatly and avoids an excess amount of mochi on the bottom.
- And here’s the secret tip! Wear thin latex gloves to insulate warm hands from ice cream and to prevent your hands from sticking to mochi.
DON’Ts:
- Do not take shortcuts until you are comfortable with making mochi ice cream.
- Do not expect to make a perfect shape of mochi ice cream for the first few trials. Working fast is the most important when dealing with ice cream.
Cooking Mochi with a Steamer or Microwave
Both steaming and microwaving methods work well, and it’s really a personal preference. I usually make it with the microwave because it only takes 2.5 minutes to cook mochi. My microwave is 1200W; make sure to adjust your microwave setting accordingly.
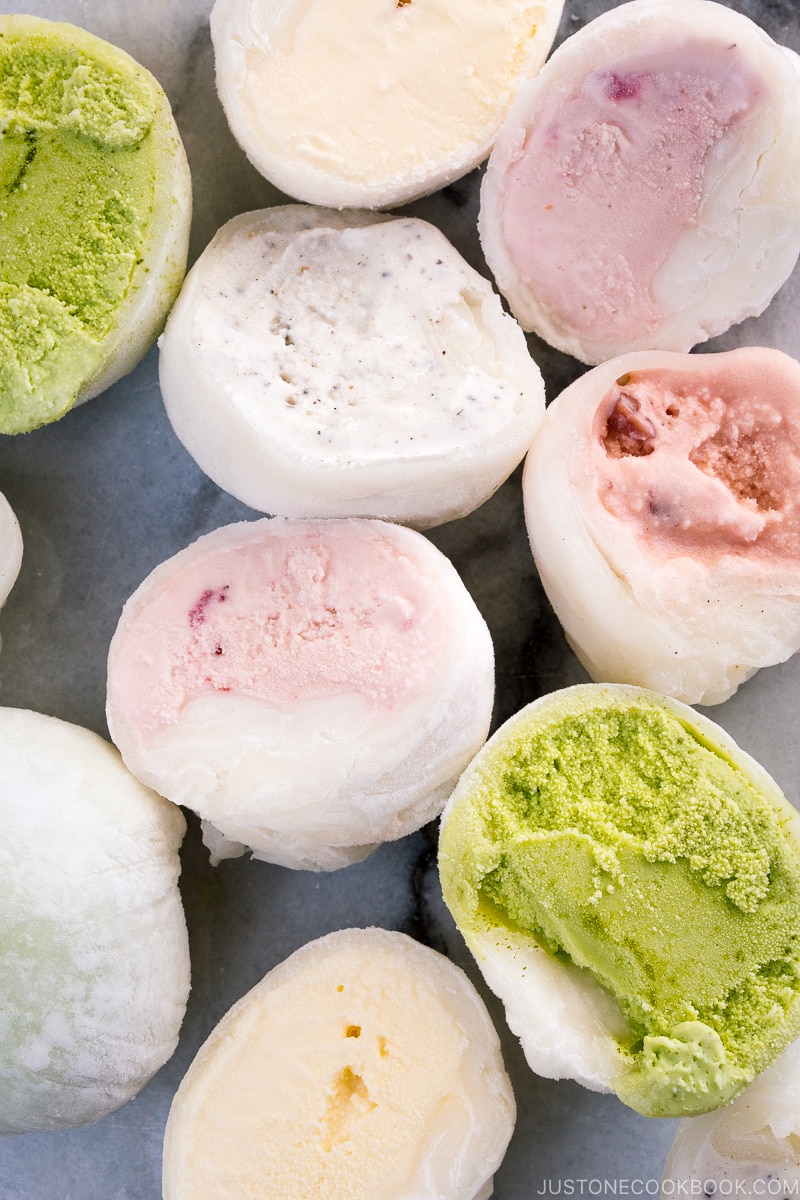
Popular Mochi Ice Cream Flavors
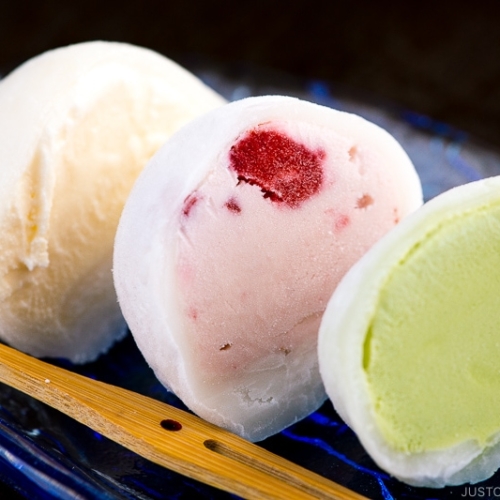
For homemade mochi ice cream, you can choose to use high quality store-bought ice cream or make your own ice cream (if you’re up for it). There are endless flavors, but in my opinion, you can’t go wrong with the classics. Here are some of the popular flavors:
- Matcha Green Tea – My personal favorite and I have a homemade matcha ice cream recipe here.
- Azuki Red Bean Ice Cream – This is also my favorite. See my red bean ice cream recipe here.
- Vanilla – My son’s favorite
- Chocolate – Find my dark chocolate ice cream recipe.
- Sweet Mango
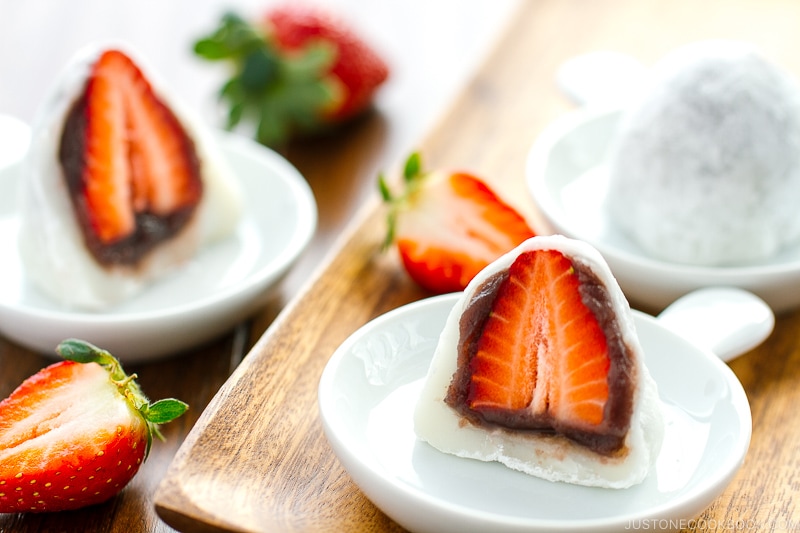
- Strawberry – My daughter’s favorite. Or try my strawberry cheesecake recipe.
- Cookies and Cream
- Coffee – Find my coffee ice cream here.
- Dulce de Leche
What’s your favorite? Will you make mochi ice cream from scratch? Or do you have a favorite store-bought brand? Please share in the comments below!
More Delicious Mochi Recipes You’ll Love
- Daifuku (Small Mochi with Red Bean Paste)
- How to Make Mochi with a Stand Mixer
- Green Tea Mochi
- Strawberry Mochi
Wish to learn more about Japanese cooking? Sign up for our free newsletter to receive cooking tips & recipe updates! And stay in touch with me on Facebook, Pinterest, YouTube, and Instagram.
Mochi Ice Cream
Video
Ingredients
- ¾ cup shiratamako (glutinous rice flour/sweet rice flour) (or use mochiko; see the measurement below; now you can buy shiratamako on Amazon)
- ¾ cup water
- ¼ cup sugar (do not omit sugar as the moisture in the sugar helps mochi stay softer)
- ½ cup potato starch or cornstarch
- ice cream of your choice
If you substitute shiratamako with mochiko…
Instructions
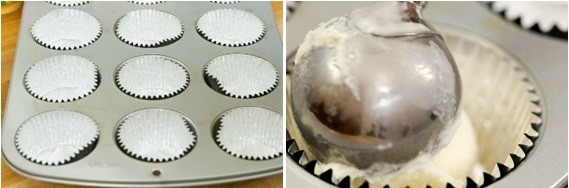
- Gather all the ingredients. Equipment you will need: 12 aluminum/silicone cupcake liners, a medium cookie scoop (smaller than an ice cream scooper), a rolling pin, and a 3.5 inch (9 cm) cookie cutter or a round bowl/glass cup.

- Using the cookie scoop, scoop out ice cream of your choice into aluminum/silicone cupcake liners. The ice cream will melt quickly so I recommend freezing them immediately for a few hours or until ice cream balls are completely frozen solid.

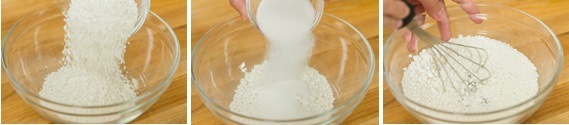
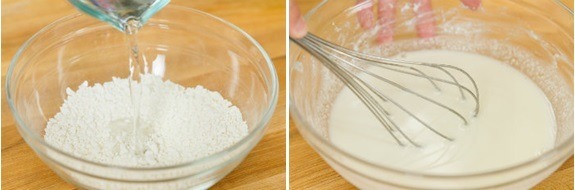
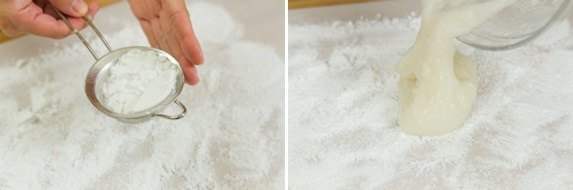
- Once the ice cream balls are frozen solid and ready, you can start making mochi. Combine ¾ cup shiratamako (glutinous rice flour/sweet rice flour) and ¾ cup water in a medium bowl and whisk all together. Tip: To use mochiko instead of shiratamako, substitute ¾ cup mochiko (glutinous rice flour/sweet rice flour) in the above step.

- Add ¼ cup sugar and mix well until combined.

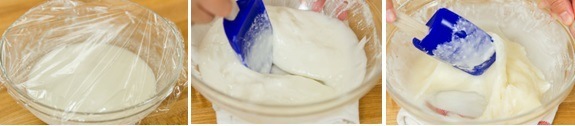
- Microwave Method: If you’re using a microwave to cook mochi, cover the bowl with some plastic wrap (do not cover too tight). Put the bowl in the microwave and heat it on high heat (1000w) for 1 minute. Take it out and stir with a wet rubber spatula. Cover again and cook for 1 minute. Stir again, cover, and cook for 30 seconds to finish cooking. The color of mochi should change from white to almost translucent.

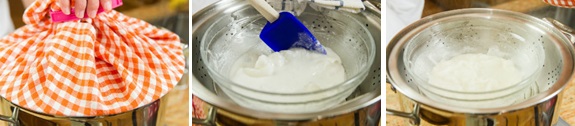
- Steaming Method: If you’re using a steamer, cover the steamer lid with a towel so the condensation won’t drop into the mochi mixture. Put the bowl into a steamer basket and cover to cook for 15 minutes. Halfway cooking, stir with a wet rubber spatula and cover to finish cooking. The color of mochi should change from white to almost translucent.
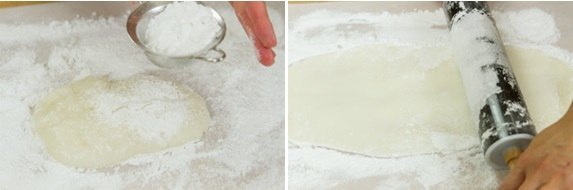
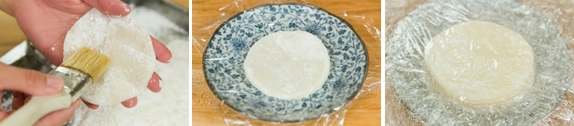
- Cover the work surface with parchment paper and dust it generously with some of the ½ cup potato starch or cornstarch. Then transfer the cooked mochi on top.

- To prevent from sticking, sprinkle more potato starch on top of the mochi. Once it’s cool down a bit, you can spread the mochi into a thin layer, about ⅛ inch (3 mm), with your hands or with a rolling pin. Make sure to apply potato starch on your hands and the rolling pin. I recommend using a rolling pin because it’s easier to evenly spread out.
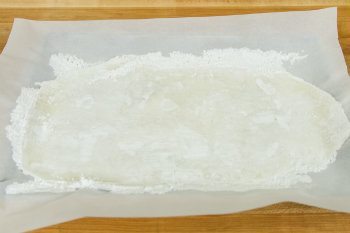
- Transfer the mochi with parchment paper onto a large baking sheet. Refrigerate for 15 minutes until the mochi is set.

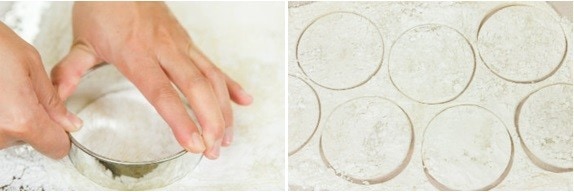
- Take out the mochi from the refrigerator and cut out 7–8 circles with the cookie cutter.

- Dust off the excess potato starch with a pastry brush. If you find some sticky part, cover the area with potato starch first then dust off. Place a plastic wrap on a plate and then mochi wrapper on top, then lay another layer of plastic wrapper down. Repeat for all wrappers. With leftover mochi dough, roll into a ball and then flatten into a thin layer again and cut out into more circle wrappers (I could make about 12 mochi wrappers).

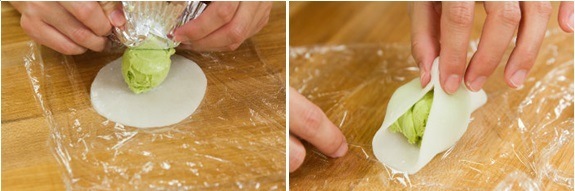
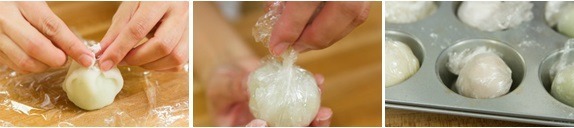
- Now we’re ready to form mochi ice cream balls. On the work surface, place one sheet of plastic wrap with a mochi layer on top. Working quickly, place a scoop of ice cream into the center of the mochi wrapper. Pinch the four corners of the mochi layer together to wrap the ice cream ball. Repeat with the remaining mochi wrappers and ice cream balls.

- When mochi gets sticky, put some potato starch on the sticky area and seal the opening. Quickly cover with the plastic wrap and twist to close. Place each mochi ice cream into a cupcake pan to keep the shape. You will need to work on one mochi ice cream at a time in order to keep the ice cream frozen at all times. Put mochi ice cream back into the freezer for at least 2–3 hours. When you’re ready to serve, keep them outside for a few minutes until outer mochi gets soften a little bit.


To Store
- You can keep the mochi ice cream in the freezer for 2–3 weeks. Be careful with freezer burn and make sure to store without air.


Hi, can I use monkfruit sugar or Allulose sweetener instead of regular sugar?
Hi Amy! Thank you so much for taking the time to read Nami’s post and try her recipe!
We have never tested this recipe with a different type of sugar/sweetener and are unsure of the results.
Please let us know how it goes if you try it!
can i exclude the sugar when making the mochi skin?
Hi Kai! Thank you for trying Nami’s recipe!
We don’t recommend omitting the sugar because it helps soften the Mochi.😉
We hope this helps!
[…] Mochi (餅) refers to Japanese rice cakes made of mochigome (もち米), short-grain japonica glutinous rice. The rice is pounded into a sticky chewy paste. Mochi is usually eaten on its own, dressed in a sweet or savory application. It can also be used in Wagashi, Japanese traditional confectionery such as daifuku, and modern desserts such as mochi ice cream. […]
I thought I recently saw a recipe for coconut milk bars with mochi, but cannot find it.
Hi Ron, Hmm…. Nami doesn’t have the coconut milk bar recipe.🤔
Mochi ice cream was invented by Japanese American, Frances Hashimoto, in Los Angeles
Hi Barbara! Thank you very much for your input!
We added information in this post. Thank you so much!🙂
Hello!
in the video it has an extra step. After the circles of mochi are cut out it gets refrigerated, for 30 mins. It doesn’t say to do that in the written recipe.
which way is correct??
Hi Nikki! Thank you very much for reading Nami’s post and watching her video!
We often update recipes to have the best result. So please follow the recipe in the post.🙂
As for this Mochi ice cream recipe, we discover that refrigeration is not necessary after cutting out the circles, so we had updated the instruction.
We hope this helps!
Thanks so much!
You are welcome, Nikki!🤗
Your instructions are so helpful! I made these with my 5 year old yesterday and it was challenging but fun. We added powdered dried strawberries to the mochi to go with strawberry ice cream, so good.
Hi, Martha! Aww! We are glad to hear you had fun making Mochi Ice Cream!😊
Thank you very much for trying Nami’s recipe and sharing your experience with us!
hello i were to add jam when and how much would i add?
Hi Lilly! Thank you very much for trying Nami’s recipe!
It depends on how much jam you would like to add to Mochi Ice cream. You can replace a bit of ice cream with jam (maybe a half teaspoon?) at Step 12.🙂
Hi there just a quick question. Would it be ok to use part milk and part water for the mochi dough ? If yes what do you suggest half and half?
Thank you 😊
Hi Alice! Thank you very much for trying Nami’s recipe!
We do not recommend replacing the water amount with milk for this recipe. The texture of Mochi would be different.
We hope this helps!
Hi! It’s my friends birthday in a few days and she has been talking about mint chocolate mochi for years now and i wanted to get it for her birthday but i couldn’t find the flavor absolutely anywhere! I found this recipe and i’m so excited to try it out! one question though, if i was to add food coloring to the dough to make it more like the one she had years ago, when would i add it? thanks!💗
Hi Kelsey! Happy Birthday to your friend! and Thank you very much for reading Nami’s post!
To add the food color, you can add them at Step 3.
We hope this helps to create the Mint Chocolate Mochi! 🙂
Hello Nami! I just finished the mochi dough and have put it in the fridge. I have one question: how long can I keep it in the fridge before I assemble it with the ice cream? I might not have time today and I’m wondering if I can do it tomorrow
Hi Ellie! Thank you very much for trying Nami’s recipe!
You can keep the mochi dough in the fridge for 1~2 days, but recommend using it as soon as you can and transfer it to the freezer as Mochi ice.
This mochi dough contains sugar and will keep the softness in the fridge. However, if it gets hard to assemble, please put them in the microwave for few seconds to soften. We hope this helps!
Thank you, and thank you for replying so quickly! This helps a whole lot. Luckily I was able to do it the same night. I’ll be using this information for future reference. I’m eager to try more of Nami’s recipe since this one worked out so well. The mochi was perfect!
Hi Ellie! Nami and JOC team are so happy to hear your Mochi Ice Cream turned out perfect!
Thank you very much for trying Nami’s recipe and for your kind feedback! We hope you continue to enjoy many recipes from our site!
Happy cooking!