Dinner is solved on a busy weeknight with this easy and delicious Pressure Cooker Japanese Curry using an Instant Pot!
My Instant Pot has been saving me plenty of time cooking for my family’s dinner. It has so many conveniences, but my favorite part is I am also able to cook up complex dishes like this Pressure Cooker Japanese Curry without having to sacrifice the flavors.
The actual pressure cooking time is only 15 minutes, and you don’t even have to be in the kitchen if you use an electric pressure cooker. I simply add the ingredients in the pot, set up the timer, go out for my kids’ activity, and come home for a fabulous dinner ready to eat. Who’s in?
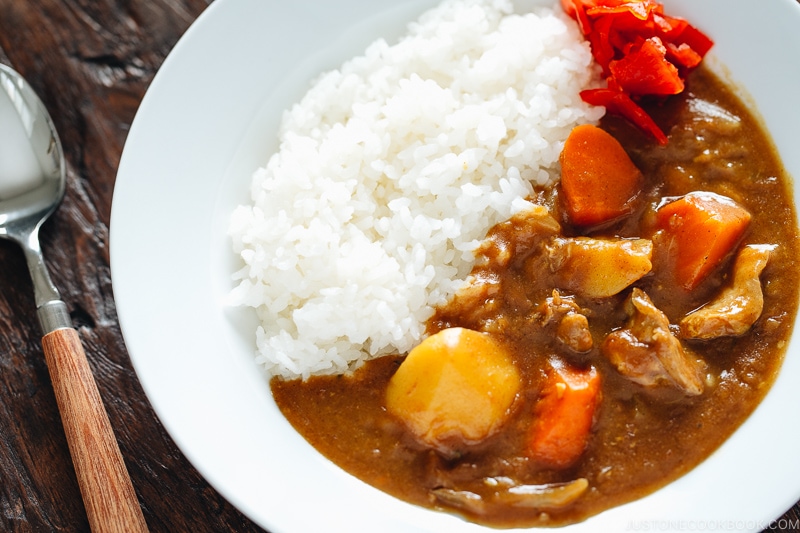
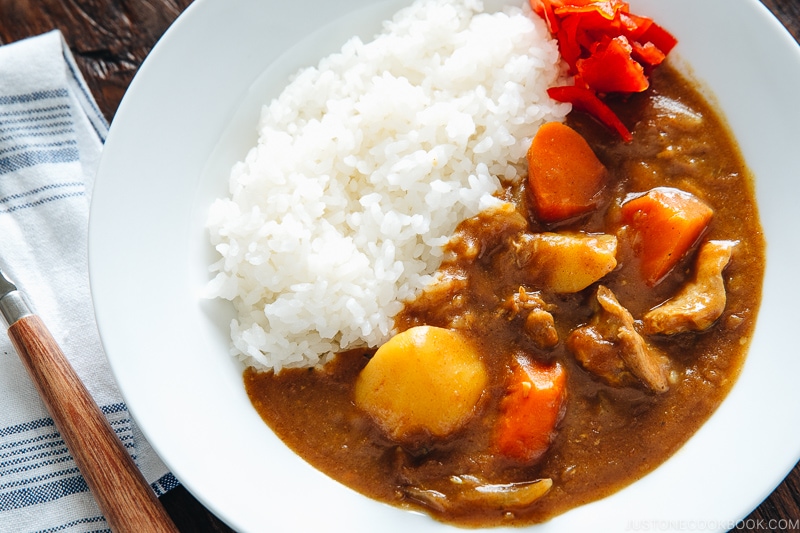
Japanese Curry Rice カレーライス
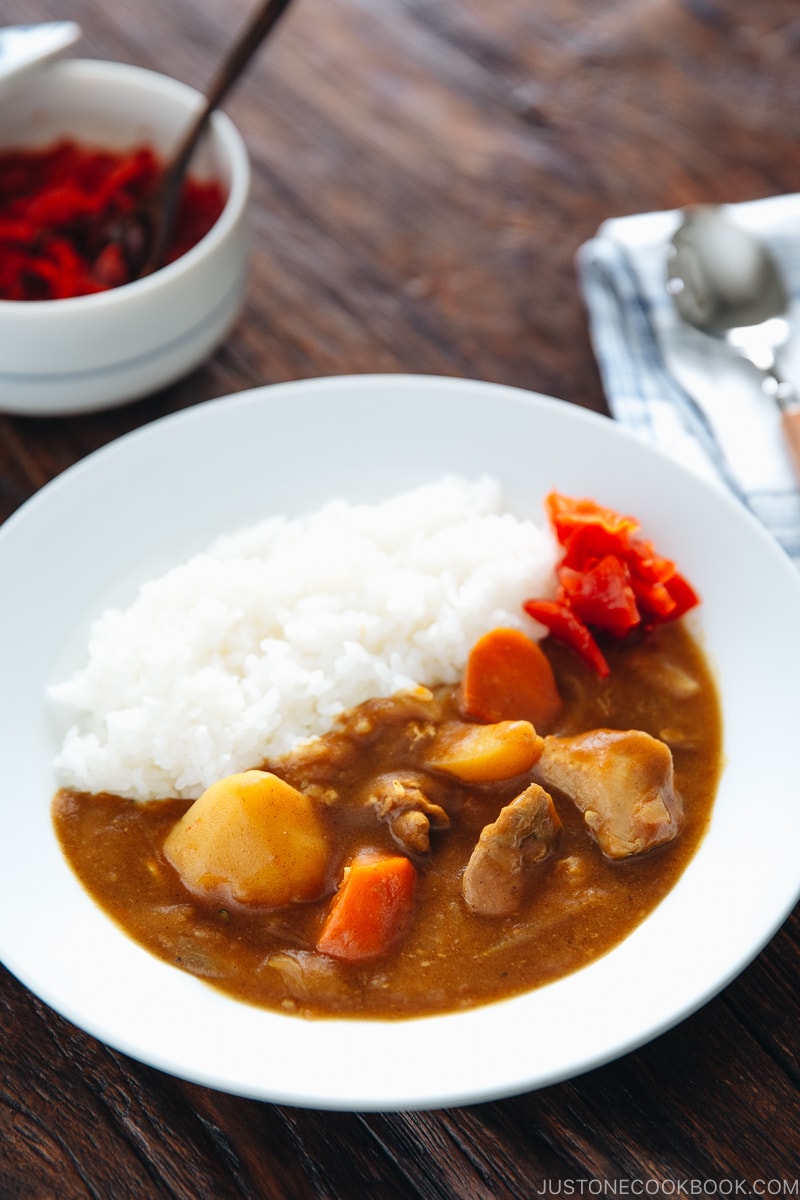
Have you heard of Japanese curry or Curry Rice (Karē Raisu)? If not, it’s best described as mild and thick curry. Even though curry was originally from Southeast Asia, it has become one of the most popular foods in Japan enjoyed by people of all ages.
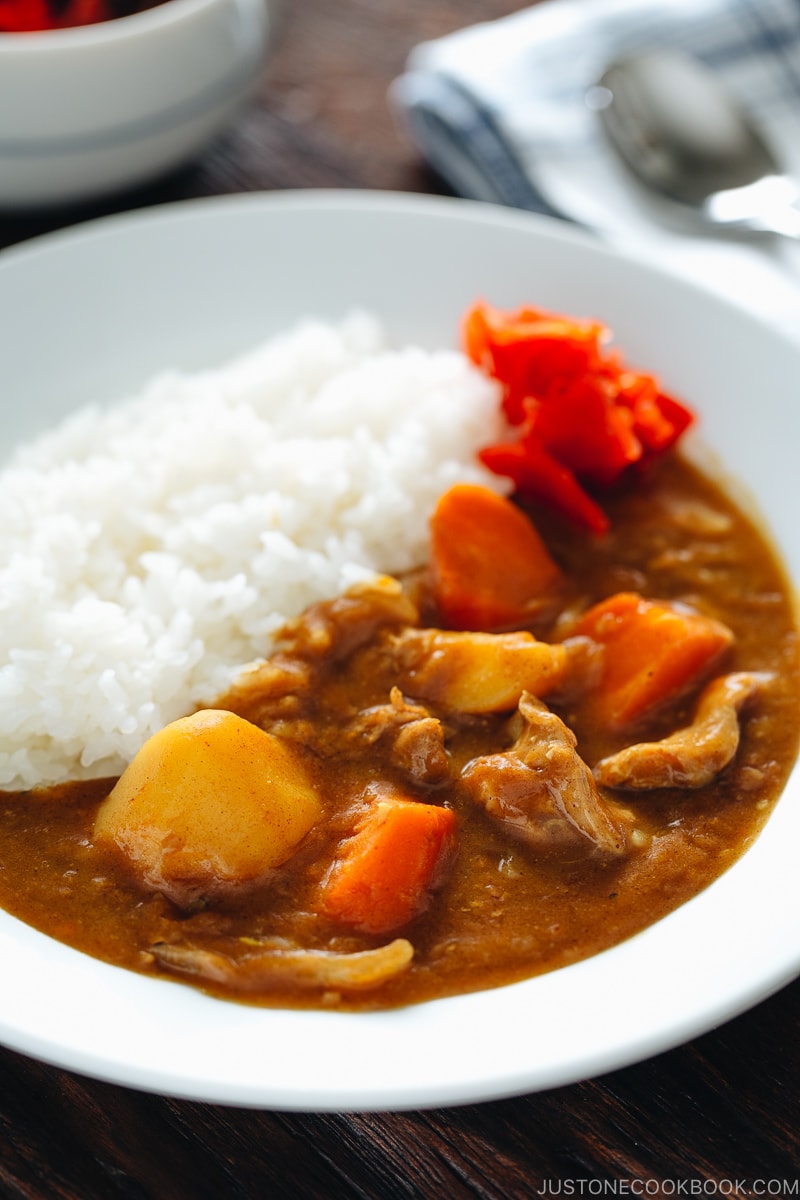
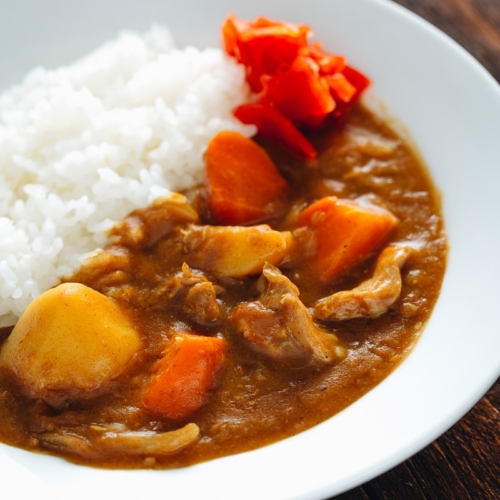
Japanese curry is always served with steamed rice, and the common ingredients include a variety of proteins (chicken, beef, pork, seafood), potatoes, onions, and carrots.
To make Thai or Indian curry, you would add the curry spices from the very beginning. However, Japanese curry is seasoned with curry roux toward the end of cooking. Until then it’s just a plain soup/stew.
What is Japanese Curry Roux?

As I mentioned earlier, Japanese curry is seasoned with curry roux. Typically made from fat and flour, roux is a type of thickening agent used for thickening soups and sauces.
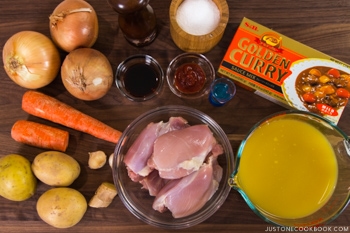
Most Japanese make curry with a boxed Japanese curry roux like this (picture above). You can find different spice levels and various brands of curry roux at Japanese or Asian grocery stores. These days I can even find it in the Asian aisle at American supermarkets.
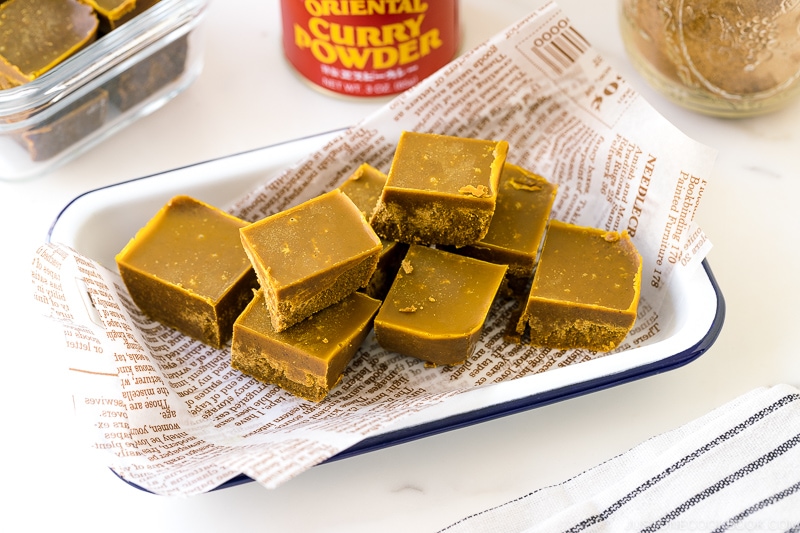
If you prefer to make curry roux from scratch and have an additional 30 minutes to spare, check out my Homemade Curry Roux recipe. All you need is flour, butter, curry powder, and additional spice.
Personalize the Store-Bought Curry with Additional Seasonings
Growing up in Japan, curry rice was a “fast food” for my family; the food that my mom made ahead of time or the previous day when she knew that she couldn’t prepare dinner in time.
I always saw my mom adding grated apples and different condiments to the curry while she was making them. She said, “If you put just the boxed curry roux, your curry will always taste the same. It will not be different from your neighbor’s curry.”
So she taught me two tricks. Use two different brands of curry roux (sometimes mix the spice level, like mild and medium spicy) and use additional seasonings.
My mom and I would use the combination of the following ingredients.
- Chocolate
- Coffee
- Butter
- Yogurt
- Grated apple
- Honey
- Red wine or sake
- Oyster sauce
- Worcestershire Sauce
- Tonkatsu sauce
- Soy sauce (used in this recipe)
- Ketchup (used in this recipe)
Other ingredients that my mom or I haven’t added in our curry include peanut butter, marmalade, and banana. Do you add any additional flavoring to your Japanese curry?
Sign up for the free Just One Cookbook newsletter delivered to your inbox! And stay in touch with me on Facebook, Pinterest, YouTube, and Instagram for all the latest updates.
Pressure Cooker Japanese Curry
Video
Ingredients
- 3 onions (large; 2¼ lb, 1,005 g)
- 1½ carrots (5 oz, 143 g)
- 3 Yukon gold potatoes (15 oz, 432 g)
- 2 cloves garlic
- 1 tsp ginger (grated, with juice)
- 1½ lb boneless, skinless chicken thighs (see Notes for substitutions)
- ⅛ tsp Diamond Crystal kosher salt
- ⅛ tsp freshly ground black pepper
For the Curry Sauce
- 1 Tbsp neutral oil (for cooking)
- 3 cups chicken stock/broth (for lower sodium, use water only or half stock and half water)
- 1 package Japanese curry roux (7–8 oz or 200–230 g; or make my Japanese Curry Roux)
- 1 Tbsp ketchup
- 1 Tbsp soy sauce
For Serving
- 6 servings cooked Japanese short-grain rice
- fukujinzuke (Japanese red pickled vegetables) (optional; or make my Homemade Fukujinzuke)
Instructions
- Gather all the ingredients. Please read my blog post about options for add-on condiments to season the curry sauce.

To Prepare the Ingredients
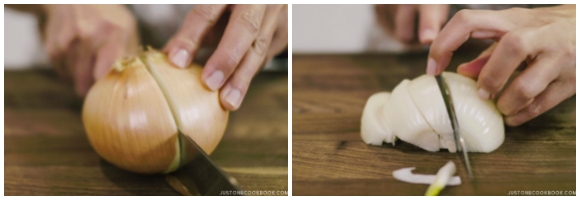
- Cut 3 onions in half and cut each half into 5 wedges.

- Peel 1½ carrots and cut into bite-sized pieces. I use a Japanese cutting technique called rangiri. This cut creates more surface area, which helps the carrots absorb more flavor and cook faster. Tip: You can cut the vegetables slightly bigger to avoid a mushy texture.
- Peel 3 Yukon gold potatoes and cut them into quarters. Soak them in water for 15 minutes to remove the excess starch. Tip: Do not use russet potatoes since they would break down too easily.
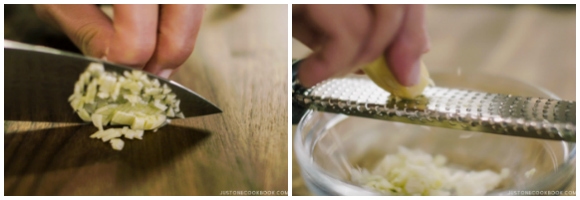
- Mince 2 cloves garlic (I like this garlic press). Then, grate the ginger with a microplane zester or ceramic grater and reserve 1 tsp ginger (grated, with juice).
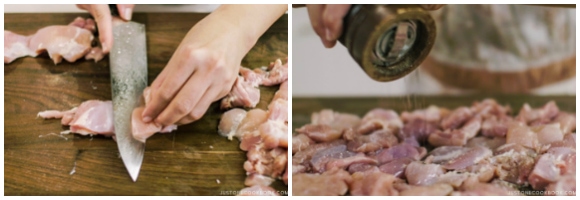
- Cut 1½ lb boneless, skinless chicken thighs into bite-sized pieces. I use the sogigiri Japanese cutting technique to create more surface area and flatten each piece so it cooks faster. Season with ⅛ tsp Diamond Crystal kosher salt and ⅛ tsp freshly ground black pepper.


To Cook the Curry
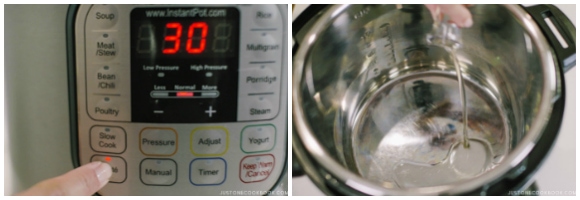
- Press the Sauté button on your Instant Pot (I use a 6 QT Instant Pot) or preheat a stovetop pressure cooker over medium heat. When the inner pot is hot, add 1 Tbsp neutral oil.
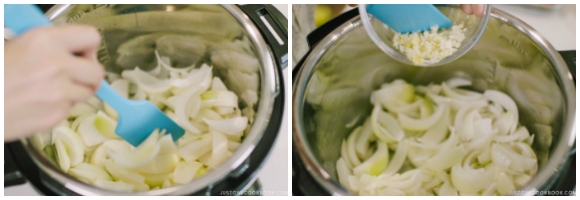
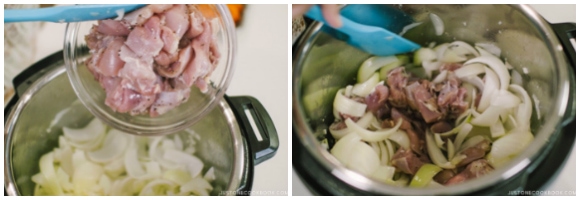
- Then, add the onion wedges, minced garlic, and grated ginger with juice.
- Add the chicken pieces to the pot and mix until just coated with the oil.
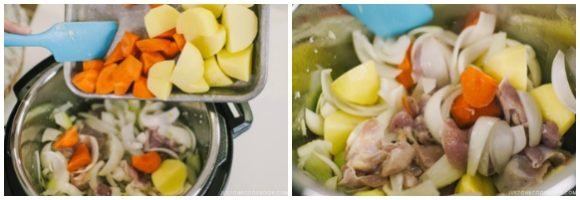
- Add the carrots and potatoes to the pot and mix well.
- Add 3 cups chicken stock/broth and use a spatula to press down the meat and vegetables into the liquid. Then, place the cubes from 1 package Japanese curry roux (I combine half mild and half medium spicy packaged roux) on top of the other ingredients. DO NOT MIX! Otherwise, the roux may sink to the bottom of the pot and burn while cooking. For solidified homemade roux, place the cubes on top of the ingredients and do not mix. For non-solidified homemade roux (that you just made), add it after pressure cooking is done.
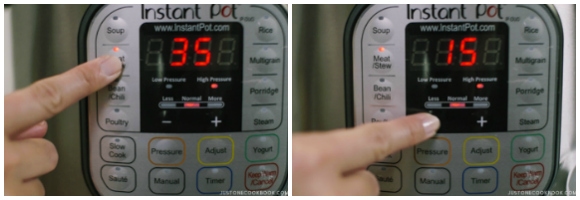
- Cover and lock the lid. Make sure the Instant Pot‘s steam release handle points to Sealing and not Venting. Press the Keep Warm/Cancel button on the Instant Pot to stop sautéing. Then, press the Meat/Stew button to switch to pressure cooking. Press the “minus“ button to change the cooking time to 15 minutes.
- For a Stovetop Pressure Cooker: Close and lock the lid. Set the pressure level to high. Heat the pot on the stovetop over medium-high heat until you‘ve reached high pressure. Then, reduce the heat to medium low to maintain high pressure, and cook for 15 minutes.
- When it is finished cooking, the Instant Pot will switch automatically to the Keep Warm mode. Slide the steam release handle to Venting to let out steam until the float valve drops down, OR let the pressure release naturally (this takes about 15 minutes).
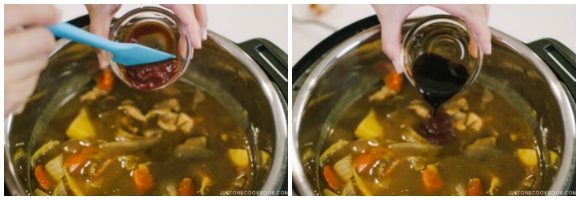
- Unlock the lid. (If you‘re using homemade curry roux, add it to the pot now and heat on Sauté mode for an additional 5 minutes until well blended into the stew.) Add 1 Tbsp ketchup and 1 Tbsp soy sauce now. Mix well, stirring to dissolve the curry roux and checking one last time that there are no undissolved chunks left. Tip: If you use my unsalted homemade curry roux, taste the curry sauce now and add salt to your liking. I recommend adding 2–4 tsp Diamond Crystal kosher salt, but this will vary based on the brand of the chicken broth and condiments you added.

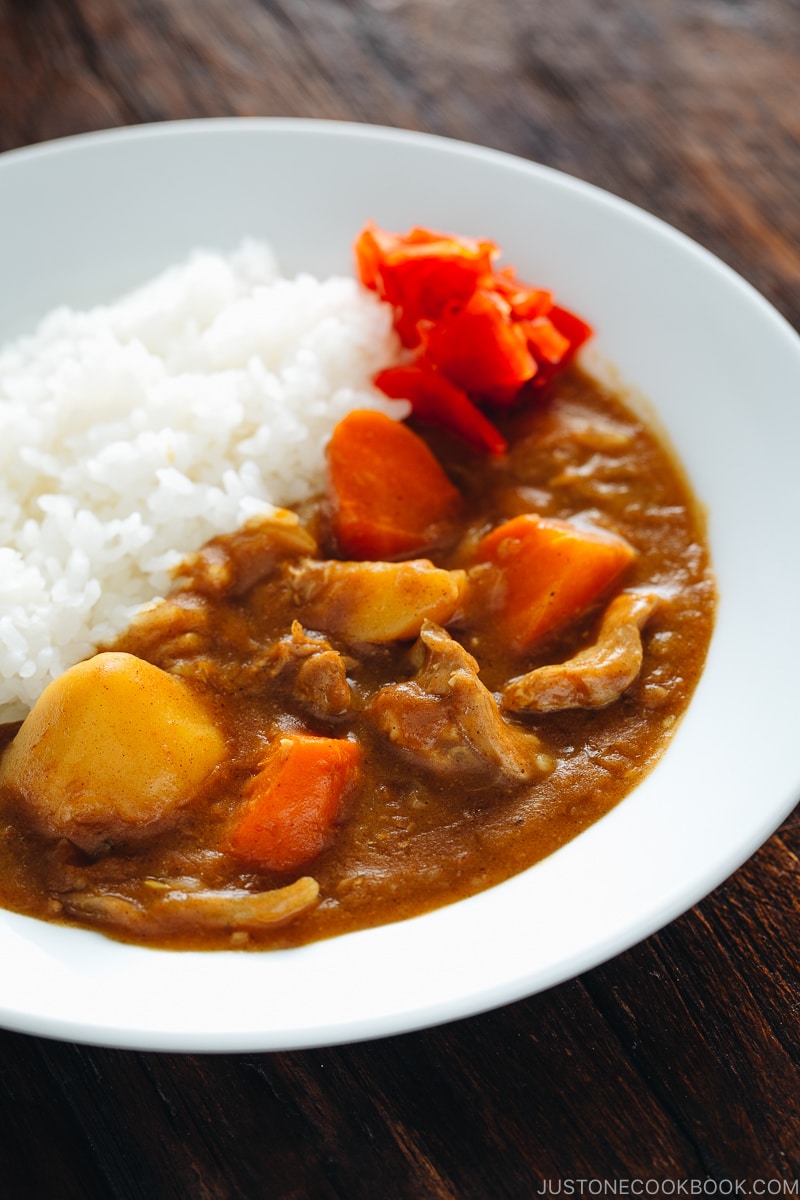
To Serve
- Portion 6 servings cooked Japanese short-grain rice on individual plates and serve the curry on top. Serve with optional fukujinzuke (Japanese red pickled vegetables) on the side.

To Store
- Keep the leftovers in a glass airtight container and store it in the refrigerator for up to 3 days and in the freezer for a month. The texture of the potatoes will change in the freezer, so remove them before freezing. Defrost the frozen curry in the refrigerator for 24 hours before you want to reheat it.
To Reheat
- Leftover curry sauce will thicken into a paste as it cools, so it tends to burn while reheating. To avoid this, stir ½ cup (120 ml) water or more into the leftover sauce until loosened. Then, gently reheat it on low heat. If the sauce seems thin, continue heating with the lid off to reduce the sauce.
Notes
Nutrition
Other Instant Pot Recipes


I’m confused on the cooking time and release. Sorry! I’m new to the instant pot world. Is it cook for 15 minutes and QR? Or natural release for 15 minutes?
Hi Laurie,
Thank you for trying this recipe!
The cook time is 15 minutes, and then you can use quick release or natural release (natural release normally take about 15 minutes).
We hope this helps!
Made this curry tonight and it was surprisingly delicious! Surprising because its the first meal I’ve made in my Instant Pot other than rice, and my first Japanese curry. Namiko made the directions so easy to follow it came out great! I experienced, however, what happens when you don’t obey the MAX FILL LINE on the Instant Pot! (The excess makes a fragrant puddle on the counter!)
The chicken was perfectly tender and the homemade roux gave me the chance to adjust the spice to my liking. Before I added the roux I took out some broth from the pot and added it to the roux to thin it. Worked great. I’ll be making this again!
Hi Linda!
We are so glad to hear you enjoyed this recipe with homemade curry roux!
Thank you very much for trying this recipe and for your kind feedback.🙂
Hi Nami, thanks for sharing this recipe! It is amazing and my go-to comfort food. Question: why add the homemade curry roux after the pressure cooking and not before? I found that I when I added after as per your recipe, the curry taste was not as favlourful. Flavour for the curry does become much more prominent after sitting over night in the fridge and microwaved the next day though. Any tips on how to achieve similar flavour when freshly cooked? Thank you
Hi Danny,
Thank you very much for trying this recipe.
The reason for adding the homemade curry roux at Step 15 is to avoid a burning error from the Pressure Cooker. Homemade roux is runnier, and it goes to the bottom of the pot easily and can burn while cooking.
To have the flavourful curry, please add the homemade curry roux before ketchup and soy sauce so that the curry flavor will soak into the ingredients and mix it well when you add the roux. You may also cook a little longer before adding the ketchup and soy sauce to enhance the flavor.
We hope this helps!
Hi Namiko, I am making your instant pot curry with chicken. I made the curry roux myself, and I have a question about that. I followed the recipe exactly, and stirred and cooked the roux for 15 minutes until a nice deep brown resulted. Then I added the curry powder and garam masala ( I opted to leave out the cayenne.) My roux came out quite thick and I wonder if it is supposed to be so thick? In your instant pot recipe, you mention adding home made roux at the end, after the cooking because it is too liquid to add at the start. In my case, it is more like a paste. Is that the correct consistency? Also, I wanted to mention I made your Doria rice with ground beef and it was delicious and a big hit. It was quite wintery that day here in MN so it was perfect. Thank you.
Hi Brenda,
Yes. The curry roux will be quite thick, but it’s not hard as one from the box. So please add it at the end.
Thank you for trying many of Nami’s recipes, and we are so happy to hear you enjoy the Doria recipe too. Happy cooking!😊
I think it depends on the instant pot you have. I sautéed & set it to a “pressure cook” setting for 15 mins (I don’t have a meat setting). I also did a natural step release for 15 mins. Unfortunately, most of the chicken disintegrated. Will try again another time with a shorter time frame and/or release.
Hi Mary Ann!
Thanks for trying this recipe! If you look at step 11 images, you can tell that Nami barely sauteed her ingredients (onion still in shape, not too wilted, the chicken still raw). If you spent time sauteing the ingredients, you had a longer cooking time for your ingredients. Nami just coated the ingredients with oil and let the pressure cooking “cook” the ingredients. Hope this helps!🙂
Hi Nami,
I would like to substitue shrimp for the chicken, any comments or tips?
Hi Warren,
The shrimp cook much faster than meat, so we recommend adding shrimp at Step 11 and pressure cook for 5~8 minutes.
You can also check out this Seafood Curry recipe; https://www.justonecookbook.com/pressure-cooker-japanese-seafood-curry/
We hope this is helpful.😊
I grew up eating this type of curry…but my family just followed the recipe on the boxed roux. We also had a ton of condiments. Made this recipe last night for family and was even better than the recipe my grandma followed. It was the absolute best and we all wanted to take home the leftovers! I’ve already been asked to make this again. Absolutely love it! I love the update for the Instapot…saves so much time! We used chopped black olives, dill pickle slices and sweet relish as condiments…not that anything was needed with the recipe. Thank you again for another top notch meal! Will definitely be making this dish many times over the winter.
Hi Deborah,
Thank you so much for trying this recipe and for your kind feedback. We’re so glad to hear you and your family enjoyed the Japanese Curry!
Thank you for sharing your cooking experience with us!💞
I added celery and mushrooms to my recipe. It came out amazing!
Hi Daniel,
Thank you so much for trying this recipe and for your kind feedback. We’re so glad to hear you enjoyed the dish.
Thank you for sharing your cooking experience and tips with us!
Hi Nami!
Thank you for the great recipes – I have tried and repeated many of them!
I noticed that the ‘sweeteners’ (honey and apple) were excluded in the IP version of your Japanese curry. May I ask why, and does it mean the IP version is less sweet?
Hi Michelle! No, when I make curry, I make variations so sometimes I use different condiments and combination etc. Otherwise, it’s always the same taste and could be boring. I shared the possible adds-on in my post. Feel free to choose and test which one you like. 🙂
Will doubling the recipe be too large for the instant pot?
Hi Christina! Looking at Step 11 picture, I would go 1.5, and not double. 🙂
I made this and it was delicious! Now I want to make it again without the chicken, or any meat. Is it okay to follow the same process without the chicken or would you recommend I cook this in a pot on the stove? I basically want the curry to top chicken katsu and rice but not sure how to make the sauce! Thank you!!
Hi Avery! Thank you so much for trying this recipe. So happy you liked it! Vegetables only right? Then you definitely cut down on the cooking time. It is fast, probably 3-4 minutes may be enough time to cook through (considering you would cut into a big chunk, not small cubes). 🙂
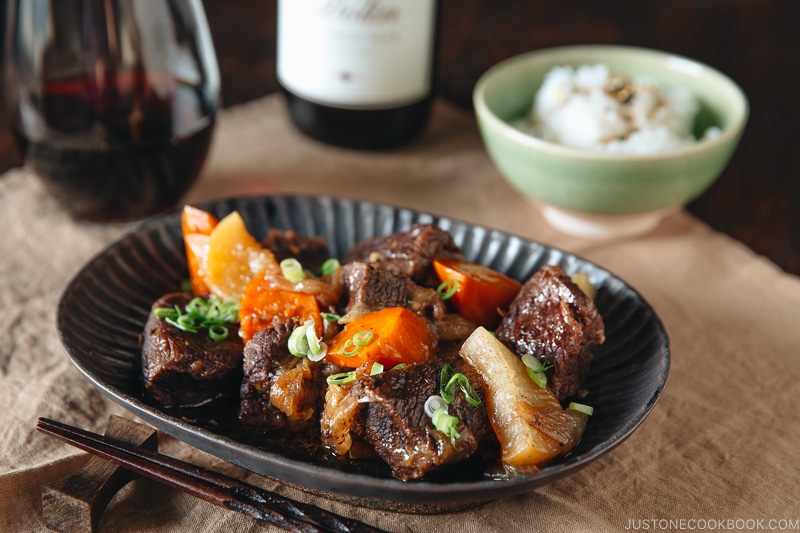
I love this recipe. I’ve also made beef curry in the IP. With that I pressure cook the meat for 10 minutes first because the potatoes and carrot would turn to mush if I did them all at the same time.
Hi Patti! Thank you so much for your kind words! Great idea on pressure cooking twice!
Loved making this and loved that I could do it in my IP! I haven’t had real Japanese curry rice since I lived in Tokyo 13 years ago! I’ve been craving it lately and this really hit the spot! I added grated apple, honey, and cocoa powder. Couldn’t find any fukujinzuke but had some umeboshi on hand. Delicious! I’m excited to keep making it and keep experimenting!
Hi Jeanne! Thanks for trying this recipe and for your kind feedback. I’m glad you got to enjoy this dish after 13 years. 🙂 Have fun experimenting and make your own Japanese curry at home! xo
Made this Saturday as we have been missing Japan. Turned out really well. We paired it with pickled shallots as had those already made. This is definitely going to be on the rotation just have to get to the Japanese store to buy the curry. Thanks for the recipe.
Hi Pam! Thank you so much for trying this recipe and I’m so happy to hear that you enjoyed it. Thank you for your kind feedback. We miss Japan very much too… 🙂
This is a GREAT recipe! The ketchup and soy sauce is a secret I never knew. Totally made the dish! I just made it and it was super easy and super delicious! Thanks Nami!
Hi Jenny! Thank you so much! Try out different additions besides ketchup and soy sauce that I shared in the blog post. It’s fun experimenting. 🙂 Thank you for your kind feedback!