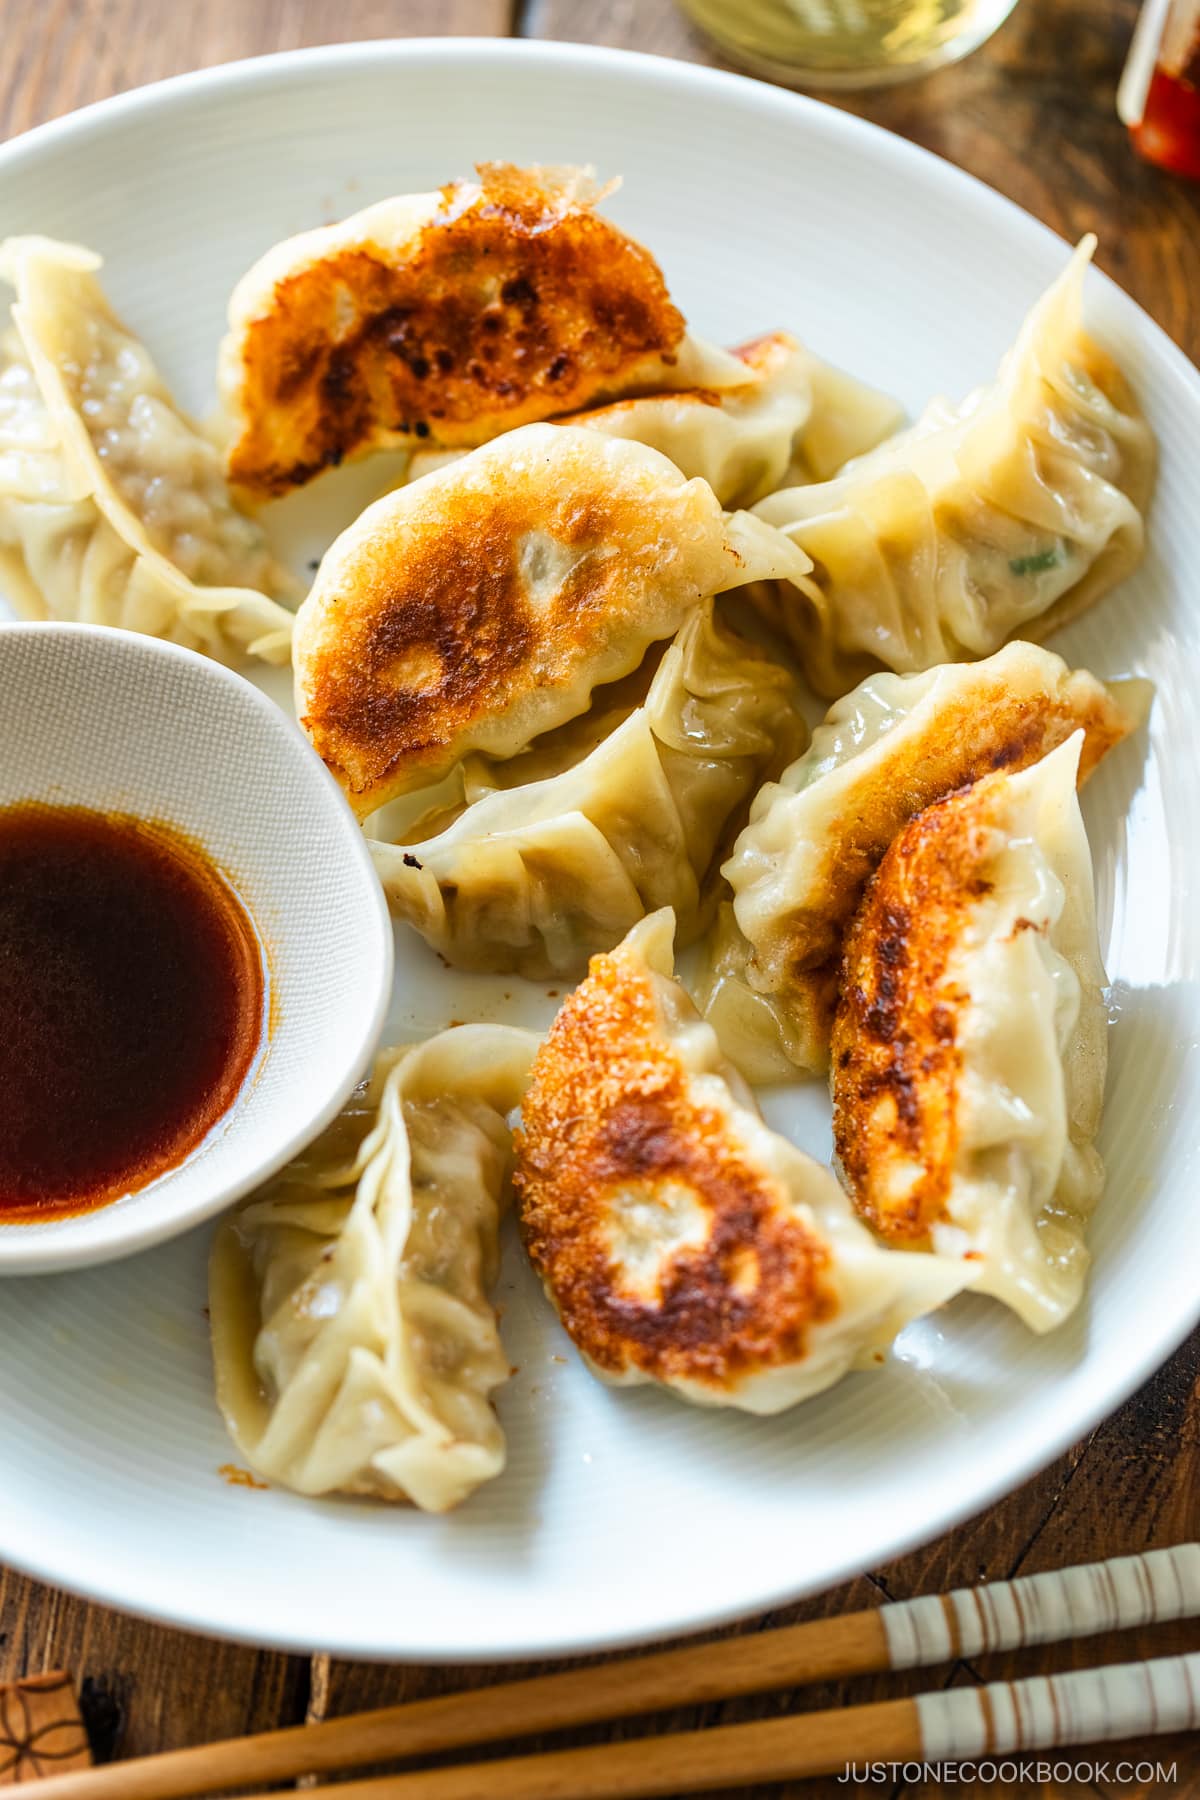
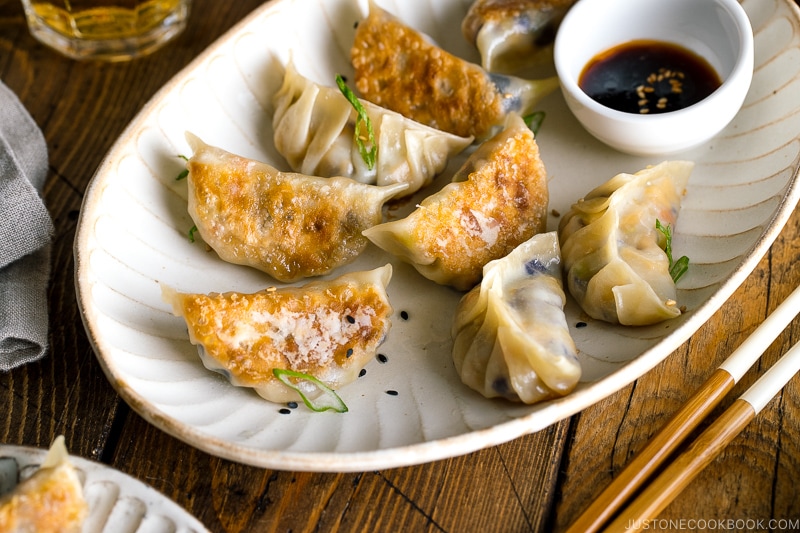
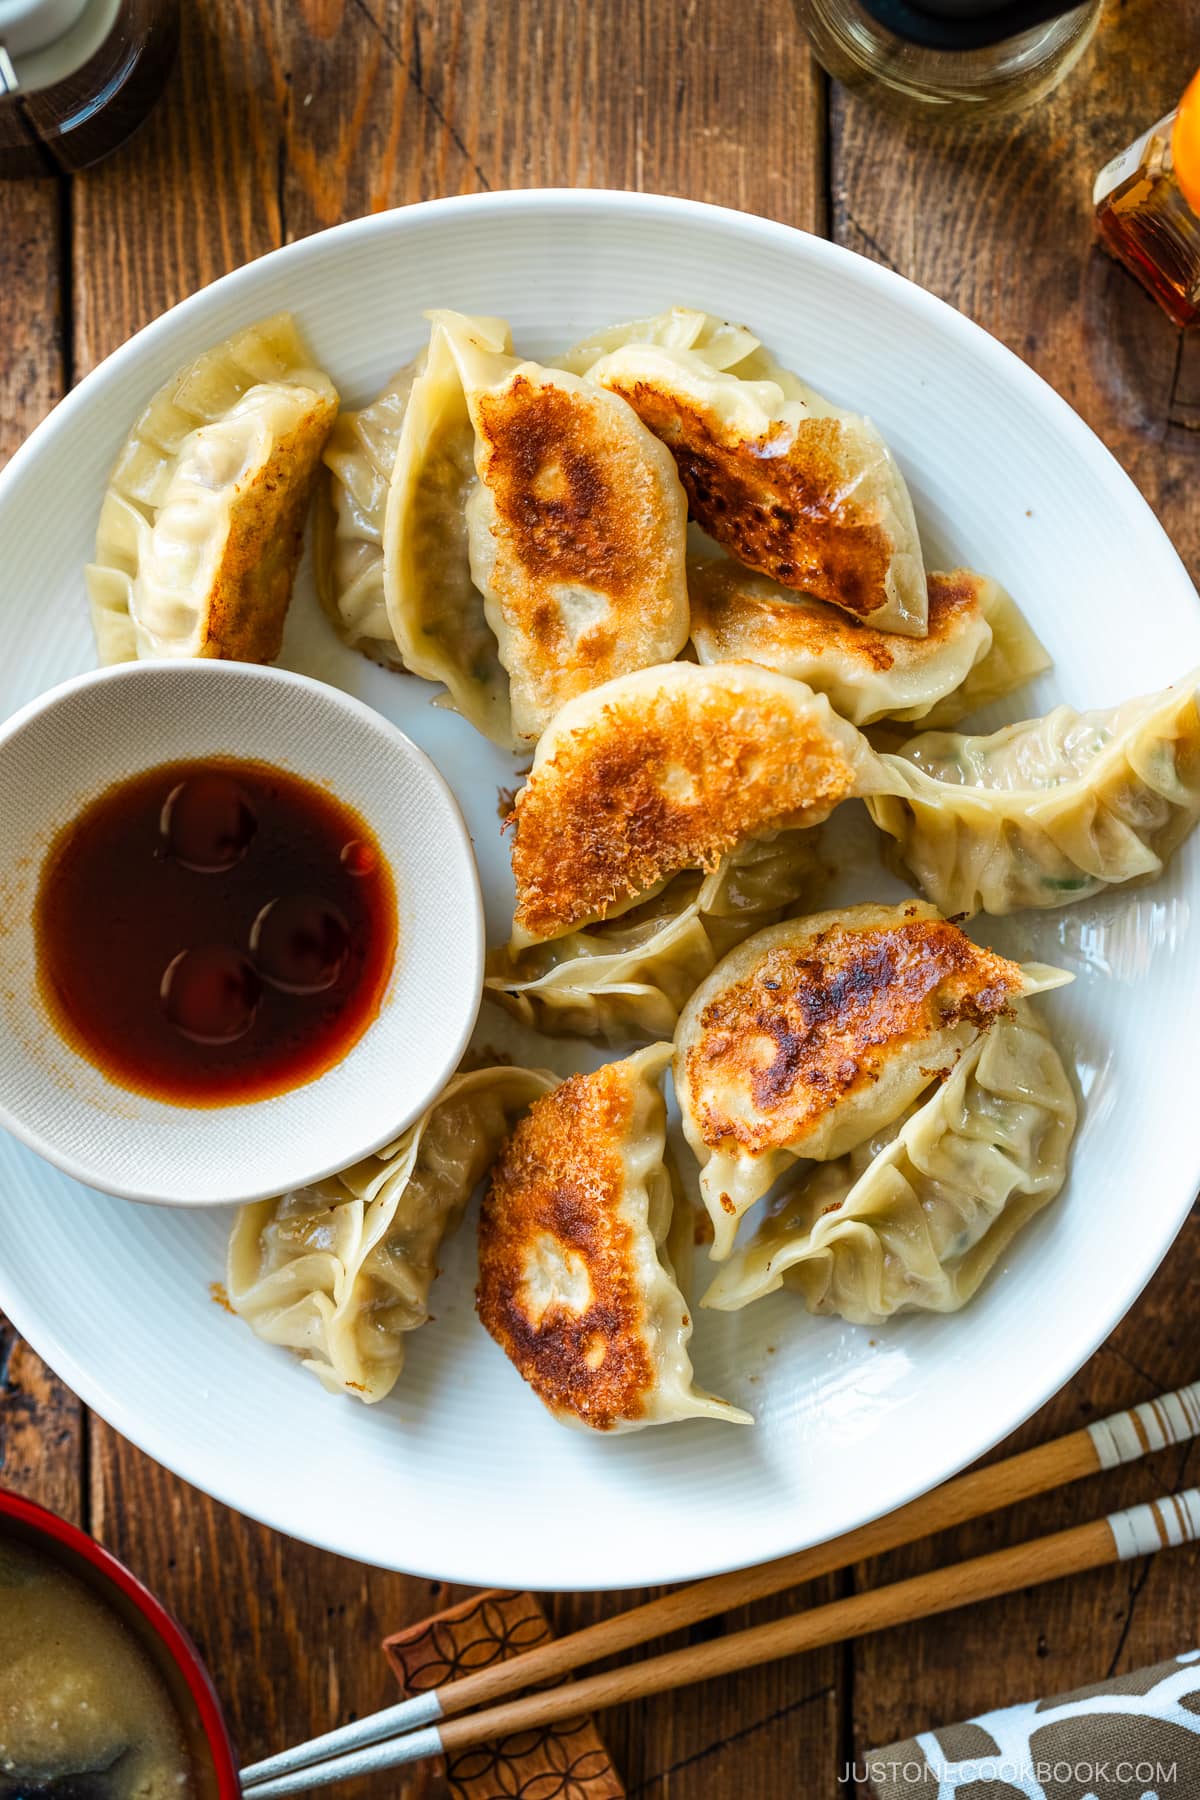
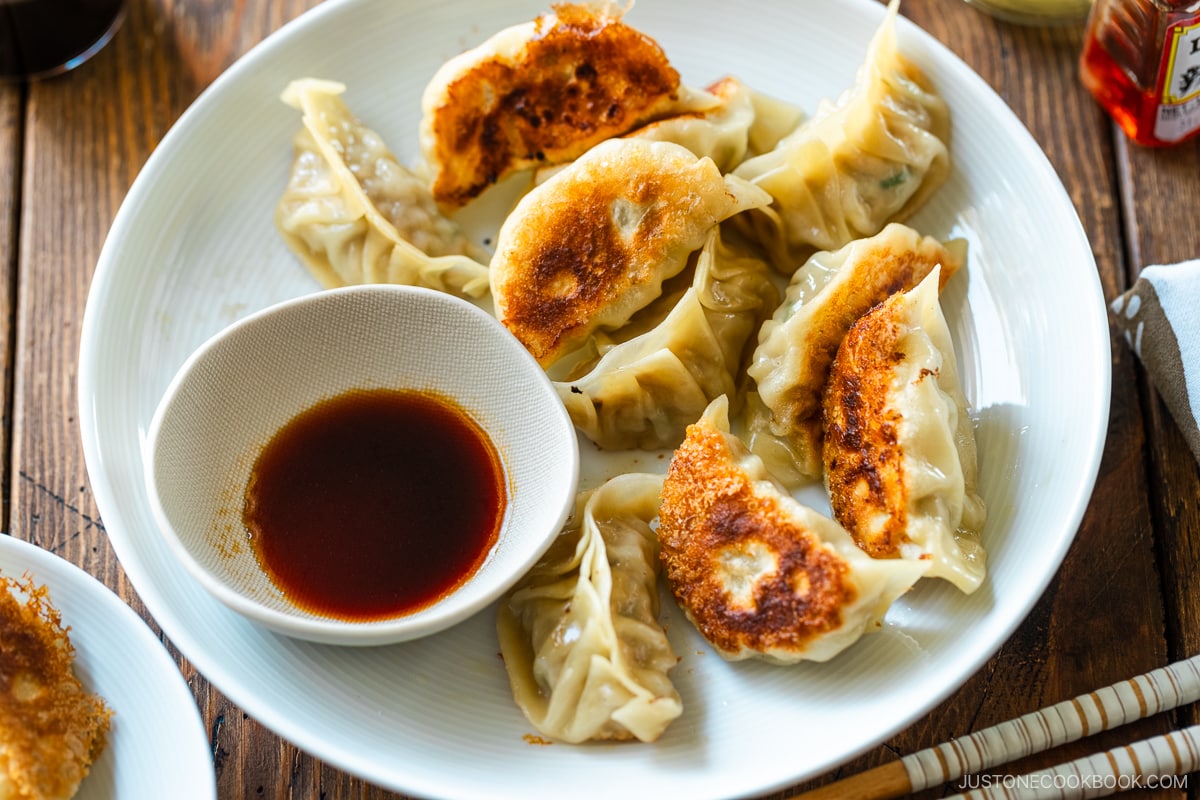
Gyoza are Japanese pan-fried dumplings that are crisp and golden on the bottom and juicy inside. These meat-filled treats are easy to fold using one of the methods I show here. They’re so delicious served with my savory dipping sauce.
Gyoza (餃子), or Japanese pan-fried dumplings, are as ubiquitous as ramen in Japan. You can find these mouthwatering dumplings being served at specialty shops, izakaya, ramen shops, grocery stores or even at festivals.
While store-bought ones are convenient, you can’t beat homemade gyoza. So, let me show you how to make the best gyoza at home!
Table of Contents
What is Gyoza?
The original Chinese dumplings are called Jiaozi (餃子). These dumplings consist of ground meat and vegetable filling wrapped into a thinly rolled piece of dough, which is then sealed by pressing the edges together. Finished jiaozi can be boiled (水餃), steamed (蒸餃), pan-fried (煎餃, we call potstickers), or deep-fried (炸餃子).
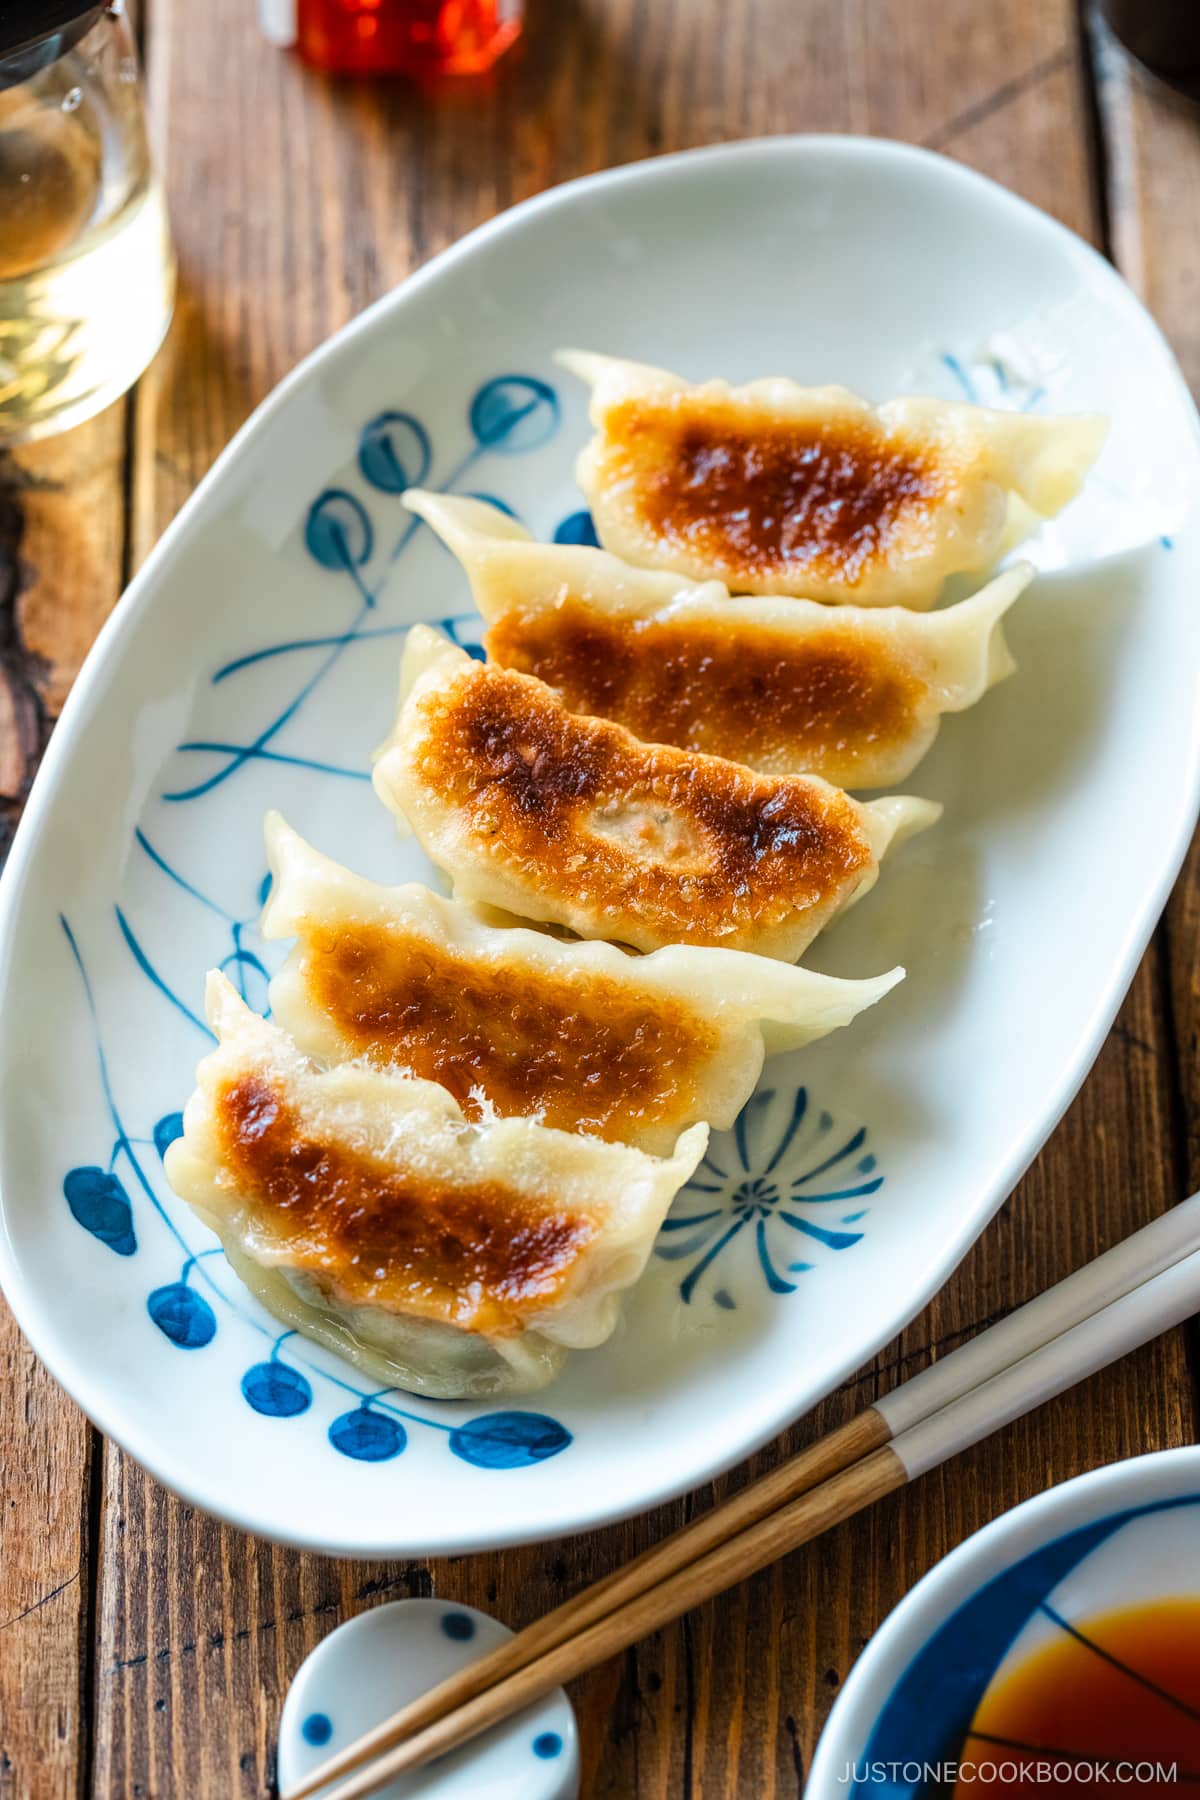
So what is the Japanese version like? The key characteristic of gyoza (餃子) is its cooking method, which involves pan-frying and steaming. They are first fried in a hot pan until crispy brown on the bottom sides, then a small amount of water is added before the pan is covered to steam the entire dumplings quickly. This technique gives gyoza the best mix of textures, where you get crispy bottoms and tender soft tops that encase the juicy filling inside.
What is the Difference between Gyoza and Chinese Potstickers?
Gyoza and potstickers are prepared similarly by frying and steaming, so they are not too different.
One distinctive difference is that gyoza usually comes in a smaller size with thinner skin. With thinner skin, gyoza yields a much more crispy texture and bite. The filling is also finer in texture. Some say gyoza tends to be heavier on the garlic, which is great if you like garlic.
For fillings, you’ll find a variety of meat such as ground pork, beef, lamb, chicken, fish, and shrimp used in Chinese dumplings. On the other hand, ground pork is typically used in gyoza.
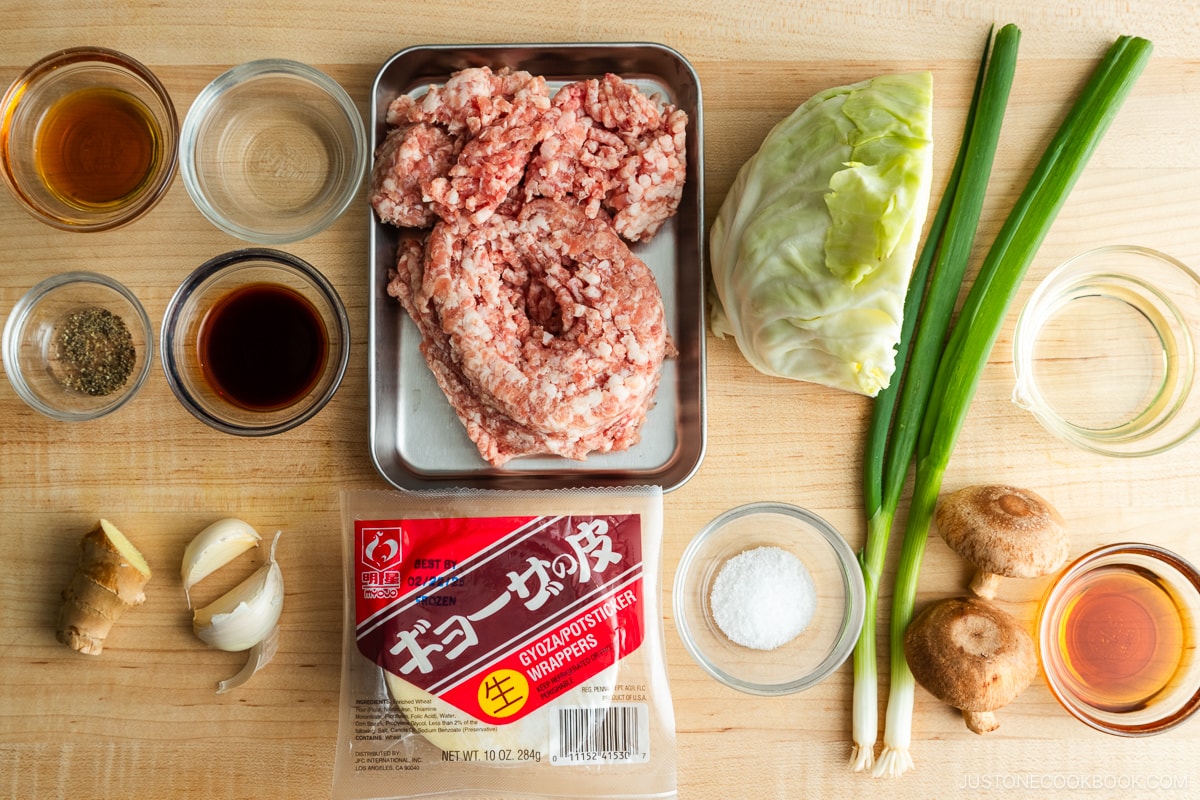
Ingredients You’ll Need for Gyoza
- Pork — Classic gyoza usually consist of ground pork.
- Cabbage — Regular cabbage is commonly used for gyoza, as opposed to Chinese dumplings, which typically use napa cabbage. We use different methods to wilt the tough cabbage leaves. Some blanch them or microwave them for a minute or two. Some sprinkle salt to dehydrate the cabbage and squeeze the water out before mixing it with meat.
- Garlic chives — My mom adds garlic chives (nira in Japanese) to her gyoza, but I usually skip them because my children don’t like their strong taste. I add garlic chives to my Napa Cabbage Gyoza recipe.
- Aromatics — Garlic is commonly used in Japanese gyoza. My mom always adds grated ginger, so I do the same for my recipe.
- Seasonings — The seasonings are simple: sake, soy sauce, sesame oil, and a pinch of salt and pepper. In traditional Japanese cooking, you will notice we use sake when we use meat and seafood. Besides adding umami, sake helps remove unwanted smells from the meat/seafood. Alcohol evaporation takes away a gamey smell. If you don’t consume alcohol, simply omit it since garlic and ginger help remove the unwanted smell.
- Gyoza wrappers — I recommend getting a Japanese brand of gyoza wrappers since they are thinner than Chinese ones. I’ll talk more about this in the following section.
Be Creative! There is plenty of room for creativity when it comes to making gyoza. To change things up, I like to make different versions at home. For example, this gyoza recipe includes fresh shiitake mushrooms, my specialty! I like the meaty texture and juicy umami from shiitake mushrooms without adding more meat. For delicious filling, the rule of thumb is to consider ingredients with different textures. So feel free to experiment with different ingredients or seasonal vegetables.
Vegan-Friendly Gyoza?
If you want to make a plant-based version, try my Vegetable Gyoza.
These pan-fried dumplings contain lots of rainbow vegetables and tofu. I love that I feel light and healthy after eating them!
How to Make Gyoza (Japanese Potstickers)
Making gyoza involves three steps. To save time, you can work on steps 1 and 2, freeze the gyoza, and cook them on the day of serving.
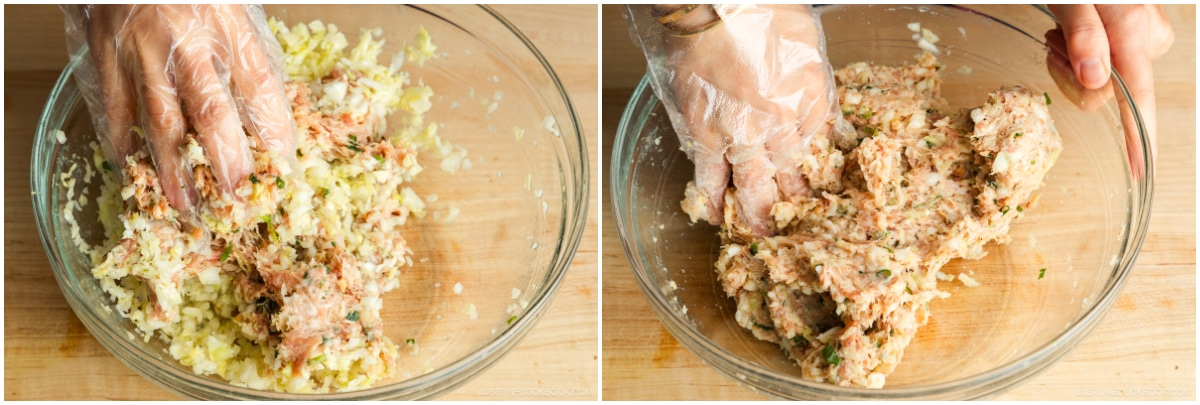
- Make the filling: Combine all the ingredients and seasonings and knead well.
- Fold the gyoza: Put the filling on the gyoza wrapper and fold it. I explained how to fold the gyoza in my recipe card below or on the gyoza folding tutorial post.
- Pan-fry: When ready to serve, pan-fry and steam the gyoza. Serve immediately with gyoza dipping sauce.
Gyoza Cooking Tips
There are a few important tips to remember when making your gyoza.
- My meat-to-cabbage ratio is between 1:1 and 1:1.5. If you are curious, the typical gyoza in Japan is 1:2 (yes, way more cabbage!). Feel free to adjust as you like, including the seasonings. This gyoza recipe has the perfect amount of juiciness and tenderness inside!
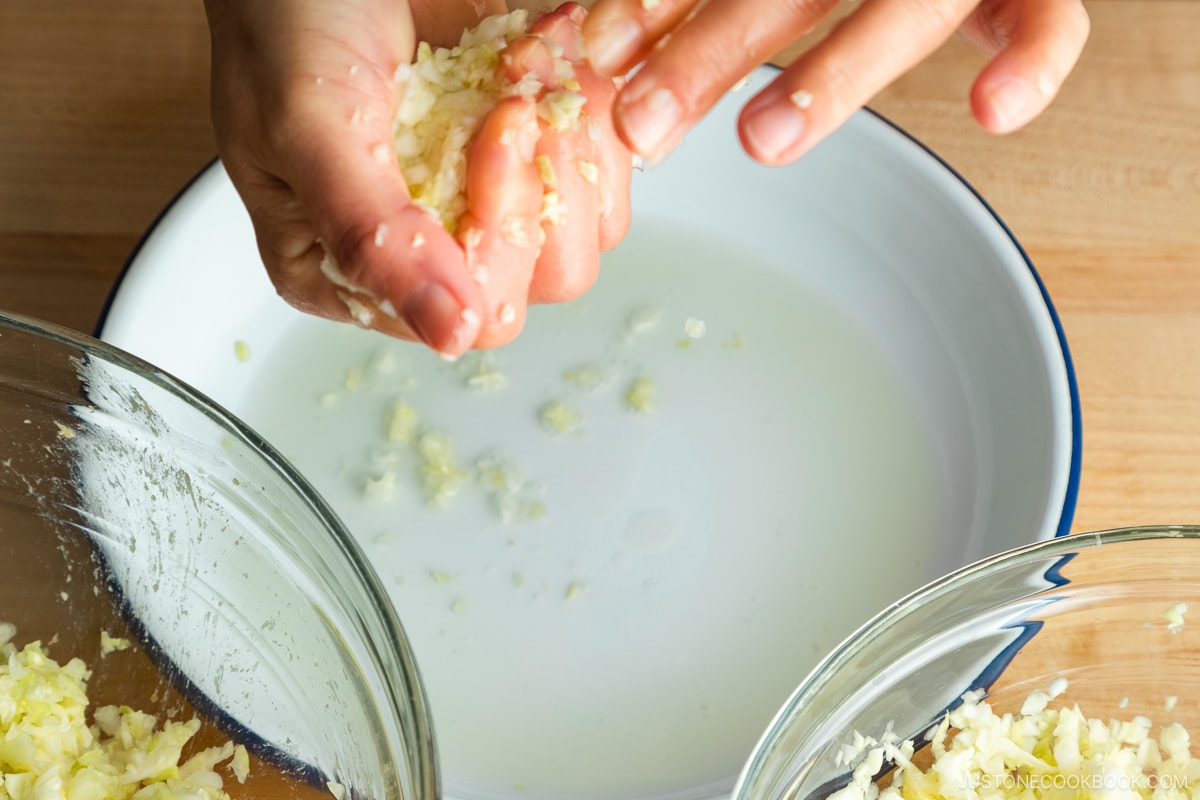
- Draw out moisture from the cabbage. This is very important so that the gyoza wrappers don’t get soggy. After sprinkling salt on the cabbage, squeeze the water out. You’d be surprised how much water comes out!
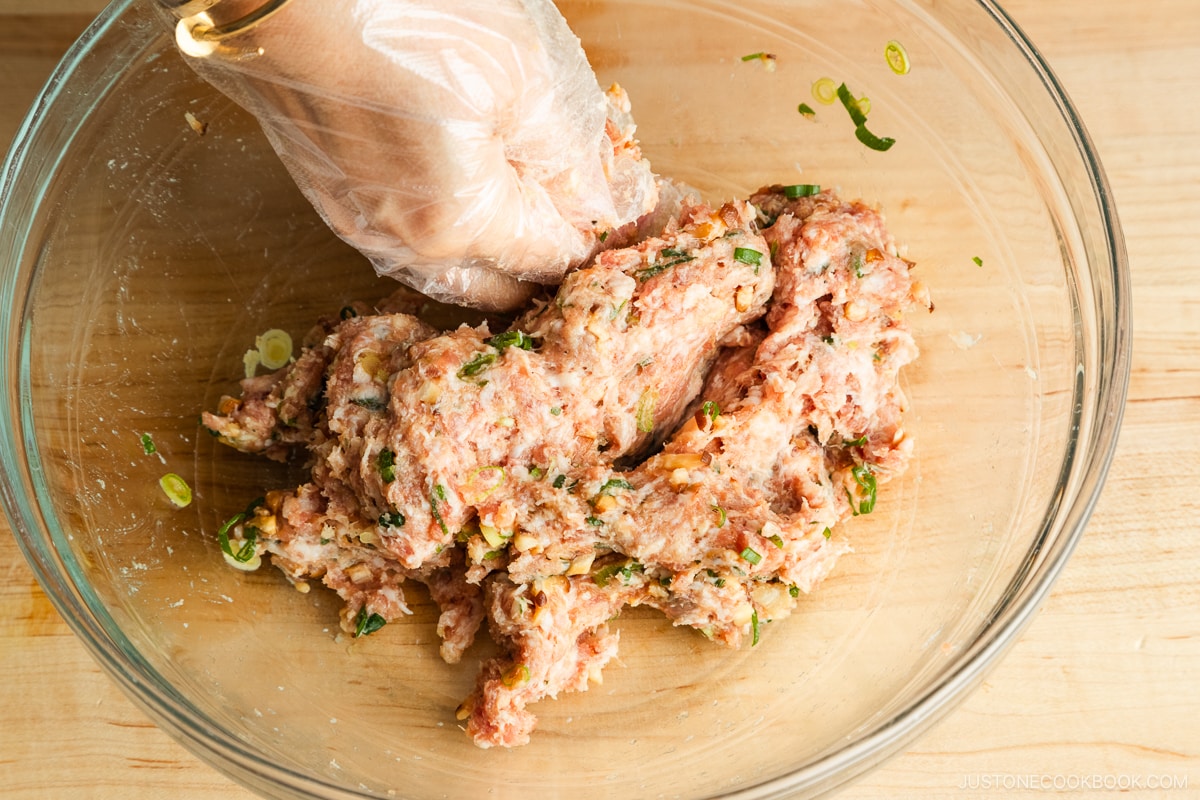
- Knead the meat well with seasonings until it becomes sticky and pale. I recommend using your hand, not a spatula or spoon. If you don’t like touching raw meat, get plastic food-grade disposable gloves. Kneading makes the proteins in the meat bind together, yielding a springier and smoother texture. It also allows the seasonings to blend well with the meat.
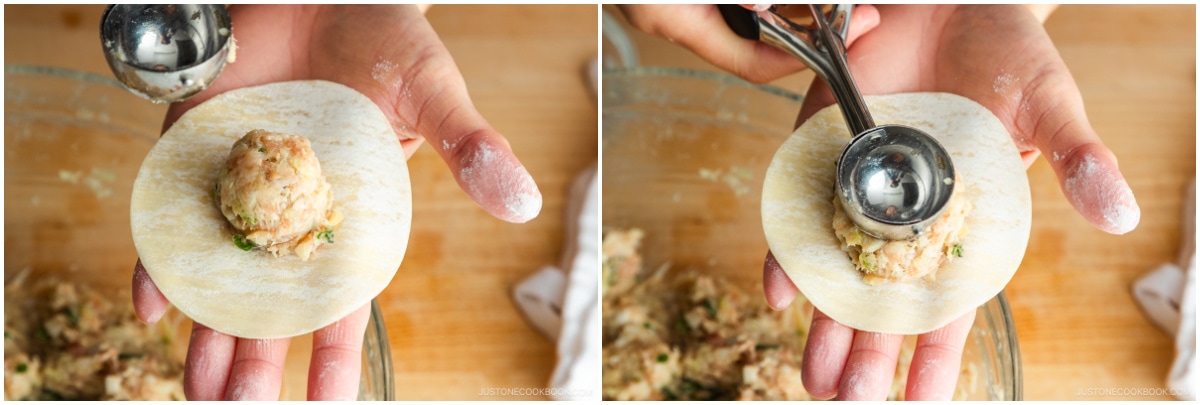
- Use less than 1 tablespoon of gyoza filling. If you’re a beginner, start with a scant 3/4 tablespoon. I use a small OXO cookie scoop (1 Tbsp) and level off the filling. If you add too much filling, it will squeeze out easily.
- While folding, cover your gyoza wrappers with a damp paper towel or kitchen cloth. Once you open the package, the edges of the wrappers dry quickly. Covering helps keep them moist and easier to use.
- Cook or store the dumplings soon after they’re wrapped. Even though you draw out moisture from the napa cabbage, the filling still contains some moisture, so don’t let gyoza sit on the counter for too long. Either pan-fry them quickly or flash-freeze them (more later).

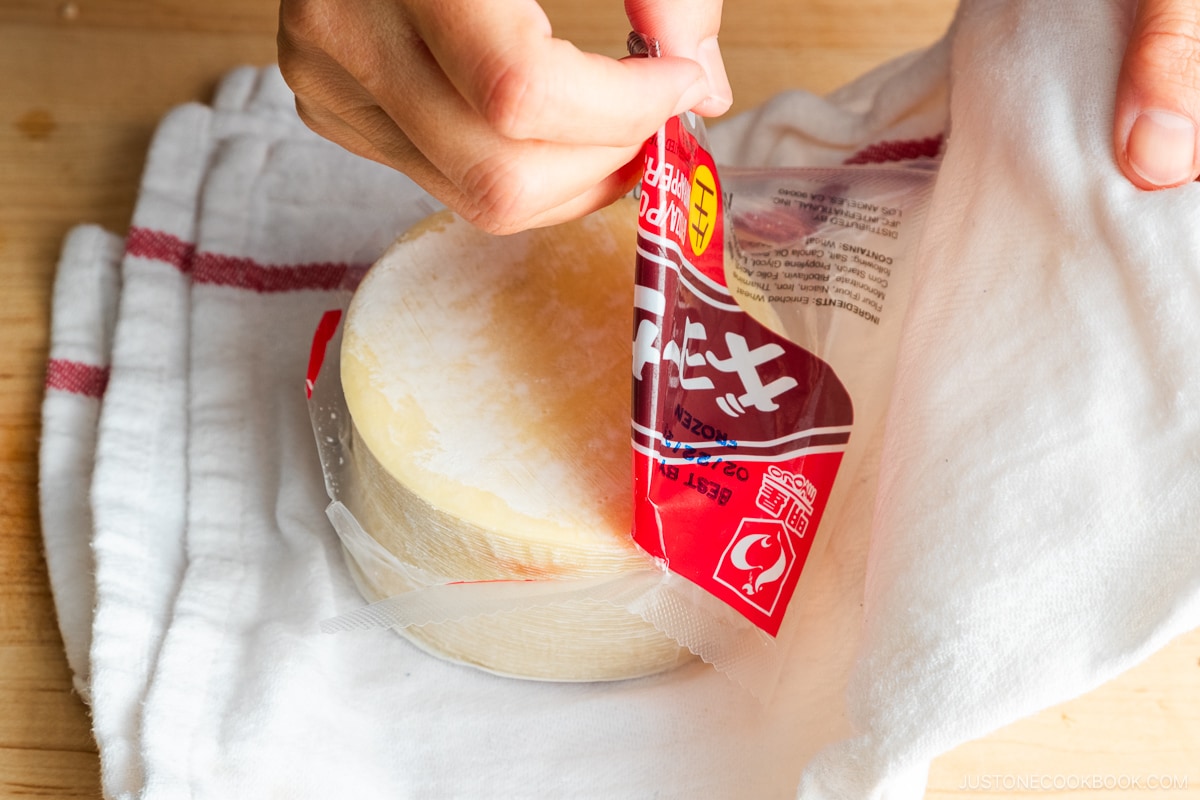
Store-bought or Homemade Wrappers
Gyoza wrappers can be purchased in Japanese or Asian grocery stores. I usually buy Myojo brand’s 10-oz wrappers, which contain about 52–54 skins. Once you open the package, cover the wrappers with a damp towel to prevent them from drying out.
If you can’t find gyoza wrappers at an Asian or local grocery store or enjoy making food from scratch, I highly encourage you to make gyoza wrappers!
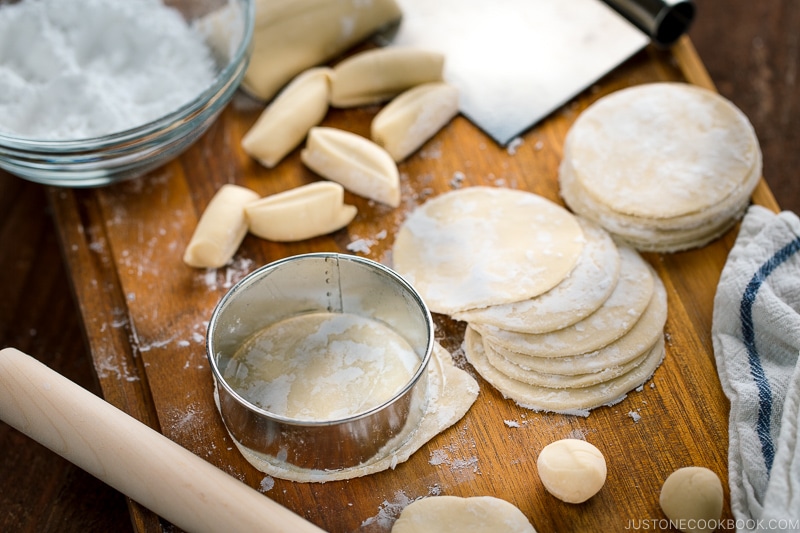
All you need is flour, salt, and water. With practice and patience, you make delicious homemade gyoza skins in just a few hours!
Here’s a detailed tutorial with the video instructions on How To Make Homemade Gyoza Wrappers.
Gyoza Folding Techniques
While Chinese dumplings have several ways to fold the wrappers, gyoza or Japanese pan-fried dumplings have just two ways: Folding pleats toward one side vs. folding pleats toward the center.
Check out my post on How To Fold Gyoza. With just a little bit of practice, you will master the folding very quickly.
How to Store Gyoza
Gyoza are best stored in the freezer before they are cooked. If you properly save them, they can last up to a month in the freezer!
Why don’t we cook first and freeze? When you freeze gyoza after being pan-fried, it will lose its crispness and become soggy and too soft after reheating.
What to Do with Extra Wrappers?
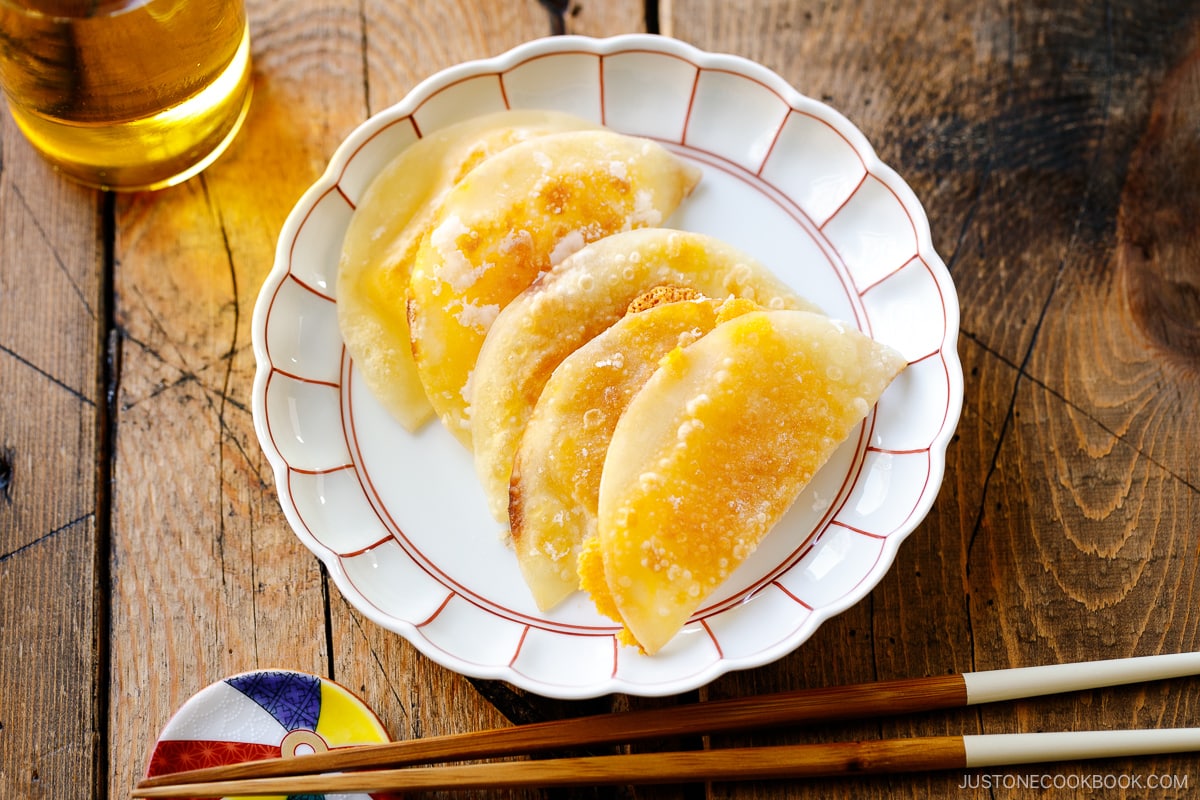
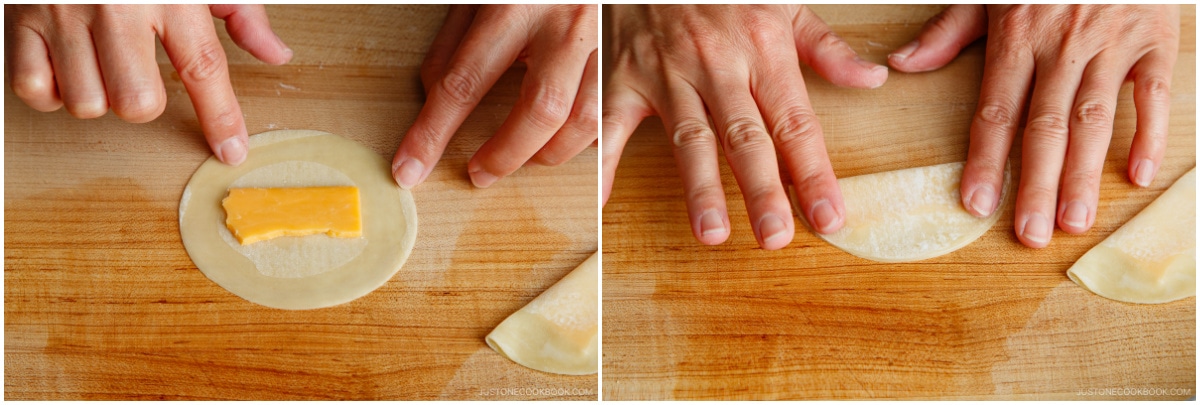
If you have any leftover gyoza wrappers, don’t throw them away. I love using the leftover wrappers for crispy cheese wraps. Fill the wrappers with some sliced cheese, cream cheese, or brie cheese, fold them into half and pan-fry or deep fry them. You can make these with wonton wrappers or gyoza wrappers.
The golden parcels with hot, gooey melty cheese make an easy and yummy appetizer that goes well with beer!
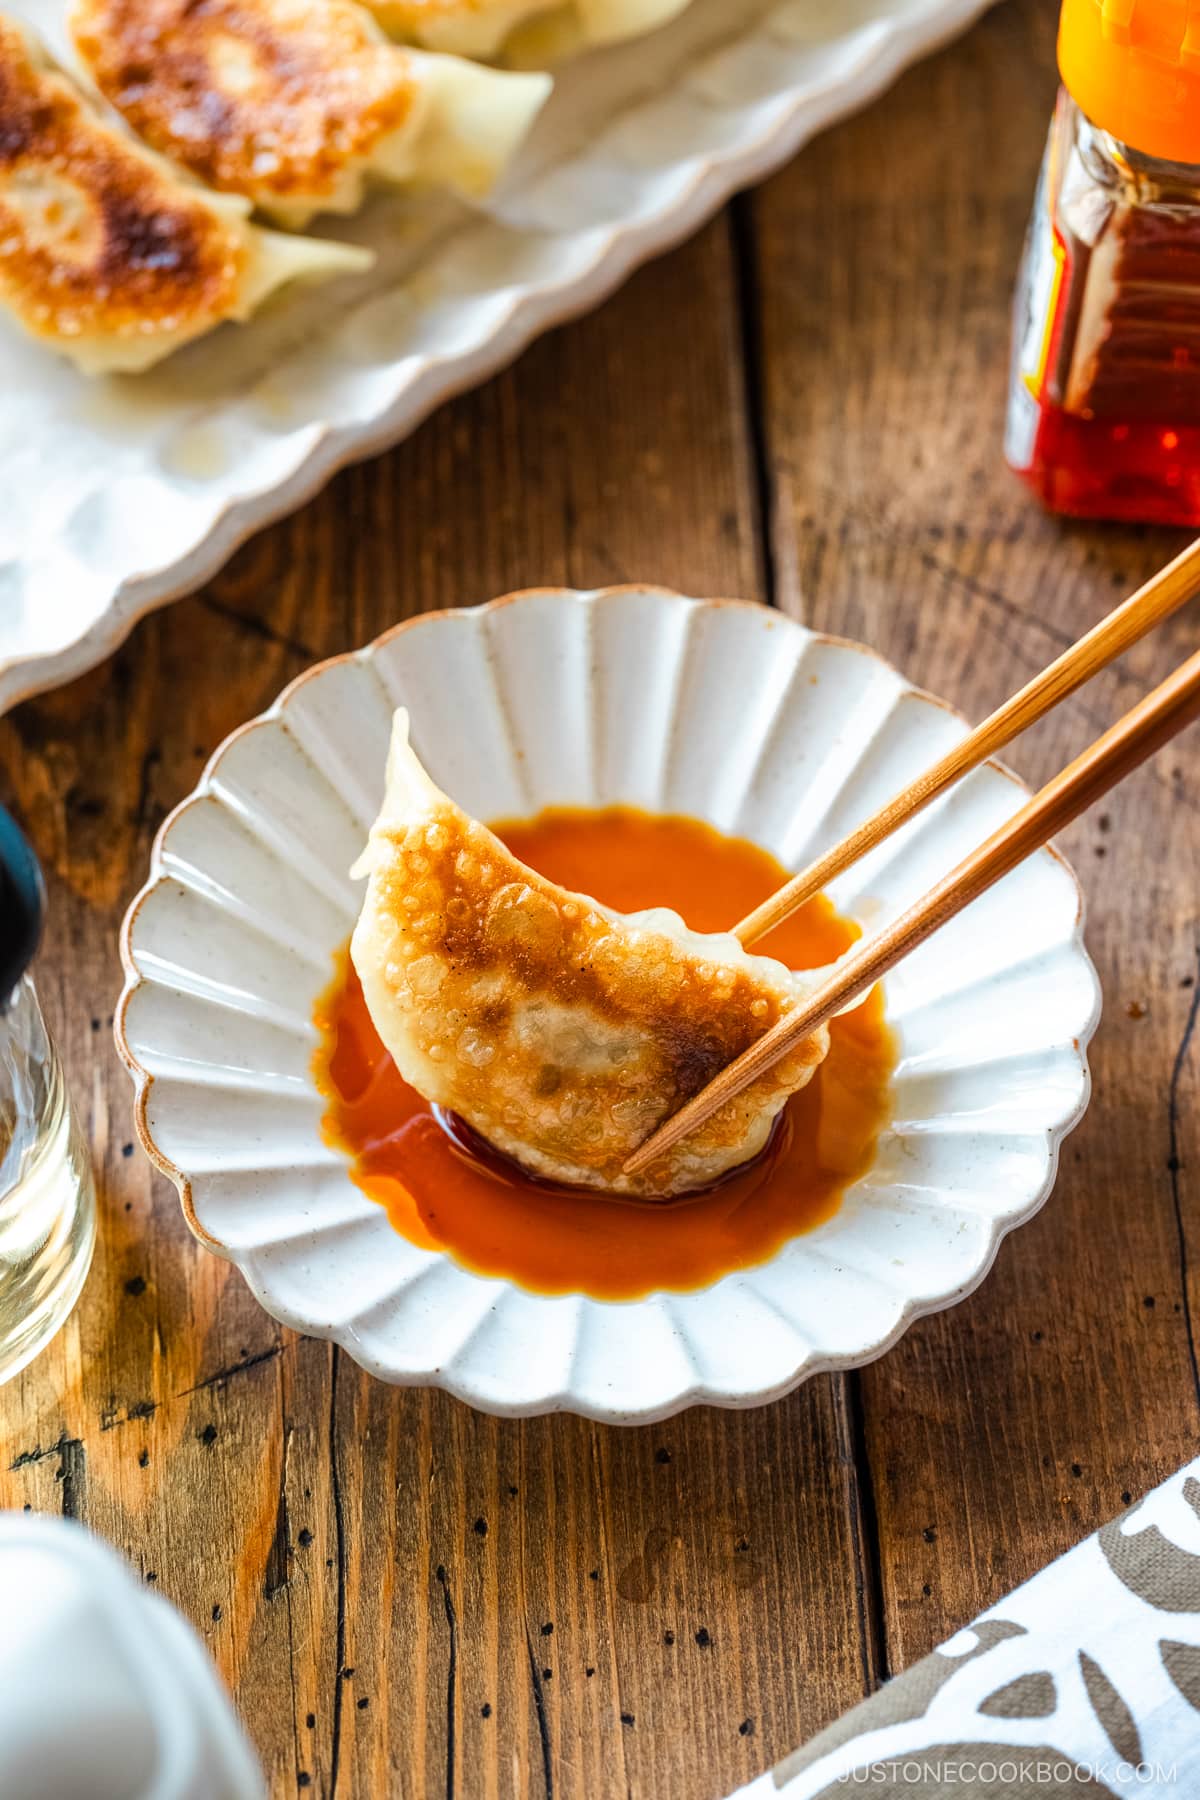
Serve Gyoza with Dipping Sauce
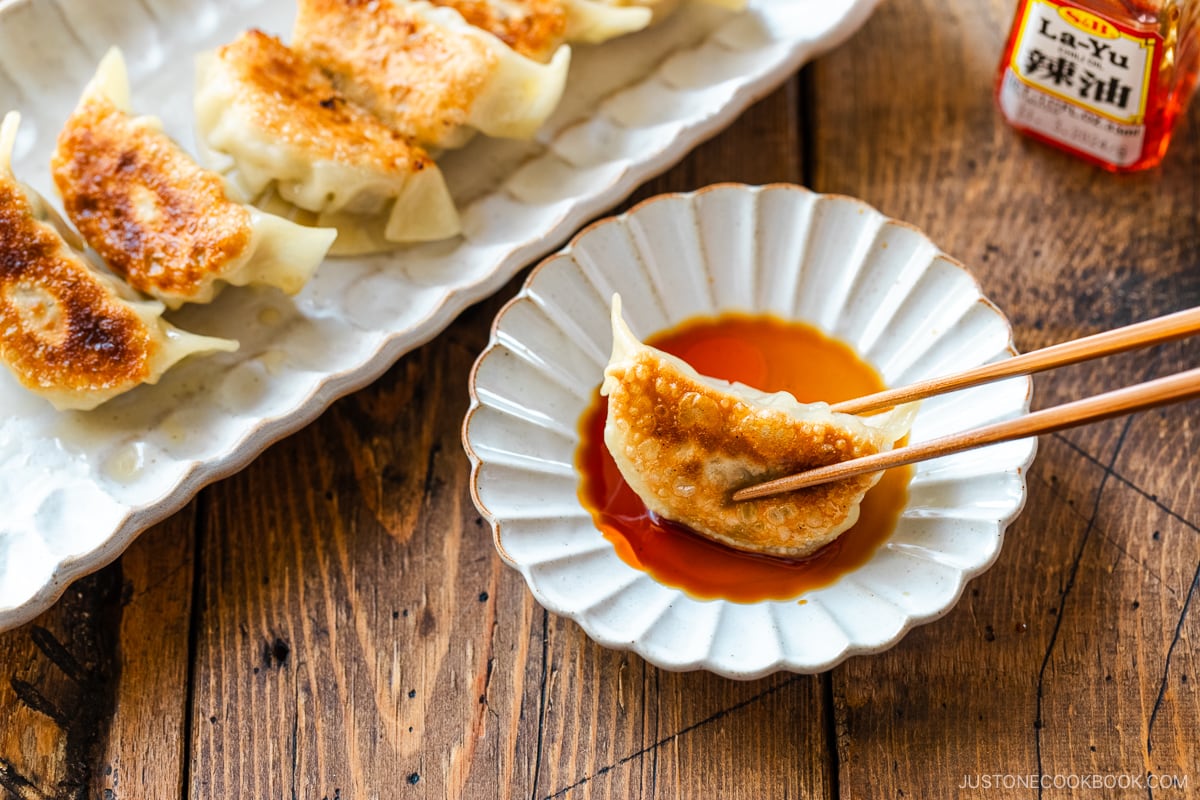
Often served in a group of six or eight, Japanese enjoy gyoza as a snack and a main meal alone. They come in carbs, vegetables, and protein in one parcel. Gyoza is best when enjoyed with a simple dipping sauce of soy sauce, rice vinegar, and a bit of la-yu (Japanese chili oil) (you can make your own).
It may look difficult to make Gyoza at home, but the method is fairly simple once you know how to prepare them. Part of the fun of making homemade gyoza is the process and the opportunity for creativity.
You can experiment with different ingredients for the filling based on your preference. Gyoza also taste better when you can involve family or friends in making them together, making it an enjoyable activity.
More Dumpling Recipes You’ll Love
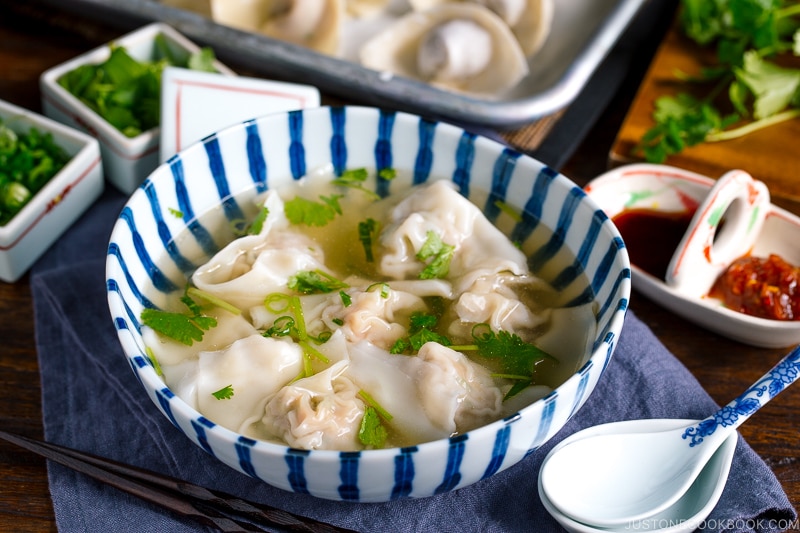
- Shrimp & Pork Wonton Soup
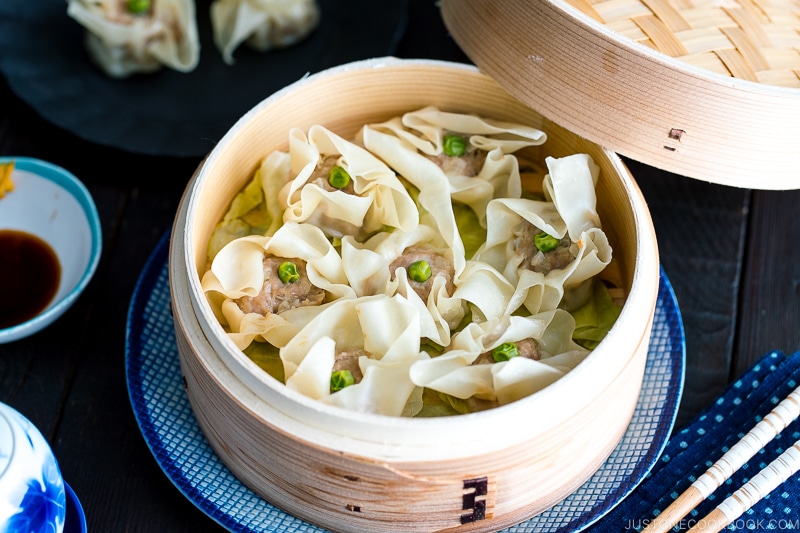
- Shumai (Steamed Pork Dumplings)
- Gyoza with Wings (Hanetsuki Gyoza)
- Chicken Shiso Gyoza with Yuzu Kosho & Ponzu Sauce
Wish to learn more about Japanese cooking? Sign up for our free newsletter to receive cooking tips & recipe updates! And stay in touch with me on Facebook, Pinterest, YouTube, and Instagram.
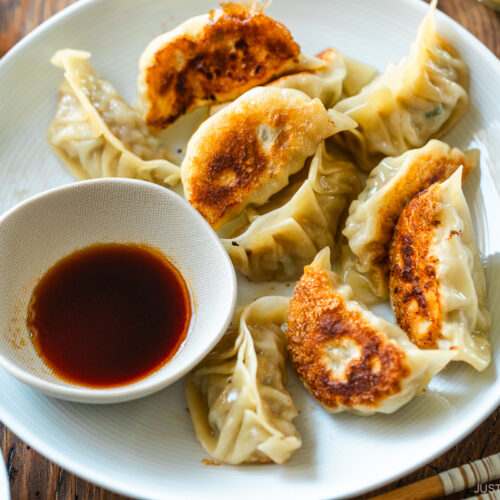
Gyoza (Japanese Potstickers)
Ingredients
For the Filling
- ¾ lb green cabbage (¼ large head)
- 1 tsp Diamond Crystal kosher salt (for salting the cabbage)
- 2 green onions/scallions
- 2 shiitake mushrooms
- 2 cloves garlic
- 1 tsp ginger (grated, with juice; from a 1-inch, 2.5-cm knob)
- ½ lb ground pork
For the Seasonings
- 2 tsp sake (to remove the pork‘s gamey taste; optional)
- 2 tsp toasted sesame oil
- 2 tsp soy sauce
- ⅛ tsp freshly ground black pepper
For Folding the Gyoza
- 1 package gyoza wrappers (52 sheets per 10-oz/284-g package; or make my homemade Gyoza Wrappers)
- water (to fold and seal the wrappers)
For Frying Each Batch
- 1 Tbsp neutral oil
- 4 Tbsp water
- 1 tsp toasted sesame oil
For the Dipping Sauce
- rice vinegar (unseasoned) (1 Tbsp per serving)
- soy sauce (1 Tbsp per serving)
- la-yu (Japanese chili oil) (⅛ tsp per serving; optional; Japanese chili oil is not too spicy; or make my Homemade La-yu)
Instructions
- Gather all the ingredients.

To Make the Filling
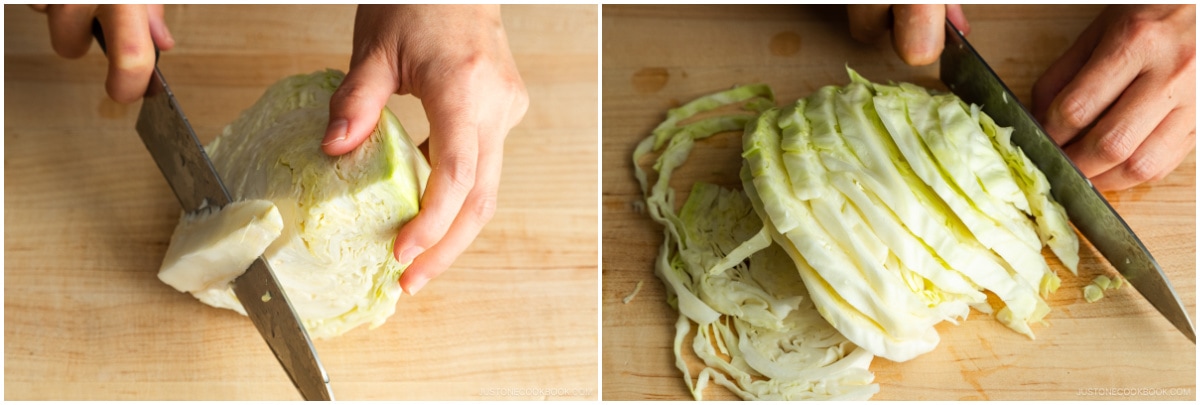
- Discard the thick core of ¾ lb green cabbage and cut it into thin strips about ⅓-inch (1 cm) wide.

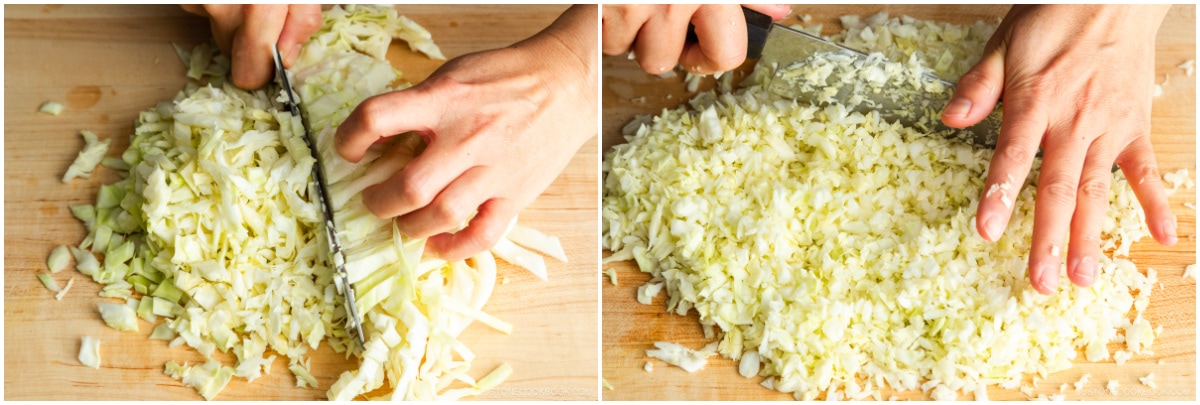
- Finely chop the strips crosswise into very small pieces, especially the thick white parts of the leaves. Then, run your knife through the cabbage to mince it finer.
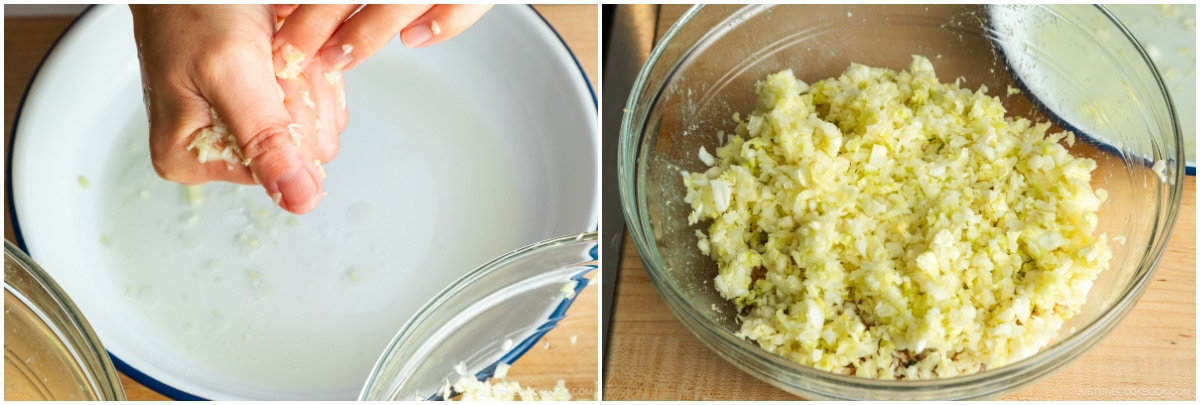
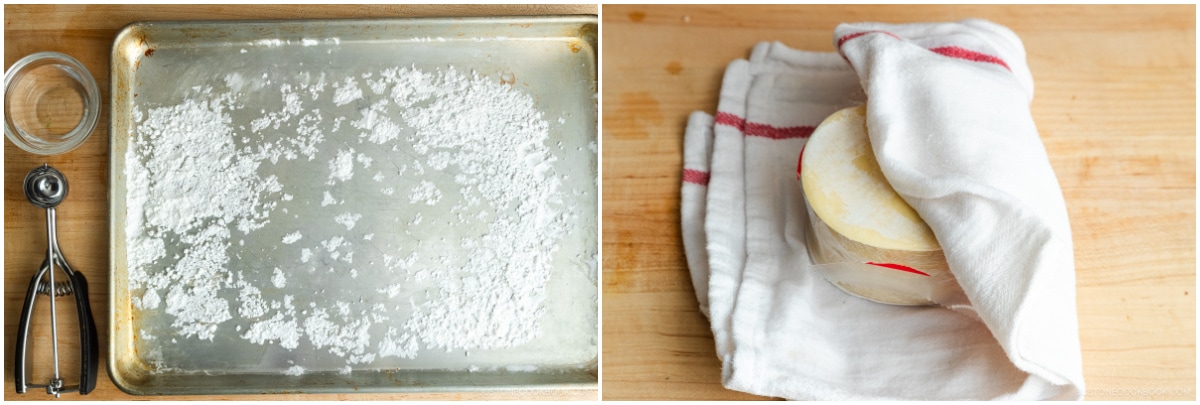
- Sprinkle the minced cabbage with 1 tsp Diamond Crystal kosher salt and massage together with your hands. Transfer it to a bowl and set aside until the cabbage is wilted. Tip: Alternatively, you can blanch or microwave the cabbage for a minute or two to soften the thick and hard leaves. Or, you can skip wilting altogether.
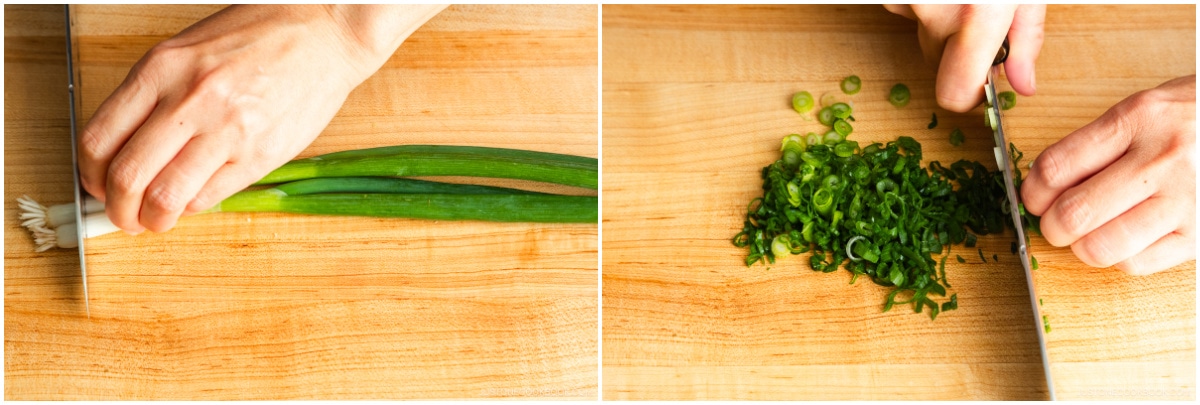
- Mince 2 green onions/scallions into small pieces.
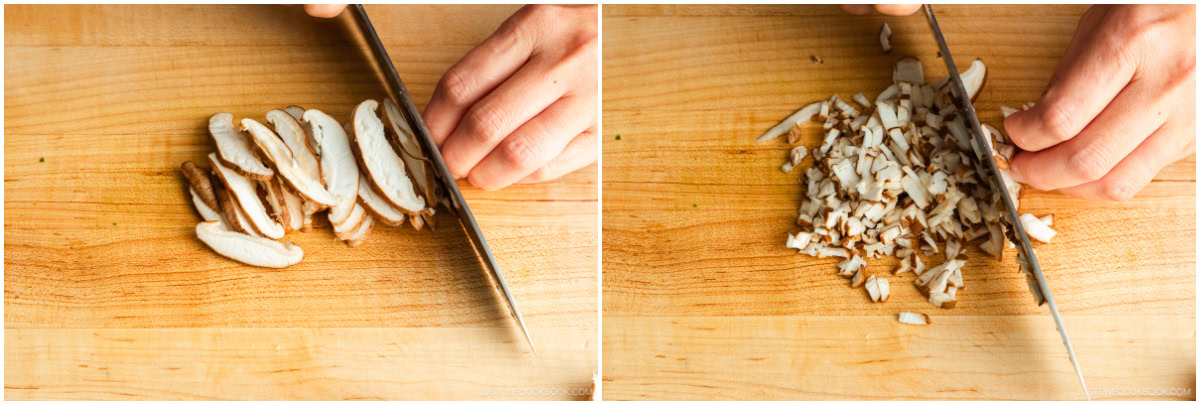
- Remove the stems from 2 shiitake mushrooms and mince the caps into small pieces.
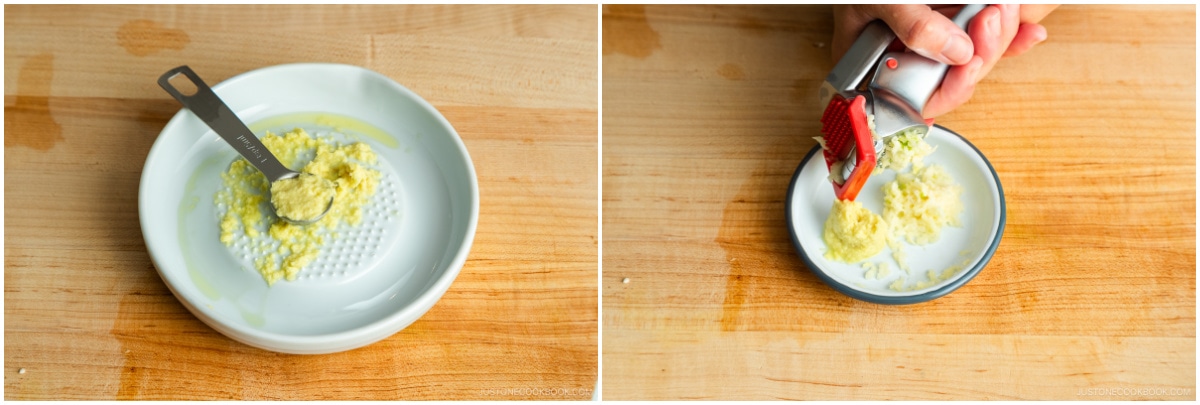
- Grate the ginger with a ceramic grater and add 1 tsp ginger (grated, with juice) to a small plate. Mince or press 2 cloves garlic (I use a garlic press) and add to the plate.
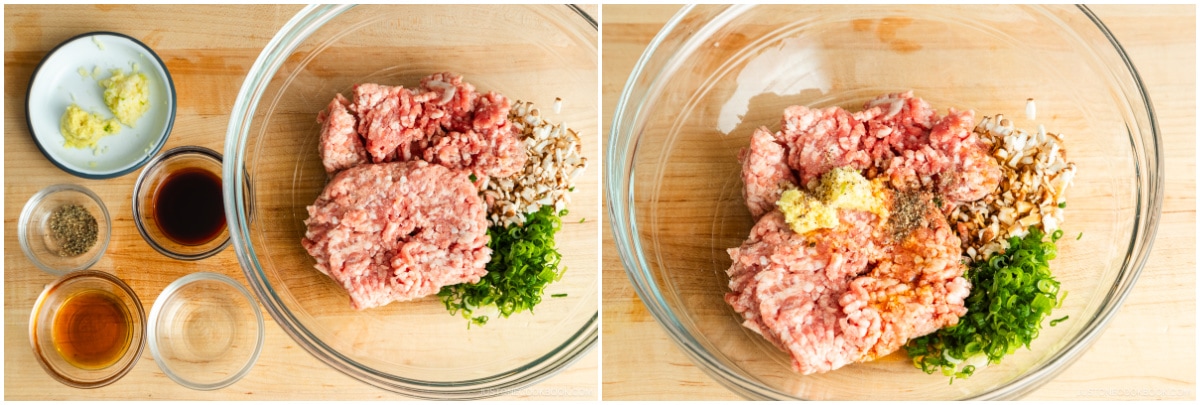
- Combine the green onions, shiitake mushrooms, and ½ lb ground pork in a large bowl. Now, add the seasonings: 2 tsp sake, 2 tsp toasted sesame oil, 2 tsp soy sauce, and ⅛ tsp freshly ground black pepper.
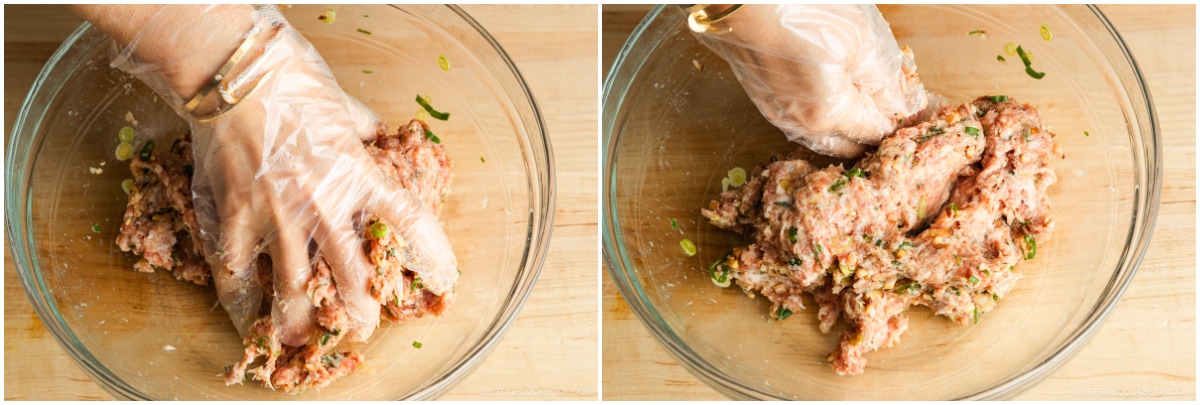
- Mix well and knead the mixture with your hand (I wear plastic disposable gloves) until it becomes sticky and pale in color.
- Next, squeeze the water out from the salted cabbage and add to the meat mixture.
- Knead the mixture again with your hand to evenly distribute the cabbage into the meat.

To Fold the Gyoza
- Prepare a small bowl of water and a baking sheet either lined with parchment paper or dusted with 2 Tbsp potato starch (or cornstarch). Open 1 package gyoza wrappers and cover them with a damp towel or plastic wrap at all times so they don‘t dry out.
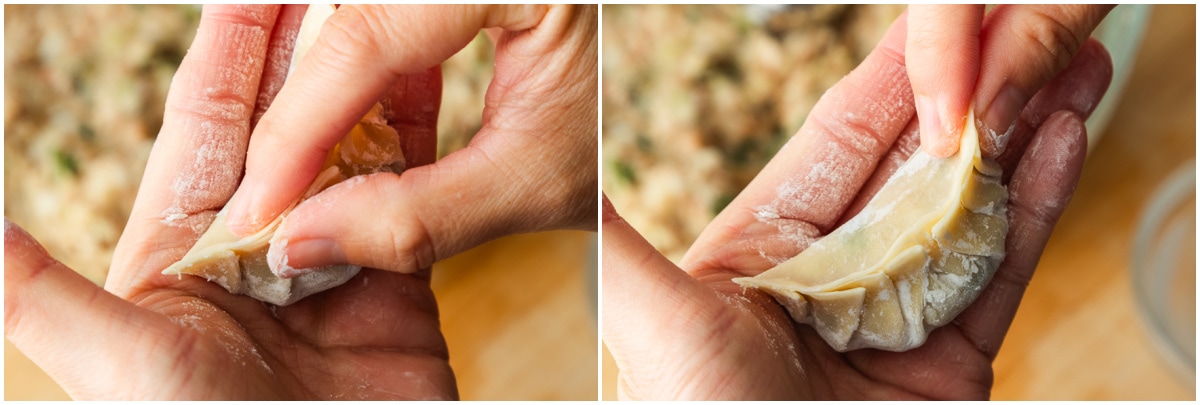
- Place one wrapper in the palm of your non-dominant hand (left hand for me). Use a 1 Tbsp cookie scoop to place a small amount of filling in the center of the wrapper. Do not overstuff. (If you‘re new to gyoza making, use a scant 1 Tbsp of filling.) Flatten it with the scooper bowl, making sure to press out any air pockets in the filling.
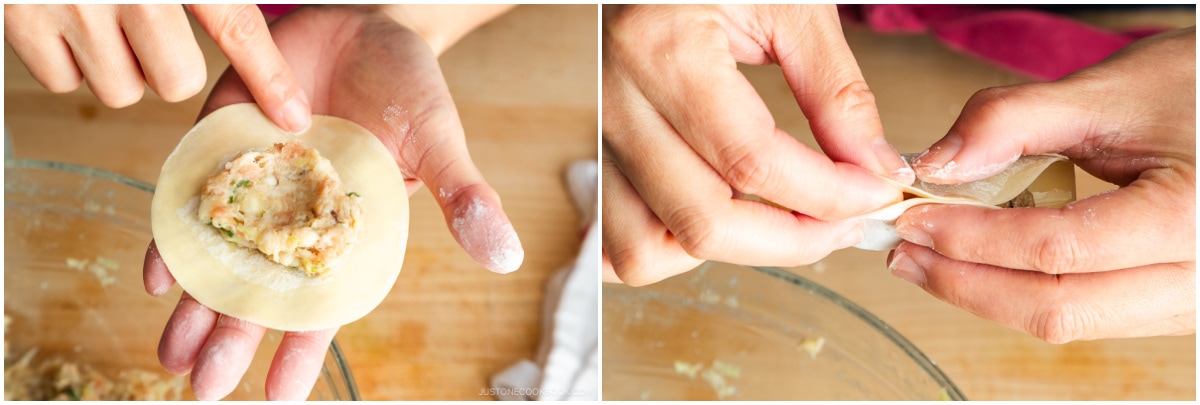
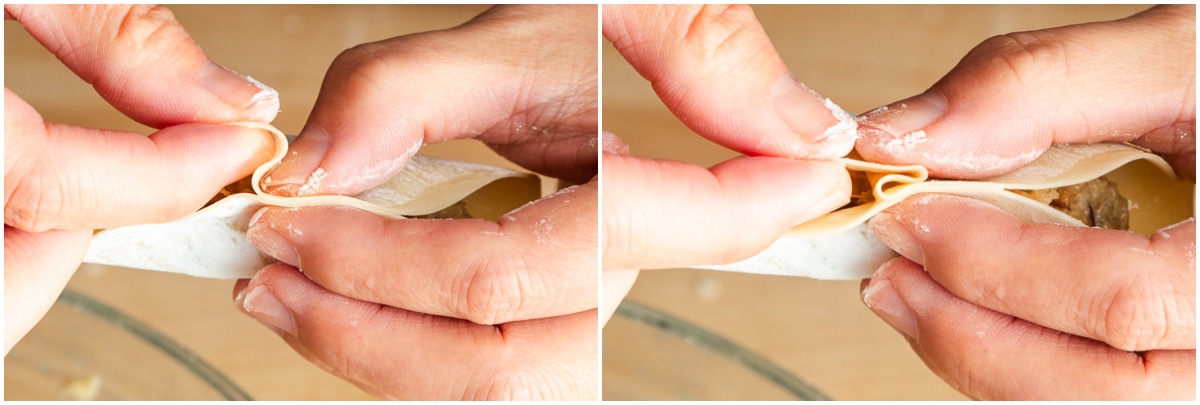
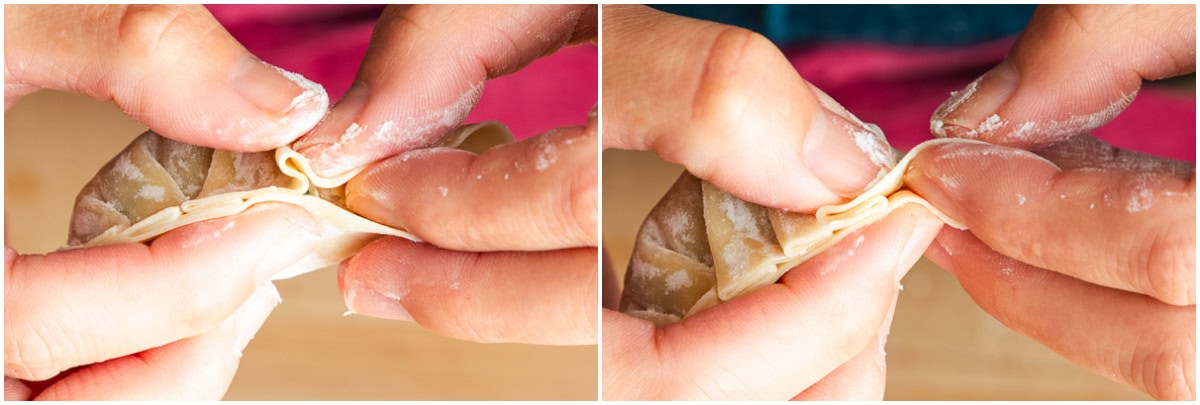
- Dip one finger in the water and use it to moisten a circle around the outer ¼ inch (6 mm) of the wrapper. Fold the wrapper in half over the filling. Pinch the wrapper together at the top center of the half circle, but don’t seal it yet.
- This recipe shares the folding method with the pleats leaning toward the center. If you want the pleats leaning toward one side, check out my How to Fold Gyoza post.

- Start on the right side near the top center. To make the first pleat, use your right thumb and index finger to fold the wrapper‘s top half into a pleat that leans toward the center. Use your left thumb and index finger to press the folded pleat tightly against the back half of the wrapper.
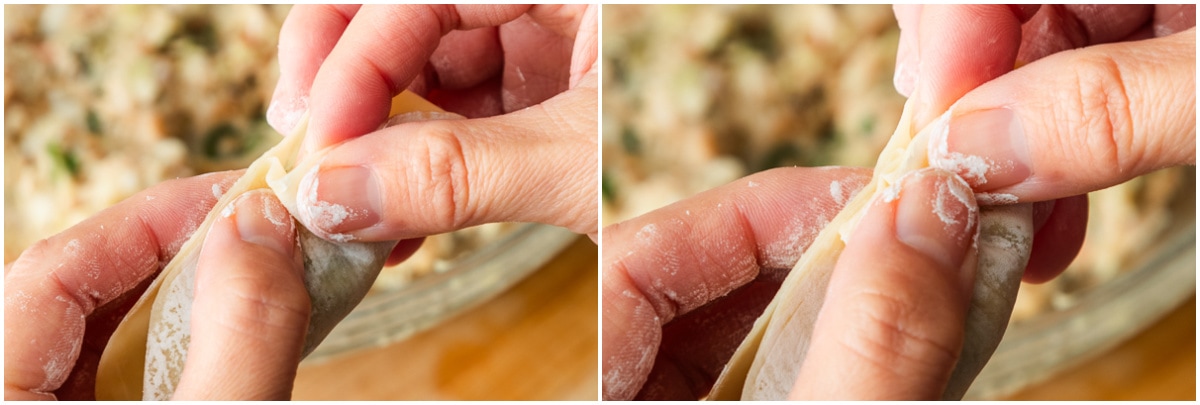
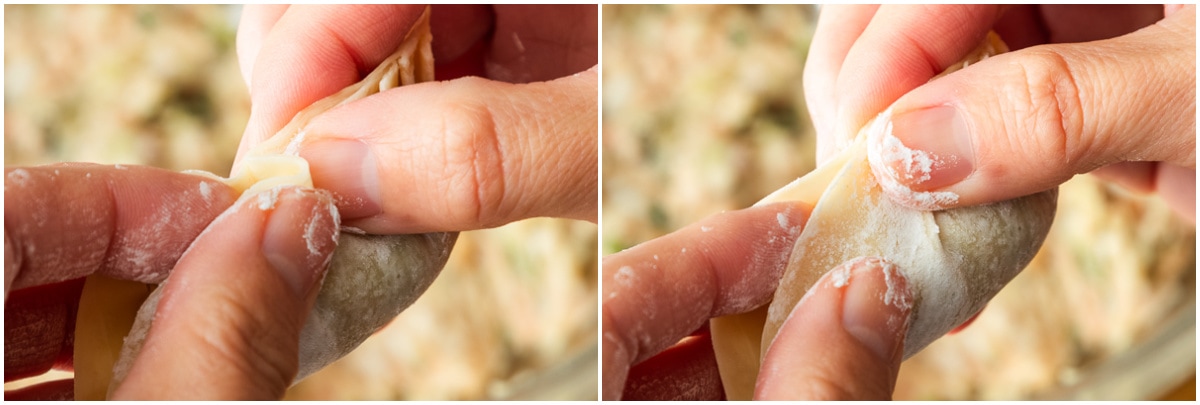
- Here is what it looks like from the front.
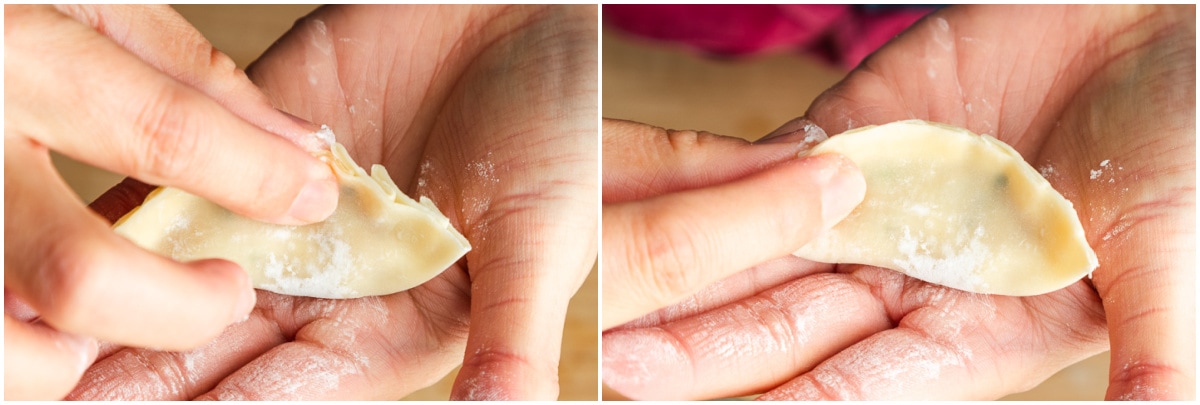
- Repeat folding along the right side about once every ¼ inch (6 mm), making 3–4 pleats total.
- Here what it looks like from the front.
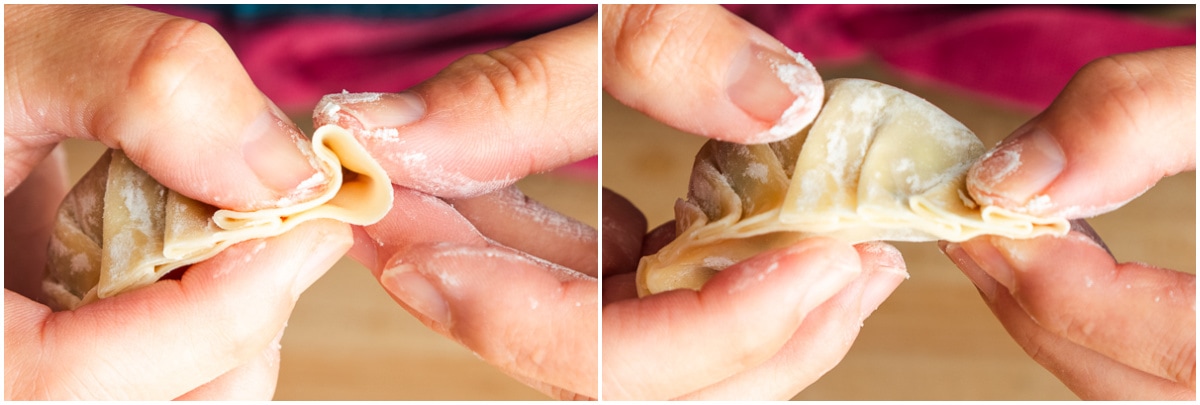
- Press down the pleats to seal any gap.
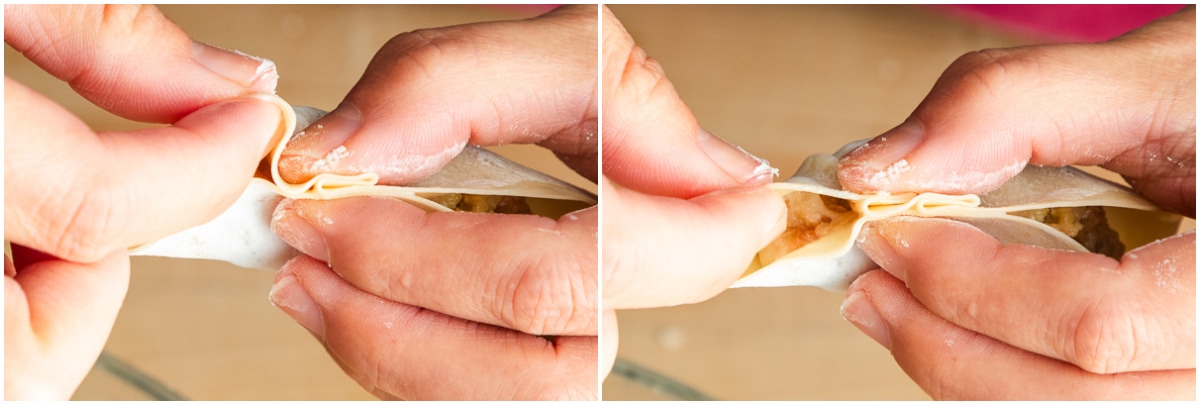
- Continue pleating the left side of the gyoza, starting near the top center. To make the first pleat, use your left thumb and index finger to fold the wrapper‘s top half into a pleat that leans toward the center. Use your right thumb and index finger to press the folded pleat tightly against the back half of the wrapper.
- Here is what it looks like from the front.
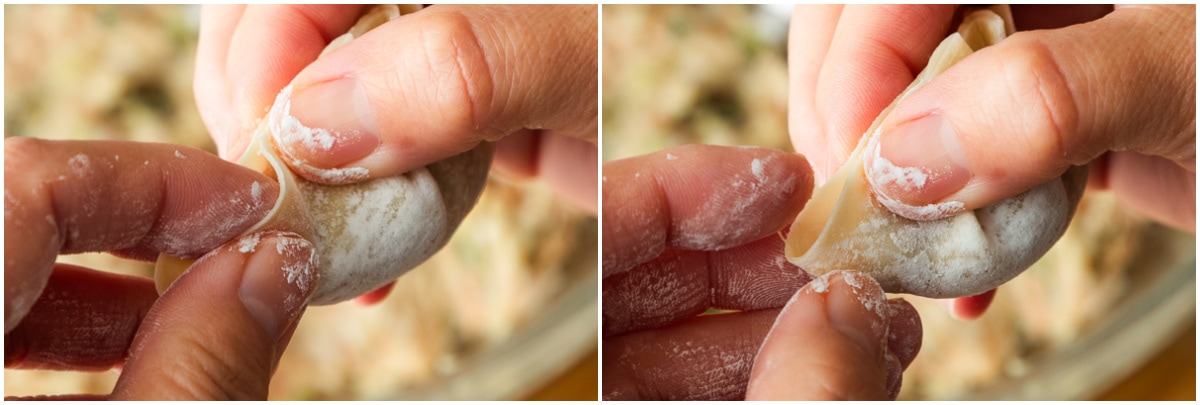
- Repeat folding along the left side about once every ¼ inch (6 mm), making 3–4 pleats total.
- Here is what it looks like from the front.
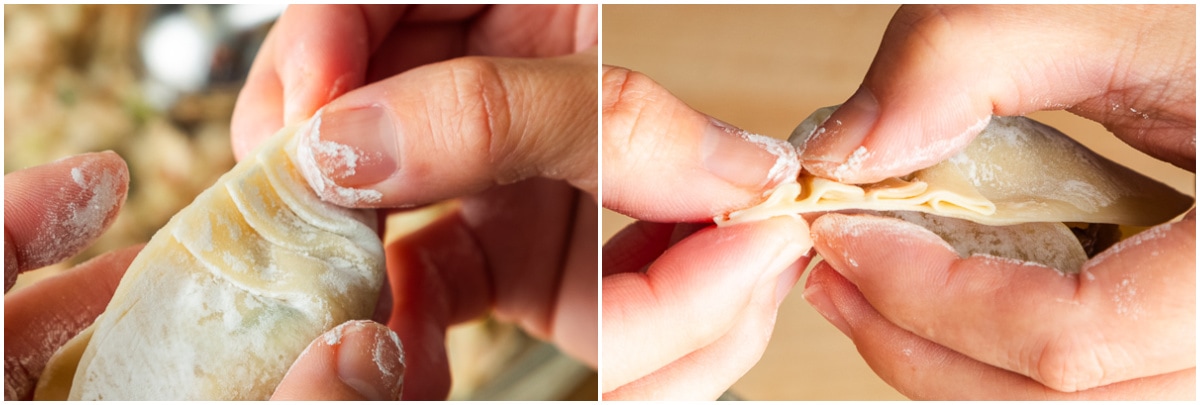
- Press the pleats one last time.
- Evenly distribute the filling and shape the gyoza to create a flat side on the bottom.
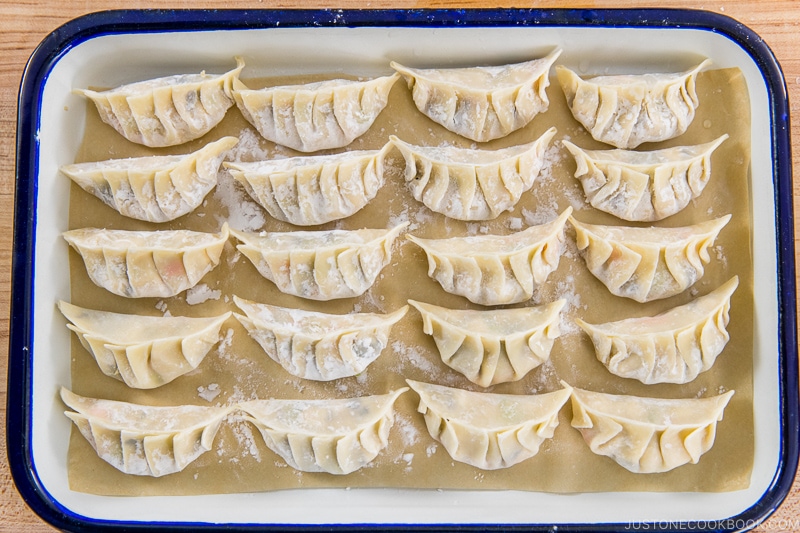
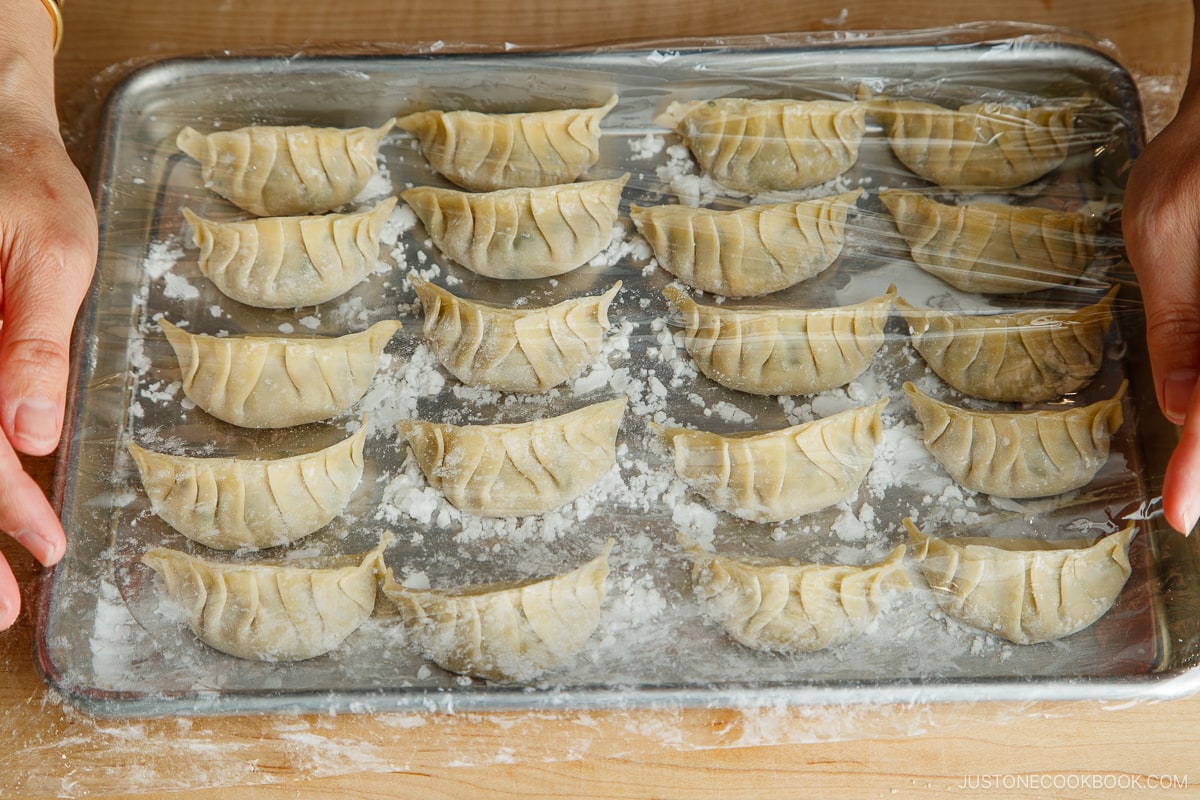
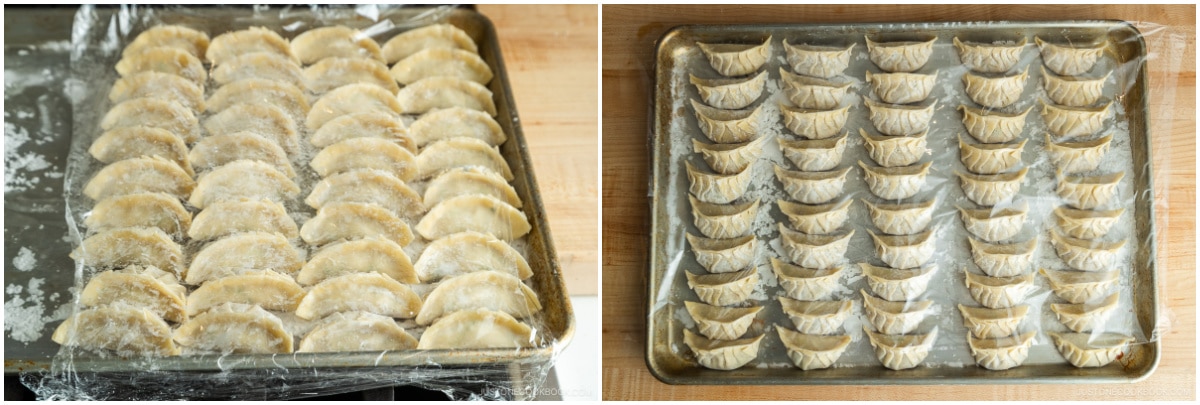
- Place your finished gyoza on the baking sheet and cover with plastic wrap to avoid drying. Repeat to fold the remaining wrappers.

To Freeze Uncooked (optional)
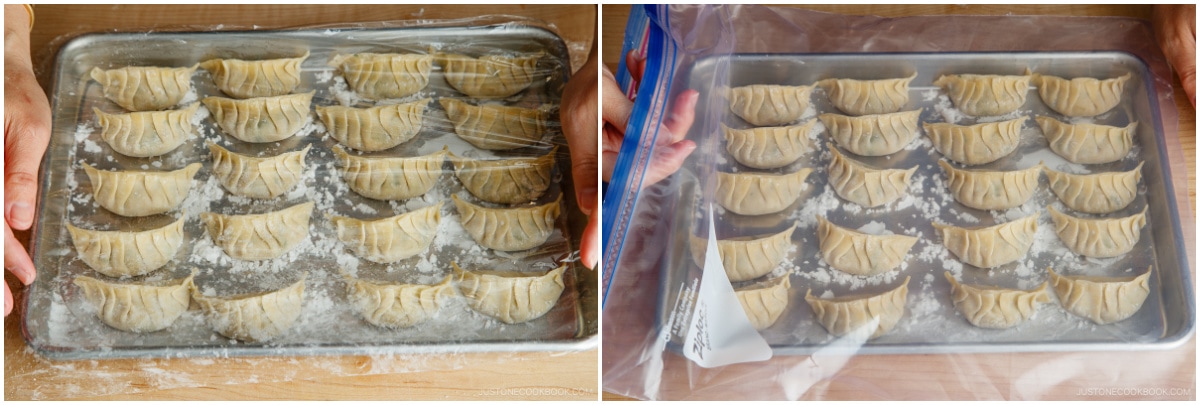
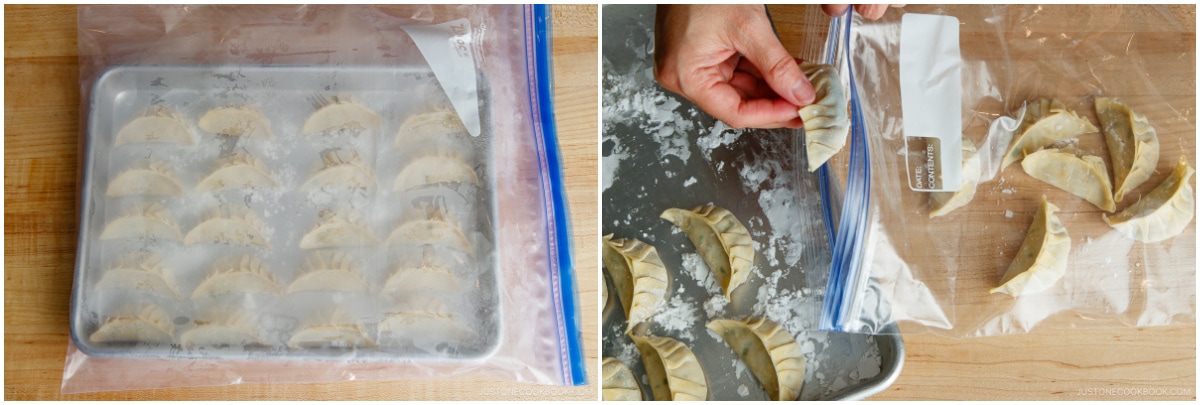
- If you want to store uncooked gyoza to cook later (optional), now is the time to freeze them. Before the filling starts to release moisture and make the wrappers soggy, lay out the gyoza on a sheet pan or plate in a single layer so they‘re not touching. Then, cover with plastic wrap or a large resealable bag. Place the sheet pan in the freezer to flash freeze the gyoza until solid (or at least frozen on the outside).
- Once the gyoza are solid, pack them in an airtight bag to freeze. Because you flash froze them, the gyoza won’t stick to each other in the bag. Store the gyoza in the freezer for up to a month. When you’re ready to cook them, place the frozen gyoza directly in your frying pan. Follow the regular cooking instructions below, but steam them for an extra 1–2 minutes.
To Cook the Fresh Gyoza
- Cook the gyoza in batches. First, dust off any potato starch from the gyoza bottoms using a pastry brush.
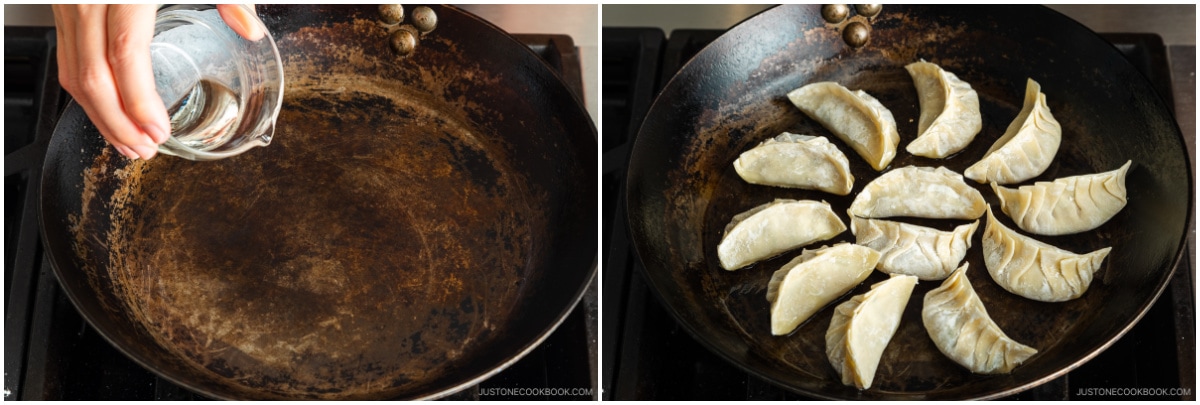
- Heat a large nonstick or carbon steel frying pan over medium heat (I use an 11" carbon steel pan). When the pan is hot, add 1 Tbsp neutral oil. When the oil is hot, place the gyoza in the pan, flat side down. Arrange them in a single layer in a circular pattern, and leave space between each piece so they don‘t touch.
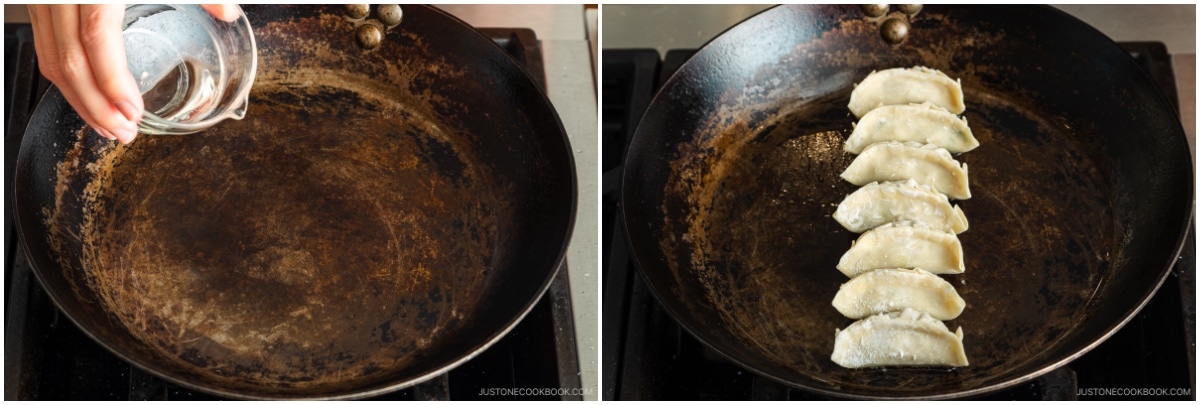
- Alternatively, you can arrange them in one or two rows. Leave space between each piece so they don‘t touch each other.
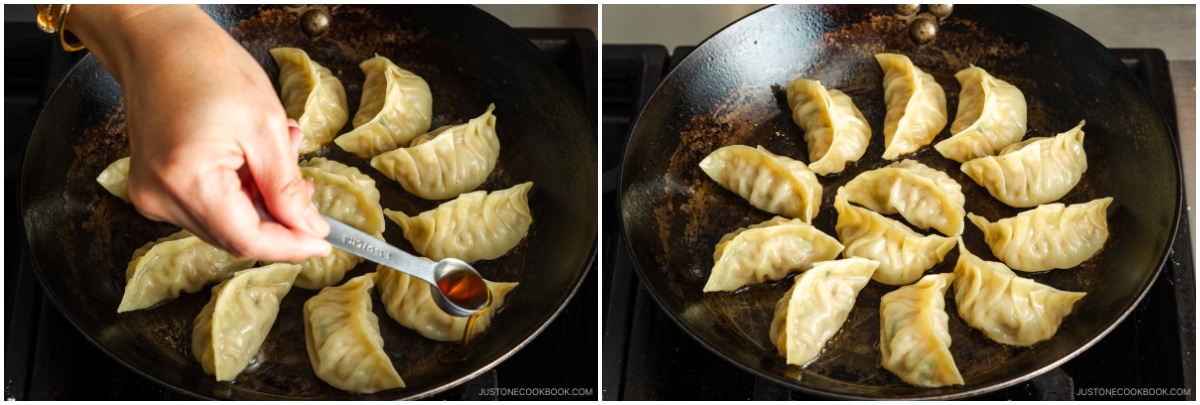
- Cook until the bottom of the gyoza turns golden brown, about 3 minutes. Then, add 4 Tbsp water to the pan and immediately cover with a lid.
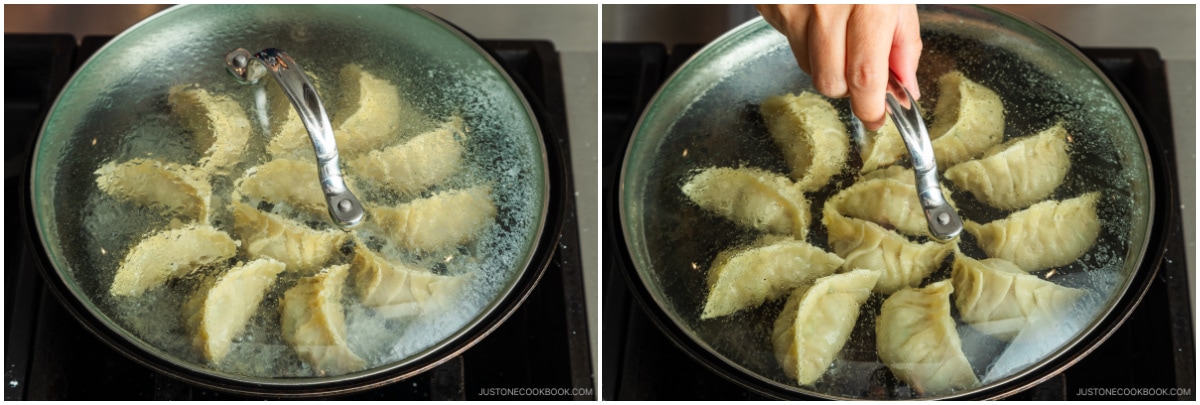
- Steam the gyoza for about 3 minutes or until most of the water evaporates. Tip: If you‘re cooking frozen gyoza, steam them for an extra 1–2 minutes.
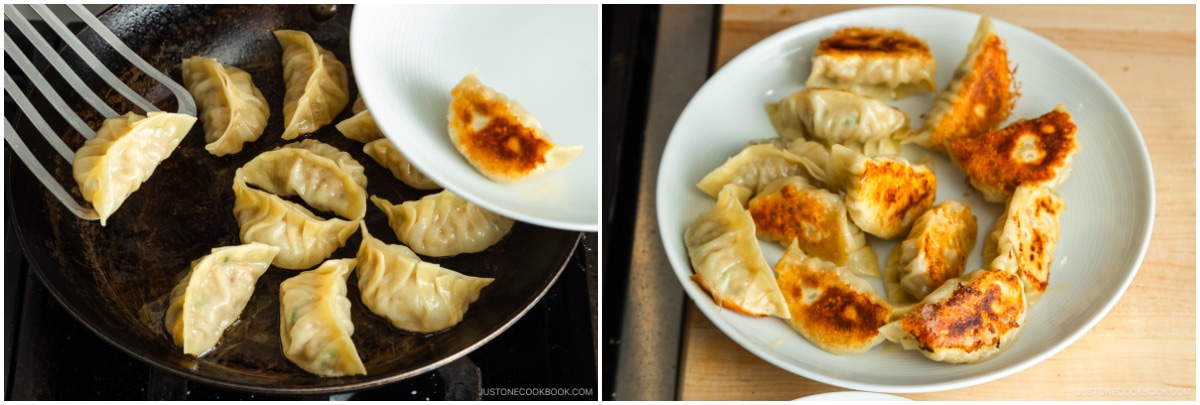
- Remove the lid to evaporate any remaining water. Drizzle 1 tsp toasted sesame oil around the gyoza in the frying pan. Cook, uncovered, until the gyoza is browned and crisp on the bottom.
- Remove to a plate. Repeat the process to cook the other batches.


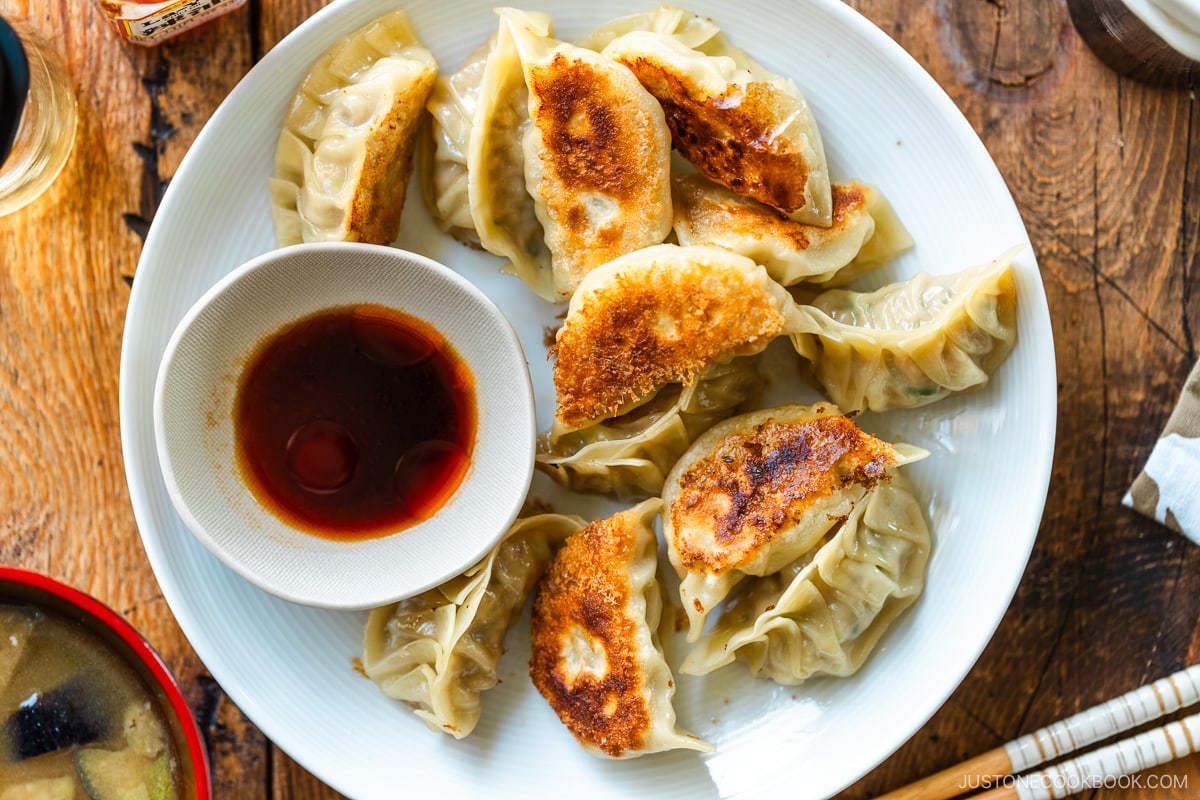
To Serve
- Transfer to a serving plate and serve with individual bowls of dipping sauce on the side. For each individual serving, combine 1 Tbsp rice vinegar (unseasoned), 1 Tbsp soy sauce, and the optional ⅛ tsp la-yu (Japanese chili oil) in a small dipping bowl and mix together. Enjoy!
To Store
- Leftover cooked gyoza: Cool, transfer to an airtight container, and store in the refrigerator for up to 3 days or in the freezer for a month.
- Leftover filling: Make mini meatballs or patties and cook them in a frying pan. Once they are pan-fried, you can cool them, pack in an airtight container, and store in refrigerator or freezer for later use.
- Leftover wrappers: You can fill each wrapper with sliced cheese, fold in half, and press to seal. Pan-fry until golden on both sides. They are a favorite with kids!
Nutrition
Editor’s Note: The post was originally published on Feb 9, 2011. It was updated with new step-by-step and final images and the slightly revised recipe on April 13, 2024.


Thank you. I love your gyoza video. Would you please tell me what kind of non stick pan with glass cover you are using? I’d appreciate it so much. I would love to get the same one !! I am sure you are busy but I did look at you reoommended equipment and it is not on that page. THANK YOU so much,
Michael
Hi Michael!
Thank you so much for your kind words.
It’s an all-clad non-stick pan https://www.amazon.com/dp/B00005AL46/?ref=exp_justonecookbook_dp_vv_d
and Nami likes to see the inside of the pan, so she uses a glass lid from a Calphalon pot (She doesn’t have the pot anymore but still keep the lid).😁
Hi Nami! Thank you very much for this great recipe (as well as the one for the gyoza wrappers). We’ve put your recipe to good use three times so far! It’s been great and getting better with practice. Also it’s kind of fun. 🙂 You’ve provided just enough detail here. My gyozas don’t yet taste like those from my favorite places in Tokyo but you’ve given me a great head start.
Do not forget to vote!
Hi Andrew!
Thank you very much for trying many of Nami’s recipes and for your kind feedback!
We are so happy to hear you enjoyed making homemade Goza everything from scratch! We are sure you will get better and better at making Goza!☺️
Flavorful, tender and delicious! These are so much better than the storebought version. I used ground chicken instead of pork. I also made the vegetable ones, which were a bit harder to keep together but still quite tasty. The dipping sauce is simple but amazing. We had them with rice and miso soup for a complete meal. Thanks for the great recipe.
Hi Holly,
Thank you very much for trying this recipe and for your kind feedback!
We are so glad to hear you made a complete Japanese meal and enjoyed the Homemade Gyoza!
Thank you for sharing your cooking experience with us.☺️
These were absolutely lovely and I really enjoyed the addition of shitake that added another extra dimension. Thank you so much. I have cooked many of your recipes in the last weeks and have loved each one.
Hi Afra,
Thank you so much for trying many of Nami’s recipes and for your kind feedback.
We’re so glad to hear you love them! 😊
Excellent recipe! I used ground pork and did not do the optional cabbage prep step. Worth the effort since they’re so much better than the frozen ones from the store!
Hi Melissa,
Thank you for trying this recipe and for your kind feedback.
We’re so glad to hear you enjoyed the homemade Gyoza!😊
I love this recipe and I was wondering if you can just steam them and if so how
Hi Samantha,
Thank you so much for trying this recipe and for your kind feedback. We’re glad to hear you enjoyed Gyoza!
As for steaming the Gyoza, Yes, you can. You may follow the instruction for the Shumai recipe. (from step 16) https://www.justonecookbook.com/shumai/
I hope this is helpful! ☺️
This recipe is amazing! I’ve done it several times already and it works so well! It’s really easy to make and so delicious!!! Thank you so much!! 🙂
Hi Andreia! Thank you so much for trying this recipe many times and for your kind feedback. I’m so glad you enjoyed it. 🙂
Love these gyoza. I’ve made them twice now and cannot wait to share this recipe with my family.
Hi Laura! Thank you so much for your kind feedback! Making twice already! 😀 Hope your family will enjoy it too 🙂
I will try these using vegan meat substitute. Thanx for the recipe these look good.
Hi Yolanda! Here’s my vegan-friendly version: https://www.justonecookbook.com/vegetable-gyoza/
Delicious, easy to make and a convenient dinner when made in advance and frozen. This recipe has becomae a staple for me, especially on nights or weekends when I just don’t have anything handy. I sometime substitute ground pork for ground turkey and its also super delicious!
Hi Jessica! Yay! I’m so happy to hear you enjoy this recipe and thank you for your kind feedback! 🙂
do you have to use the Sake when make them
Hi Elinnie! Typically we use sake to remove the unwanted smell of the meat/pork. You can skip if you don’t consume alcohol.
Hello!
I cant wait to try this recipe! I was wondering what you would do to make these spicy?
Thanks!!
Hi Dazjah! Usually, we make it spicy for the dips, not for the filling. 🙂 In Japan, we add chili oil to the dipping sauce. 🙂
I’m so excited to try making these! We love ordering gyoza appetizer at our favorite sushi restaurant but I always feel so sad that they are gone so soon! 😁 So tonight, there’s going to be a whole meal of gyoza! Can’t wait.
Hope you enjoy the recipe, Yana!
I have my mother’s Gyoza recipe, which is very similar to yours, and I used your recipe and instructions to help me along. They turned out so good. Thank you for your website site…I love it!
Hi Vicky! Thank you so much for trying this recipe and I’m so glad you enjoyed it. Thank you for your kind feedback. xoxo
I made this for the first time and they were delicious, they filling was really tasty. I had a problem with the gyozas sticking to the pan after I boiled the water off, and they all fell apart after that so it was a mess to eat (lol). Next time I’m going to boil the gyozas before frying them and hope that will solve the problem. Thanks again for the recipe.
Hi Jess! Thanks so much for trying this recipe! First of all, your next plan “boil first and then fry” approach won’t work as the skin gets too soft. I have a few questions.
1) What kind of pan were you using? If you’re new to gyoza making, a non-stick pan is very easy to solve this issue. Lately, I switched to my carbon steel frying pan and it is pretty much non-stick surface after seasoning many times, and this works great. But I do not recommend using a cast-iron skillet etc to make gyoza. Either a non-stick or carbon steel pan that became non-stick.
2) How much water was it when you add to the pan? Do you think it was a bit too much? 1/4 cup is decent for my size of the pan.
3) This is very important. Once the water evaporate, and you add the sesame oil to the pan, the gyoza skin starts to detach from the pan (if you use the right pan). This is the same for steak or chicken or shrimp etc when you sear them. First, it sticks to the pan. Then when the surface is nicely brown and became crust, it releases itself from the pan. You can’t touch it during this time. You have to patiently wait until the skin releases itself. When I use a non-stick pan, I don’t have this issue, but carbon steel pan is not like a non-stick pan, so I have to wait and believe that the skin will become crusty and release the pan. That’s the time you take away and you will have beautiful gyoza crust!
Hope this helps! I’ll be happy to help when you have further questions on this. 🙂