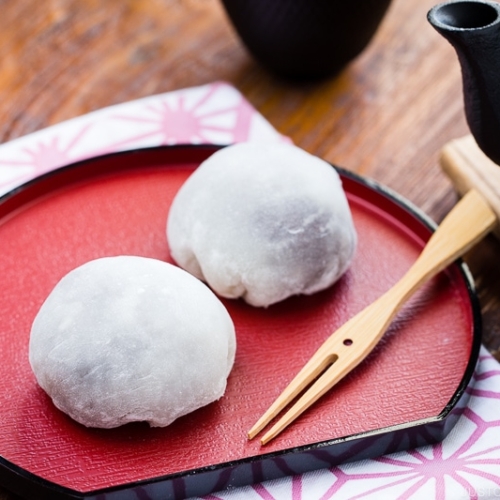
A popular Japanese sweet treat, Daifuku is a small, round mochi filled with sweet red bean paste. This easy recipe shows how you can make this delicious snack at home with a quick steam on the stovetop or in the microwave.
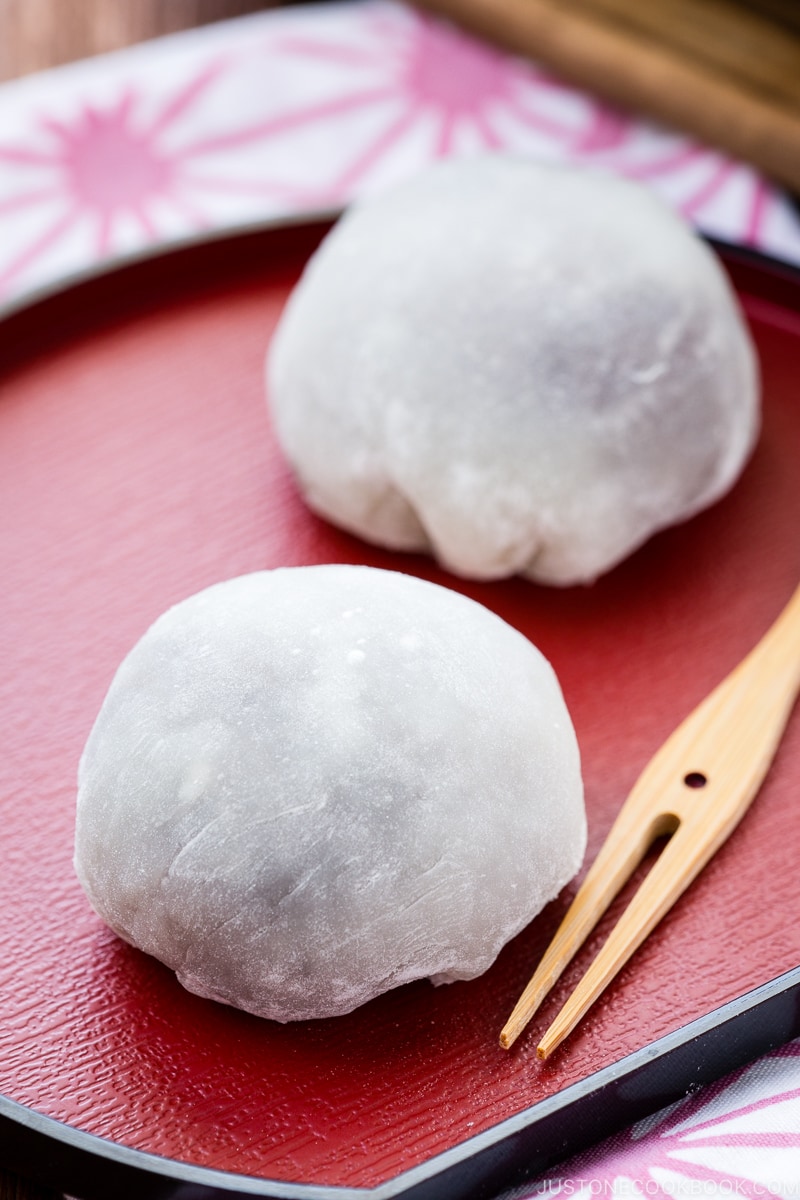
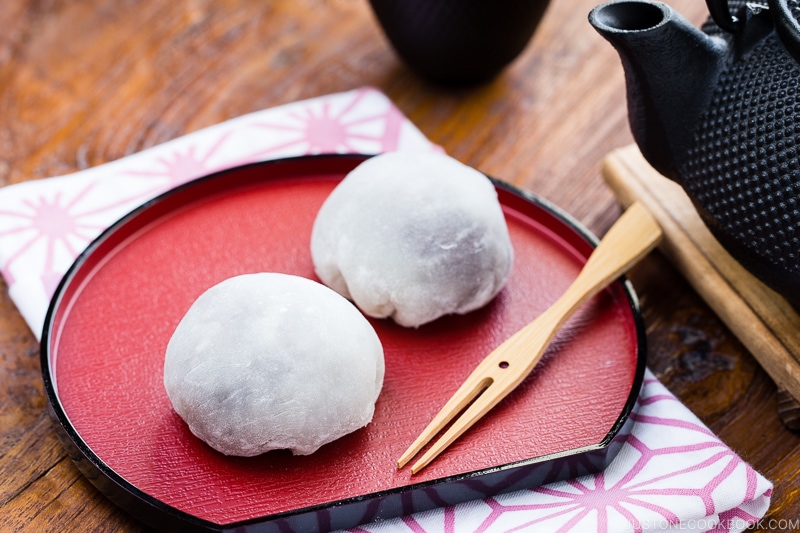
Daifuku (大福) or Daifuku Mochi (大福餅) is a small round mochi stuffed with anko (sweetened red bean paste) made from azuki beans. We usually enjoy this popular Japanese sweet with green tea.
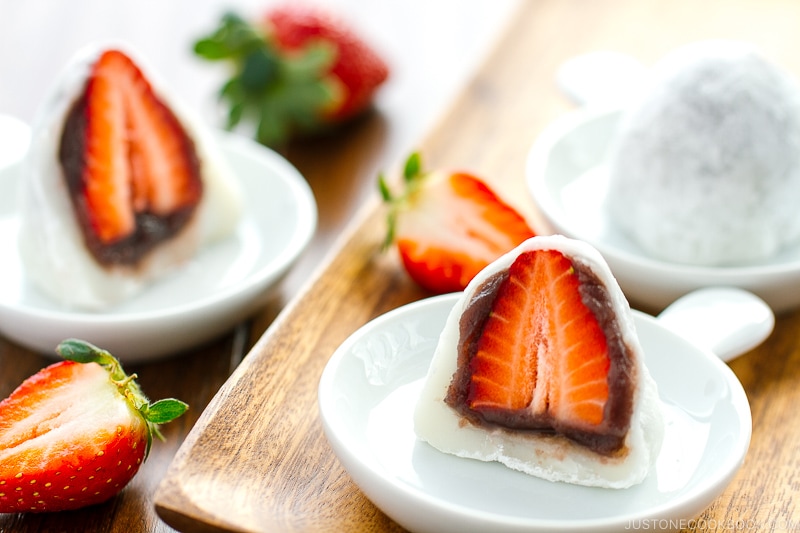
I’ve previously shared Strawberry Daifuku recipe on Just One Cookbook, which includes a whole strawberry inside a mochi surrounded by anko filling. While strawberry daifuku is seasonal and available during the springtime, daifuku is available all year round at Japanese confectionery shops and supermarkets. Here, I will show you how to make the classic daifuku mochi with 2 quick and easy methods— steaming and microwaving.
Table of contents
What is Daifuku
Among the wide variety of traditional Japanese sweets (wagashi), daifuku is considered a type of mochi sweet. The name daifuku literally means “great luck.” What a perfect name! Who wouldn’t get lucky after eating these adorably round, chewy and tasty sweets?!
In Japan, you’ll find all sorts of colors and fillings for daifuku. Some shops even sell daifuku the size of one’s palm instead of the usual golf ball size, which is 3-4 cm in diameter. You can also bake, grill, or eat daifuku in soups.
A Quick History
Daifuku was a later product from uzura mochi (mochi shaped like a quail) which was popular during the early Edo period (1603-1867). During the Meiji period (1868), salted red bean was a common filling as sugar was a luxury item at the time.
In 1875, it is said that a widow in Koishikawa, Edo (modern-day Tokyo), refashioned the sweets by making them in smaller sizes and added sugar to the red bean paste. It became known as habotai mochi (thick belly rice cake) because the rice cake resembled a well-fed belly. The name later changed to daifuku mochi (big belly rice cake), as fuku can mean both ‘belly’ and ‘luck’.
The new daifuku mochi was then given a new meaning by using “大福” the kanji (Chinese characters) for big luck. As a result, we often serve daifuku—known to bring good luck and fortune—during Japanese New Year and other spring celebrations.
How to Make Daifuku with Red Bean Filling
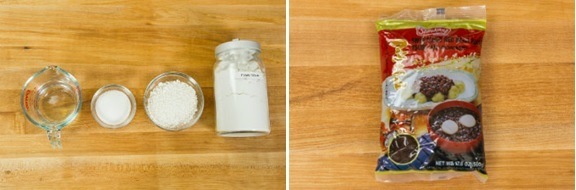
Ingredients You’ll Need
- Shiratamako (glutinous rice flour/sweet rice flour) OR mochiko – I personally prefer to use shiratamako as it yields a better texture compared to mochiko. However, I understand that mochiko is cheaper and widely accessible.
- Water
- Sugar
- Potato starch or cornstarch
- Sweet red bean paste (anko) – store-bought or homemade
Overview: Cooking Steps
- Prepare the sweet red bean paste if using homemade. You can prepare it in advance and freeze.
- Make the mochi mixture: Combine the rice flour, sugar, and water. Microwave or steam the mixture until it becomes translucent and cooked through.
- Spread and the mochi into a thin layer: Transfer the hot mochi onto a large baking sheet lined with parchment paper and dusted with potato starch. Use a rolling pin to roll out the mochi.
- Refrigerate for 15 minutes until the mochi is set.
- Cut the chilled mochi into 7-8 mochi wrapper circles.
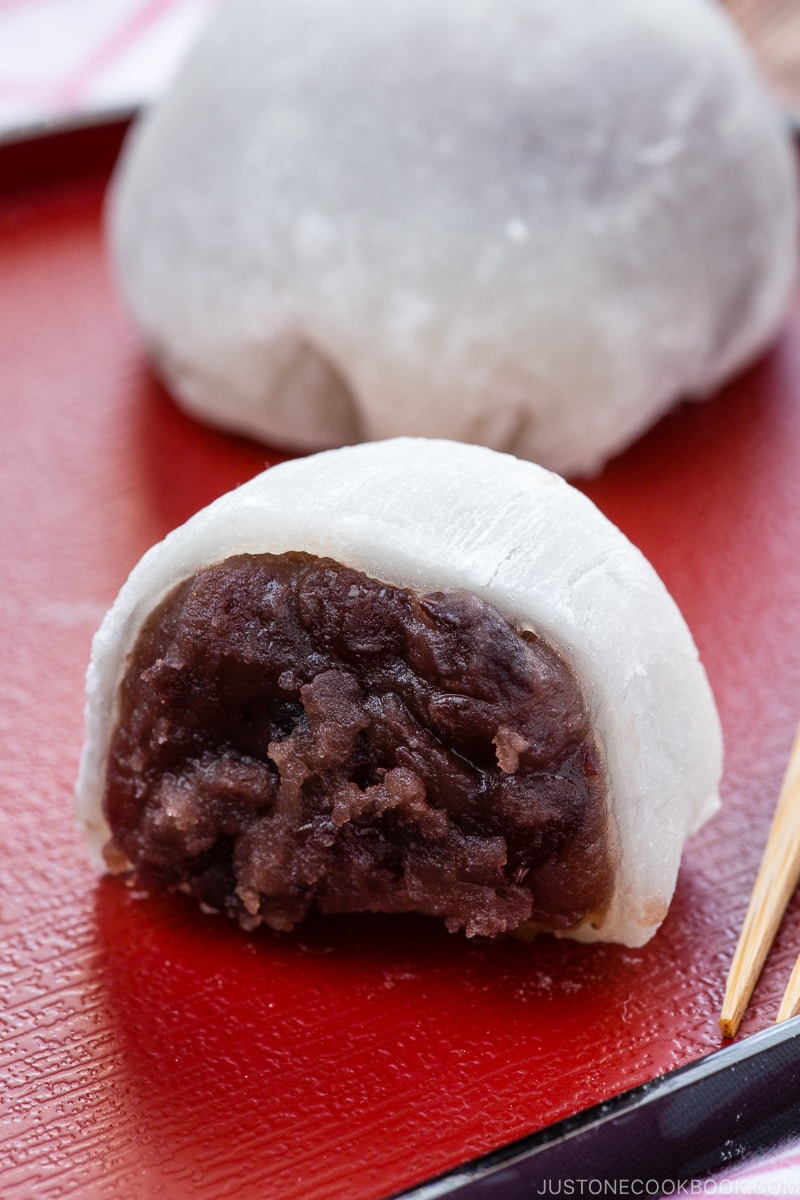
- Stuff the anko filling: Wrap the sweet red bean filling with the mochi.
Homemade Red Bean Filling: Fine or Coarse Texture
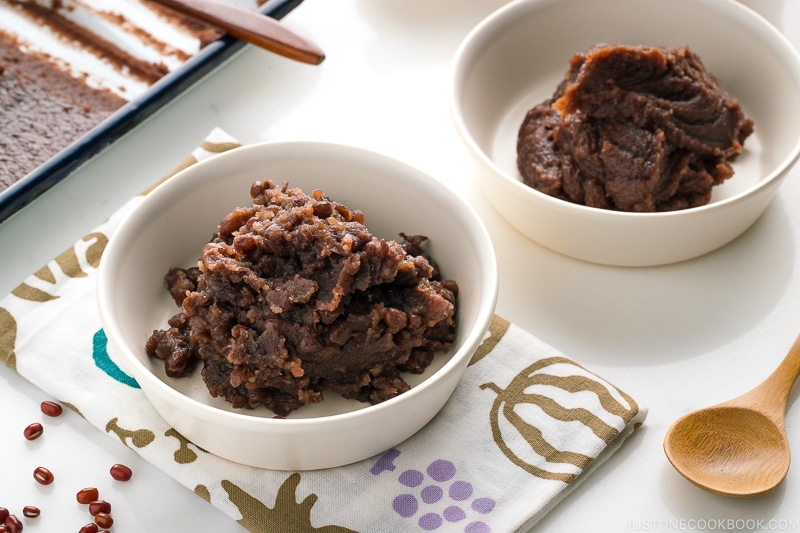
You can make two types of red bean filling.
- Koshian (fine texture)
- Tsubuan (coarse texture)
I’m more inclined with tsubuan for its coarse texture as you can still taste the azuki bean skin in the paste. However, it’s totally personal. Get my homemade recipe here and make it in advance.
Different Types of Daifuku

Anko red bean paste is the most common filling for daifuku. However, you can find some other popular flavors and fillings, such as:
- Yomogi Daifuku – Green colored mochi made with yomogi (Japanese mugwort leaves).
- Matcha Daifuku – Matcha (green tea powder) is used to flavor either the mochi or the white bean paste (shiroan) or both to create a lovely matcha-scented mochi sweet.
- Ichigo Daifuku – A springtime favorite, this daifuku is stuffed with strawberry.
- Shio Daifuku – This daifuku uses a mix of salt and sugar in the red bean filling to create a mildly sweet and salty taste.
- Ume Daifuku – Ume or Japanese plum is another signature flavor for Japanese sweets. For this version, the tangy ume is coated with red bean paste to create a contrasting flavor before they are wrapped with mochi. A precious flavor to enjoy in early spring during ume season.
- Coffee Daifuku – Made from mochi stuffed with a creamy coffee-flavored bean paste. Some variations even include a filling made with fresh cream, sometimes called Café au lait Daifuku. Other types mix the mochi with coffee, causing the rice cake to take on a coffee-like brown color and a coffee taste and aroma.
- White bean paste (Shiroan) – After red bean paste, white bean paste (made from lima beans or butter beans) is also very popular. It has a milder taste and can be used on its own as a filling or mixed with other flavoring.
- Kinako paste – A filling made from roasted soybean flour.
More on Japanese Desserts and Sweets
- How to Make Mochi with a Stand Mixer
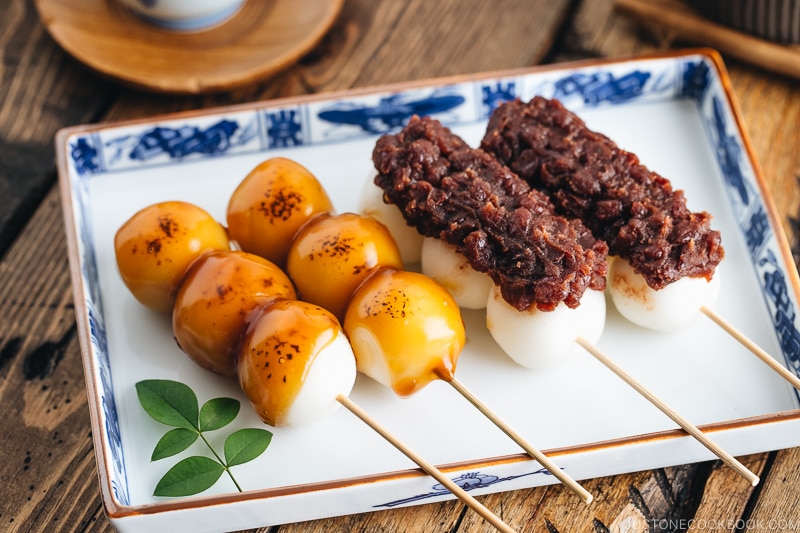
- Mitarashi Dango
- Wagashi Guide: History of Japanese Confectioneries
- What is Mochi? All You Need to Know About Japanese Rice Cakes
Wish to learn more about Japanese cooking? Sign up for our free newsletter to receive cooking tips & recipe updates! And stay in touch with me on Facebook, Pinterest, YouTube, and Instagram.
Daifuku Mochi
Video
Ingredients
- ¾ cup shiratamako (glutinous rice flour/sweet rice flour) (or use mochiko; see the measurement below)
- ¼ cup sugar (do not omit; the sugar helps the mochi stay soft)
- ¾ cup water
- ½ cup potato starch or cornstarch
- 1½ cup sweet red bean paste (anko) (I use tsubuan chunky paste; you can make Homemade Anko)
To Substitute Shiratamako with Mochiko, Use:
Instructions
- Gather all the ingredients.

To Make the Mochi Mixture
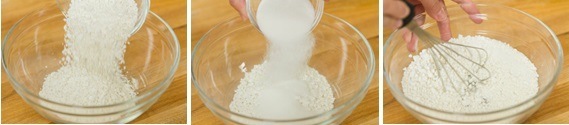
- Combine ¾ cup shiratamako (glutinous rice flour/sweet rice flour) and ¼ cup sugar in a medium bowl and whisk it all together. Tip: If you can‘t find shiratamako, you can substitute ¾ cup mochiko (glutinous rice flour/sweet rice flour).

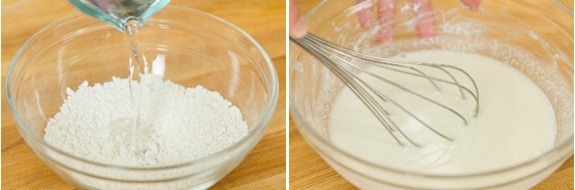
- Add ¾ cup water and mix well until combined.

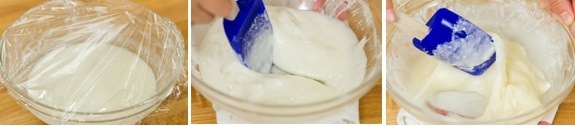
- Microwave Method: If you’re using a microwave to cook the mochi, loosely cover the bowl with plastic wrap. Put the bowl in the microwave and heat it on high (1100w) for 1 minute. Take it out and stir it with wet rubber spatula. Cover again loosely and cook for 1 additional minute. Stir again, cover loosely, and cook for 30 seconds more to finish cooking. The color of the mochi will change from white to almost translucent.

- Steaming Method: If you’re using a steamer, wrap the steamer lid with a towel so the condensation does not drop into the mochi mixture. Put the bowl into the steamer basket and cover to cook for 15 minutes. Halfway through cooking, stir it with a wet rubber spatula, then cover to finish cooking. The color of the mochi will change from white to almost translucent.

To Roll and Cut the Mochi
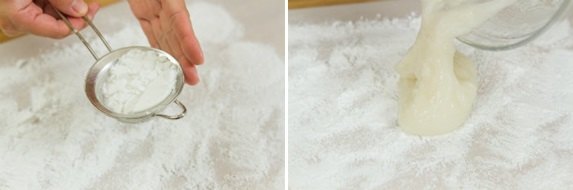
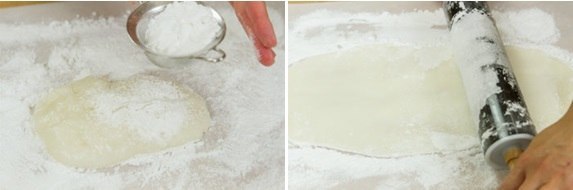
- Cover your work surface with parchment paper and dust it generously with some of the ½ cup potato starch or cornstarch. Then transfer the hot mochi on top.

- To prevent it from sticking, sprinkle more potato starch on top of the mochi. Once it cools a bit, spread the mochi into a thin layer, about 3/16 inch (4–5 mm), with your hands or with a rolling pin. Make sure to apply potato starch to your hands and the rolling pin as needed. I recommend using a rolling pin because it’s easier to evenly spread out the mochi.
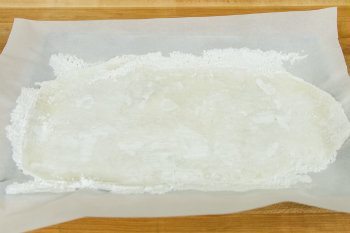
- Transfer the mochi with parchment paper onto a large baking sheet. Refrigerate for 15 minutes (no more than that) until the mochi is set.

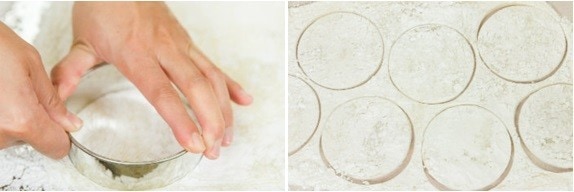
- Take out the mochi from the refrigerator and cut 7–8 mochi wrapper circles with a 3½-inch (9-cm) cookie cutter.

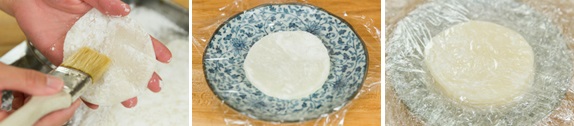
- Dust off the excess potato starch from these wrappers with a pastry brush. If you find any sticky spots, cover the area with potato starch, then dust it off. Next, stack the wrappers: Place a piece of plastic wrap on a plate and put a mochi circle on top. Then, layer another piece of plastic wrap on top, and add another wrapper. Repeat for all the wrappers. Roll the leftover mochi dough into a ball, roll it out into a thin layer, and cut out more wrappers circles. You can make about 12 mochi wrappers.

To Make the Daifuku
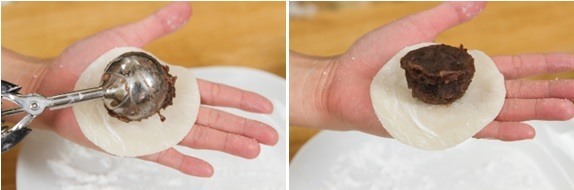
- Now, we’re ready to make the Daifuku. On the work surface, place one sheet of plastic wrap with a mochi wrapper on top. Using a medium cookie scoop, place one scoop of the 1½ cup sweet red bean paste (anko) on top of the mochi wrapper.

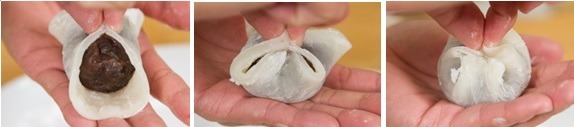
- Pinch the four opposite points of the mochi circle together to enclose the anko. Then pinch the remaining edges together.

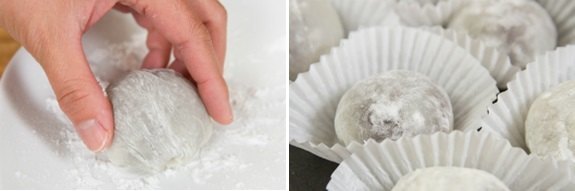
- Put some potato starch on the sealed area and set aside, seam side down. Continue making the rest of the Daifuku.

To Store
- Keep the Daifuku mochi in an airtight container and store in a cool, dry place. Enjoy within 2 days. For summer months when it‘s very hot, you may want to refrigerate these; since mochi gets hard in the refrigerator, you will need to wrap the container with a thick kitchen towel to keep it cool but not cold.


[…] justonecookbook […]
Loved this recipe! It was super easy to make in the microwave. The tricky part was rolling the dough out but after a couple of tries it went quite smoothly!
Hi Silvi! Thank you for trying this recipe and I’m so glad your daifuku came out well! Thank you for the kind feedback. 🙂
This was so easy and delicious to make! I appreciate the metric measurements as I wanted to make a smaller batch and it was easy to halve.
Hi Radhika! I’m so happy to hear that you enjoyed this recipe. Thank you for your kind feedback. 🙂 xo
Hi Radhika! I’m so glad you enjoyed making it! Thank you for your kind feedback. 🙂
Hi Nami,
 &f=1
&f=1
I love your site and your recipes!
Can I make mochi with this flour?
thank you!
Hi Cat! Please know that this is not short-grain glutinous rice. Just like how Japanese rice is different from other types of rice, the result is probably different. Taste, texture, absorption of water, etc etc… You can make it something similar as both “glutinous rice” but Mochi and Daifuku are always made with short grain. 🙂
[…] justonecookbook […]
[…] justonecookbook […]
[…] justonecookbook […]
[…] One Cookbook — Daifuku Just One Cookbook — Pressure Cooker Anko (Red Bean […]
I never thought mochi would be something I could make in the microwave! it tastes great filled with anko, and is perfectly sweet and chewy. raw cornstarch bothers my stomach, so I recommend heating the cornstarch in a pan before rolling the mochi in it.
Hi Miki! Thank you for trying this recipe and for your feedback! 🙂
What brands do you prefer for the azuki beans? Unfortunately, I could only find “organic adzuki” beans vacuumed sealed from China :(. Which I’m not sure I’m Keen on. and glutinous rice flour from Thailand which will probably work from my local China Town grocery. Looks like a good recipe, I plan to follow it.
Hi Sam! I think the glutinous rice flour may work, but I’m not sure if it’s Japanese mochi texture. We use short grain rice flour, and Thailand has glutinous rice dessert, but I assume they are not exactly the same. If you’re in the US, you can buy Koda Farm’s glutinous rice flour and that’s short grain.
Regarding adzuki beans… I hope you can find ones from Japan (Usually Hokkaido). Have you checked any online source or health food store? Hope you enjoy the recipe! 🙂
Yes, I am in the US. I think the flour will be ok, I’m used to what I am assuming is the Chinese version.
I couldn’t find any Hokkaido beans online, Amazon wasn’t carrying them that I saw. lol I hate eating stuff from China, for obvious reasons, but who knows what I am eating when I eat at Chinese bakeries. It’s easier not knowing, I am comfortable with Japanese and American food practices.
I find the pre can paste to be too sweet for my liking, I don’t eat a lot of sugar.
Hi Sam! I share the same feelings and sometimes ignorance is bliss… I also couldn’t find it online. 🙁 I also think store-bought paste is too sweet for my taste too. Homemade one is nice as we can control the amount of sugar goes in (although we need a decent amount of sugar to keep it for a longer time).
Have tried it, very delicious, my mom love it, thumbs up! 👍☺
Thank you for the recipe and the details, love
Hi Ale! I’m so happy to hear your mom enjoyed it! Thank you for trying this recipe and for your kind feedback! xo
Hi I used Mochico instead and it’s taking so long to cook under the steamer, not changing into translucent color too. I followed each steps. Thank you
Hi Mimi! Thanks for trying this recipe! How long did you steam? I have 2 questions: 1) Did you increase the amount of mochiko? 2) Translucent means it’s not solid and it’s the color (?) that light can go through, but it’s not clear. Do you think yours was but you thought it’s not cooked? You know mochi has that light texture, and you can kind of see the resemblance at this stage as you started with white mass.
Ms Nami thank you for immediate response. I actually did double the recipe but I think I also triple the cooking time. It didn’t turn into that kinda clear color but yeah the color changed compared when it was raw.
It still turned out to be okay but it’s just difficult to mold, maybe i made it too thin. It I don’t know if I cooked it too long. How many minutes should I cook it if I double or triple the ingredients. Does the timing starts when the water starts boiling on the steamer. Thank you again.
[…] Daifuku (大福) is a popular traditional Japanese sweet; it is soft mochi stuffed with sweet red bean paste. There are many varieties of Daifuku. They usually come with the same soft and chewy mochi exterior with different stuffing. […]
Can i make the dough slightly ahead of time? I dont have a microwave and was wondering if I can make it and roll it out ahead of time and how long it will keep like that.
Hi Jamie! I recommend stuffing the filling while mochi is soft and pliable. The reason is not just requiring the soft mochi but it also needs to pinch to close. But if you mean “ahead of time” is like 30 minutes or less, I think it’s still possible. 🙂
[…] Daifuku Mochi […]