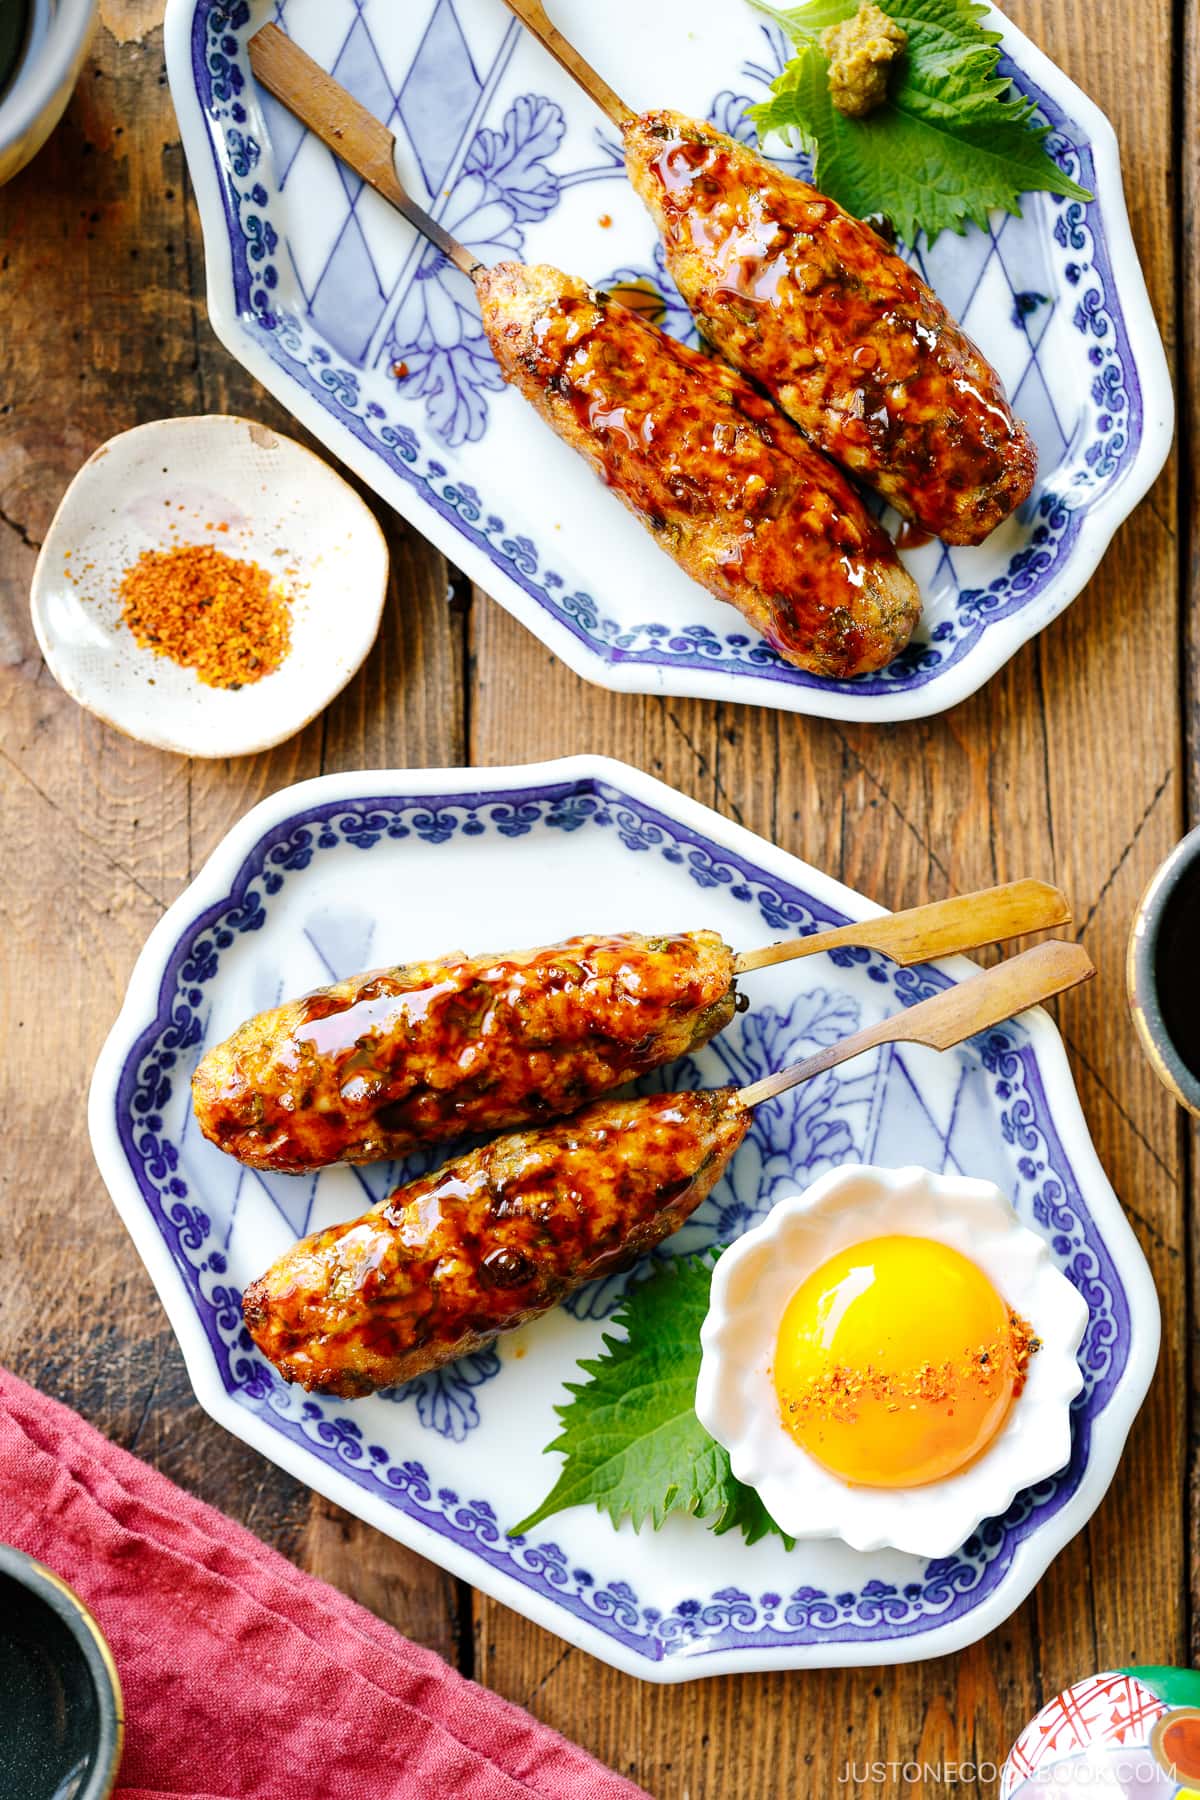
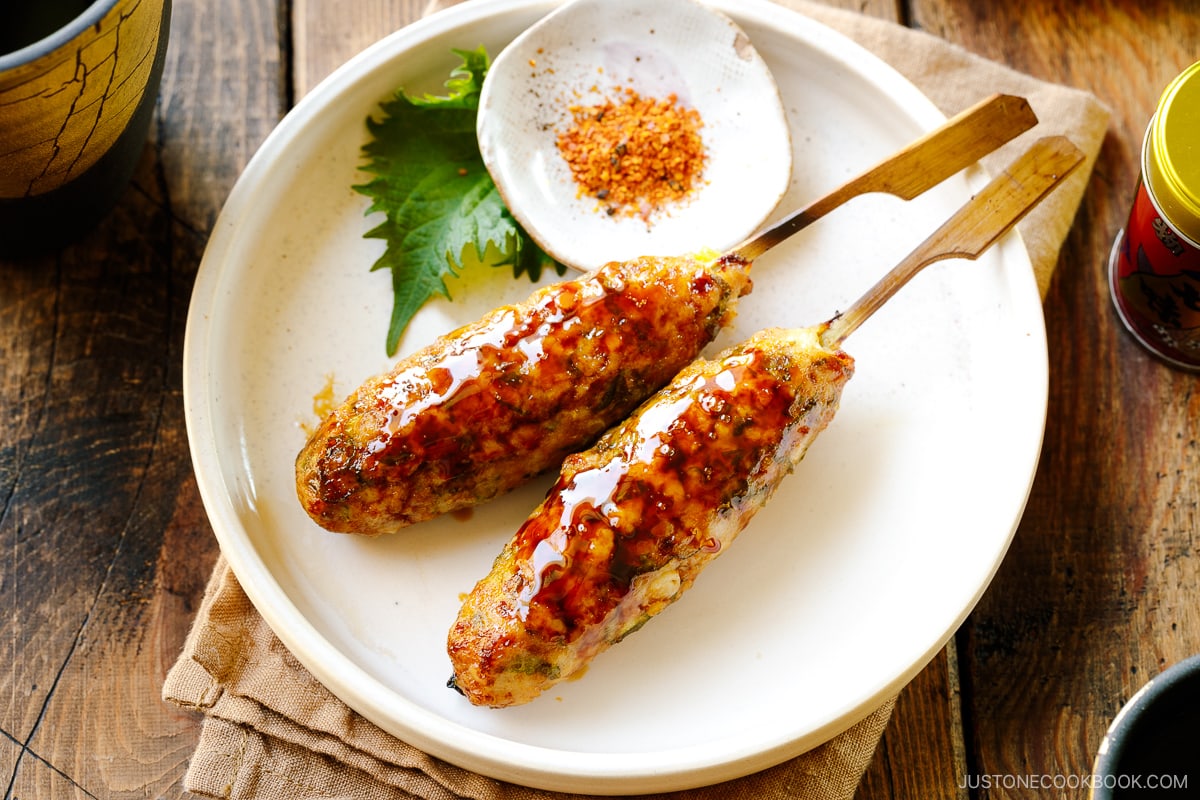
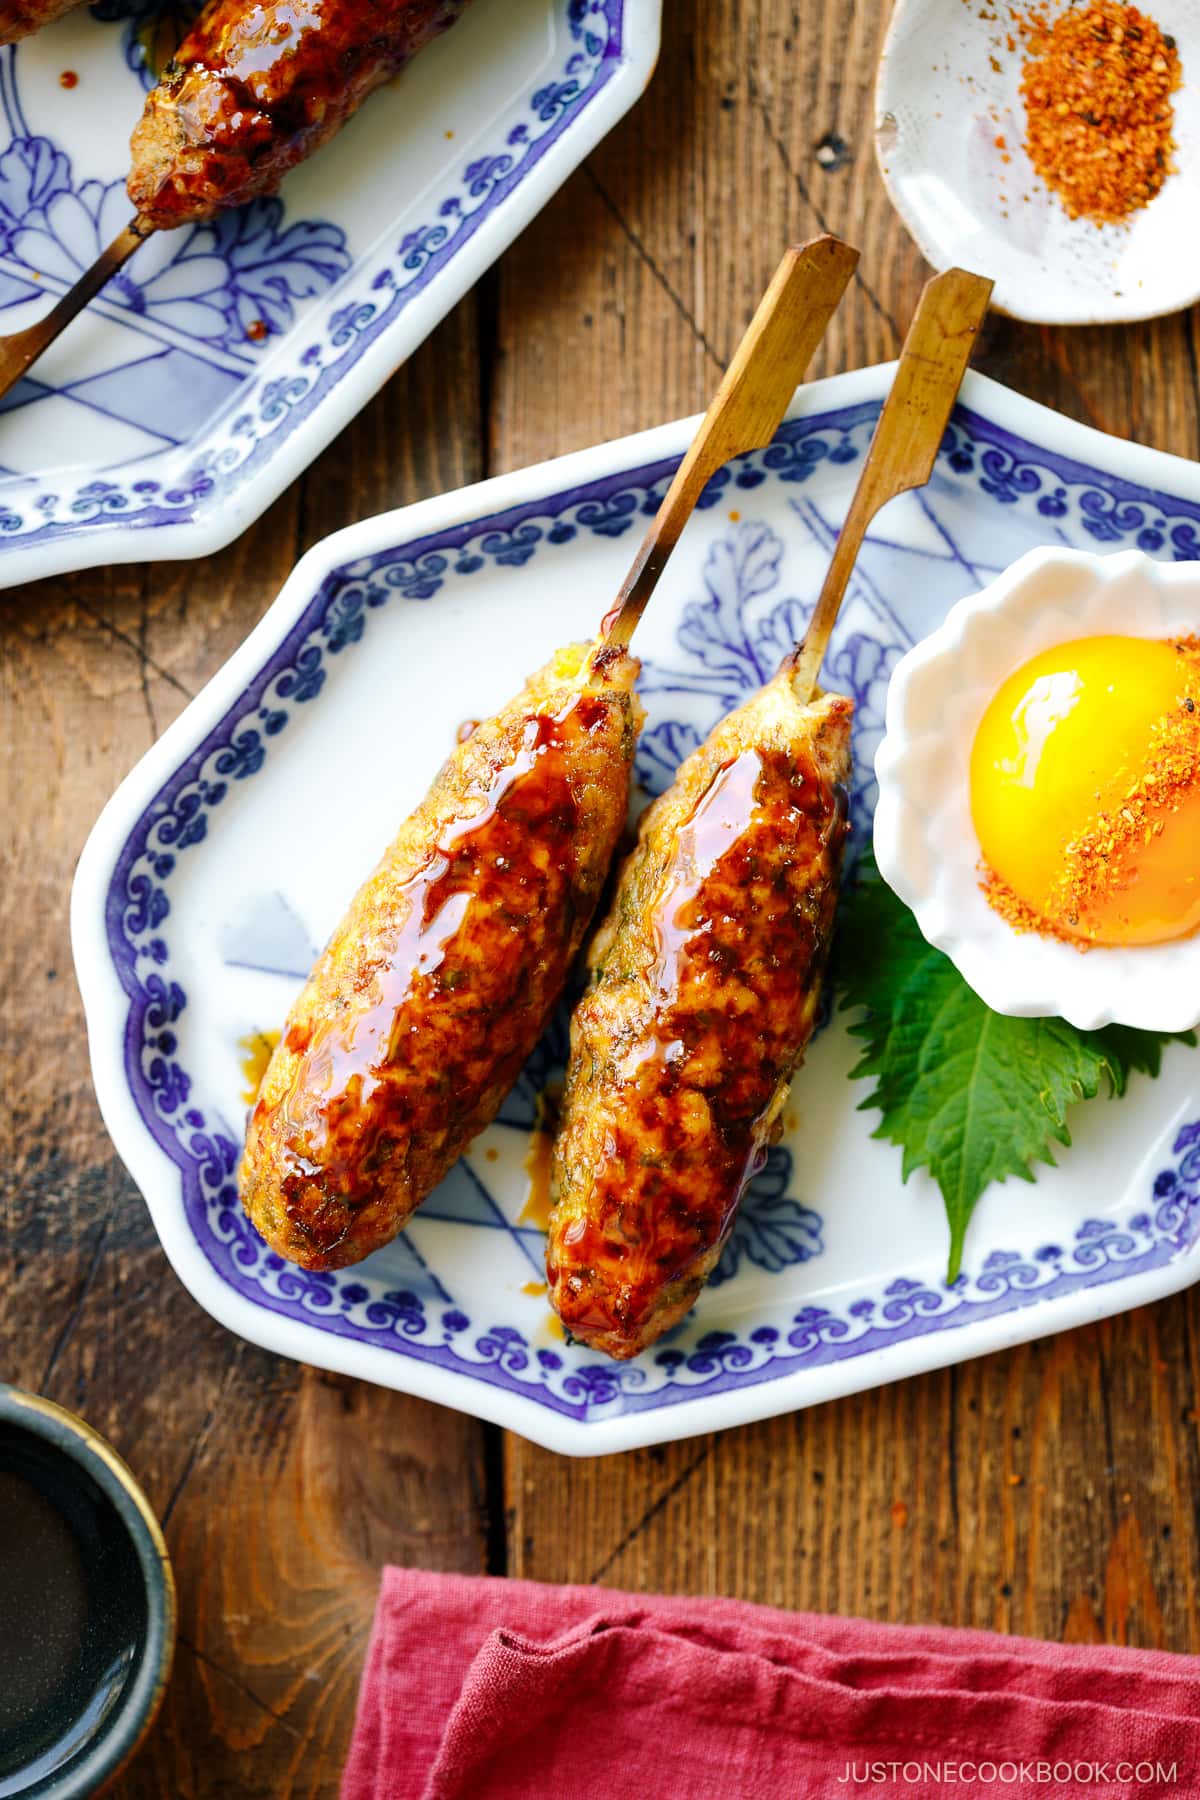
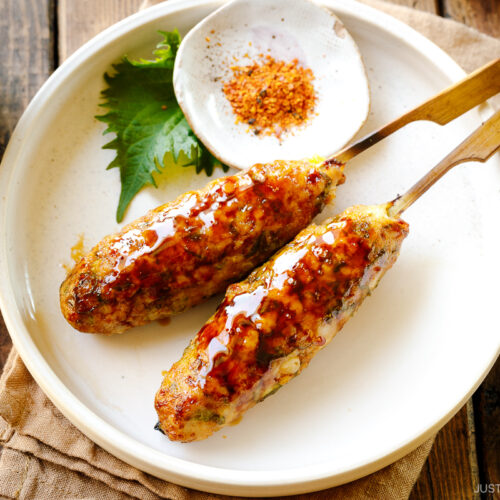
Tsukune are grilled Japanese chicken meatball skewers glazed in a delicious sweet-savory sauce. Typically served at yakitori and izakaya restaurants, these juicy and irresistible meatballs are easy to make at home with your oven broiler or grill. It’s hard to eat just one!
If you’re on the hunt for some crowd-pleaser recipes for your next party, look no further than the world of Japanese bar fare known as izakaya food! The dishes are often bite-sized or skewered and meant to be enjoyed in a lively, social setting. Picture the classics like Chicken Karaage, Yakitori, and Gyoza. The best part: They go hand in hand with sake and Japanese draft beer. Today, I’ve got another favorite that you need to try at home: Tsukune or Japanese chicken meatball skewers.
Table of Contents
What is Tsukune?
Tsukune (つくね) refers to Japanese chicken meatballs that are skewered, grilled, and coated with a sweet and savory sauce called tare.
To make tsukune, you’ll need ground chicken or a mix of chicken and pork, scallions, and various seasonings. The meat mixture is formed into an oval patty or three meatballs, which are then threaded onto bamboo skewers. They can be cooked either over charcoal at restaurants or pan-fried when prepared at home.
For family dinners, Japanese home cooks typically serve the meatballs without the skewers, so you can certainly make them in regular ball shapes. But if you’re serving tsukune for a party or a potluck, I recommend skewering them as demonstrated here. Everybody loves food on a stick!
Tsukune Making Tips
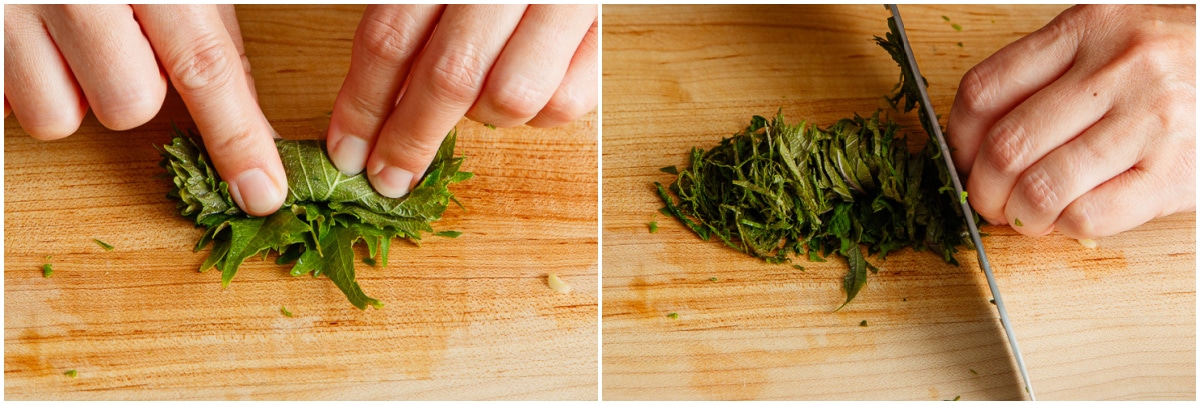
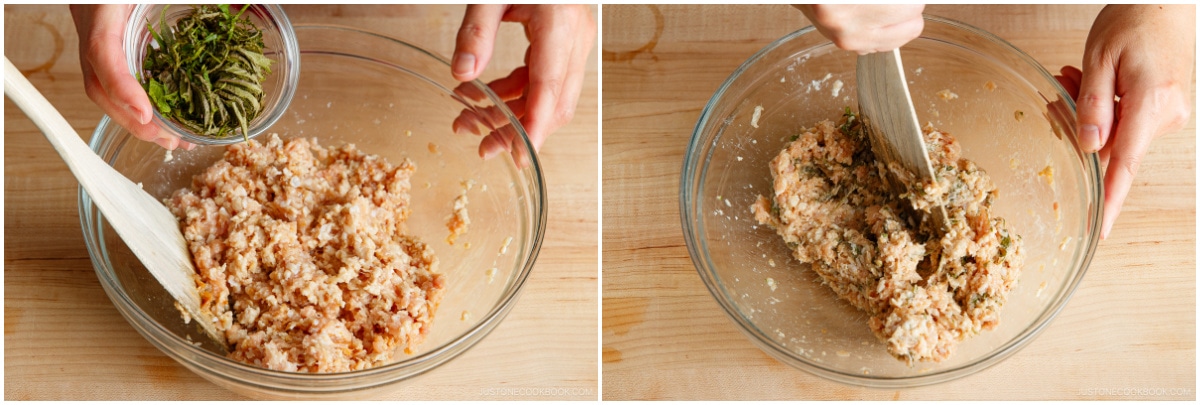
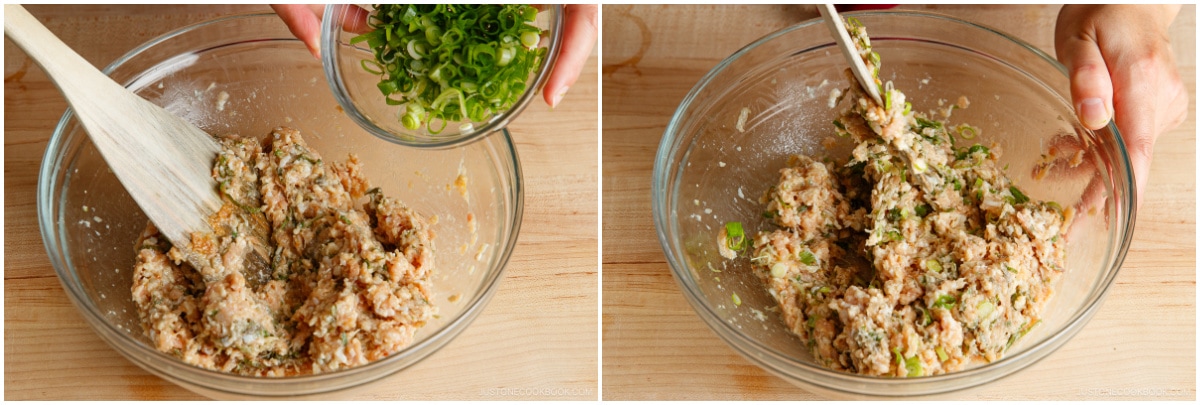
- Add texture and fragrance to the meat mixture. In Japan, we usually add chopped chicken cartilage to the mixture to create a contrasting texture. I also use shiso leaves and green onions for extra depth of aroma.
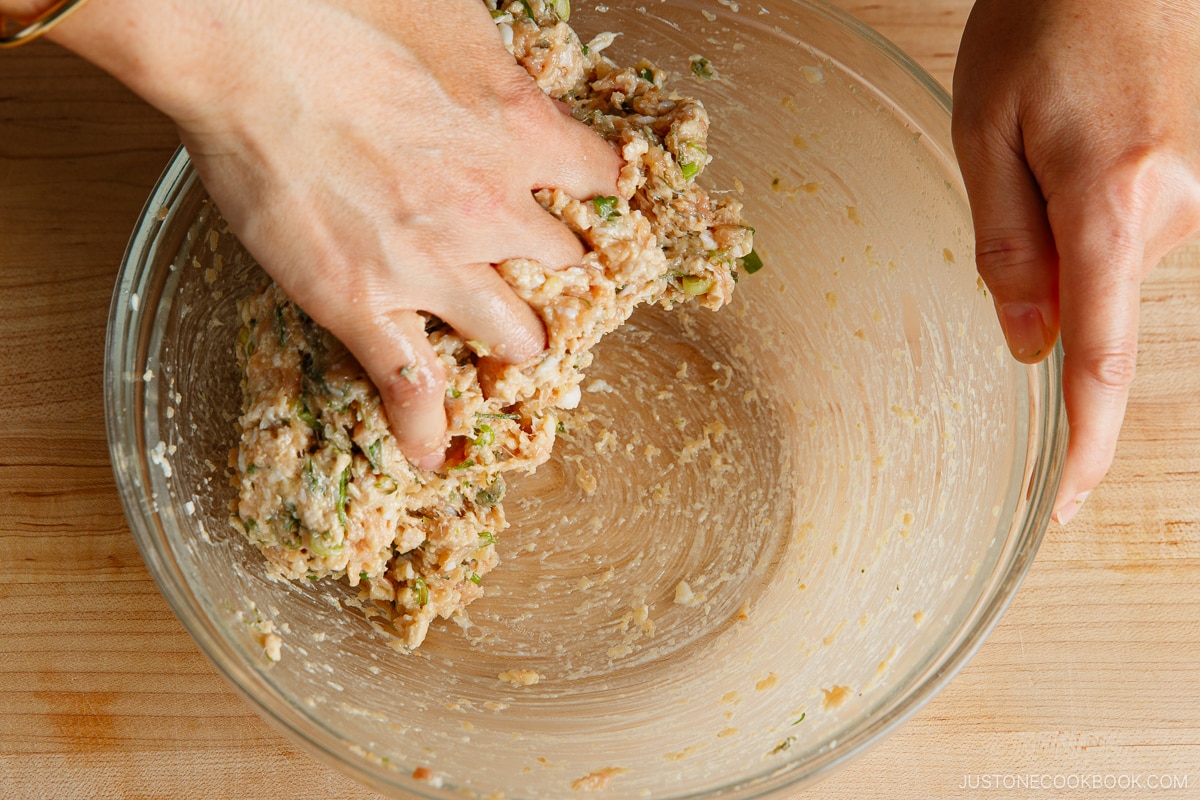
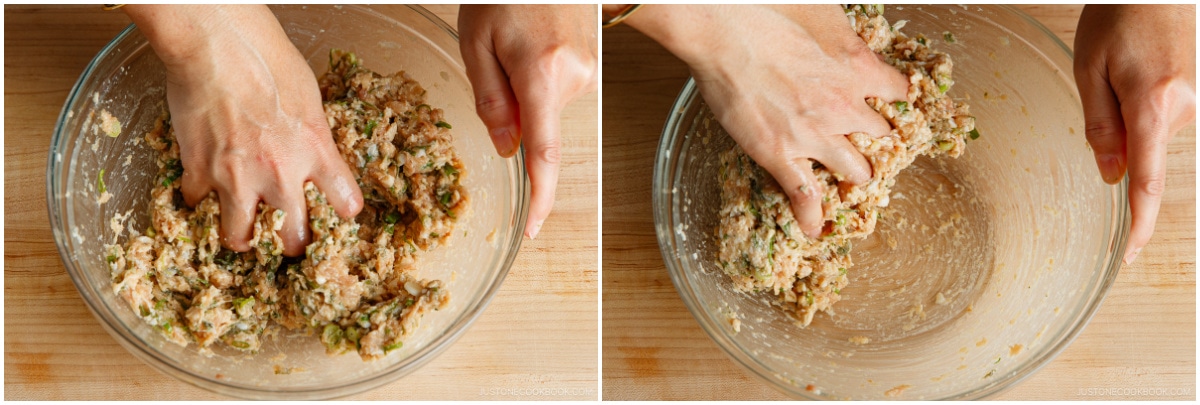
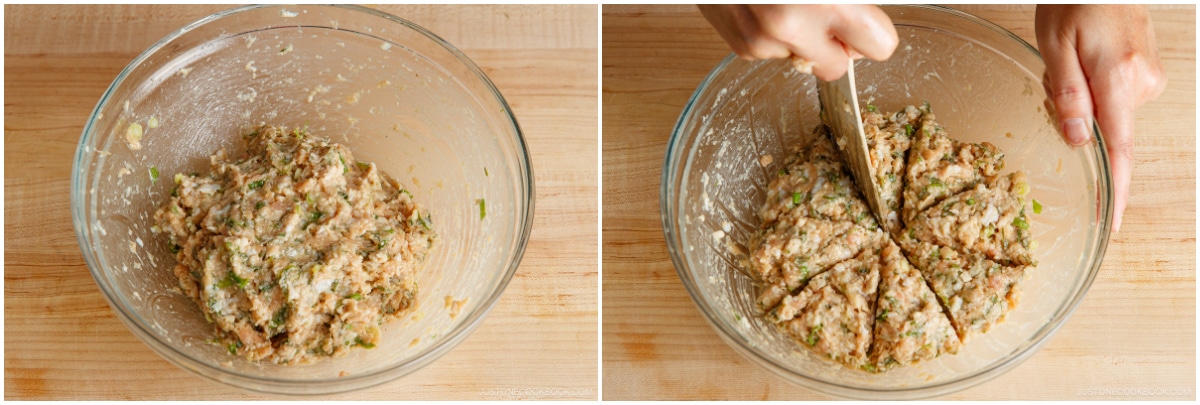
- Knead the chicken mixture until it becomes pale and sticky. Some tsukune recipes require eggs or panko to bind the ground meat together so that the meat mixture doesn’t easily fall off the skewers. However, my mom taught me to knead the mixture really, really well, and my tsukune never falls off the skewers!
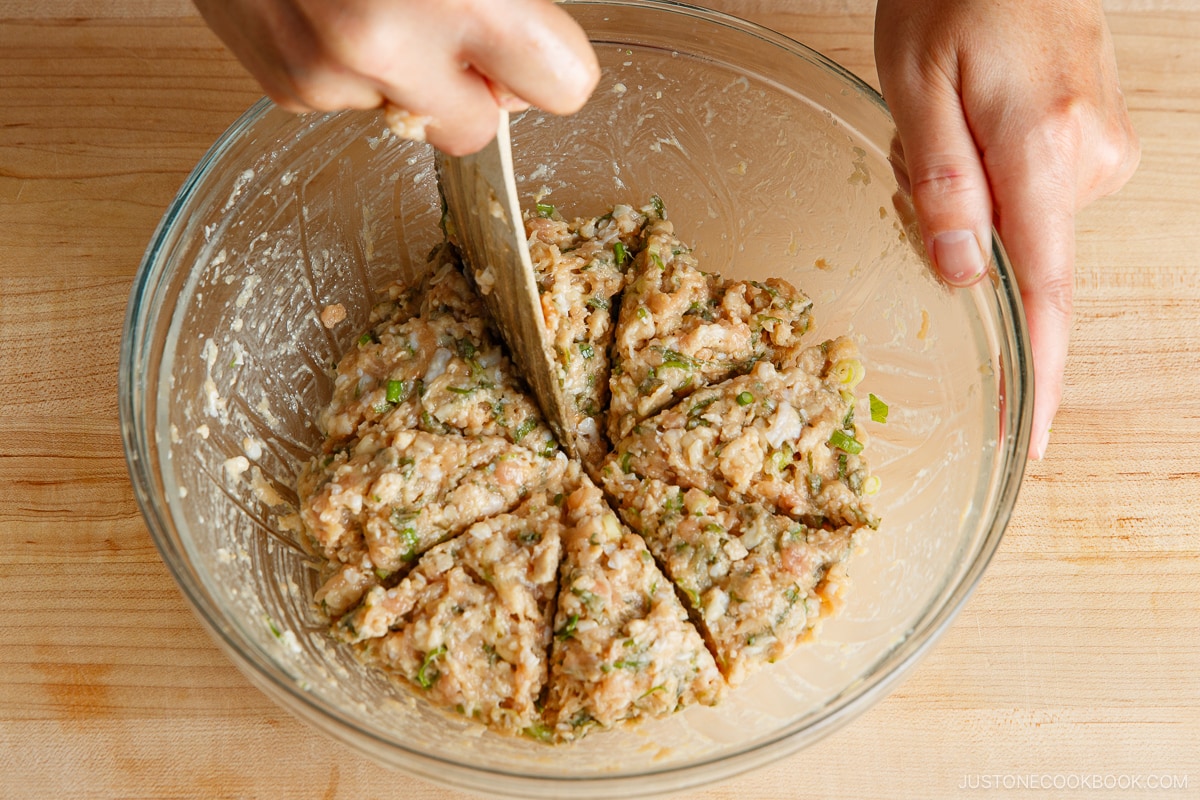
- Divide the meat mixture equally so each patty is roughly the same weight.
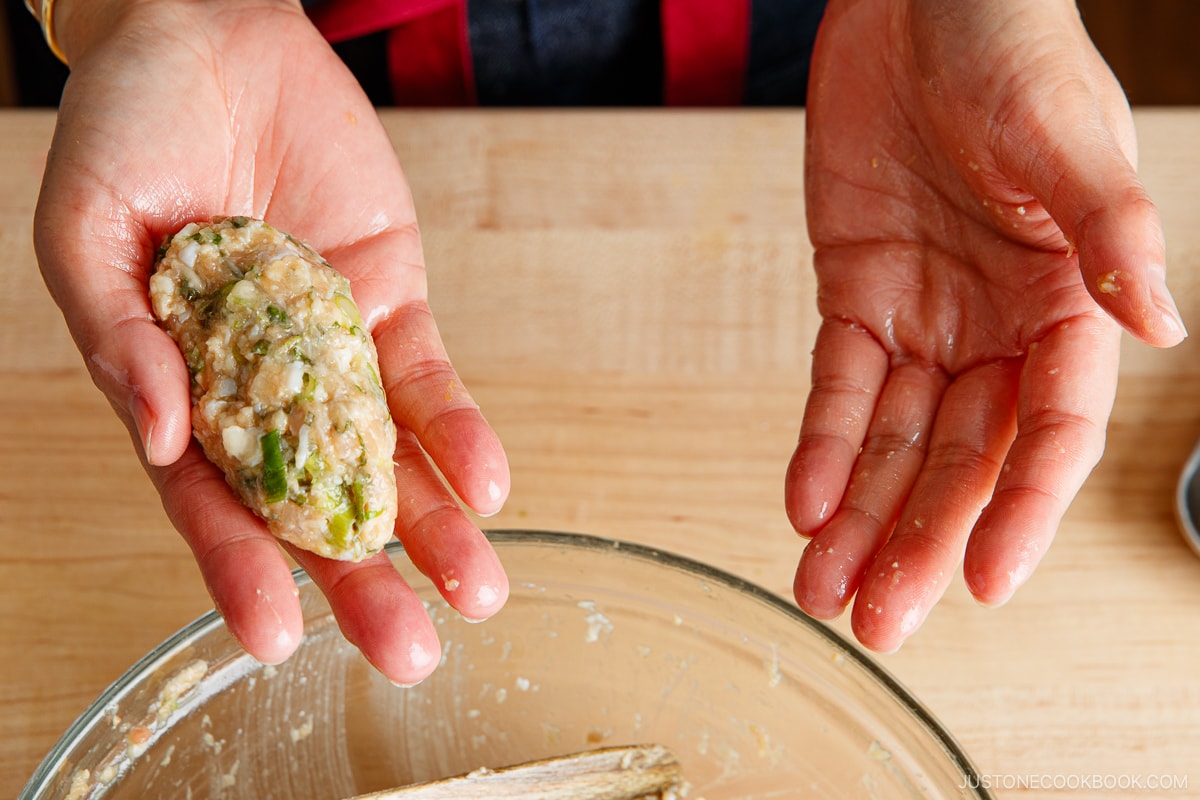
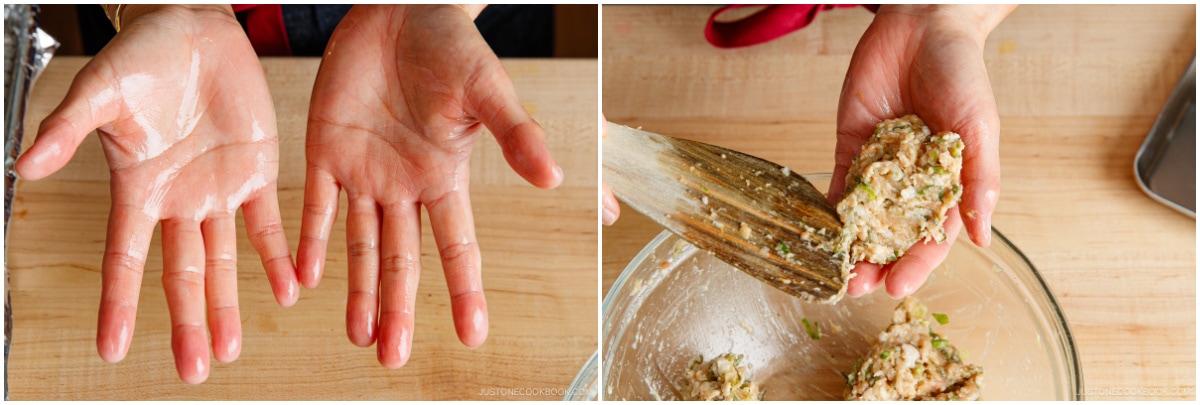
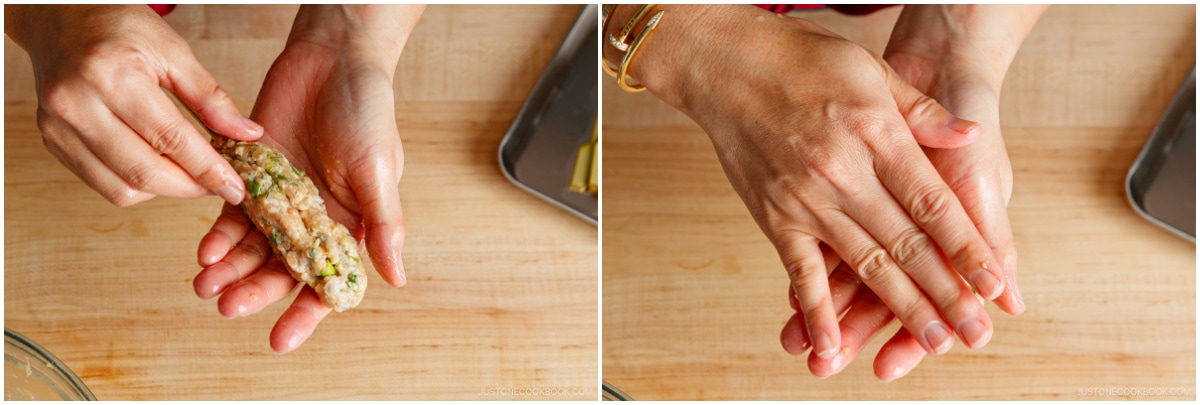
- Toss the meat from one hand to the other to release any air pockets. This prevents breakage.
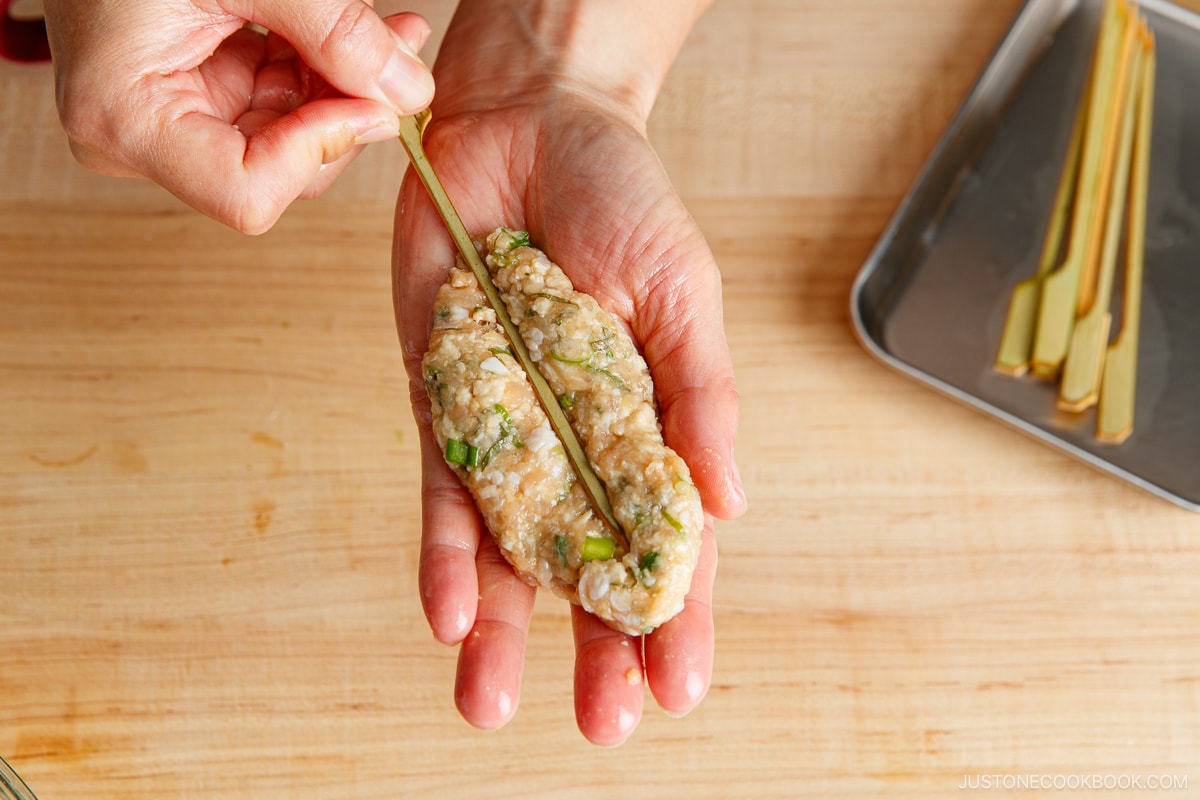
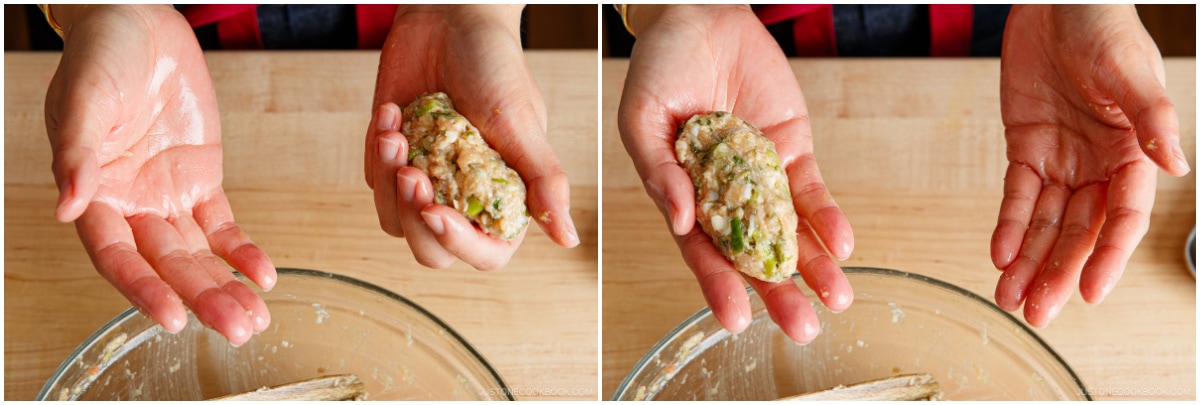
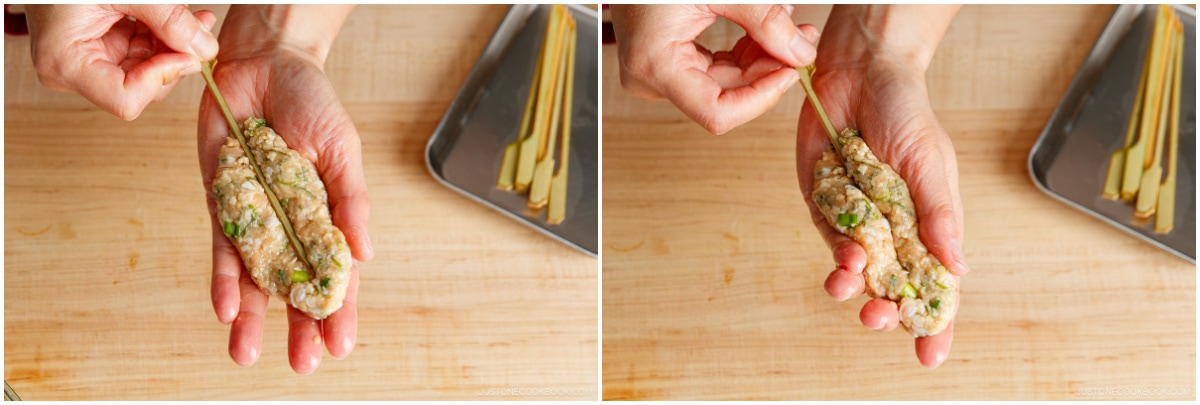
- Make a 4-inch long oval patty, then place a bamboo skewer on top. All the patties should be the same size so your tsukune is shaped the same.
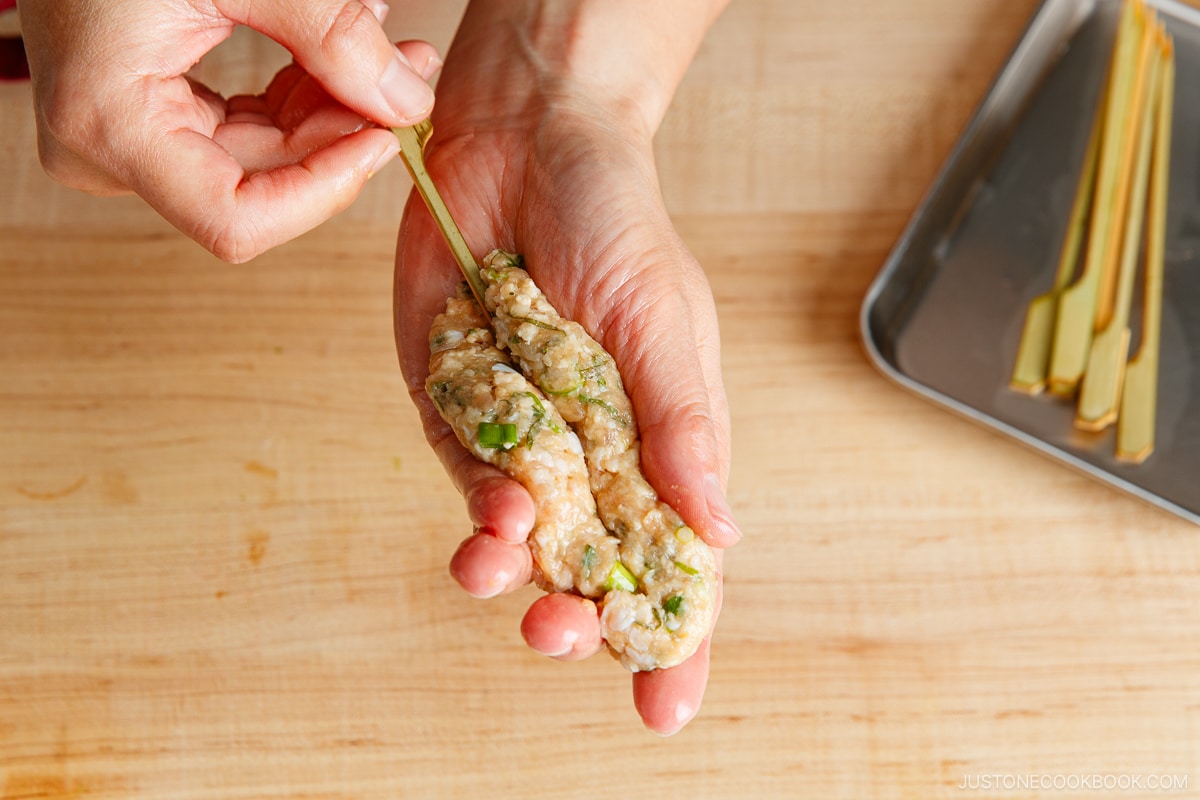
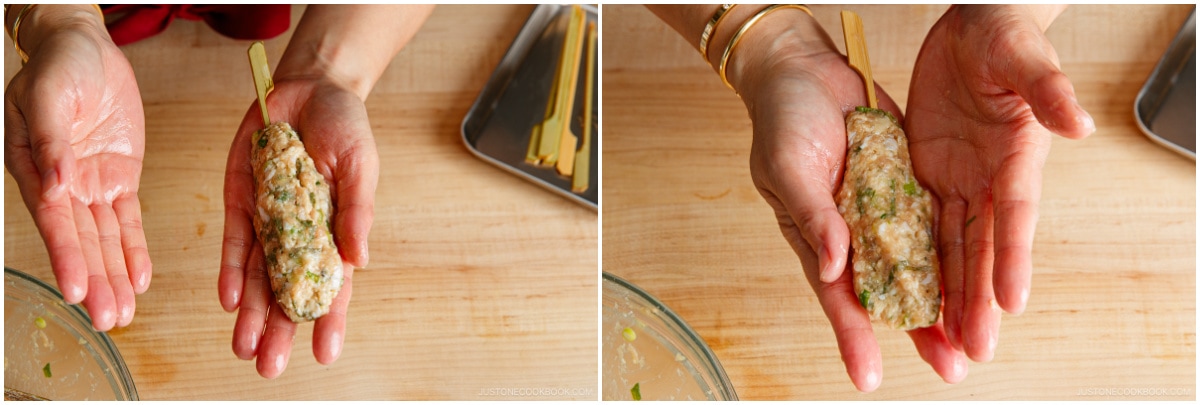
- Press the skewer down a little and wrap the meat around the skewer. Form the meat into a nice 4-inch long cylindrical shape. Ensure the skewer is secured in place and the edges of the patty are sealed completely.
A Big Secret for Juicy Chicken Meatballs
When you make chicken meatballs, you want to make sure they are fluffy, springy, and juicy. I learned this technique from The Japanese Grill, one of my husband’s favorite grill cookbooks, and I’ve been following this method ever since.
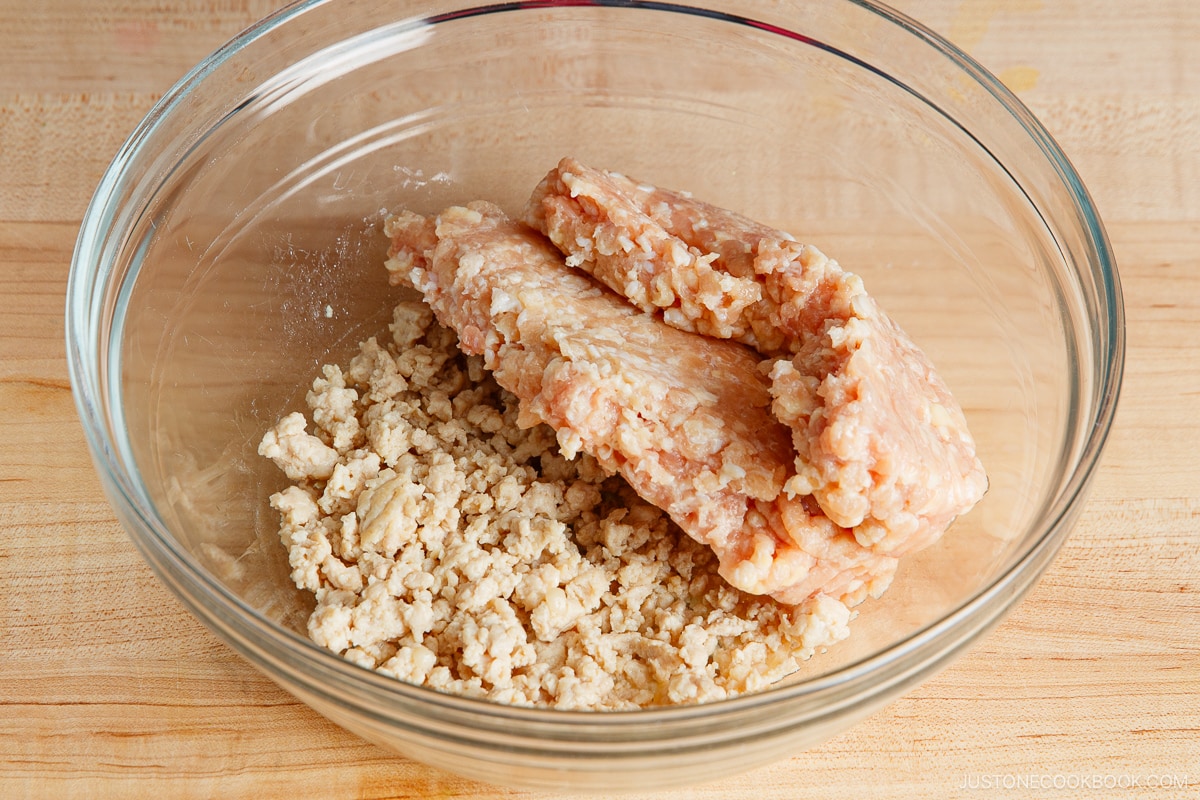
To make the ground chicken mixture, precook one-third of the ground chicken first. Let it cool completely and then mix it with the raw ground chicken.
Do you notice when you cook the meat, you end up with much smaller pieces because the meat shrank after cooking? This technique of precooking a part of the meat mixture prevents the meat from shrinking too much.
Also, it prevents the meat from losing a lot of juice. Although it is an extra step, I find it’s totally worth it.

How to Use the Broiler When Cooking the Tsukune
To make the tsukune similar to the restaurant style, use the broiler in the oven. Unlike baking, which uses hot air to cook the food, the broiler uses infrared energy similar to an outdoor grill. When it’s done cooking, the tsukune comes out really juicy and beautifully charred.
Here are some important tips for you.
- Create patties that are evenly sized and not too large. Shape each patty into a thin, long cylindrical form to allow for quick heat penetration. This ensures that they all cook at the same rate and finish simultaneously.
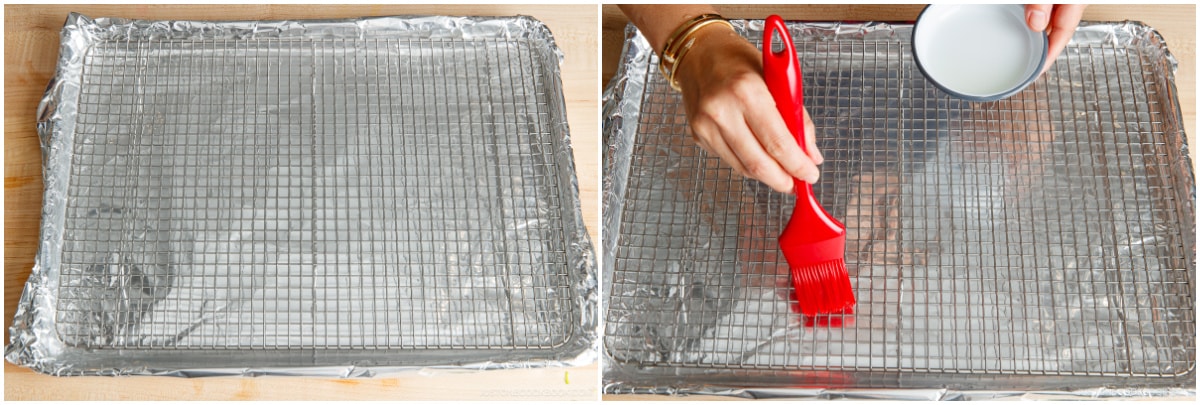
- Use an oven-safe wire rack to allow the meat’s excess oil to drip onto the baking sheet, preventing the meat from cooking in the accumulated oil.
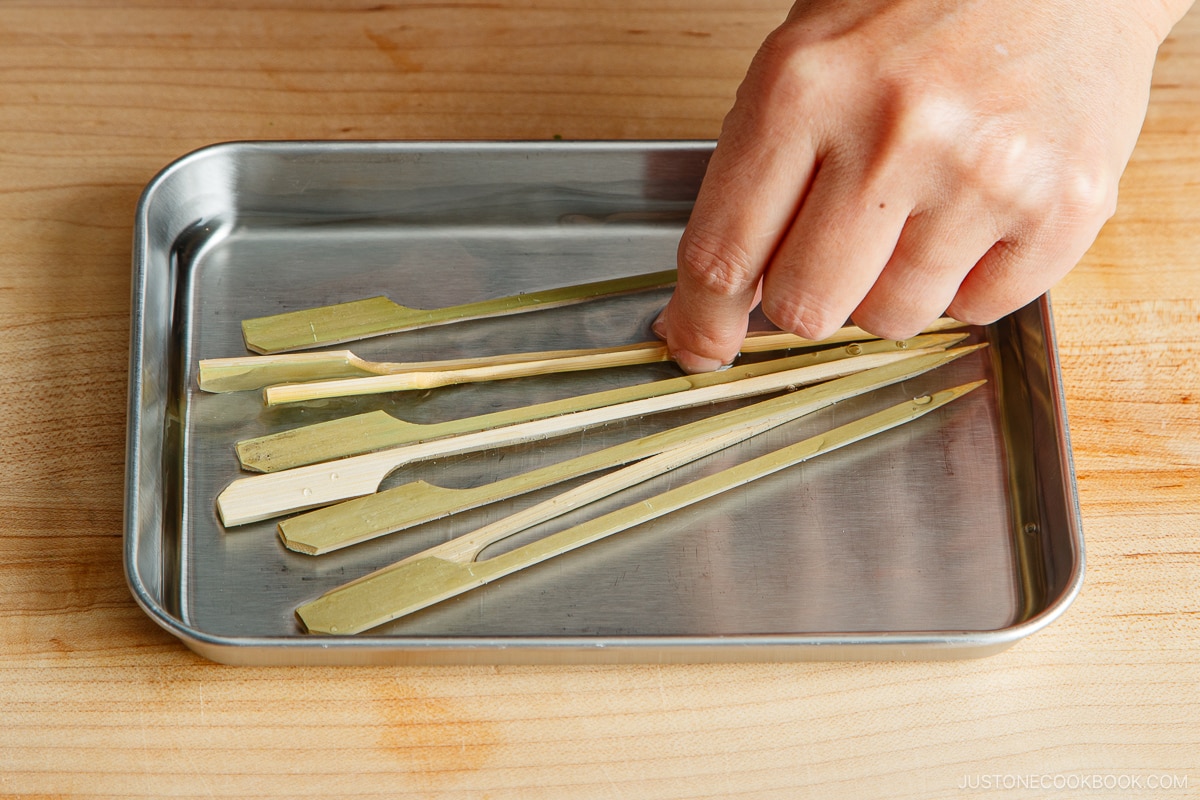
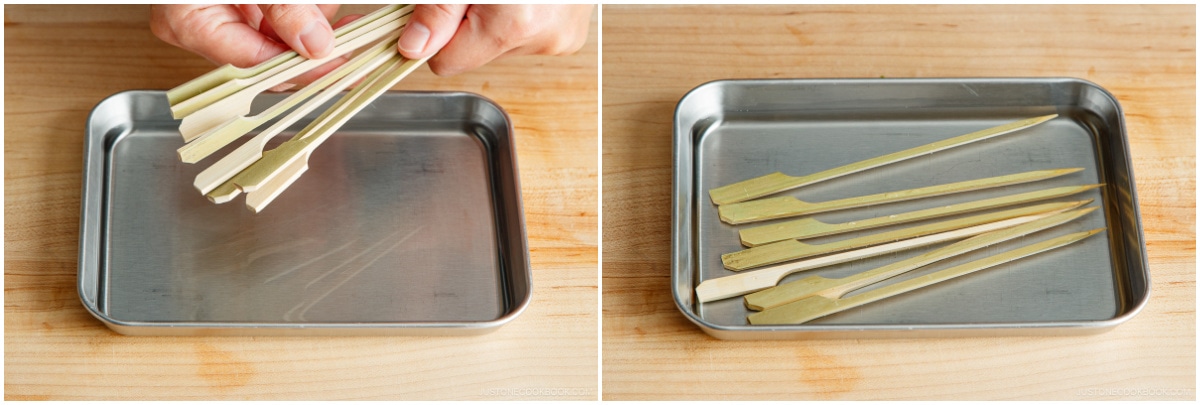
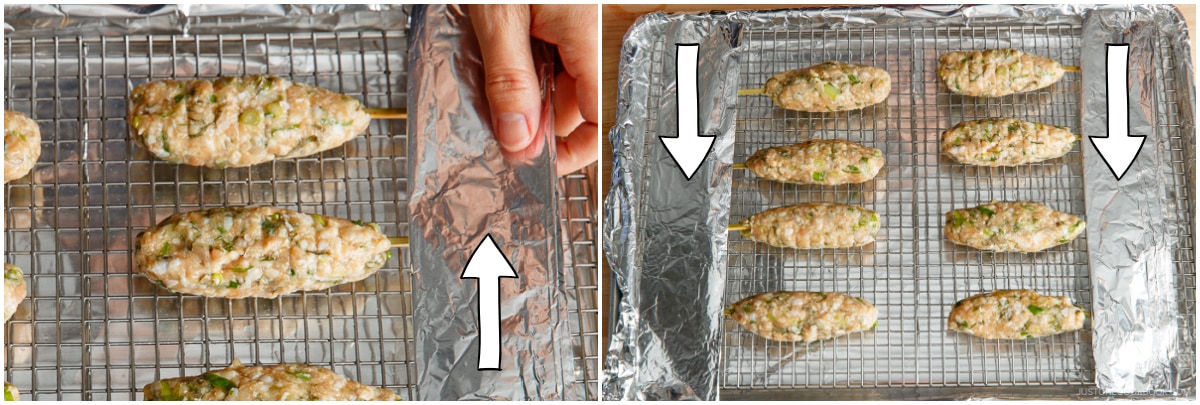
- Before broiling, soak the bamboo skewers in water and cover them with foil. This step prevents the skewers from burning and turning black.
- Control the oven rack’s distance from the top heating element and the broiling time. I set my oven rack in the center position, 9 inches (23 cm) away from the top heating element. With the broiler, you cannot set an exact temperature. However, you can adjust two things: the distance of the rack and the broiler settings (Low, Medium, High). I usually use the High setting (550ºF/288ºC) and adjust the rack’s proximity to the heating element.
- Keep a close eye on the food while broiling. If you’re new to using the broiler, exercise caution to avoid overcooking until you determine the optimal rack position and broiler setting.
How to Make Tsukune
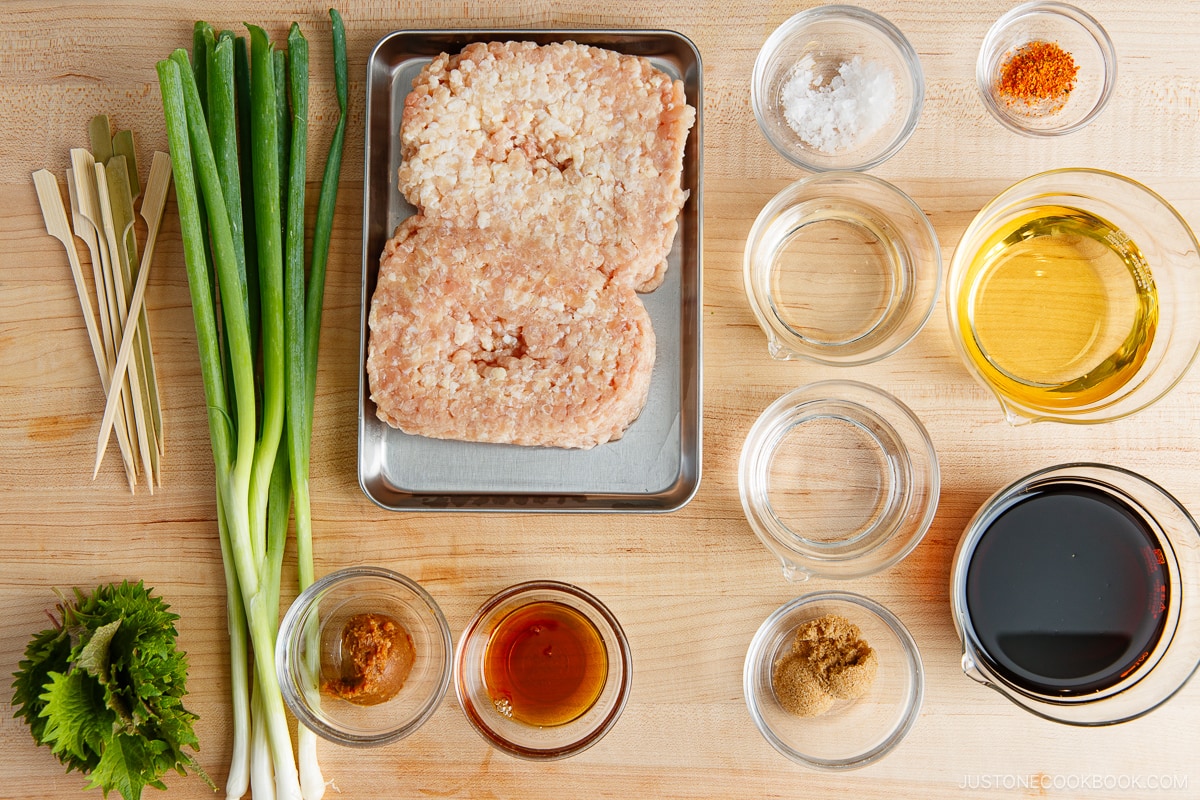
The Ingredients You’ll Need
- Ground chicken
- Shiso leaves – Skip if you can’t find them. It definitely tastes better with it.
- Scallions
- Seasonings: Miso, sesame oil, and salt
- Homemade yakitori sauce: sake, mirin, soy sauce, and brown sugar
- For serving (optional): Shichimi togarashi and raw egg yolk (please see the note below)
The Cooking Steps
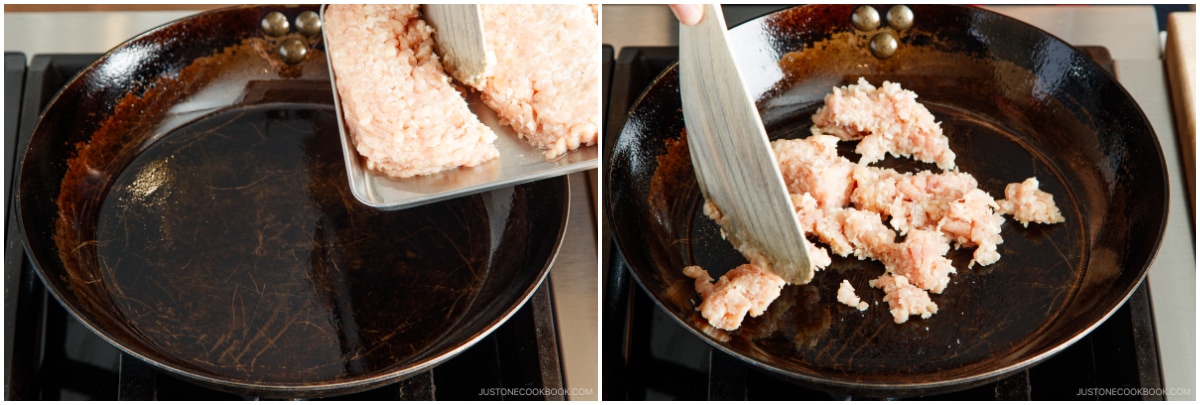
- Cook one-third of ground chicken on medium-low heat in an ungreased frying pan. Set aside and let cool completely.
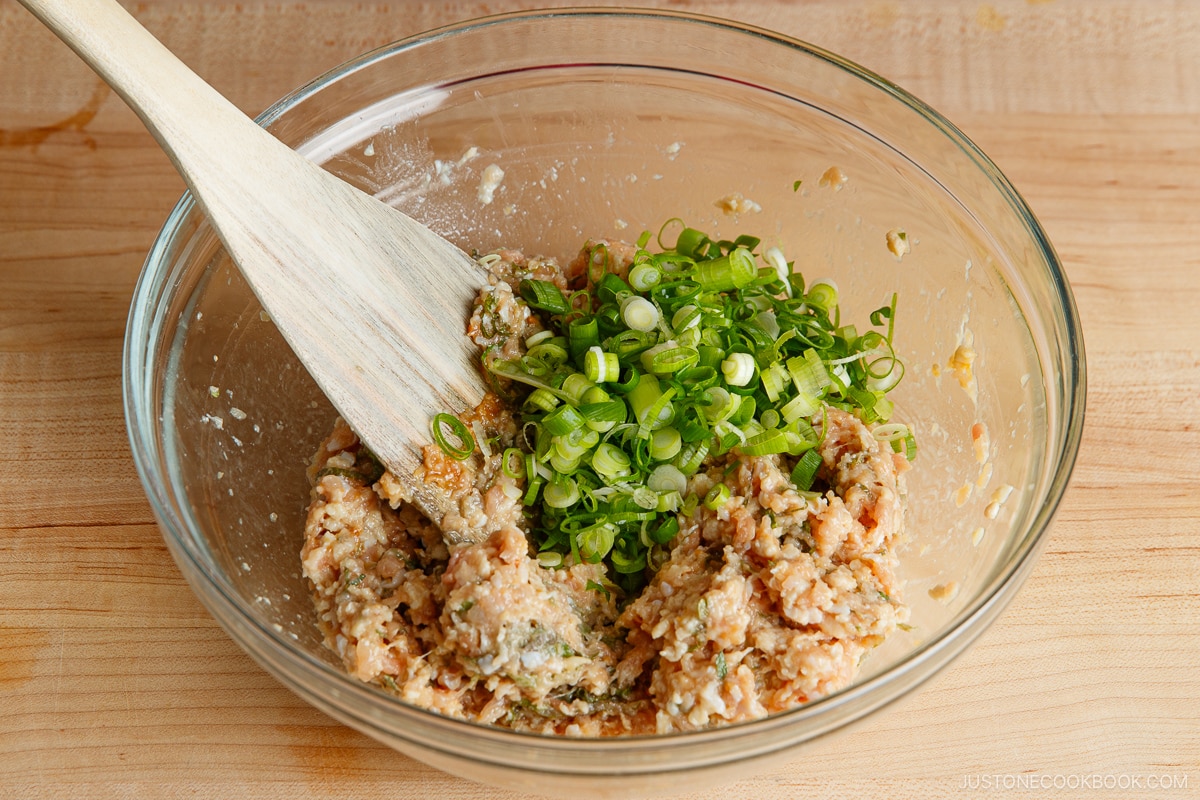
- Combine cooked and raw ground chicken, shiso, scallions, and seasonings. Knead the mixture until it becomes sticky and pale in color.
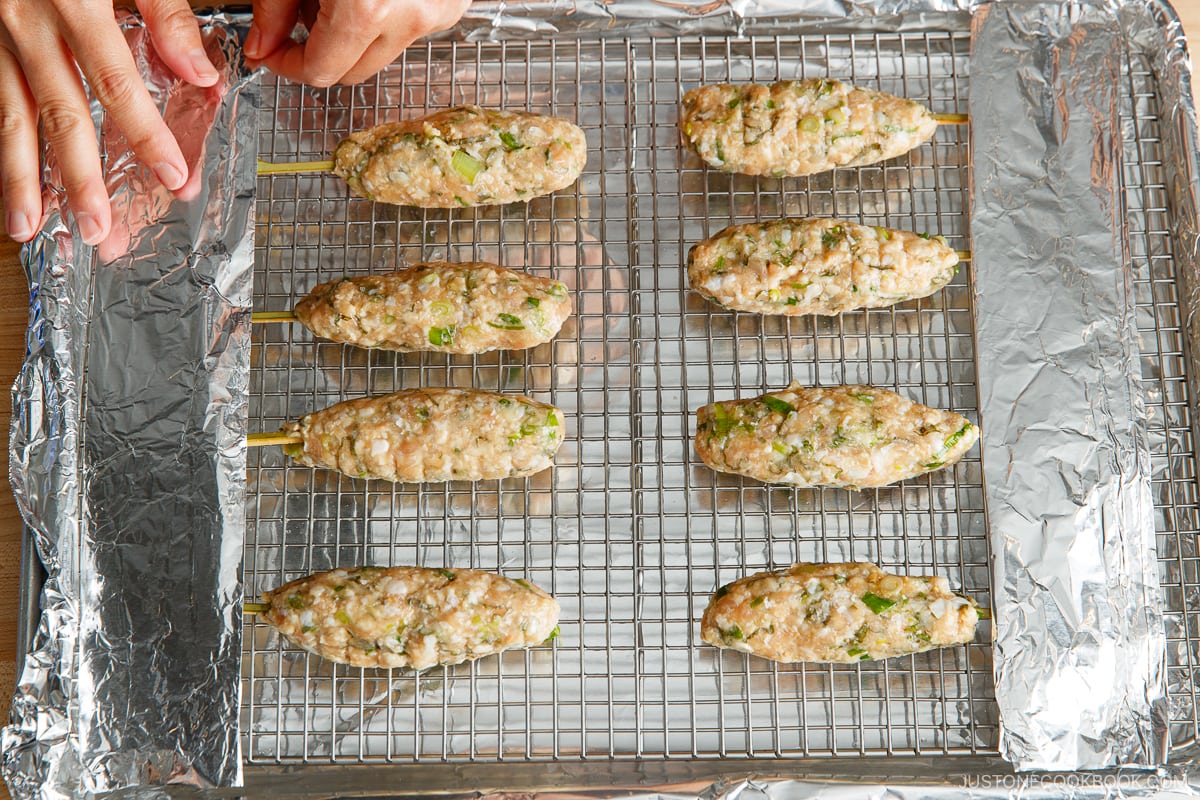
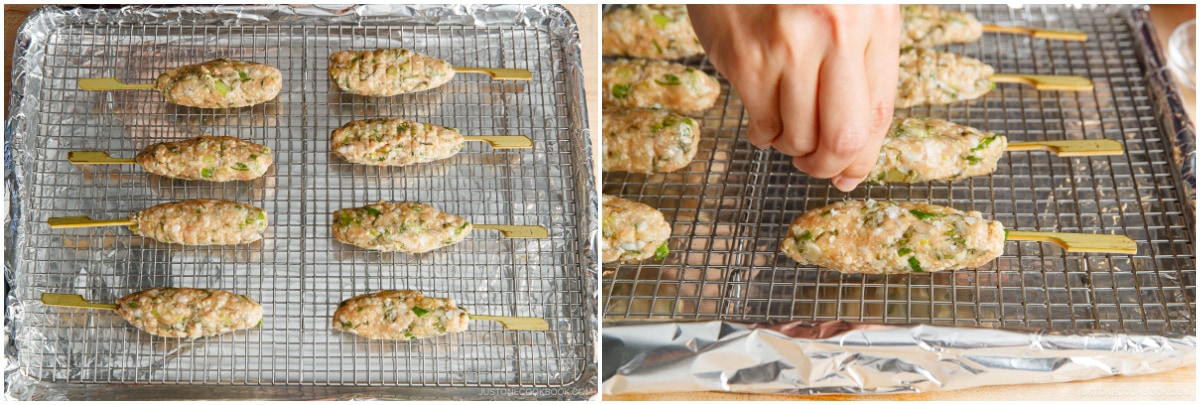
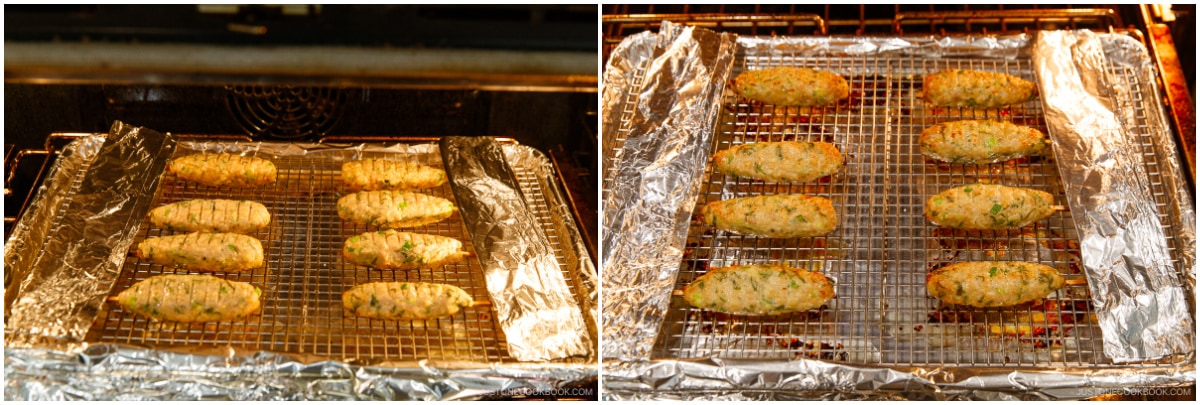
- Line a baking sheet with aluminum foil and place an oven-safe wire rack on top. Shape the ground chicken mixture into an oval patty and wrap it around a skewer. Place the finished skewer on the baking sheet and continue with the rest of the mixture.
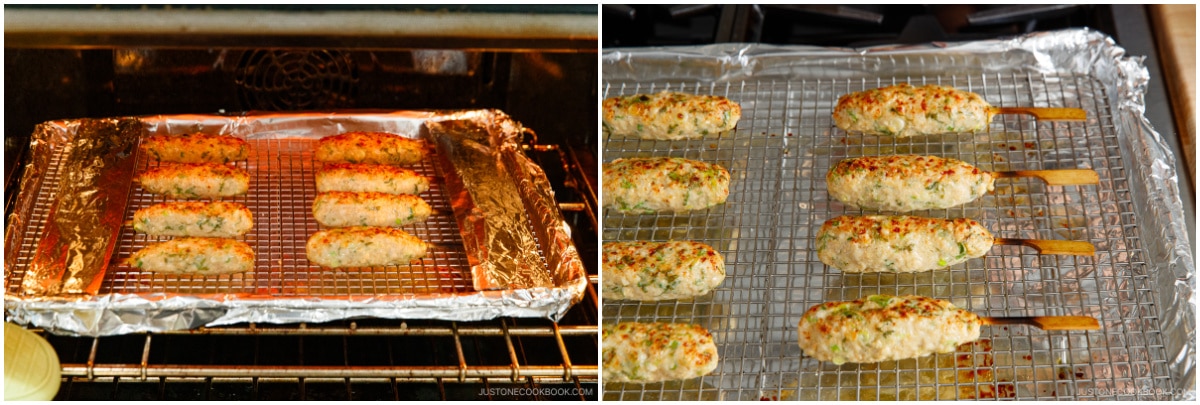
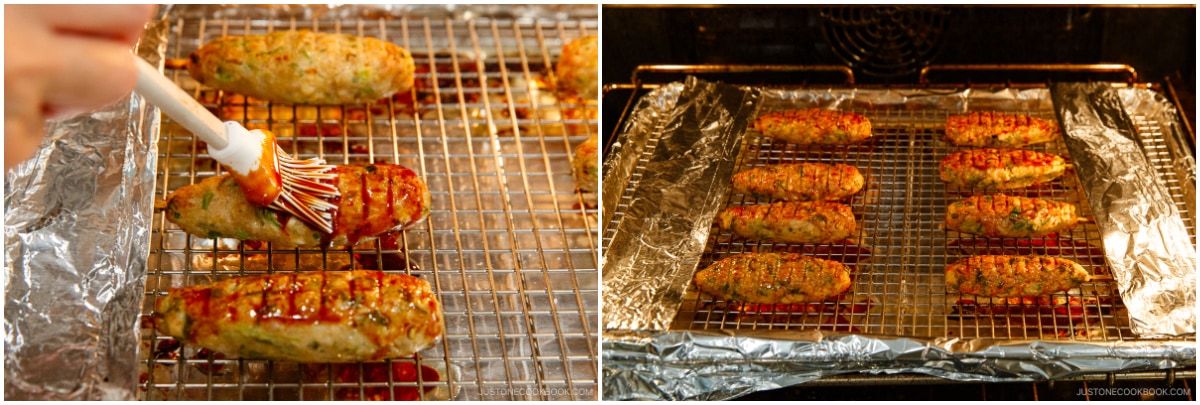
- Cook the skewers under the broiler for 6 minutes, and flip to cook for 3–4 minutes. Next, brush the yakitori sauce on the chicken and broil for 45–60 seconds until bubbling. Then, flip the chicken, brush the other side, and broil for another 45–60 seconds until bubbling.
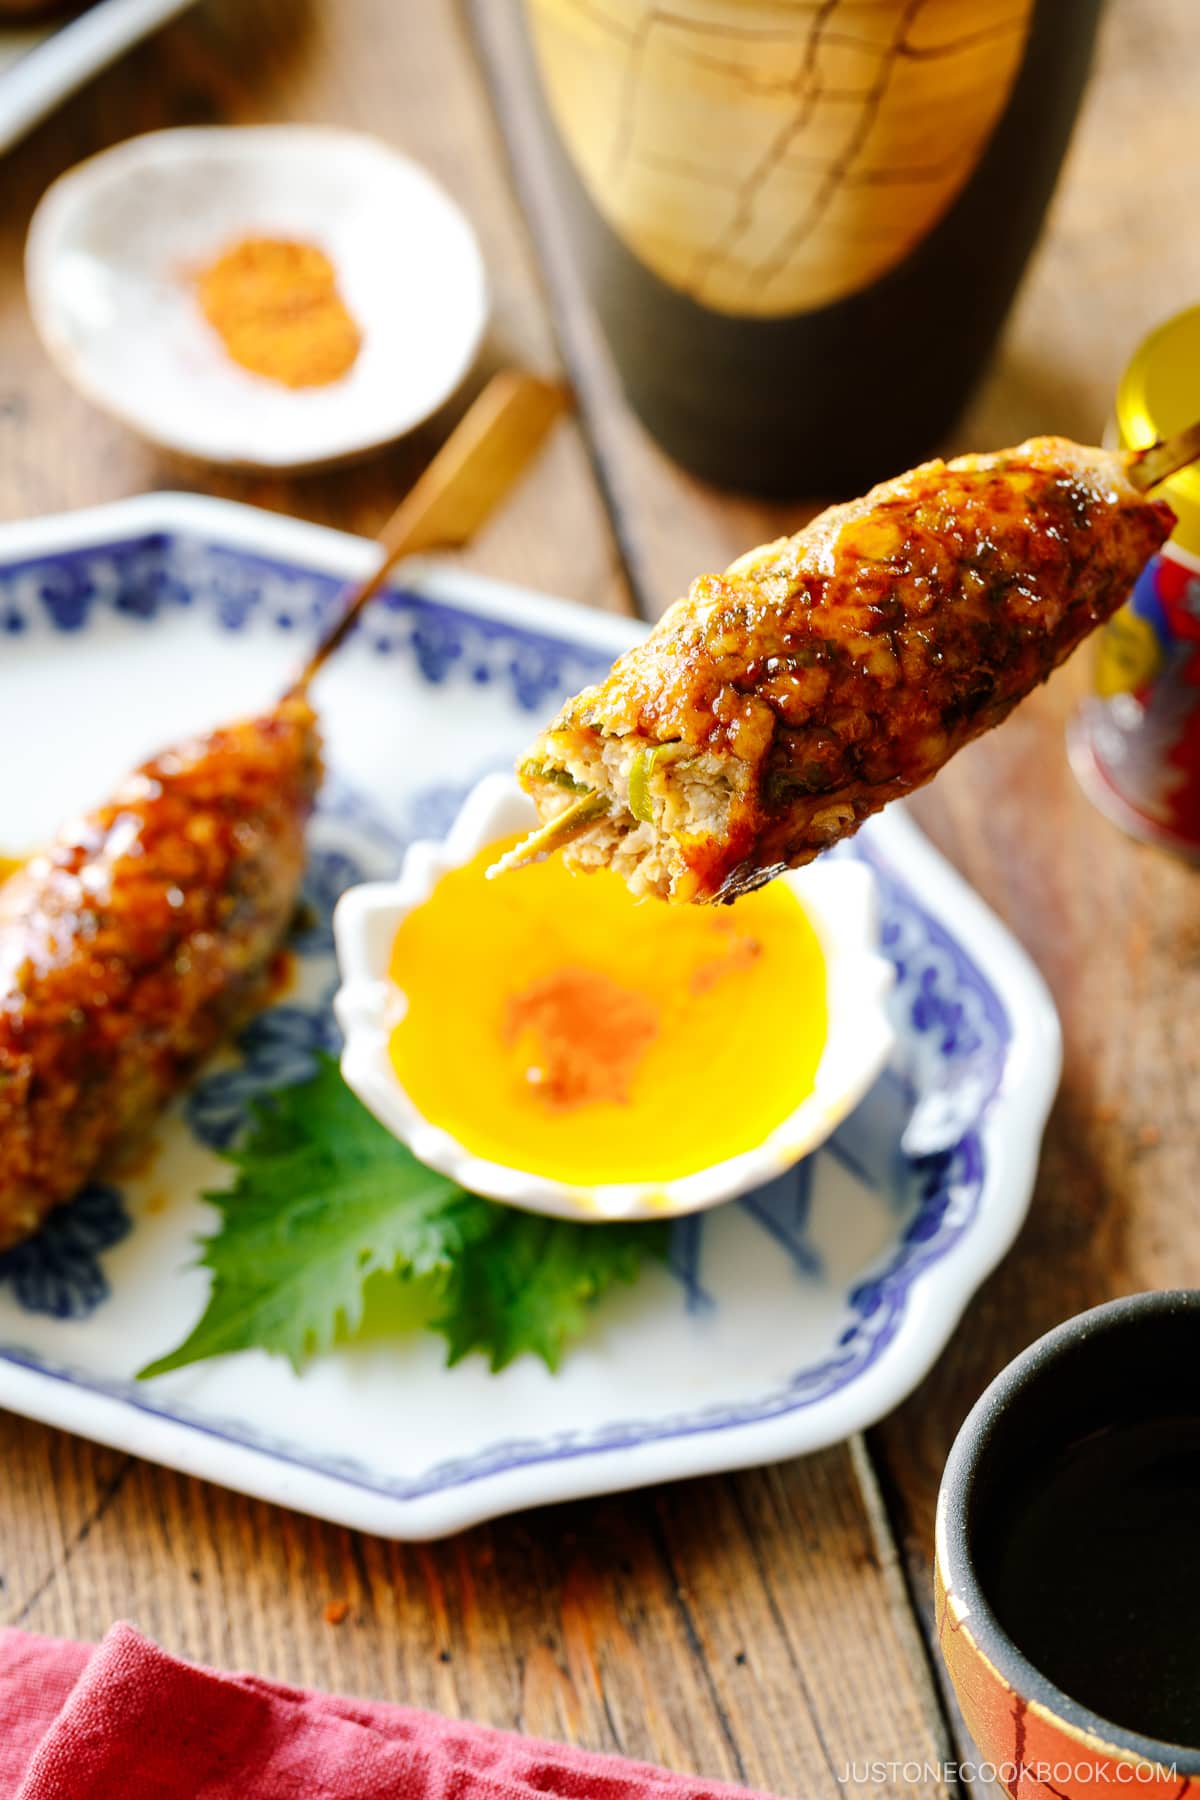
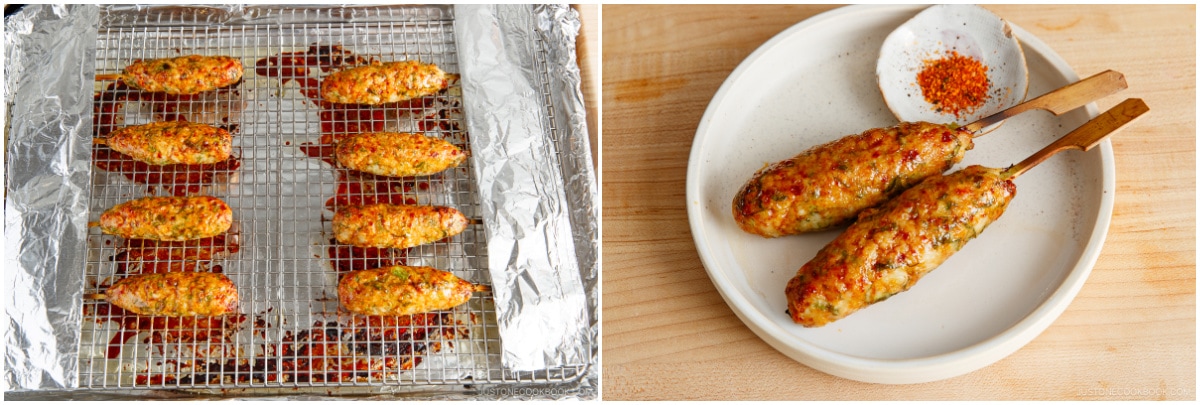
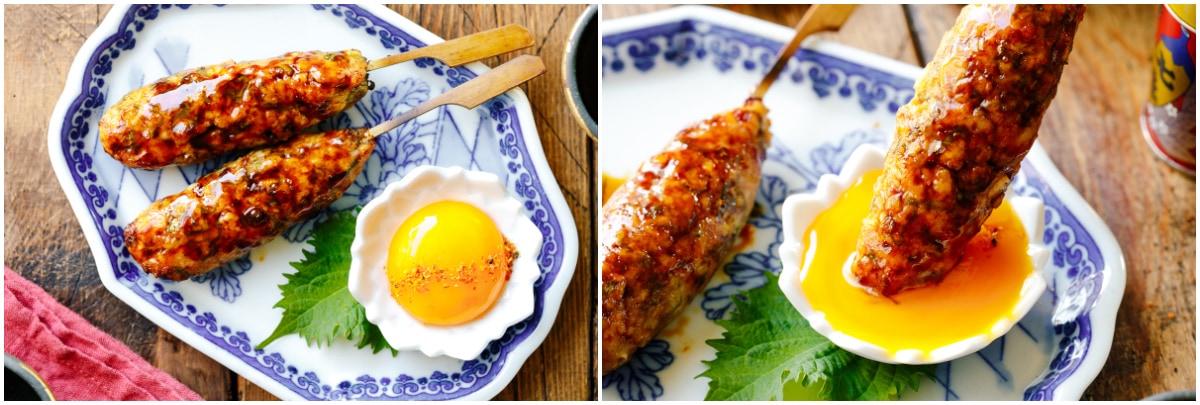
- Serve immediately and enjoy! Sprinkle with shichimi togarashi for a spicy kick. Optionally, dip in a raw egg yolk to enjoy.
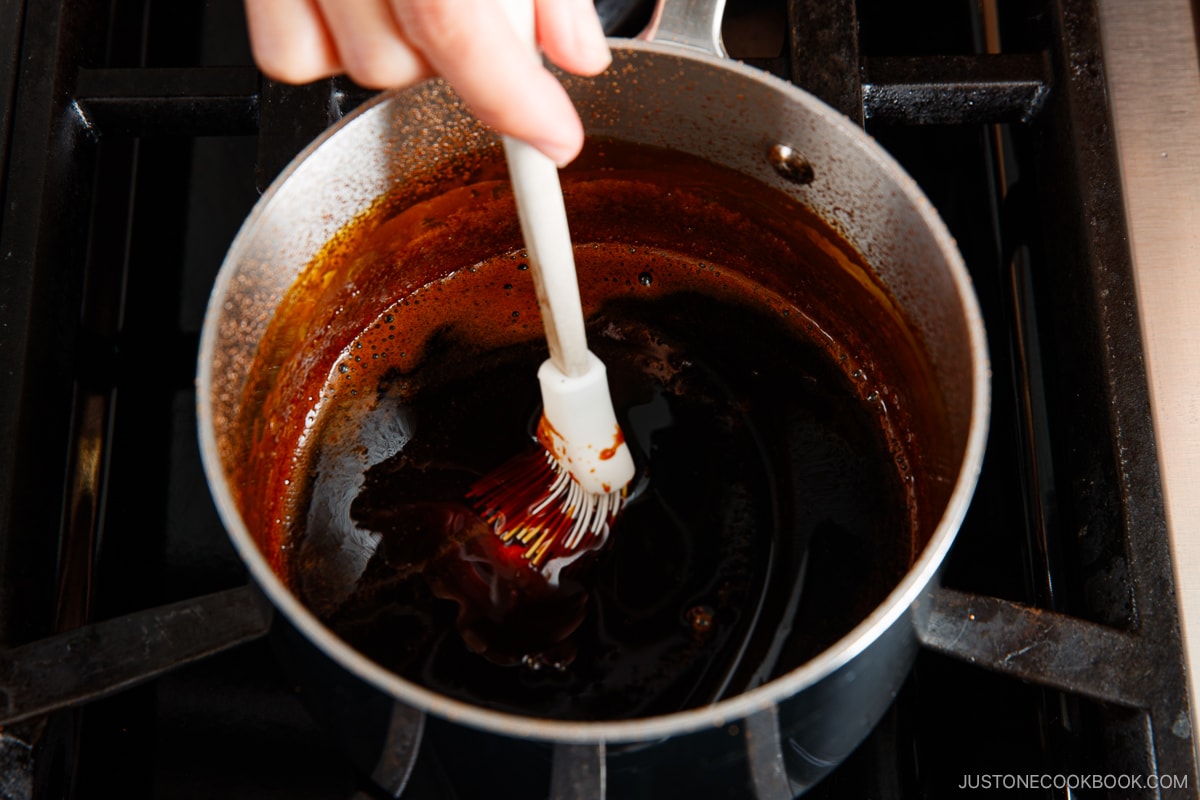
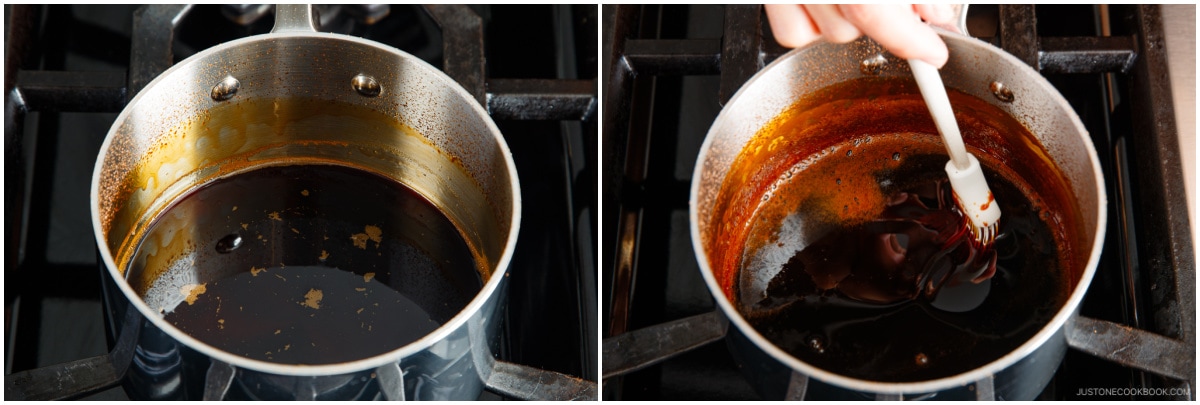
Homemade Yakitori Sauce
Elevate your tsukune with this homemade sauce—it’s the secret to taking them from good to absolutely mouthwatering! All you have to do is mix together five simple ingredients: sake, mirin, soy sauce, brown sugar, and water. Then, let it simmer away on medium-low heat for about 30 minutes until it reduces by half and thickens up. Trust me, it’s a breeze!
My yakitori sauce recipe below will yield some extra, so save the leftover for other dishes. You can dilute it with a little bit of water to thin it and use it as a marinade or stir-fry sauce.
How to Eat Tsukune
Tsukune is delicious when brushed with yakitori sauce alone, but there are other fun ways to enjoy the meatball skewers too!
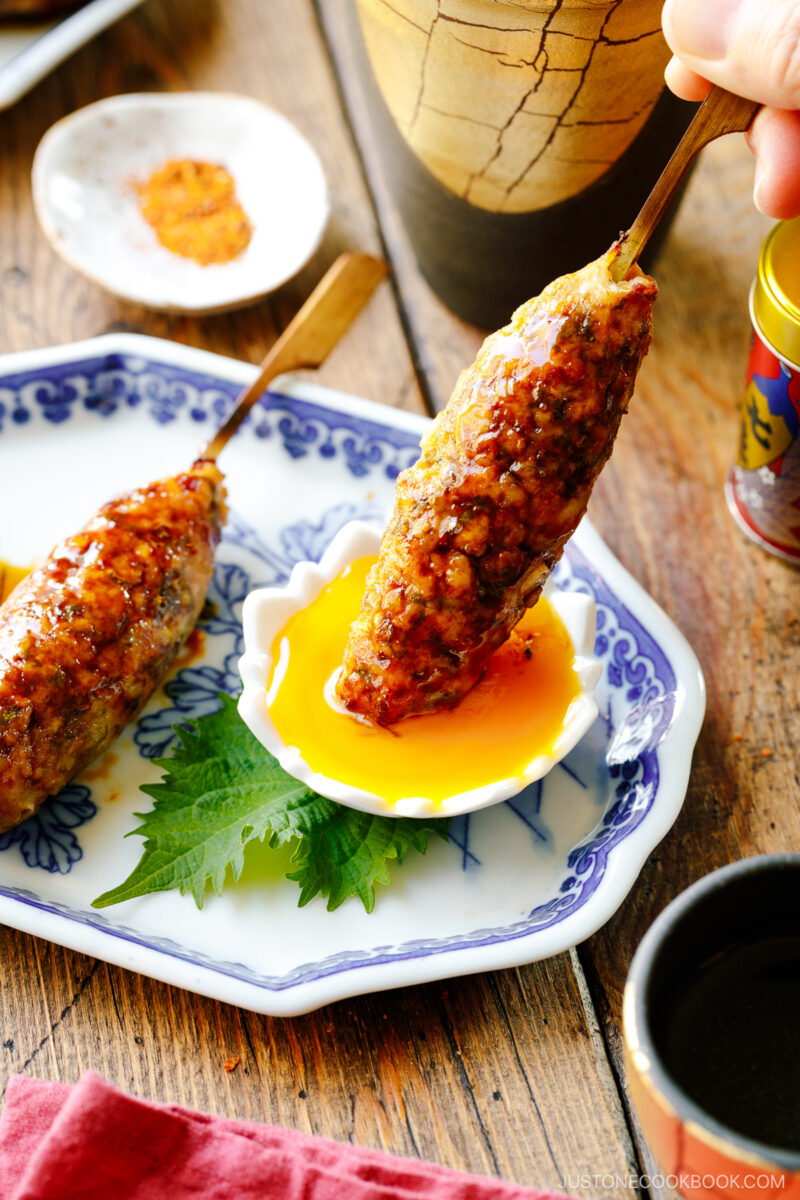
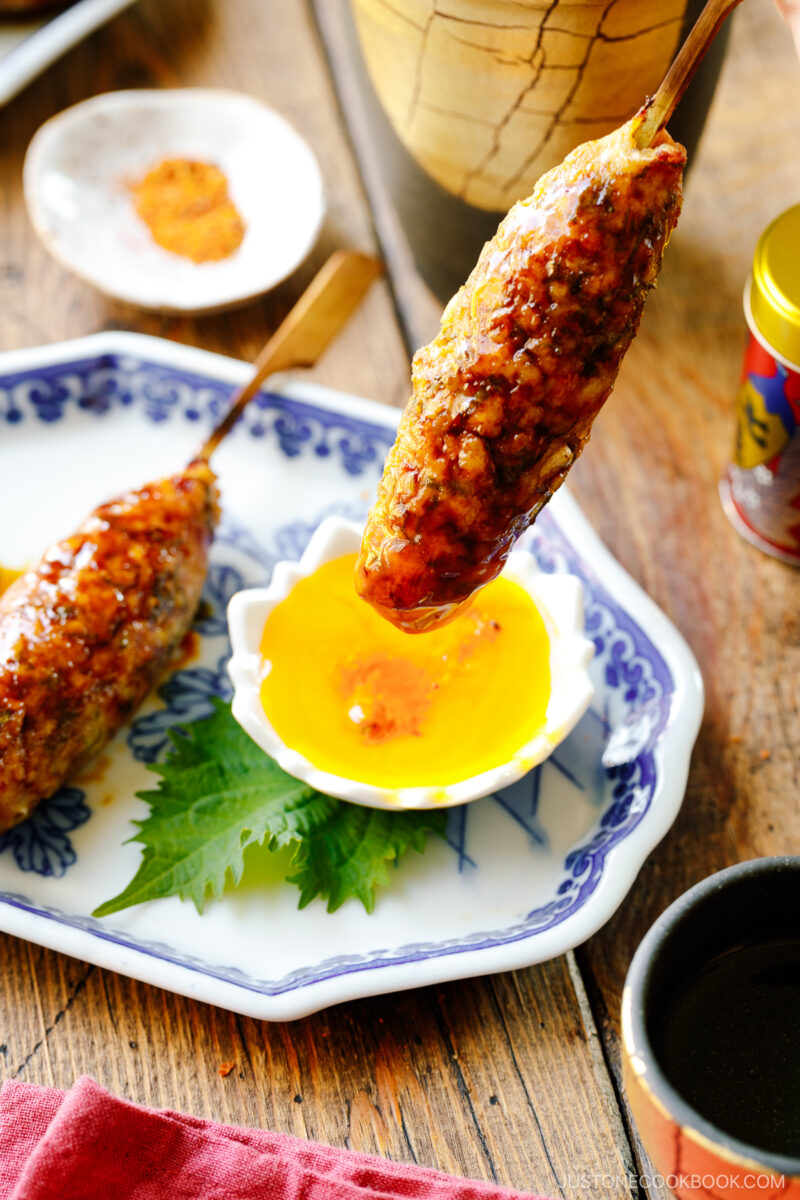
- Dip in raw egg yolk. Eating raw eggs is common in Japan. Eggs are processed differently there and raw eggs are considered safe to consume. Dipping the sweet and salty chicken meatball in rich, creamy, and naturally sweet egg yolk makes it extra delicious.
- Dip in Japanese mayonnaise. I highly recommend Japanese mayo here like the Kewpie brand. Then, sprinkle with a bit of shichimi for a spicy kick.
- Sprinkle with shichimi togarashi. Need a spicy kick? Sprinkle shichimi over the tsukune.
- Enjoy it with yuzu kosho. The citrusy hot sauce gives a bold and spicy taste. Give it a try!
What to Serve with Tsukune
- Beverages: Sake, Japanese beer
- Appetizers: Agedashi Tofu, Spicy Edamame, Cold Tofu (Hiyayakko)
- Mains: Teba Shio (Salted Chicken Wings), Kakuni (Braised Pork Belly)
- Salads: Japanese Potato Salad, Tofu Salad with Sesame Ponzu Dressing
- Rice: Onigiri (Japanese Rice Balls), Yaki Onigiri (Grilled Rice Balls)
Also, don’t forget to try out my Teriyaki Chicken Meatballs and Meatballs with Sweet and Sour Sauce.

Wish to learn more about Japanese cooking? Sign up for our free newsletter to receive cooking tips & recipe updates! And stay in touch with me on Facebook, Pinterest, YouTube, and Instagram.
Tsukune (Japanese Chicken Meatball Skewers)
Video
Ingredients
For the Yakitori Sauce (enough for 2 batches of tsukune)
For the Tsukune
- 2–3 green onions/scallions
- 6 shiso leaves (perilla/ooba)
- 1 lb ground chicken (use half white meat + half dark meat if grinding your own)
- 1 Tbsp toasted sesame oil (plus more for coating your hands)
- 1 Tbsp miso (any type of miso works)
- coarse sea salt (for sprinkling)
For Serving
- shichimi togarashi (Japanese seven spice) (optional, for a spicy kick)
Instructions
- Gather all the ingredients.

- Soak 8 bamboo wooden paddle skewers (6 inches long) in water for 30 minutes. Soaking will prevent the sticks from burning while broiling.

To Make the Yakitori Sauce
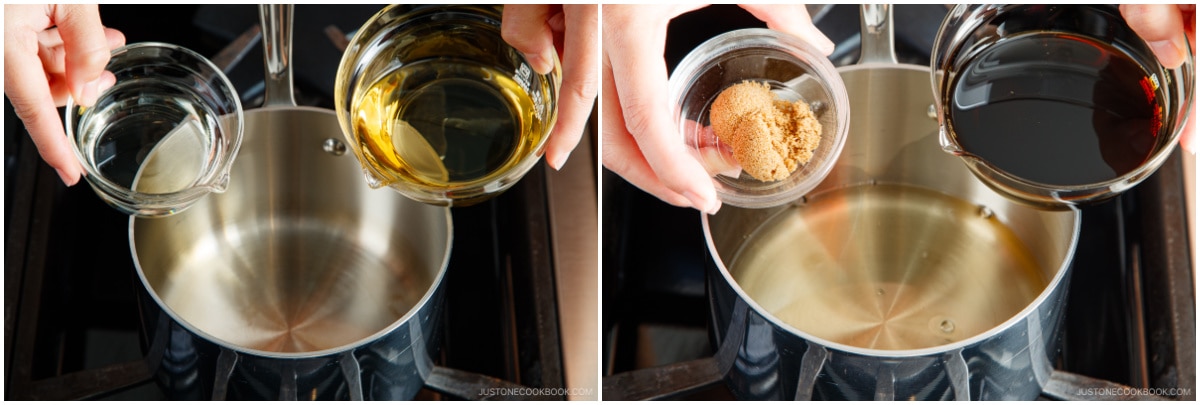
- In a small saucepan, combine ¼ cup water, ¼ cup sake, ½ cup mirin, ½ cup soy sauce, and 2 tsp brown sugar.
- Bring the mixture to a boil over medium heat. Once boiling, lower the heat to a simmer and cook for about 30 minutes. Meanwhile, start preparing the tsukune mixture.
- When the sauce has thickened and reduced by half, remove from the heat. Remember, the sauce will continue to thicken as it cools and moisture evaporates.

To Make the Tsukune Mixture
- Heat an ungreased frying pan over medium heat. When it’s hot, add one-third of the 1 lb ground chicken. If your ground chicken package includes both a fatty and lean part (like the kind sold at Nijiya Market near me), use the lean part here and keep the fatty part for later. Tip: Precooking some of the meat mixture prevents the meatball from shrinking too much while cooking and keeps the tsukune juicy.
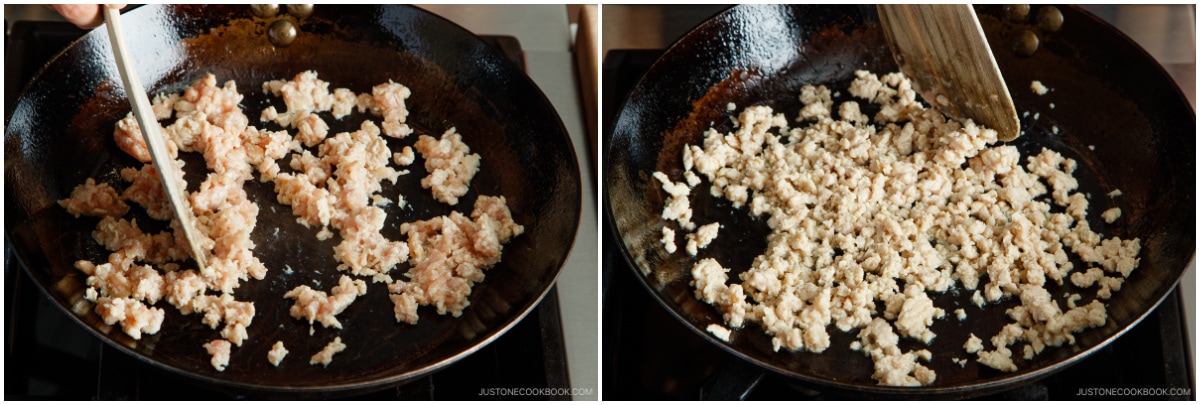
- Cook the meat—without browning it—until no longer pink. While cooking, break it up into small pieces with a wooden spatula.
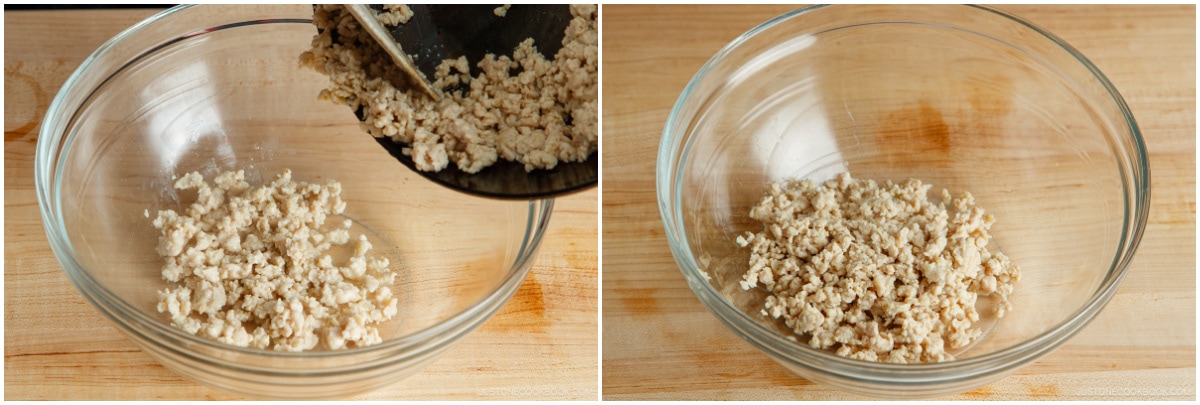
- Transfer the cooked meat to a large bowl and let it cool completely.
- Stack and roll up 6 shiso leaves (perilla/ooba), then cut into thin julienned slices.
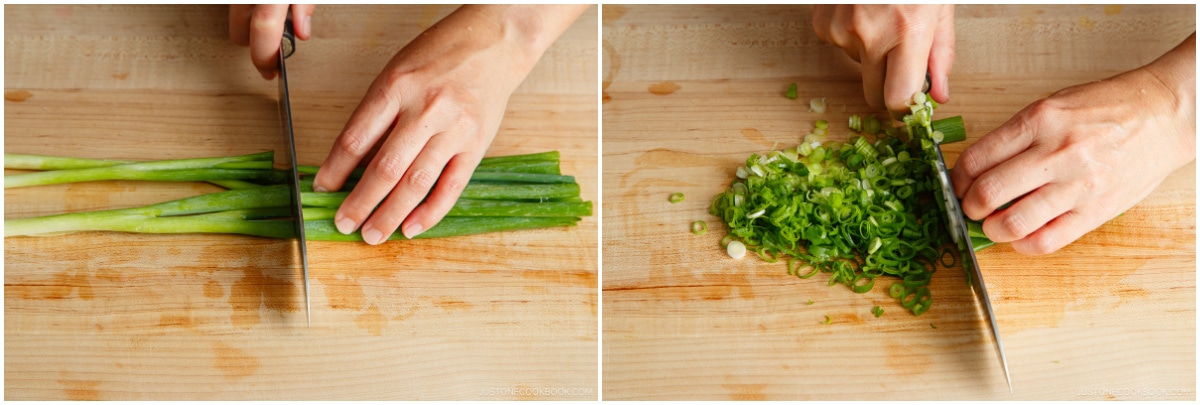
- Cut 2–3 green onions/scallions into thin slices.
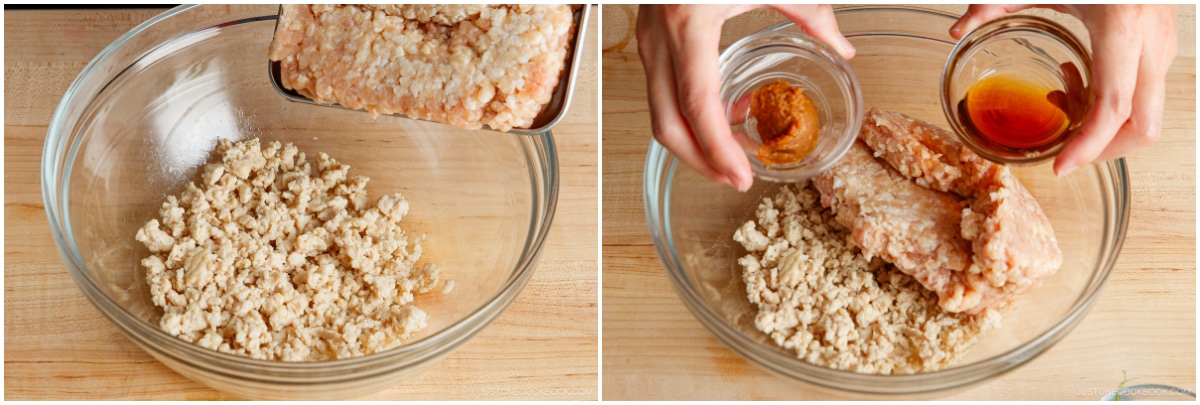
- When the cooked ground chicken is completely at room temperature, add the remaining uncooked ground chicken to it and combine. Then, add 1 Tbsp miso and 1 Tbsp toasted sesame oil.
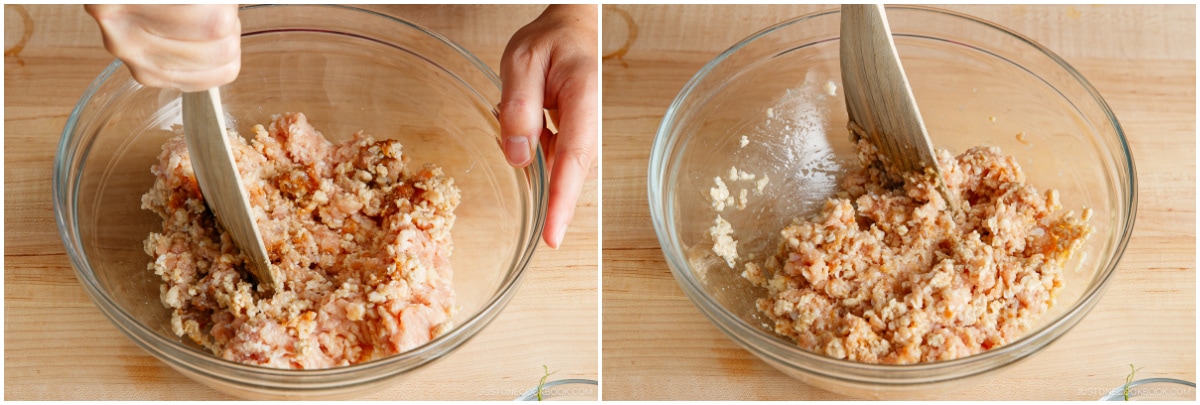
- Using the wooden spatula, knead the mixture well.
- Add the julienned shiso and knead well.
- Add the chopped green onions and knead well.
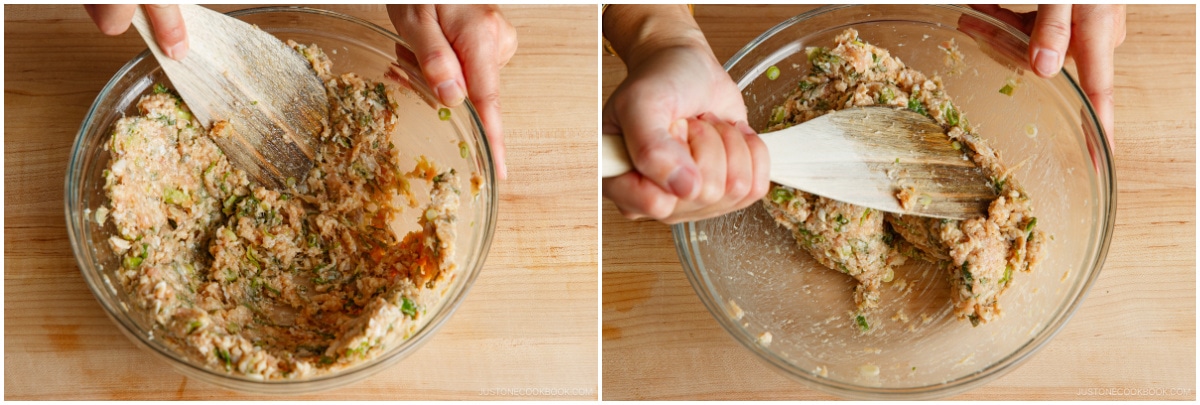
- With the wooden spatula, spread the mixture around the bowl and then mix. Repeat it a few times.
- Now, switch to mixing by hand. Knead and fold the mixture in a clockwise direction 30 times. Then, knead it counterclockwise 30 times. The meat will become paler in color and sticky. This process is very important for the meat to stay on a stick, so please do not skip this step. Tip: If the fat in the mixture starts to look melted, refrigerate it for 10 minutes, then continue kneading until the mixture is pale and sticky.
- Now, divide the mixture into 8 equal portions. Patties that are the same size will cook at the same rate and finish cooking at the same time.
To Shape the Tsukune
- Prepare a baking sheet lined with aluminum foil. Place an oven-safe wire rack on top and brush it with cooking oil. Why use a rack? It allows the excess oil from the meat to drip down to the baking sheet while broiling. This way, the meat chars nicely and comes out juicy. To achieve a restaurant-style tsukune, we don‘t want to cook it in a pool of oil.
- Lightly coat your hands with sesame oil to prevent the meat from sticking. Scoop up one portion of the chicken mixture.
- Toss the meat back and forth between your hands to release the air pockets. Then, gently squeeze and shape the meat to form it into a long and oval patty, about 4 inches (10 cm) long.
- Flatten the patty a bit. Now, place the top half to two-thirds of a skewer along the center line of the patty. Then, gently close the two sides of the patty around the skewer to encase the stick‘s tip and top part.
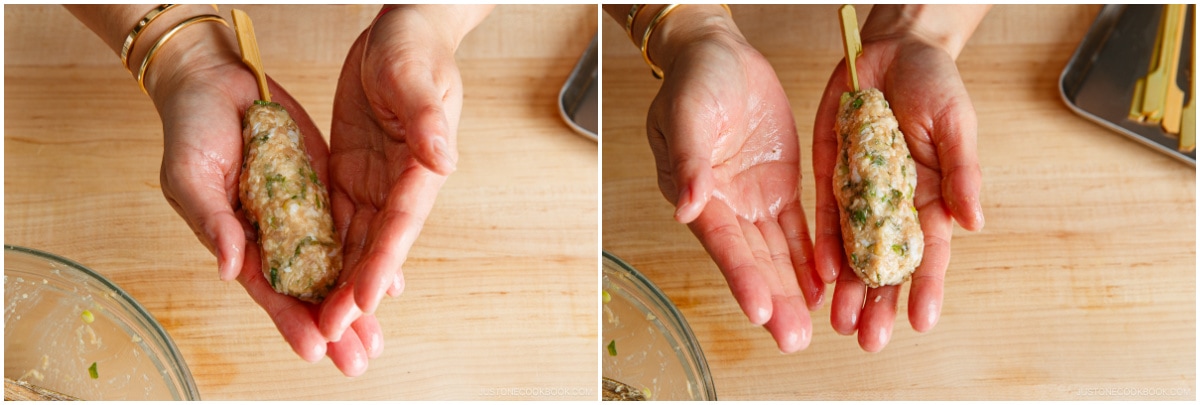
- Seal the edges of the patty together and form it again into a long, cylindrical shape. This thin shape allows the heat to penetrate the meat quickly.
- Gently toss the skewered patty from one hand to the other a few times to make sure the front and back sides are nicely formed. Press and form the meat gently into shape.
- Do a final check, making sure the skewer is secured in the center.
- Place the finished tsukune on the prepared wire rack, and repeat to shape the remaining tsukune. Space them apart on the rack and position them so the skewer handles line up along two of the rack‘s sides and the meat points toward the center. Lightly sprinkle coarse sea salt over the meat.
- Prepare strips of aluminum foil to cover the skewer handles and keep them from turning black and burning while broiling.
To Broil in the Oven
- Five minutes before cooking, preheat the oven broiler on High (550ºF/288ºC). After heating for 5 minutes, place the baking sheet on the middle rack of the oven, about 8 inches (20 cm) away from the heating element. Cook for 6 minutes. Watch the chicken closely while broiling so it doesn‘t burn. If your oven is small/strong, try broiling on Medium (500ºF/260ºC) or lower the rack. Tip: When broiling, you can‘t set the exact temperature. You adjust two things—the distance of the rack and the broiler settings (Low, Medium, or High). I usually use High and move the rack closer or farther away from the heating element.
- Take out the baking sheet from the oven.
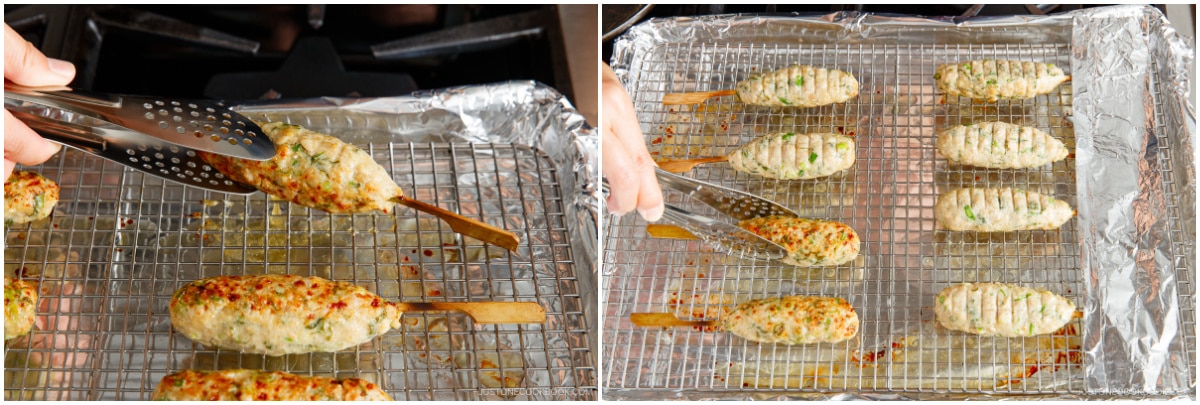
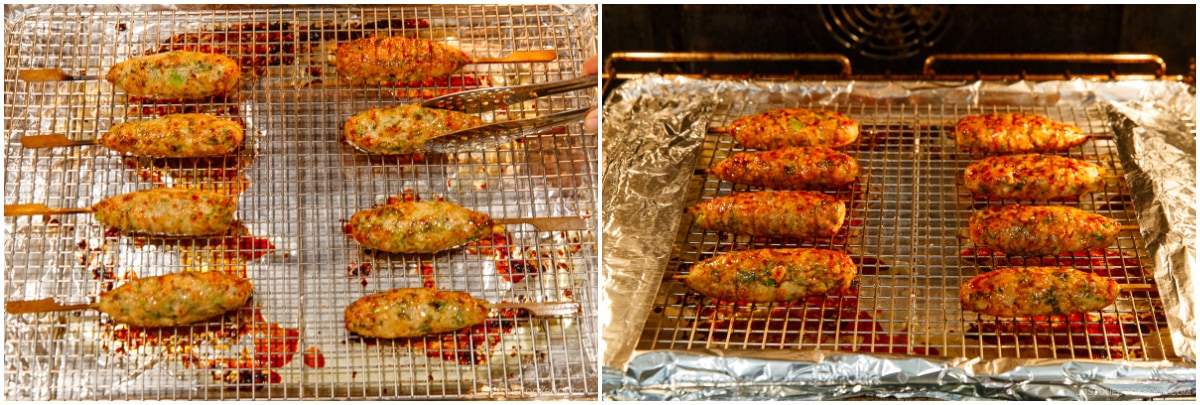
- Using a pair of tongs, flip the tsukune.
- Return the baking sheet to the oven and broil the other side for 4 minutes, or until the chicken‘s internal temperature is 165ºF (74ºC).
- When both sides are cooked, brush the yakitori sauce on the meat (I use a silicone brush). Broil for another 45–60 seconds to caramelize the sauce a bit.
- Flip and brush the sauce on the other side of the meat and broil for another 45–60 seconds until sizzling.
- Transfer the skewers to a serving plate and brush extra sauce on the meat. Serve immediately. Sprinkle optional shichimi togarashi (Japanese seven spice) for a spicy kick. You can try it dipped in Japanese Kewpie mayonnaise or yuzu kosho, too.
- In Japan, tsukune is often served with raw egg yolk (which is safe to consume in Japan). Optionally, dip in the raw egg yolk and enjoy!

To Cook on the Grill (optional)
- Clean and grease the grilling grate. Preheat the grill to medium-hot heat, about 400ºF (200ºC). Gently place the skewers on the grill and cook until the bottom side is nicely brown, 3–4 minutes. With both a stainless steel spatula and tongs, gently rotate the tsukune and cook the other side for 2–3 minutes. Turn to the remaining sides where you want to grill more for another 1–2 minutes. To check if it‘s fully cooked, insert a bamboo skewer to see if the juices run clear or check that the chicken‘s internal temperature registers 165ºF (74ºC). Brush with additional yakitori sauce, cook briefly until sizzling, and remove from the heat.
To Store
- You can keep the leftovers in an airtight container and store in the refrigerator for up to 3 days and in the freezer for a month.
Nutrition
Editor’s Note: This post was originally published on June 2, 2014. It was republished with new images, a new video, and more helpful content on January 6, 2024.


This is just my favorite meatballs ever!! I’m so happy I found this recipe! Just incredible (:
Just so everyone knows..i never put shiso leaves and the sauce.. and it still turns out the yummiest meatballs I’ve ever made.
Hi Noa! Thank you very much for trying Nami’s recipe and for your kind feedback!
We are so happy to hear this became your favorite meatballs recipe!😊
What would the grilling directions be then?
Hi Chris! Thank you very much for reading Nami’s post!
She had updated this recipe with grilling instruction for you.
Please check out the recipe card! We hope this helps!
Hi,
I’ve tried many of your recipes, they all have come out quite successfully. However, with this one, although I like the shiso flavor, the meat came out quite dry. I wonder if there is anything I could add to help with it? Thanks.
Hi Mag! I’m wondering how was the fat % of your ground chicken. If it’s mostly made with chicken breast, it’s usually very dry (just like you cook chicken breast). I recommend getting more fatty ones or if you make your own ground chicken, please use chicken thighs or more chicken thighs and less breast. 🙂
These were so easy and tasty! The only thing is that my tare didn’t thicken very much even though I cooked it for 30 minutes… maybe I need to leave it on longer or hit with higher heat? Thank you for amazing recipes.
Hi Molly! I’m so happy to hear you tried this recipe and liked it! Once the condiments evaporate it will have to thicken. And it depends on one’s stove setting too. Try again with higher heat (but don’t burn!) or longer. 🙂
Is it possible to freeze some of these for future use? If so, what is the recommended way to do so?
Hi Kristine! Sure! Cook first, and let cool completely, and put them in an airtight container to freeze. 🙂
[…] the exposed ends in aluminum foil. Overall, a win win situation.For the recipe I’ll send you to JustOneCookbook, my favorite version of tsukune, where rather than adding potato starch or other additives to help […]
Have you tried this recipe with ground turkey?
Hi Paul! I received from some JOC friends that they made with ground turkey, and liked it. But I personally have never used ground turkey before. 🙂
Is it best to make the recipe without the shiso if not available or to substitute with something else? If the latter, what would you suggest? Thanks 🙂
Hi Nolwenn! It’s really up to you. If you want to add some herbs, you can definitely use chives, green onions, etc. But if you prefer just the meat, then you can completely omit it. 🙂
[…] 1. Tsukune (Japanese Chicken Meatball Skewers) […]
Perfect tsukune recipe, I enjoyed it very much! Thank you!
Geert, Amsterdam
Hi Geert! I’m so happy to hear that you enjoyed the recipe. Thank you for your kind feedback! xo
[…] might have seen this tip in my gyoza or Tsukune (Japanese meatball) recipes, but I can’t stress enough how important it is to knead the mixture well. If you […]
This was perfect! Thank you! Natsukashii! <3
Arigato, Evie! 🙂
I made tsukune for dinner tonight and it was a huge hit.
I made a few adjustments. I couldn’t find awase miso but bought Hikari brand red miso instead as I read it’s better for meat. Didn’t use shiso as they are hard to locate. Had to use some white wine as I didn’t have any sake on hand for the homemade yakitori tare.
Despite the adjustments & substitutions and the fact that the recipe was a lengthy one, we were rewarded with tender, juicy and flavourful chicken meatballs. I didn’t even need to use any Shichimi Togarashi.
Thank you Nami for the great recipe with many precise instructions. From this recipe I learned how to cook ground chicken, how to prevent shrinkage and losing juice by mixing cooled cooked portion of ground chicken with raw portions and how to bind the ground chicken together without eggs or panko. Oh I also get to learn to make homemade yakitori tare.
Will the technique of mixing cooked ground meat with raw ground meat work for pork or beef?
Hi Christina! Thank you for trying my Tsukune recipe and sharing your feedback! It’s very helpful for other readers. I’m glad you enjoyed this recipe.
I’m glad my tips were helpful, and thank you for mentioning that. 🙂
Regarding the technique of mixing cooked and raw ground chicken… to be honest, I’m not sure as I had never tried it before. When I make hambagu (ground pork and beef – https://www.justonecookbook.com/hamburger-steak-hambagu/), it’s totally ok without using cooked meat. Maybe because expansion doesn’t affect the skewer to fall off etc. I think it’s helpful when it comes to skewer… For hambagu recipe, meat does expand, so the trick is to press down the center of the patty so when expand it doesn’t break by expanding the meat (more for visual). Hope this makes sense? 🙂
Thank you Nami for the reply and the tip on making the hambagu. If I ever try the chicken meatball using beef or pork, I will be sure to report back.
By the way, is it possible to make the chicken meatballs in ball shape (instead of the sausage/oval shape as in your photo) and follow the rest of your recipe? I’m thinking the long oval shape fits perfectly on the roasting rack & the excess oil can have a space to drip down into the pan. Have you tried the ball shape with the roasting rack & pan?
Hi Christina! Yes, you can make ball shape. Tsukune can be both shapes in Japan; the long shape is probably more than ball shape. It works just the same. I think, in my theory, meatball is a ball shape, so to differentiate the shape, Tsukune got the different shape. 🙂
Ah that makes sense. Using different shapes to distinguish various skewered items. Thanks.
I cooked these over the weekend and my fussy kids loved them. They left 3 for my husband and I.
I subsituted shiso leaves with 1 tsp of cinnamon and 1 tsp of clove powder. And substituted mirin for chinese rice wine with 1/2 tsp of organic palm sugar.
It was still fantastic and I am going to add this recipe to our regular list. It was easy too!
Some issue sI found, even after needing for so long the mixture was too wet to put on skewers. It was the sesame oil..So I just cooked in a log shape and inserted the skewers after they were cooked!
oh and I cooked it under the grill for around 15 minutes, because it didnt brown up, and when put on the sauce, it took a while to caramelize. (this is my oven issue, not the method)
It was still very moist though. .
THANKS SO MUCH, LOVE IT!
Hi Nicole! I’m so happy to hear that your children enjoyed it. I share the similar stories. Sometimes the kids eat so much that Mr. JOC and I share a small portion! I’m glad you found substitute that work for you and your family. Thank you so much for sharing your feedback with us! I truly appreciate that you took time to write. xoxo
Hi.
I made it.
I didn’t have al the good ingredients and my yakitori sauce was far too heavy and too salted (bought from a shop), but the texture of the tsukune was almost there. The idea of precooking a part of the chicken is simply great.
Even too salted,, the result is way better than what i got in my preceding attempts.
I think that what is missing in your recipe would be to put the preparation in the fridge for a while, so that the balls will be easyer to form when the mixture is colder.
Also they would cook better outside and stay more juicy inside.
I also put tiny breadcrumbs outside,,and i had nothing to complain about that.
Next time my tsukune will be perfect.
Thanks for the recipe.
Hi Marc! Thank you so much for your detailed feedback and tips! As I use a broiler for the recipe, make sure the mixture doesn’t get too cold. It takes longer to cook inside while the outside will get cook too fast (so inside will be raw). Maybe keep it out at room temp before putting in a broiler might help. Hope your next one will go well! Thank you for writing!
thanks for your reply
now i did i almost by the book
what differences : it took me time to find shisho leaves, and i found leaves that look exactly like yours execpt that they are green on one side and purple on the other side. I didnt like the taste of these leaves so i simply decided not to add them.
i also forgot to buy miso, so i replaced it by a hot condiment and ginger. I like them.
I made myself a yakitori sauce but i chend the proportions by adding much less soy sauce, and i did well because it would have been far too salted for me. The tare was perfect
then i placed my tsukune above the middle of the oven like in your video at high broiler. and i must tell you that 6 minites on one side and 4 minutes on the other side is far too much
they didnt burn but they dried. I was fearing that it would happen, but i wanted to reproduce your recipe as much as i could
the textture was much better the first time when i cooked them with a very little sauce in a pan, because it was much more easy to stop the cooking wen done.
Mty tsukune was rather large so for sure, 6 minuts on one side and 4 on the other side at this temperature is far too much.
Unless the temperature of your oven is lower than you think (it is unlikely because the oven of your vedea seems to be very nice)
thankd for this. Anyway i know what to do the next time.
Best regards Marc
sorry for the misstypings. You should have read this :
thanks for your reply.
Now i did it almost by the book.
What differences : it took me time to find shisho leaves. I found leaves that looked exactly like yours except that they are green on one side, and purple on the other side.
I didnt like their taste, so i simply decided not to add them.
i also forgot to buy miso, so i replaced it by a hot condiment and ginger. IT doesnt taste like miso, but i like hot dishes.
I made myself a yakitori sauce but i changed the proportions by adding much less soy sauce, and i did well because it would have been far too salted for me.
The tare was perfect. I used agave syrup instead of sugar, because i have diabetes. When it got caramelized, i added some sake to reach the texture that i wanted.
then i placed my tsukune above the middle of the oven like in your video at high broiler temperature,. and i must tell you that 6 minutes on one side and 4 minutes on the other side is far too much !
They didnt burn, but they dried. I was fearing that it would happen, but i wanted to reproduce your recipe as much as i could.
the texture was much better the first time when i cooked them with a very little oil in a pan, because it was much more easy to stop the cooking wen done.
My tsukune was rather large so for sure, 6 minutes on one side and 4 on the other side at this temperature is far too much.
Unless the temperature of your oven is lower than you think ( it is unlikely, because the oven of your video seems to be very nice).
thanks for this. Anyway i know what to do the next time.
Best regards Marc
Hi Marc! My readers will appreciate your input. Thank you for writing a thorough feedback! 🙂