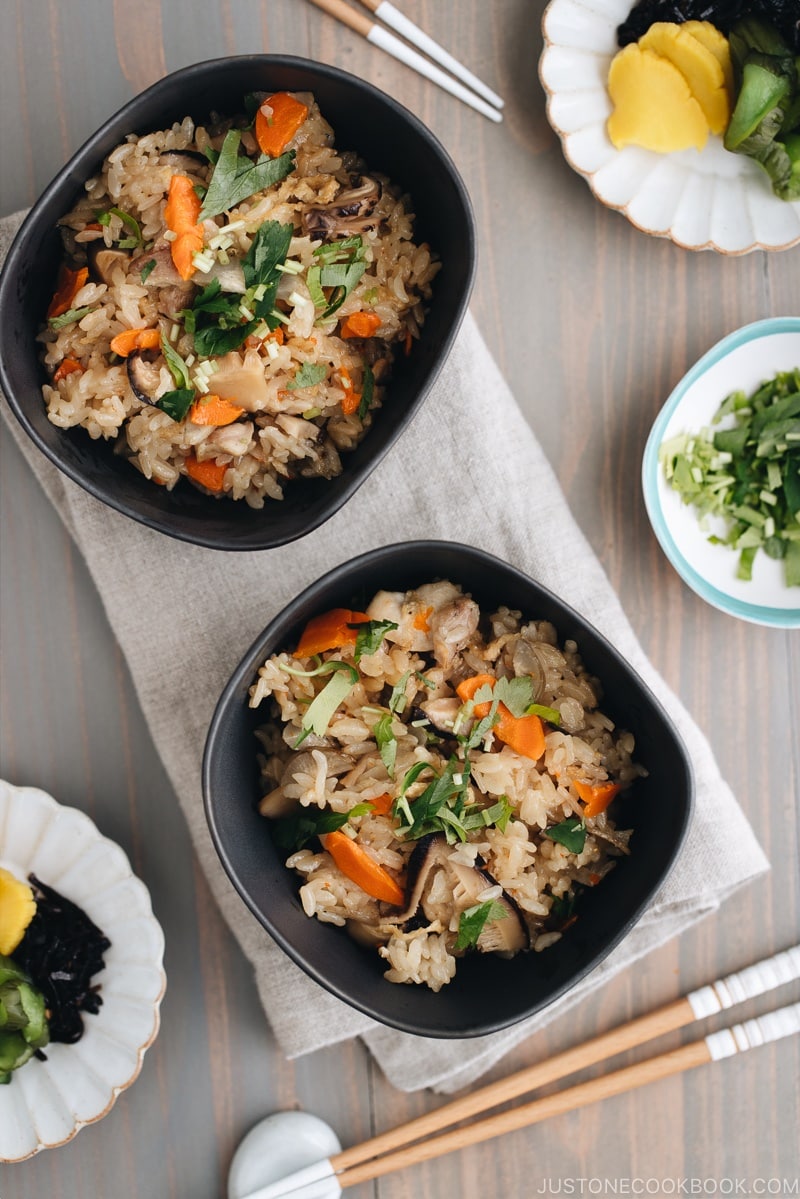
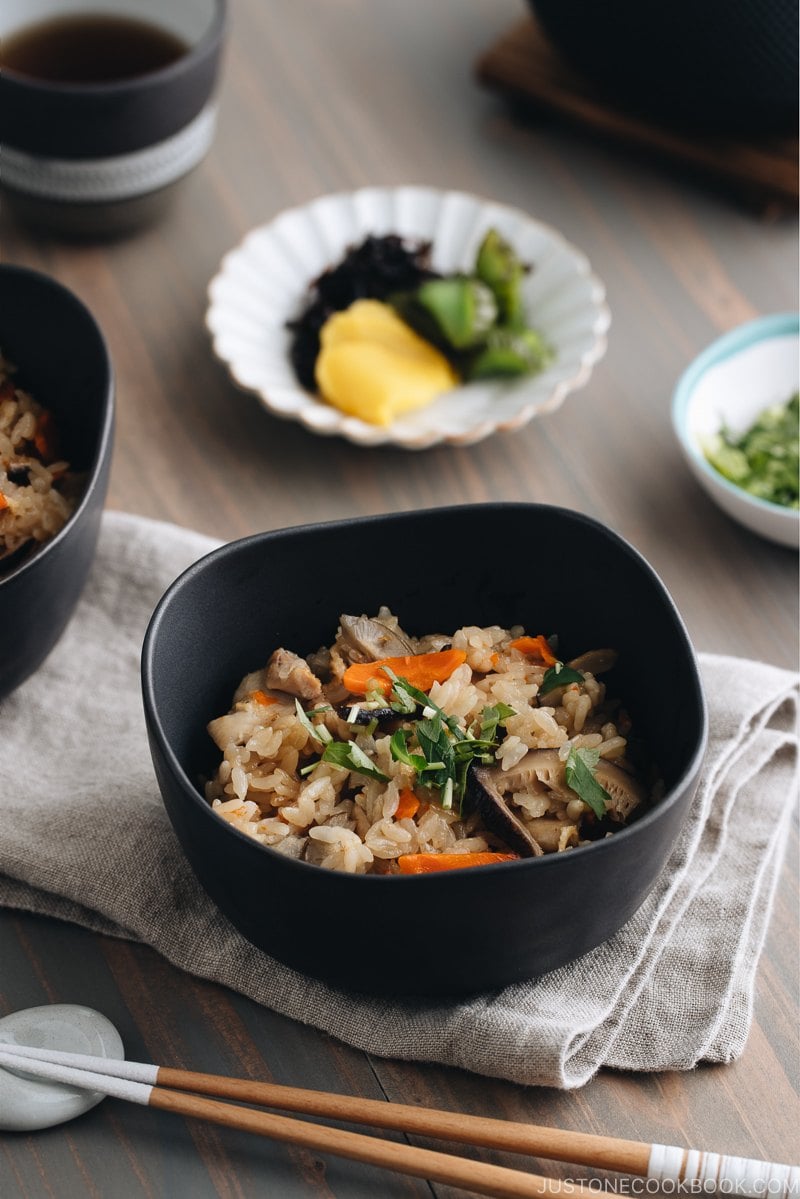
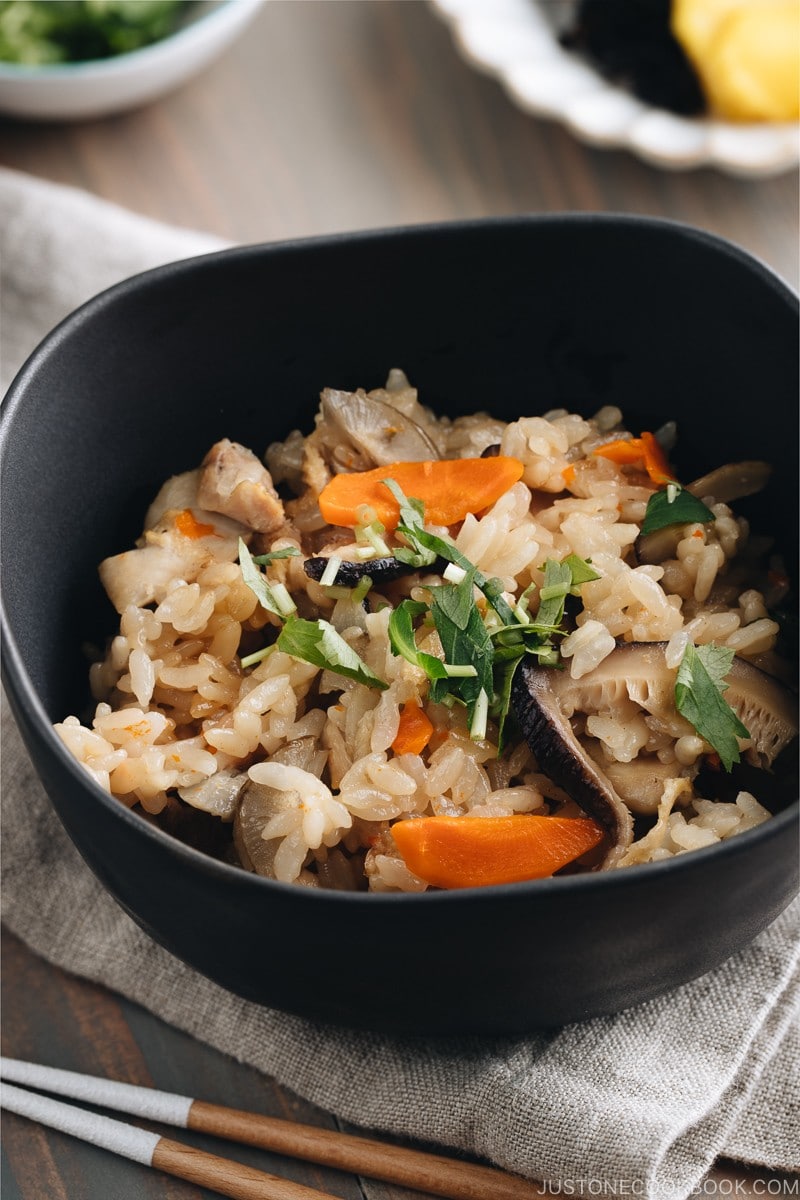
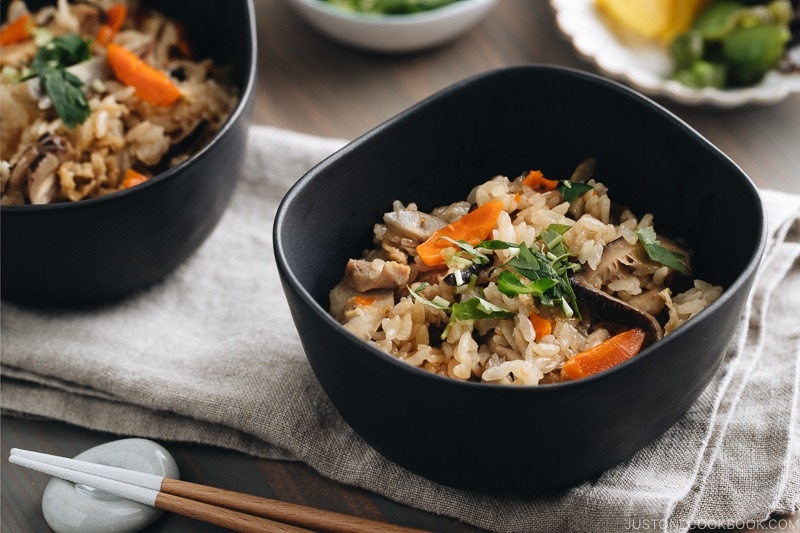
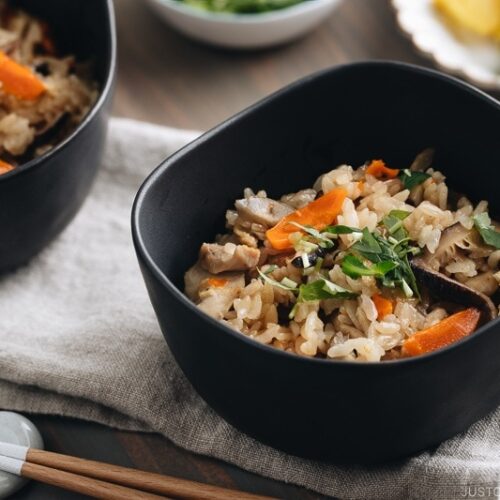
This Instant Pot Takikomi Gohan is a traditional Japanese mixed rice with chicken and vegetables that is pressure cooked in a savory dashi broth. This time-saving recipe makes for a delicious and quick weeknight meal!
Looking for more ways to cook various rice dishes in your instant pot? Today we will use the trusty pressure cooker to make Instant Pot Takikomi Gohan, a versatile Japanese rice dish with a colorful mix of ingredients. Everything is cooked in one pot, and nutrition-wise, it is a wholesome, comfort food to enjoy on a hectic weeknight.
This rice recipe is specifically created for those of you who practically cook everything with the instant pot. If you don’t own an instant pot, you can prepare takikomi gohan following my rice cooker method.
What is Takikomi Gohan?
Takikomi Gohan (炊き込みご飯) is a Japanese rice dish cooked with dashi and soy sauce along with mushrooms, vegetables, meat, or fish.
Takikomi Gohan often includes seasonal ingredients such as matsutake mushrooms in Matsutake Gohan or chestnuts in Kuri Gohan. We also put different ingredients to make all kinds of variations. On the blog, we have:
- Gobo and Miso Takikomi Gohan
- Sweet Onion Takikomi Gohan
- Ginger Rice
- Sansai Gohan (Rice with Mountain Vegetables)
- Classic Takikomi Gohan (stovetop)
There is a similar dish called Maze Gohan (混ぜ御飯), in which flavorful ingredients are mixed into cooked rice.
4 Important Tips for Making Instant Pot Takikomi Gohan
1. Cut the ingredients into similar sizes.
Ingredients should be cut into similar sizes for two reasons. One, you don’t want to eat chunky big ingredients when you’re eating soft tender rice. And two, all the ingredients are cooked at the same time; therefore, tougher ingredients should be cut into slightly smaller than tender ingredients.
2. Add the seasonings right before cooking rice.
Takikomi gohan is always cooked with soy sauce and salt. These ingredients prevent the rice from absorbing water, so make sure to soak the rice for 20-30 minutes before cooking. Japanese short-grain rice is ALWAYS soaked prior to cooking because it is plumper and thicker and it takes time to become tender.
3. Do not mix rice and ingredients.
When you add the ingredients to the rice, you may want to mix it all up. Actually, it’s best not to. In order for the rice to cook evenly, the rice should not be mixed up with the ingredients, and stay below the ingredients. That way, rice gets access to water easily without interference from the meat and vegetables.
4. Fluff the rice after 10-minute natural release
Set the timer for 10 minutes when the Instant Pot beeps to let you know it’s done cooking. Then release the remaining pressure by opening the valve. You do not want to keep too much moisture in the cooker, so open up the pot and release the moisture and fluff up the rice.
Takikomi Gohan Ingredients & Substitute
Don’t feel restricted to using the same ingredients when it comes to Takikomi Gohan. As I mentioned earlier, Takikomi Gohan has many variations and you can definitely make yours with whatever you like. Here are the ingredients I used today, with tips on substitution.
- Dried shiitake mushrooms: Shiitake mushrooms, especially dried ones, have amazing aromas and flavors. Plus, you can get the delicious “shiitake dashi” out of the soaking water, which you can use to cook the rice! You can find dried shiitake mushrooms at any Japanese or Asian grocery store and online at Amazon. Alternatively, you can use fresh shiitake mushrooms (but can’t get dashi out of fresh ones) or other mushrooms.
- Gobo (burdock root): Japanese/Asian grocery stores and Whole Foods carry gobo, but it may be costly or come in bulk (I have many gobo recipes). If you can’t find it, you can skip and add other root vegetables, such as turnips.
- Aburaage (deep-fried tofu pouch): The tofu pouch adds extra flavors & texture to the mixed rice, so I almost always like to add this ingredient. It’s the same tofu skin used for Inari Sushi, but it’s not seasoned (basically the tofu skin before seasoned). You will find it in a freezer or tofu section at Japanese grocery stores and sometimes Asian grocery stores carry similar deep-fried tofu that is a small cube shape. You can cut it up for use.
- Mitsuba (Japanese parsley): This Japanese herb makes the dish extra tasty, yet it is extremely hard to find if you don’t have a well-stocked Japanese grocery store. Use chives or green onion/scallion instead to add some green color.
- Dashi: The fundamental Japanese stock is what makes the rice dish “authentic” Japanese. Chicken broth or vegetable broth will not make Takikomi Gohan. You can use any dashi you like – Awase Dashi (Kombu + Katsuobushi), Kombu Dashi, and Shiitake Dashi. You can pick 3 ways to make dashi (dashi powder, dashi packet, or from scratch).
The Wonder of Instant Pot Japanese Mixed Rice
Besides being convenient, you’ll learn that takikomi gohan makes a great template for trying new flavor combinations. I hope you can lean on the recipe anytime when you need to make a fulfilling meal for the family.
Wish to learn more about Japanese cooking? Sign up for our free newsletter to receive cooking tips & recipe updates! And stay in touch with me on Facebook, Pinterest, YouTube, and Instagram.
Instant Pot Takikomi Gohan
Video
Ingredients
- 1½ cups uncooked Japanese short-grain white rice (2 rice cooker cups, 360 ml)
- 2 dried shiitake mushrooms
- ¼ cup water (to rehydrate the shiitake)
- 1 chicken thigh (4–5 oz, 113–142 g)
- ½ Tbsp sake (for marinating the chicken)
- 1.8 oz gobo (burdock root) (about ⅓ cup sliced)
- 1.8 oz carrot (about ⅓ cup sliced)
- 1 piece aburaage (deep-fried tofu pouch) (about ⅓ cup sliced)
- 3 sprigs mitsuba (Japanese parsley) (for garnish; or use green onion)
For the Seasonings
- 1½ cups dashi (Japanese soup stock) (use standard Awase Dashi, dashi packet or powder, or Vegan Dashi)
- 1½ Tbsp soy sauce (use gluten-free soy sauce for GF)
- 1 Tbsp mirin
- ½ tsp Diamond Crystal kosher salt
Instructions
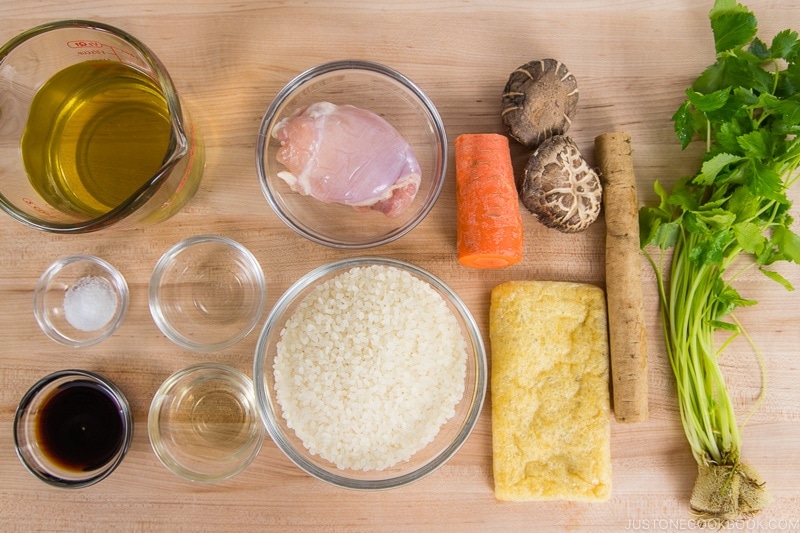
- Gather all the ingredients. Make the dashi if you haven‘t already and let it cool to room temperature (you can place the pot with dashi in a bowl of iced water).

To Wash and Soak the Rice
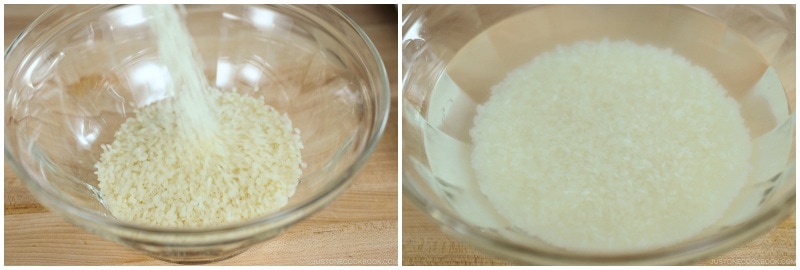
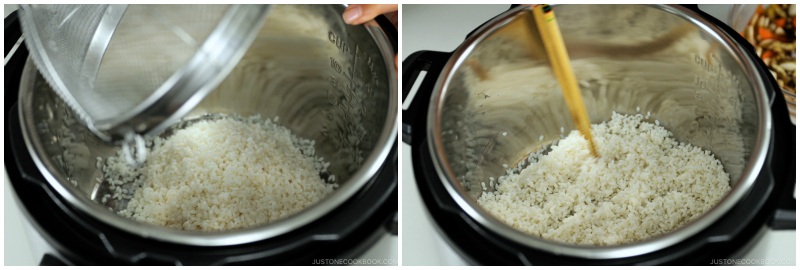
- In a large bowl, measure and add 1½ cups uncooked Japanese short-grain white rice. Rinse the rice under cold water, gently rubbing the rice with your fingertips in a circular motion for 10–15 seconds. Add more water, then pour off the starchy water. Rinse and repeat until the water becomes clear. Then, add water to cover the rice and soak for 20–30 minutes. Meanwhile, start preparing the ingredients.

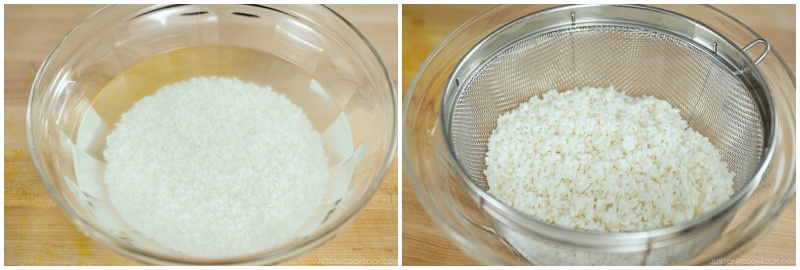
- Here‘s how the rice looks before and after soaking for 20 minutes. Drain the water completely. Set aside for 10 minutes. If you don’t have time to wait, then shake off the excess water the best you can.
To Prepare the Ingredients
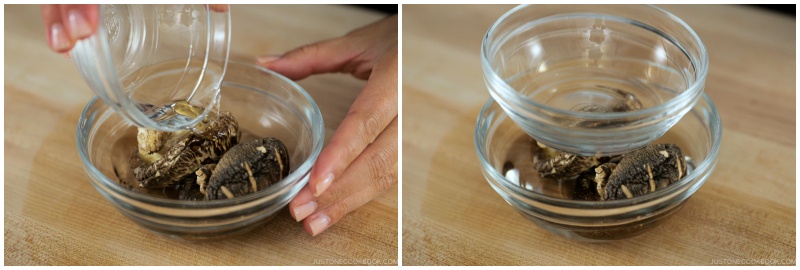
- In a small bowl, add 2 dried shiitake mushrooms and ¼ cup water. Put a heavy object on top so the mushrooms stay submerged in the water. Let them soak until they‘re tender. In the meantime, prep the other ingredients.
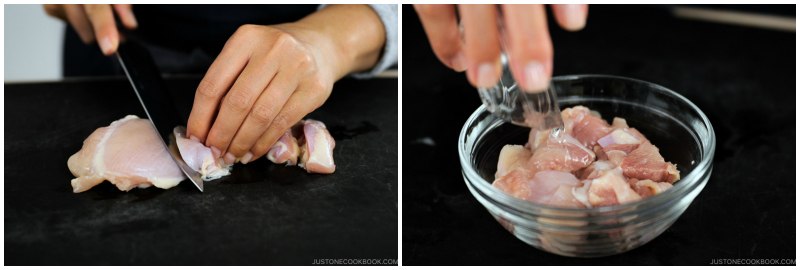
- Cut 1 chicken thigh into slanted, smaller bite-sized pieces. I use the sogigiri Japanese cutting technique to create more surface area so the meat will cook faster. Sprinkle the pieces with ½ Tbsp sake to remove any unwanted smell from the chicken.
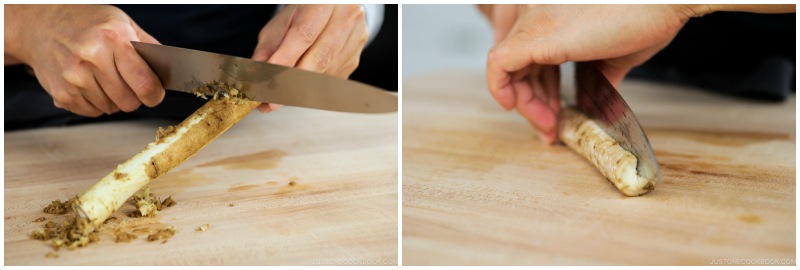
- With the back of a knife, scrape off the skin of 1.8 oz gobo (burdock root). Do not peel the skin with a vegetable peeler, which will remove the earthy and delicious flavor just below the skin. Cut the gobo in half lengthwise.
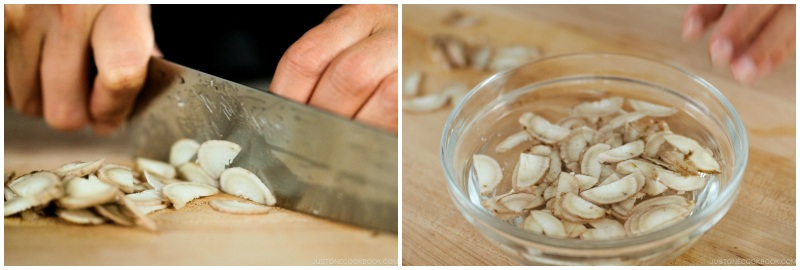
- Thinly slice each half diagonally. Soak the gobo in water to prevent it from turning brown and remove any astringent taste.
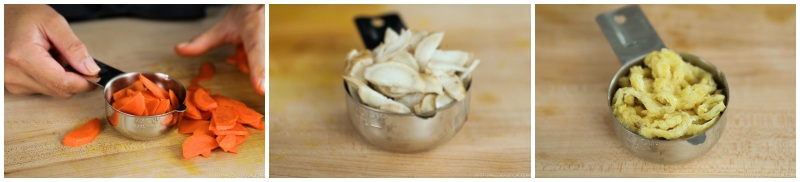
- Cut 1.8 oz carrot in half lengthwise and thinly slice it diagonally.
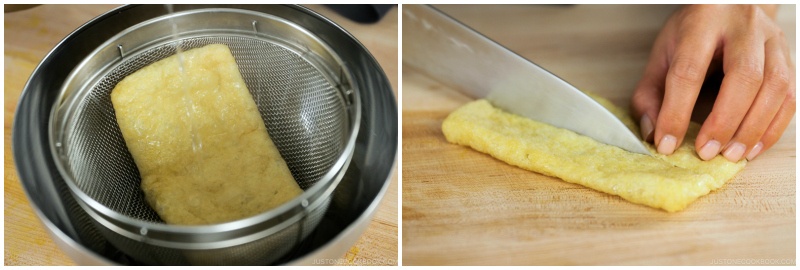
- Pour hot water over 1 piece aburaage (deep-fried tofu pouch) to get rid of the excess oil. Some people skip this step as the factory oil is cleaner these days. I do it anyway. Cut the aburaage in half lengthwise.
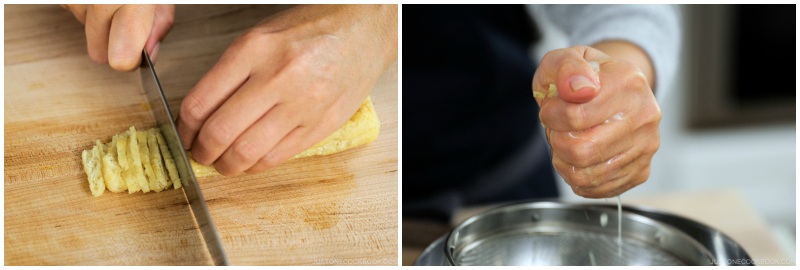
- Cut the tofu pouch into thin slices and squeeze out the water.
- You will need about ⅓ cup each of sliced carrot, sliced gobo, and sliced aburaage.

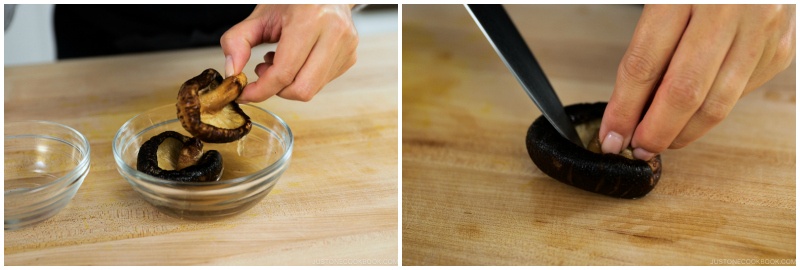
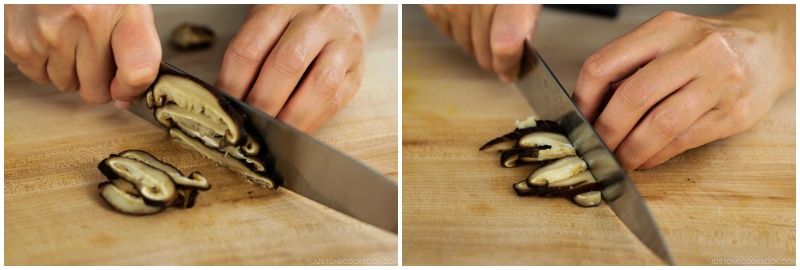
- By now, the shiitake mushrooms should be hydrated and tender. Squeeze out the excess liquid into the bowl and reserve this shiitake dashi to use later. Next, remove the stem from each shiitake mushroom.
- Thinly slice the mushroom caps. If it’s a big mushroom, cut the thin slices in half crosswise.
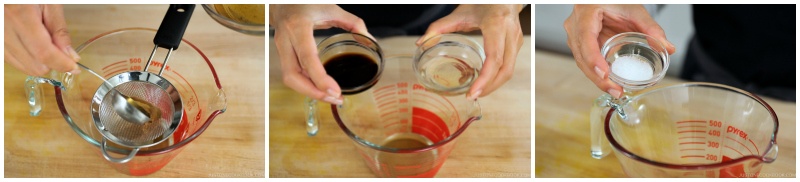
- In a 2-cup measuring cup, add 2 Tbsp shiitake dashi (the reserved liquid from hydrating the shiitake mushrooms). If you are worried about the small particles left in the liquid, you can strain the liquid using a tea strainer. To the same measuring cup, add 1½ Tbsp soy sauce, 1 Tbsp mirin, and ½ tsp Diamond Crystal kosher salt.
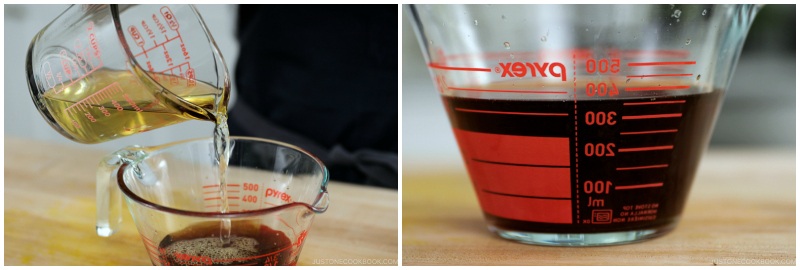
- Lastly, add enough of the 1½ cups dashi (Japanese soup stock) to the measuring cup so that the seasoning liquid measures 360 ml total.
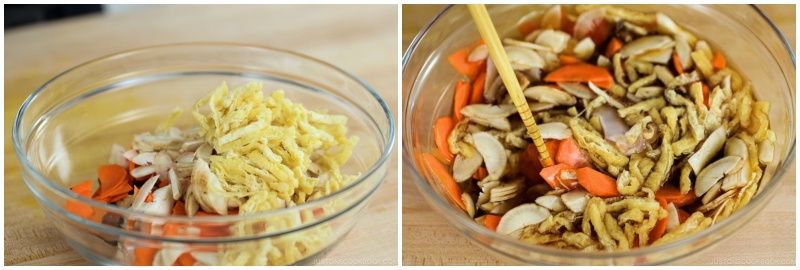
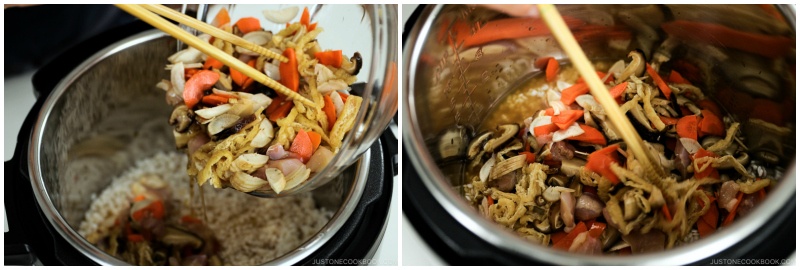
- To a large bowl, add the chicken, shiitake mushrooms, carrot, gobo, and aburaage. Then, add the 360 ml seasoning liquid from the previous step. Mix well.

To Cook the Rice
- Transfer the well-drained rice to the rice pot. Make sure the rice is evenly distributed and flat.
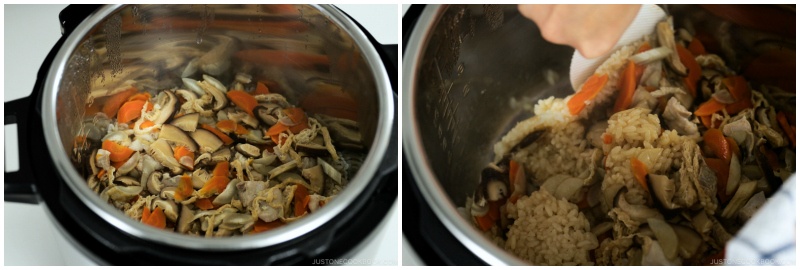
- Add the ingredients and seasoning liquid on top of the rice. DO NOT MIX the rice and the ingredients. Try to evenly distribute the ingredients on top and flatten them without mixing with the rice.
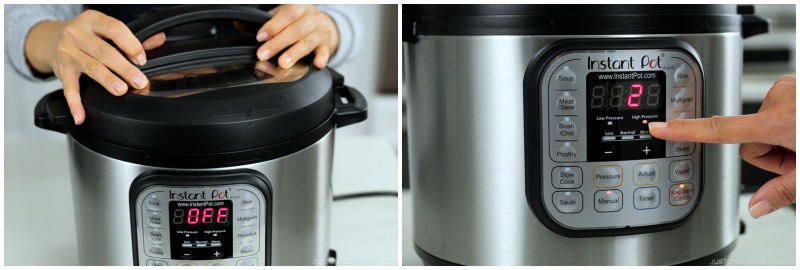
- Close the lid and click Manual. Set to High pressure for 2 minutes.
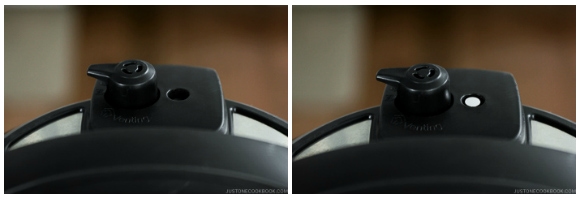
- Make sure the steam release handle points at Sealing and not Venting. The float valve goes up when pressurized (it takes roughly 10 minutes to pressurize).

- When it’s finished cooking, the Instant Pot will beep and switch automatically to the Keep Warm mode. Let the pressure release naturally for 10 minutes; I recommend setting a timer. DO NOT EXCEED 10 MINUTES of natural release. After 10 minutes, proceed with a quick release by turning the steam release handle to the Venting position until the float valve drops down. Hold a kitchen towel over the steam release valve to protect your hand and face during quick release. Only a little bit of steam will be left after 10 minutes of natural release.
- Open the lid and immediately fluff the rice with a rice scooper to avoid burning the rice on the bottom. Instead of “mixing” the rice, try to “cut” it at a 45-degree angle using a slicing motion as you turn over each scoop of rice to fluff.

To Serve
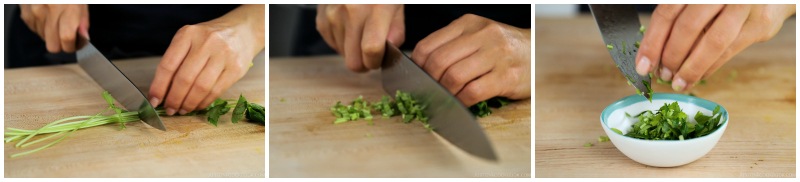
- Cut 3 sprigs mitsuba (Japanese parsley) into small pieces. If you don’t have mitsuba, you can use green onion.
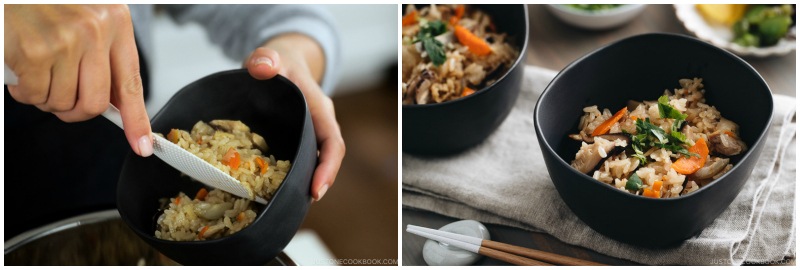
- Serve the Takikomi Gohan in individual bowls and garnish with the chopped mitsuba.
To Store
- The best way to store Japanese rice is to freeze it, even if you plan to use it the following day. To learn how, please read my post on how to store cooked rice.


Hi,
I tried this dish for 8 servings and it came out great. Only thing is I think I used the wrong kind of dashi (will correct next time) causing it to be too salty.
Do I need to adjust ingredients or process if I use salmon instead of chicken?
Thank you.
Hi Saket! Thank you very much for trying Nami’s recipe and for your kind feedback!
To make this with salmon, you can follow the recipe as written and adjust the salt level as you like.
We hope this helps!
Hi Namiko,
In your video, the instant pot was set to high pressure, 2mins for 2 cups of rice. If i increase the use 3 cup of rice instead of 2 cups which means the dashi amount increases from 360ml to 540ml (dashi qty recommended by recipe scale based on pax), will the cooking time for the instant pot change? Kindly advise.
Thank you
Hi Kenny, Thank you very much for trying Namiko’s recipe!
If you are cooking 3 cups of rice (rice measuring cups), Nami recommends extending the cooking time to 3 minutes and natural release for 10 minutes. If it turned out harder than you prefer, try extending the natural release time to 12~14 minutes.
We hope this helps!🙂
This looks good! Two questions… 1. I do not eat meat, so if I just omit the chicken but leave everything else the same, would I still use the same amount of water? 2. I do not have a rice measuring cup. 1 rice measuring cup = how much in regular measuring cups? Thank you!
Hi Cat,
Please use the same amount of water.
And if you like more vegetables or mushrooms, you may add more to this recipe or just use the same amount.
You can also add Konnyaku. (Prepare same as Step 5 (boil and cut) in Hijiki salad recipe and add to the ingredient: https://www.justonecookbook.com/hijiki-salad/) It’s up to your preference.😉
As for the measuring, 1 rice cooker cup (1 gō / 1合) is 180 ml (150 g rice) instead of 200 ml or 240 ml.
We hope this is helpful!
So much faster than using a rice cooker, and in my opinion, the rice cooked better too, not mushy, not al dente, just perfect! I think this will be my go to method for takikomi gohan. I used dashi powder, I know you’re not a fan of it, Nami. It was a tad too salty with 1/2 tsp salt, next time I’ll add no salt if using dashi powder. Thanks for another great recipe!
Hi Olivia! I’m so happy to hear you liked this recipe and thank you so much for your feedback and letting us know about the dashi powder/salt! It’ll be very helpful for other readers! Thanks for trying this recipe. xoxo
This was so good! One of our favourite restaurants in San Diego has a kamameshi rice with butter, corn and scallop, which I was trying to recreate and found your post. I was a little hesitant to just do 2 minutes on the instant pot but it came out perfect! We almost could not stop eating it. Thank you for the recipe!
Hi Fran! I LOVE Kamameshi… how lucky you get to eat it in San Diego! Do they serve in the kama too? Thank you so much for trying this recipe. I’m so glad you enjoyed it! 🙂
Koinichiwa Nami san,
Thank u so much for your yummy receipes. I have been trying out lots of your dishes… all excellent👍👍👍
Question pls..
Do I have to soak Taiwanese short grain rice for 20 minutes too❓
To be honest, I never soak my rice (even Japanese rice) before cooking & it tastes just as good.
Tnx again.. be well
Tina
Hi Tina! Thank you for trying out my recipes. I’ve never tried Taiwanese short-grain rice, but if the roundness (thickness) is the same as Japanese rice, I’d say I would recommend soaking. 🙂
Thank you for the recipe! If I use the prepared mixed vegetables in the packet with liquid (maitake iri kinoko shigure), 260g. Do I use the liquid for dashi or throw it away? Thanks!
Hi Tiare! Are you using the Takikomi Gohan Mix? Then you put all in including the sauce. Then add the water until rice cooker measurement (I think…or follow the package instructions). 🙂
Hi Nami. I tried making this in the instant pot and got the burn message twice. I used different vegetables and hot water for the dashi broth. I am not sure if that’s what caused the burning. I have never received a burn message prior to trying this recipe. Not sure what went wrong 🙁
Hi Stella! That’s really rare – as I make takikomi gohan in the IP a lot but never happened. 1) what kind of vegetables did you add? Anything starchy, sticky, and how about the size? 2) did you add hot water to combine with the uncooked rice? If you are skipping dashi, it should be at least water, not hot water. 3) did you mix the rice and ingredients? You can’t do that, as ingredients may stick to the bottom. I’m happy to help investigate what went wrong, but without being in the kitchen with you it’s hard to figure out the problem… especially when different ingredients are used (it might be beyond my experience)… Let me know how I can help. Burnt message is supposed to show up when things are stuck on the bottom of the pot. Takikomi Gohan has enough water to cook the rice and nothing should be burnt on the bottom. Hope this helps a bit…
Hi! How would you suggest adding konnyaku to this method (I love it in the stovetop method)?
Hi Julia! Sure, you can! 🙂
Great recipe! Made it for lunch today. Love the step by step visual photos. Definitely see more of this recipe in my future (and so easy to make in IP!) thank you!!!
Hi Kirby! Thanks so much for trying this recipe and for your kind feedback! I’m glad to hear you enjoyed this recipe. 🙂
I literally make this every month. My husband hates aburage (too sweet) and gobo (too bitter?), so I just do more carrot. I always double by half – so 3 cups of uncooked rice, and it always turns out fantastic (although the metric to imperial mix of measurements can be a challenge!).
Thank you, Nami, for a delicious Japanese dish that has become such a key part of my family’s version of home cooking!
Hi Jenn! I’m so happy to hear you enjoy cooking Japanese food and thank you for your kind feedback and support. xo
Aburaage – it’s just deep-fried tofu pouch. Inari Age is the sweet one (it’s basically seasoned aburaage). If you can get Aburaage, it should give nice savory flavor, without sweetness. 😉
Thanks for your reply, Nami, I will give that a try next time!
Hi, Jenn! As someone else who just wants to make more of this dish when I make it, do you have any changed times for the extra cup of rice + extra ingredients? Thanks!
Hey Futura – no changes; I use the same timing as the recipe and it turns out perfect. I’m a beginner at the IP but instances like this make me feel like a Jetson. I will say one time I didn’t soak the rice properly and it wasn’t great, so I can vouch for that key step for cooking short grain Japanese rice and in order to execute this recipe.
I am planning to make a smaller portion of this in the Instant Pot so might have to cook the rice using pot in a pot method. Do you think it’ll still work? Also probably wanna use short grain brown rice since that’s the one I have on hand.
Hi Jos! Yes, the pot in a pot method should work. In Japan, we soak short grain brown rice for 8-12 hours (longer for winter, but I usually do 8 hours at most). Please refer to this post: https://www.justonecookbook.com/instant-pot-brown-rice/
[…] Instant Pot Takikomi Gohan […]
こんにちは。
いつも拝見しております。(I hope you can see my Japanese on your PC )今日、初めて、Instant Potでの炊き込みご飯をやってみました。
すべてを計量して、(もちろん、野菜も)全く同じようにレシピーで行ったのですが、2分設定していた時に、私の(もちろん、これも同じ会社の同じ容量のポットです)Burn とでてしまい、パニクりました。笑 蓋を開けると底が少し焦げ付いておりまして。。。少しだけお水を足したのですが、また、Burnとなりまして、結局。半分硬い状態でして、で、強制終了して、Riceのボタンにし、1分だけ待ち。で、あとは保温という状態にしました。結果オーライで、笑 ことを泣き得ましたが。。。何がどうおかしかったのか、よくわかりません。何かこれについてアドバイスありますでしょうか?Burnというのを無視してそのまま続行したらよかったのか。。。(^^ゞ Thank you .
こんにちはゆりさん!日本語でも大丈夫です。私結構な頻度でInstant Pot使ってるのですが、Burnが出たことがないんです。でも聞くところによると、水分が足りない、トマトソースとかソースが厚め(コッテリ系)の料理だったりすると起こるそうです。あと、料理によって、焦げ目をしっかり取ってからプレッシャークッカーに入らないと(Deglazeするという意味)、底の焦げ目がBurnになったりするとか。
Burnが出たというのは、多分お米がひっついてたはず。炊き込みご飯の設定してからすぐスイッチオンされましたか?下に沈んでしまったりするのが原因というのを読んだことがあります。あとは、シリコンのパッキンがきっちりしまっていないと、そこから水蒸気が漏れ、IP内に必要な水分が足りない可能性もあるそうです。蓋の確認とVentの向きの確認が重要です。
私はレシピのタイポなどをダブルチェックのため、いつも自分のレシピを使って料理しているのですが、炊き込みご飯は何度か作っているし、焦げる心当たりがないです。リサーチしてみると、ご飯でBurnと出るというクレームが多いみたいですが、普通のご飯、玄米、炊き込みご飯、今のとこ出たことないです。
しっかり準備してこのような結果になって、とても残念でしたね。私も同じ経験をしていたら、アドバイスのしようもあるのですが、なんとも言えないです。何人かこのレシピを作った方がいて、Instagramなどでチェックしたことがあるのですが、大丈夫そうです。
アンテナはって、少し研究しておきます。今後特にこのレシピを作るときはよく見ておきます。
Namiさん。お返事ありがとうございました。説明されていたこと、とっても理解できました。工程の中で、ただ一つ違ったのは具とだし汁をお米の上に入れる前に混ぜず、お米ー具ーそして、だしミックス液体を上からかけてたということです。これだけで何かやはり、焦げ付く”Burn”という表示が出てしまったのかはわかりませんが。。それと私のポット(Instant Pot Duo )にはManualボタンはなく、Pressure Cookerというボタンがあり、それでLaw-Medium-Highと設定するようになっています。で、それのHighにして2分設定しました。Namiさんはアメリカのどちらに住んでおられるかわかりませんが、わたしの州はとっても乾燥地帯ですので、それも一因かなあと。笑 どちらにしましても、また、作って見たいと思います。(茶碗蒸しを作ったときはもう、目からうろこでとっても感激しました。結果が最高においしかったです!)あ!それから、肉じゃがも炊き込みご飯のあとに作りまして、それは全く成功しておいしかった。これからも、日本の食べ物でInstant Pot使用のをどんどんご紹介していただくことを望みます。(NamiさんほどのInstant Potでの日本のMealをご紹介してる人はネットではいませんもの!!)これからもまたどうぞよろしくお願いいたします。がんばってください!応援しています。
ゆりさん、液体と具材が別々でも大丈夫。本当にどうしてだろう。IPでご飯炊く人たちの中でも、成功する人、失敗する人(Burnが出る人)がいて、みなさんお水とお米の割合は同じなんです(取り分けて水が多いとかではなく)。なぜだろう?!お米の種類とかまで関係するとは思わないけど、みんな同じIP、お米、お水だけに、不思議に思います。ゆりさんの設定も合っています。一度失敗すると、お米大事にする日本人としては、再挑戦しずらいですよね。私はカリフォルニア州サンフランシスコに住んでます。比較的乾燥してますが・・・。茶碗蒸し、成功されたとのこと、嬉しいです!本当簡単でいいですよね。IPの日本食レシピ頑張ります(何かリクエストあれば教えてください)。今のところ2つレシピ出来てるので、あとは必死にポストを書くのみです(汗)。応援、ありがとうございます!
Namiさん
お返事ありがとう!そうですか、みなさん同じ事があったりするんですねえ。ちなみに、私もカリフォルニ州ですが、Desertです。笑 なので、確実にもっと乾燥地域だと思います。笑
何か、候補にあがっているレシピーがあるとのこと。私も試していただきたい候補がたくさん、ありすぎてどれにしようかしらんと迷いますよ。笑 とりあえず、また、新しいインスタントポットでのお料理のレシピーを心待ちにしています。Thank you !
どうもありがとう!!
I also got the “burn” notice. It happened right when the IP switched to the 2:00 minute mark. So the pressure built up, and plugged, then 2:00 showed up, and about 30 seconds later, it beeped “burn”. I let the pressure out to open the pot, I added 1/2 cup water, started with 2:00 again, but it immediately beeped “burn”. So I mixed the rice and closed the top, put it on warm, but it beeped “burn”. So I turned it off and kept it covered for about 10 minutes. It was edible, but I wonder why it burned. I followed the recipe pretty exact, with water amount and no mixing. I wonder why?
Hi Manna! I research a little bit on this “burn” message related to cooking rice online because I’ve made IP Takikomi Gohan (or other rice dishes) several times in the past and I had no issues with burn message.
Burn notice happens when the inner pot encounters a heat distribution issue, such as when starch accumulates on the bottom of the inner pot. Then I wonder if you started to cook the dish right away, or you prepped ahead and left it (try to find any reason some food or starch may accumulate at the bottom).
I also found some people finding out that their silicone ring and the valve was not set properly which ended up releasing the moisture that should be kept to cook rice in the IP and ended up losing water to cook rice (hence burning message). They fixed the issue and they said no more error message.
Usually, burn message comes when you cook with thick sauce (tomato paste, roux etc) as well as burnt bits (when you don’t deglaze) but we do not have this issues at all. And the rice to water ratio is normal (unless you accidentally release moisture from the valve).
I’m sorry you had this issue and I hope above tips help… but it’s hard to know what could cause this issue as I wasn’t in the kitchen. 🙁