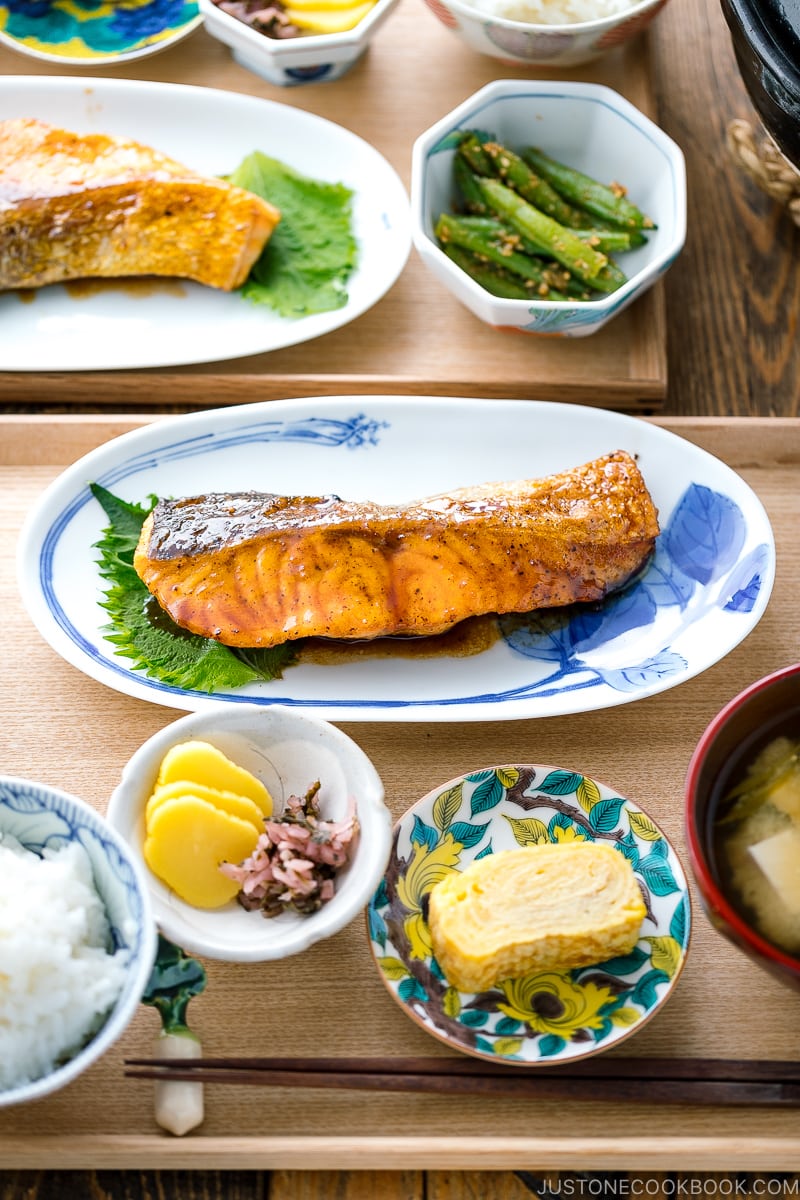
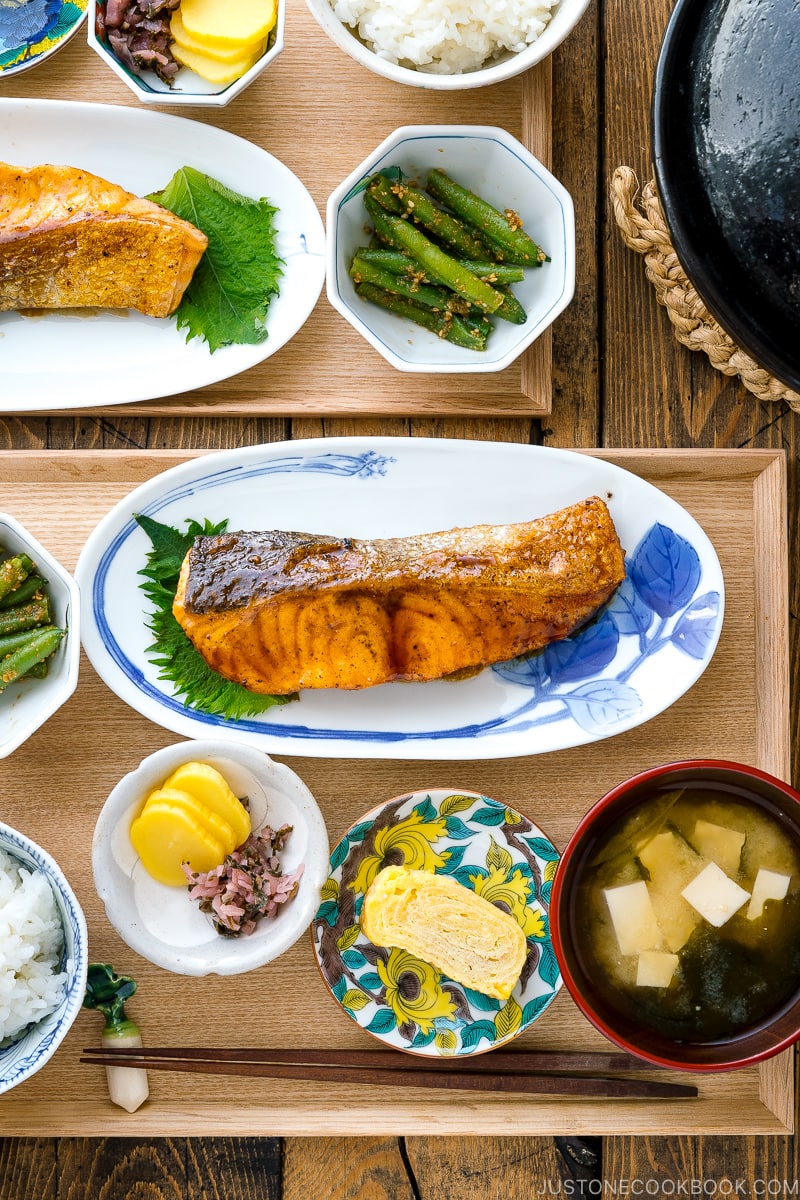
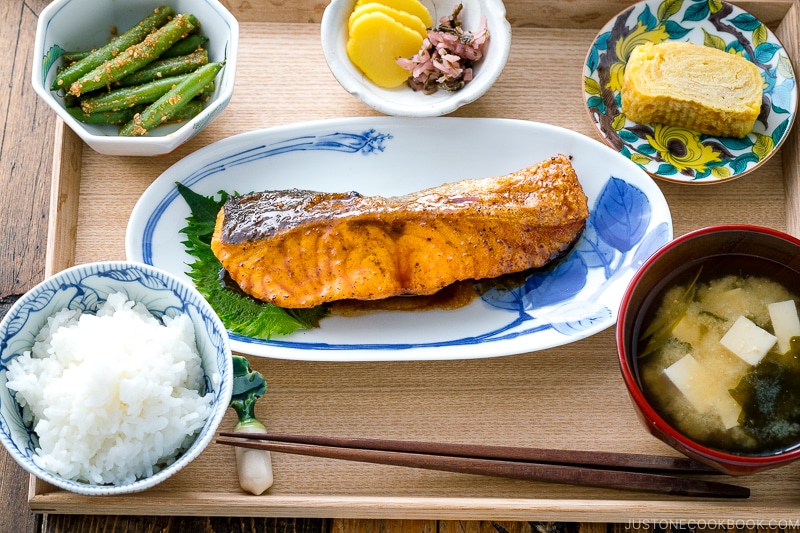
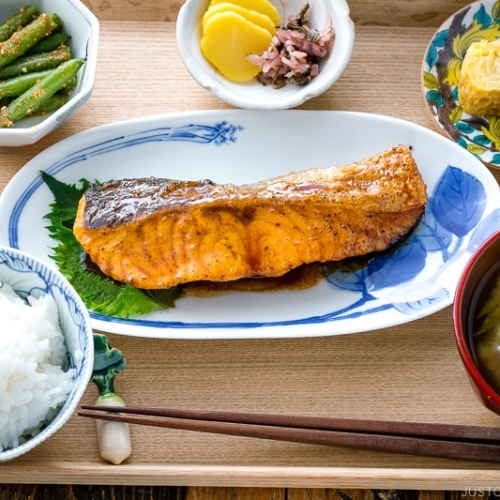
Use this quick and easy Teriyaki Salmon recipe to make a light and savory meal any night of the week. Salmon fillets are pan-grilled to tender perfection in the traditional method and finished with an authentic homemade teriyaki sauce.
Growing up in Japan, I enjoyed eating a variety of fish, with salmon being one of the most readily available option in our household. It’s a great source of protein and healthy Omega-3 fatty acids in our diet. Today, I’m going to share with you an authentic Teriyaki Salmon recipe and illustrate how the Japanese prepare it at home.
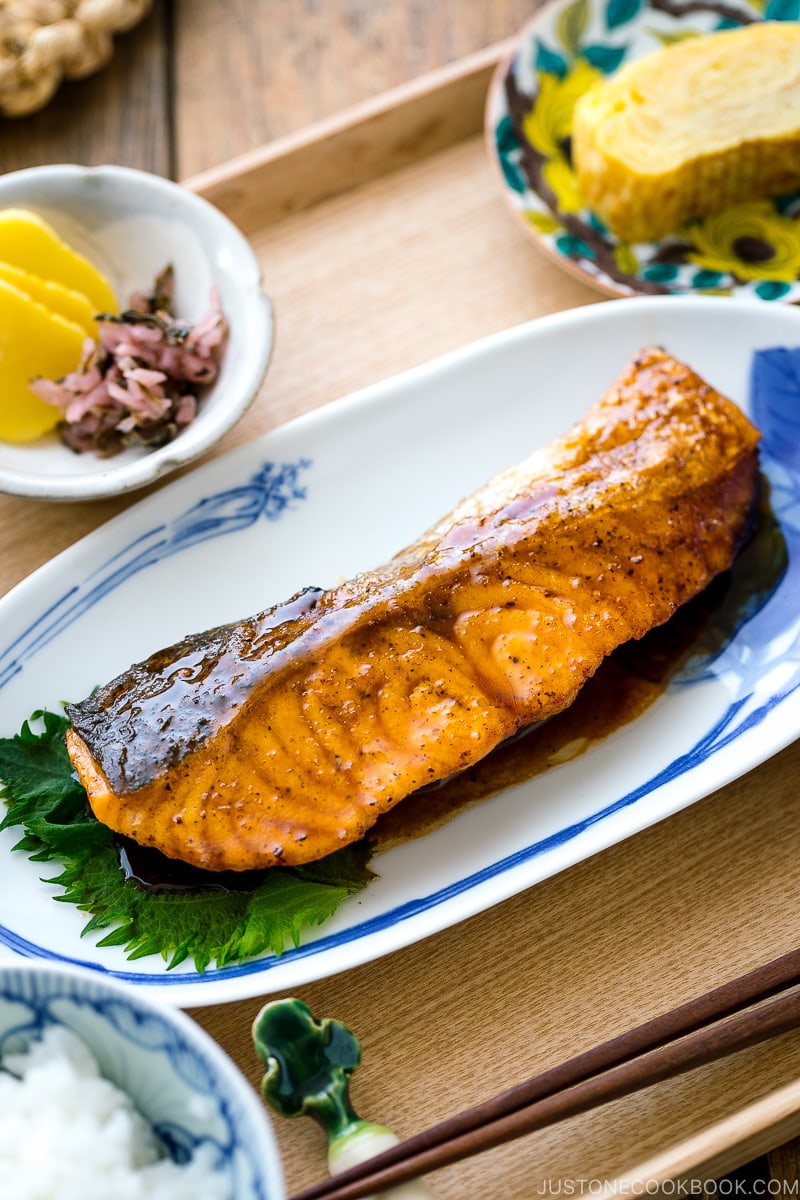
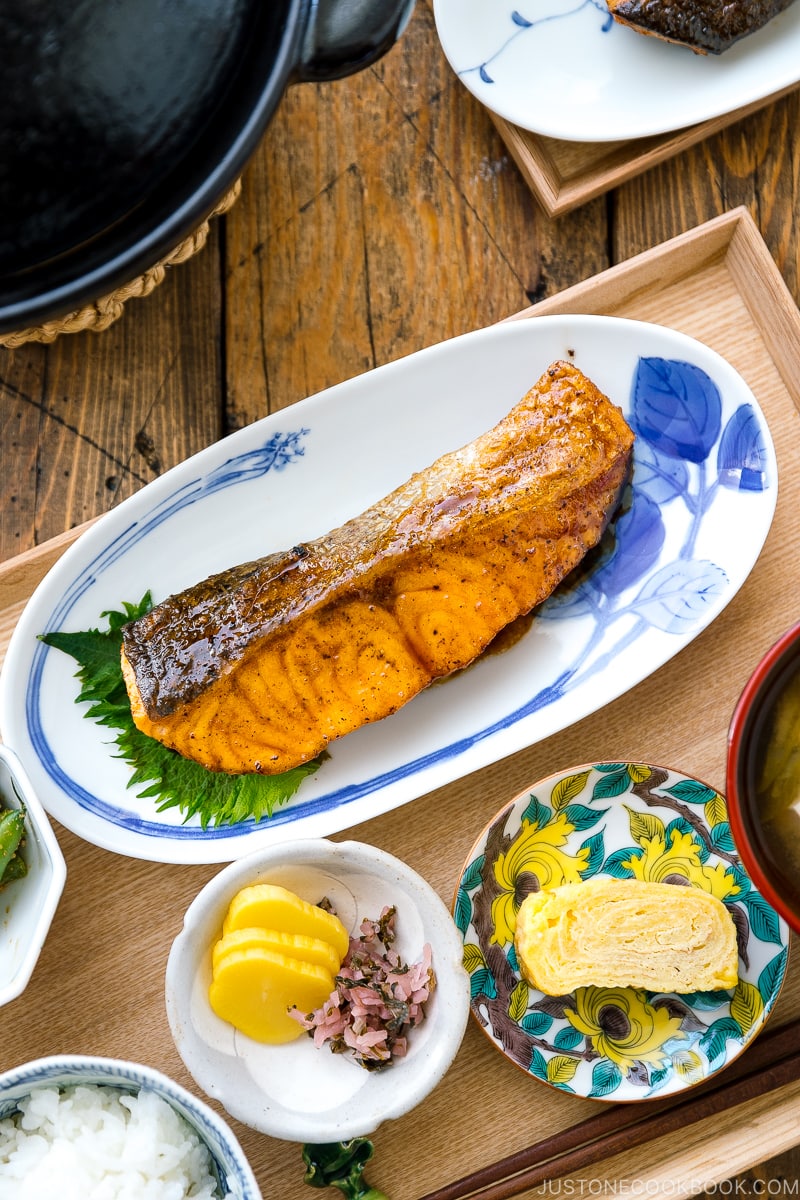
The salmon fillets are pan-grilled to achieve a golden-brown exterior while retaining their tender and juicy texture. We then finish it off with a sweet-savory glazed homemade Teriyaki Sauce. It’s easy and absolutely no fuss.
Table of Contents
- What Makes Authentic Teriyaki Salmon
- How to Cut the Salmon into Japanese-Style Fillets
- Homemade Teriyaki Sauce with 4 Ingredients
- Important Condiments: Sake and Mirin
- How to Cook Teriyaki Salmon
- Cooking Tips
- Frequently Asked Questions
- What to Serve with Teriyaki Salmon
- What to Do with Leftover Teriyaki Salmon
- Related Recipes
What Makes Authentic Teriyaki Salmon
I noticed most of the teriyaki salmon recipes online are quite different from how the Japanese make it at home. Here are the main differences:
- Make your own teriyaki sauce. In Japan, convenient “teriyaki sauce” in a bottle is not as common as the ones found in American grocery stores. Instead, we typically prepare teriyaki sauce from scratch. Each family makes the sauce to suit their preferences and with the ingredients they have at hand. More on authentic teriyaki sauce below.
- Cut the salmon into Japanese-style fillets. The fillets are thinly sliced, about 1 inch (2.5 cm) thick, and cut diagonally (see the next section). Since they are thinner, they cook faster in a frying pan.
- We do not marinate the salmon. Japanese cuisine focuses on bringing out the original flavor of an ingredient without overwhelming it with spices and seasonings.
- Pan-fry the salmon. Cooking in an oven is not very common in Japan. Most of the dishes are cooked on the stove as a typical Japanese kitchen has a countertop microwave oven and does not have an oven unless you’re a baker.
How to Cut the Salmon into Japanese-Style Fillets
In Japan, the salmon fillet is sliced differently than in the US. You will find the fillet available in diagonal cuts and thinner slices. Each cut is about ½ to ¾ inch (1.3-2 cm) thick.
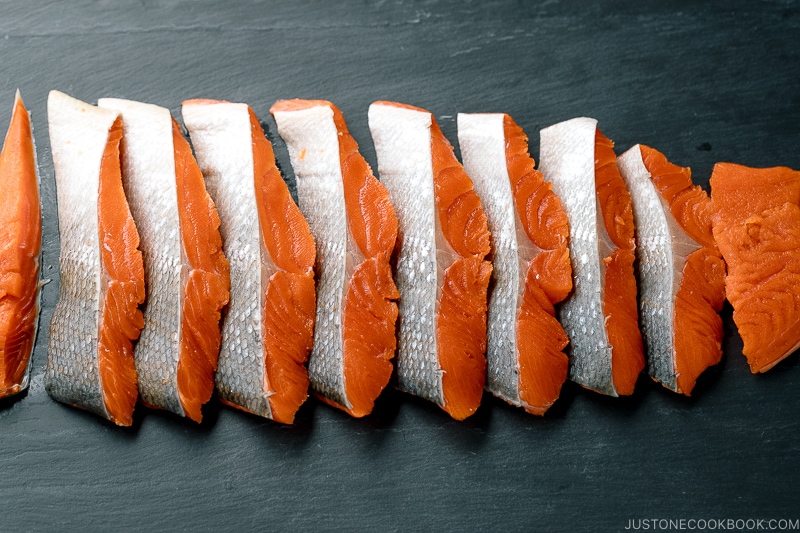
If you buy salmon as a whole fish, you can fillet it the Japanese way. It will cook faster and absorb flavors quickly. Check out my tutorial here.
Homemade Teriyaki Sauce with 4 Ingredients
When you come across authentic Japanese teriyaki recipes, you’ll find that 99% of them use just 4 ingredients: soy sauce, sake, mirin, and optionally sugar.
The best way to start making teriyaki sauce is to use equal parts of soy sauce, sake, and mirin and add sugar to your liking. My basic teriyaki sauce ratio is 2:2:2:1.
For optimal taste, we often play around with the ratio, depending on the ingredients and flavor combination of the dish. Therefore, each teriyaki recipe should have a slightly different taste.
In this recipe, for example, I cook the salmon with butter to give it a layer of rich creaminess. So I’ve tweaked the teriyaki sauce ratio to work perfectly with all the flavors.
If you’re a beginner cook, start with my basic teriyaki sauce (2:2:2:1). It’s easy to remember and you’re guaranteed a delicious sauce!
Important Condiments: Sake and Mirin
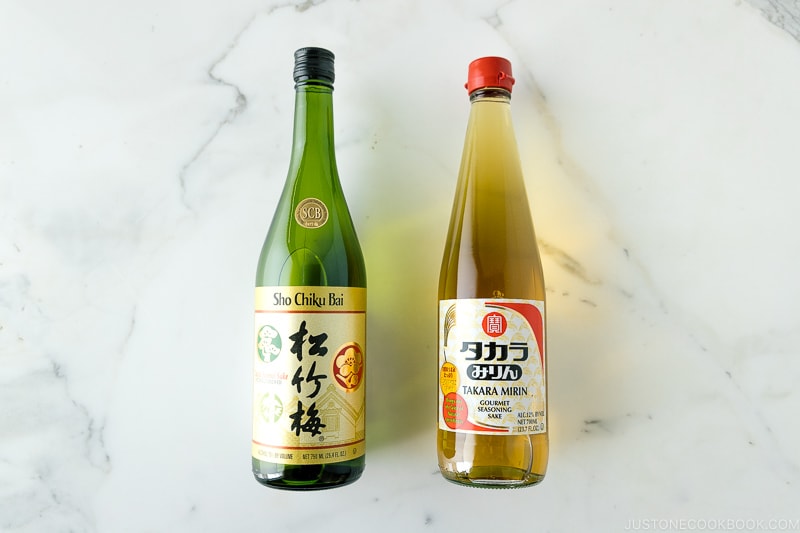
Japanese cooking doesn’t require many condiments compared to other ethnic cuisines. However, two of the essential pantry items I highly recommend are sake and mirin. Japanese recipes use both of these condiments 90% of the time (have you noticed?). You can’t create authentic Japanese flavors without sake and mirin because they are foundational to Japanese cooking.
Substitute:
Now, if you can’t consume alcohol, you can read the substitution option in my sake and mirin pantry pages.
Use gluten-free soy sauce or tamari if needed. If you prefer to use honey or maple syrup, go ahead but take care as it burns easily.
How to Cook Teriyaki Salmon
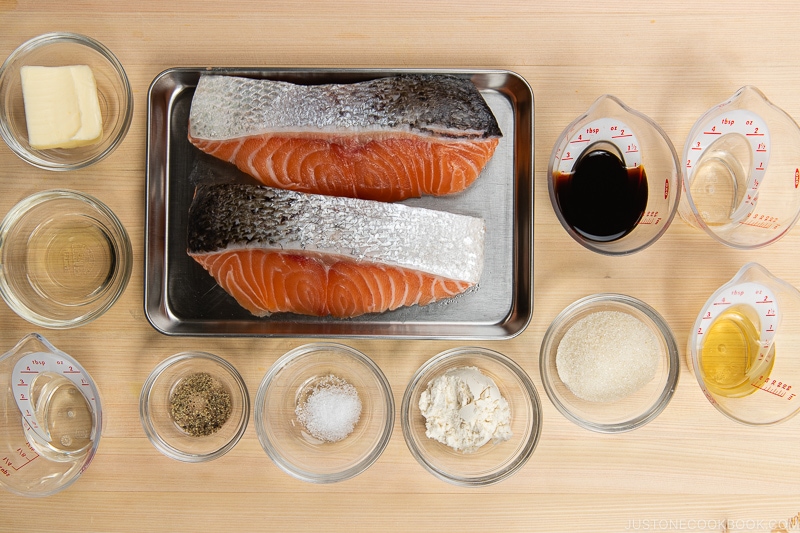
The Ingredients You’ll Need
- Skin-on salmon fillets – ¾ inch (2 cm) thick
- Salt and freshly ground black pepper
- All-purpose flour – You can use cornstarch or potato starch for gluten-free
- Cooking oil (for cooking)
- Unsalted butter (for cooking)
- Sake (for steaming) – You can substitute it with Chinese rice wine, dry sherry, or water
- Homemade teriyaki sauce: sake, mirin, soy sauce, and sugar
The Cooking Steps
- Make the teriyaki sauce by combining the ingredients.
- Season the salmon with salt and black pepper. Coat the fillets with flour.
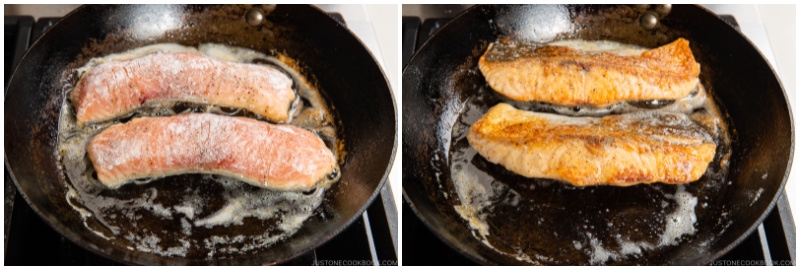
- Sear the skin of the salmon. Cook the salmon from the skin.
Cooking Tips
- Use skin-on salmon fillets that are in diagonal cut and thinner slices. Don’t remove the skin. It will prevent the flesh from overcooking and drying out. You don’t have to eat it, although it’s delicious and good for you! Each cut is about ½ to ¾ inch (1.3-2 cm) thick. If you buy a whole fish, you can fillet it the Japanese way. It will cook faster and absorb flavors quickly.
- Coat the salmon evenly with flour for crispy skin. This is the secret to juicy salmon. The flour creates a protective layer and retains its umami flavor and juiciness. It also helps to thicken and absorb the sauce well. You can use cornstarch or potato starch for gluten-free.
- Sear the salmon skin before laying it down. Salmon skin is so delicious when it’s crispy. Hold the fillet and press the skin against the hot frying pan’s surface for 15 seconds.
- The presentation side (also the skin side) should go down into the pan first because the pan is clean and you will get the best browning on the first side that hits it.
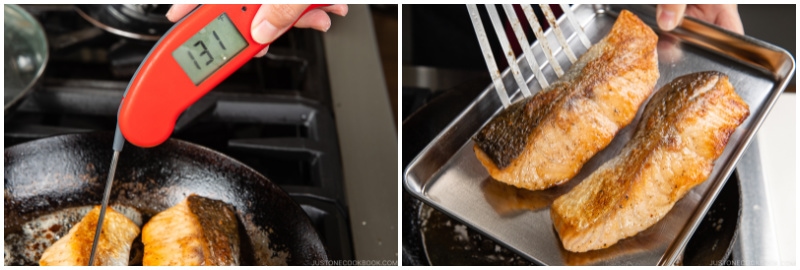
- Highly recommend getting an instant-read thermometer and cooking the salmon until an internal temperature of 125-130°F* (52-54ºC) is registered at the thickest part of the fillet. Take the guessing out of your cooking: every salmon is cooked perfectly with the thermometer.
Frequently Asked Questions
Q: Why don’t you add these ingredients to teriyaki sauce while other popular recipes do?
I’ve seen many non-Japanese recipes that include ingredients such as rice vinegar, honey, brown sugar, sesame oil, hoisin sauce, or garlic in the teriyaki sauce. Some recipes also use ground ginger or garlic powder. I would not recommend them if you wish to follow the authentic Japanese cooking method.
Some people even use cornstarch to thicken the sauce, but it is not needed for my recipe. The sauce will be naturally reduced and thickened during the simmering process. Plus, we coat the fish with flour (or starch) which helps thicken it.
We also don’t usually garnish the salmon fillet with sesame seeds, but it’s personal choice.
Depending on the teriyaki recipes, I occasionally add grated ginger and grated onion for extra flavors but never include rice vinegar, sesame oil, and hoisin sauce.
Q: Can I adapt your method for baked teriyaki salmon recipe?
If you prefer to bake or broil the salmon, you can follow the baking method from my Miso Salmon recipe for the instructions. You will need to make the teriyaki sauce separately and brush the salmon with the sauce several times while baking for a minimum of 10-15 minutes.
What to Serve with Teriyaki Salmon
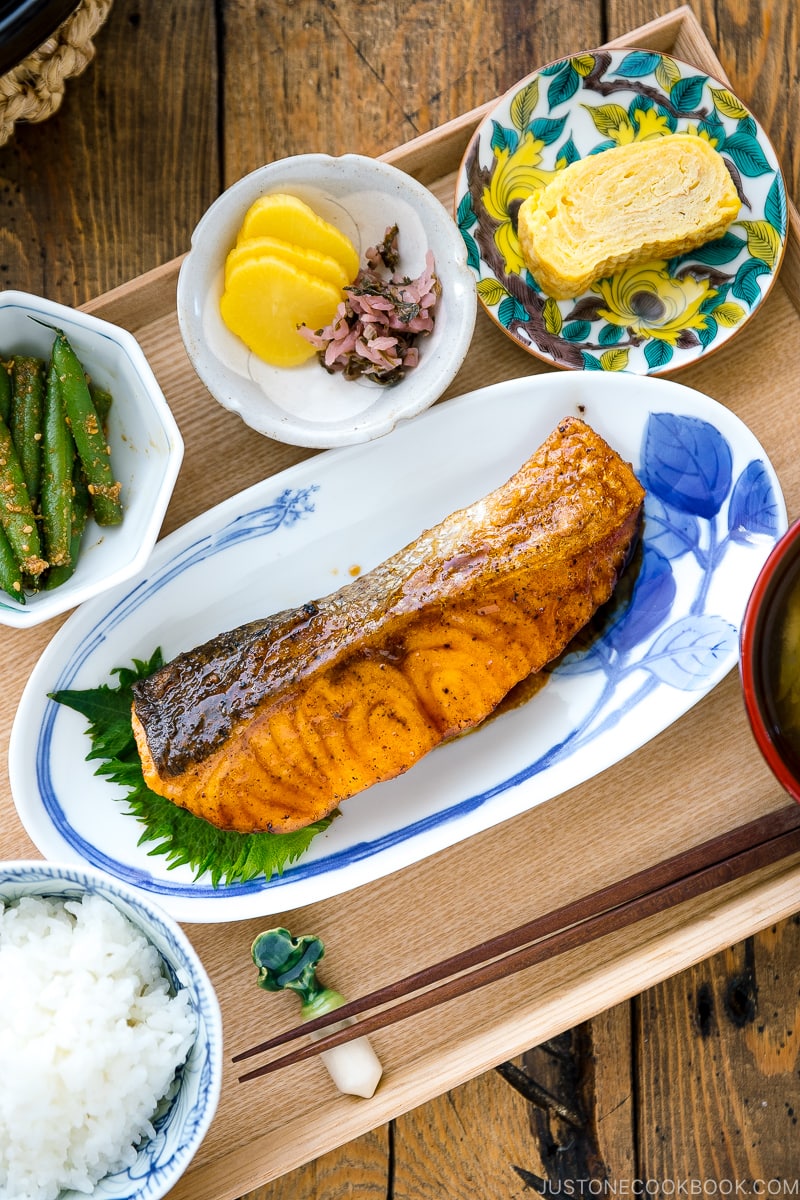
With a sweet and savory soy-based flavor, teriyaki salmon pairs perfectly well with many different side dishes. For a healthy Japanese-style weeknight dinner, I like to serve the fish with pan-grilled asparagus and miso soup, alongside steamed brown rice.
Other veggies such as green beans, Brussels sprouts, cauliflowers, and spinach are also delicious with salmon. Here are more suggestions I think you’d like:
- Blanched Broccoli with Sesame Oil
- Brussels Sprouts with Bacon
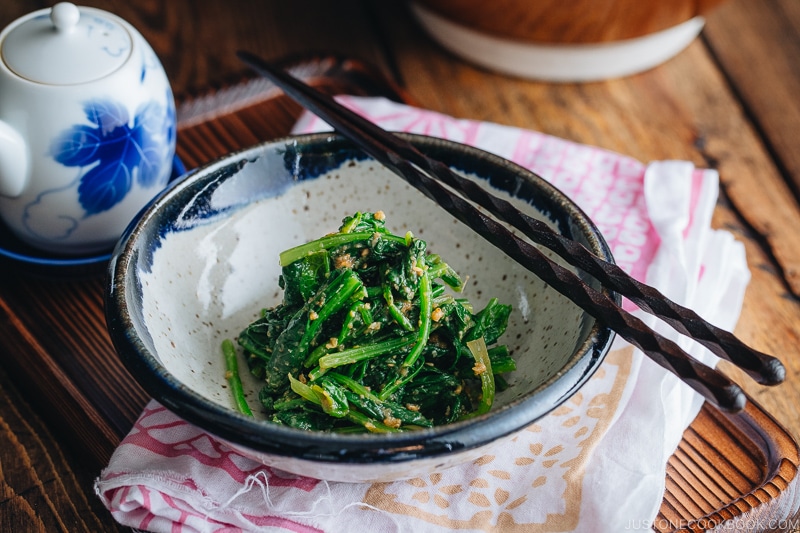
- Spinach with Sesame Miso Sauce
- Japanese Potato Salad
- Roasted Cauliflower Kale Salad
- Green Bean with Crumbled Tofu & Sesame
- 15 Best Healthy Side Dishes to Serve with Salmon
For a low-carb diet, you can serve the salmon with cauliflower rice or quinoa.
What to Do with Leftover Teriyaki Salmon
You can do a lot with leftover teriyaki salmon! Here are some of my favorites:
- Teriyaki Salmon Onigirazu (Rice Sandwich)
- Put it in the lunch box (bento), rice bowl, or noodle.
Related Recipes
- Teriyaki Recipes: Check out my authentic Chicken Teriyaki recipe and don’t miss our 17 Best Teriyaki Recipes You Must Make at Home!
- Salmon Recipes: Try out my other salmon recipes which I share on my blog. You can also substitute this recipe with fresh seasonal fish such as yellowtail or other white fish.
Wish to learn more about Japanese cooking? Sign up for our free newsletter to receive cooking tips & recipe updates! And stay in touch with me on Facebook, Pinterest, YouTube, and Instagram.
Teriyaki Salmon
Video
Ingredients
For the Teriyaki Sauce
For the Salmon
- 2 skin-on salmon fillets (¾ lb, 340 g; ¾ inch (2 cm) thick)
- ¼ tsp Diamond Crystal kosher salt
- ⅛ tsp freshly ground black pepper
- 1 Tbsp all-purpose flour (plain flour) (use cornstarch or potato starch for gluten-free)
- ½ Tbsp neutral oil (for cooking)
- 1 Tbsp unsalted butter (for cooking)
- 1–2 Tbsp sake (for steaming; can substitute Chinese rice wine, dry sherry, or water)
Instructions
- Gather all the ingredients.

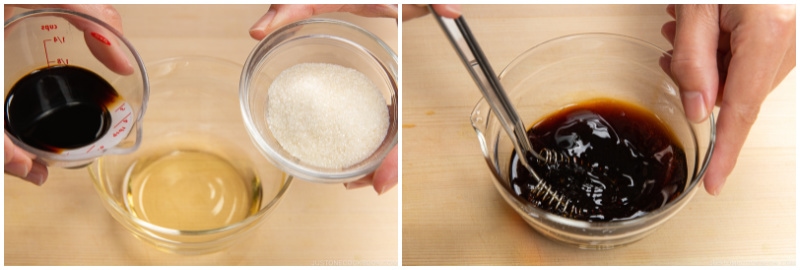
To Make the Teriyaki Sauce
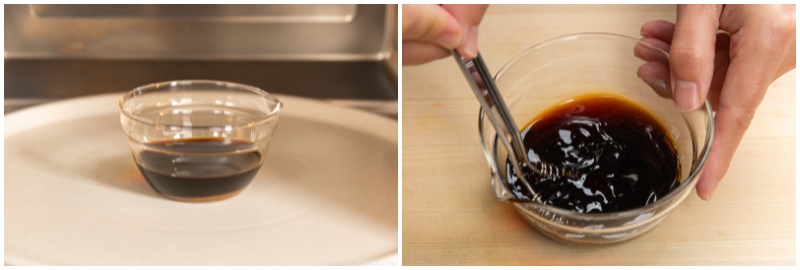
- In a microwave-safe bowl, combine the ingredients for the teriyaki sauce: 1 Tbsp sake, 1 Tbsp mirin, 2 Tbsp soy sauce, and 1 Tbsp sugar. Mix well to dissolve the sugar.

- To help dissolve the sugar, you can microwave the mixture for 30 seconds.
To Prepare the Salmon
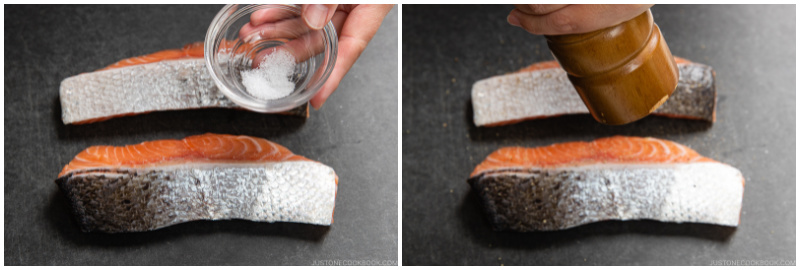
- Rinse 2 skin-on salmon fillets and pat dry. Season one side with half of the ¼ tsp Diamond Crystal kosher salt and half of the ⅛ tsp freshly ground black pepper. Tip: The salmon skin will hold the flesh together while cooking.
- Flip over and season the other side with the remaining salt and black pepper.
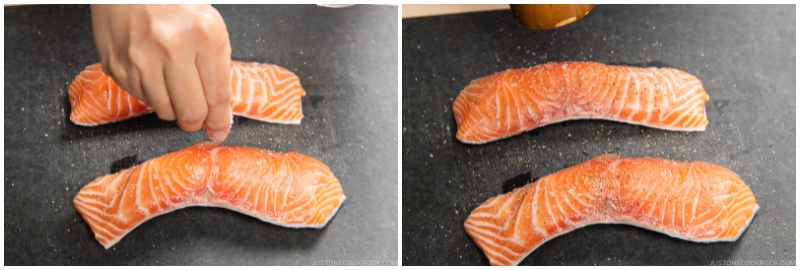
- Sprinkle half of the 1 Tbsp all-purpose flour (plain flour) on one side of the salmon and coat evenly. Tip: Coating the salmon with flour helps it retain its umami flavor and juiciness. It also helps absorb the sauce and thickens it.
- Flip over and sprinkle the rest of the flour on the other side. Gently press it to adhere and then remove the excess flour.


To Cook the Salmon
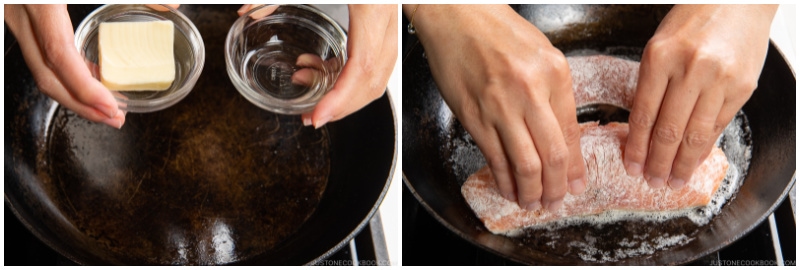
- Heat a frying pan over medium heat. When the pan is hot, add ½ Tbsp neutral oil and 1 Tbsp unsalted butter. Take care not to burn the butter. If the frying pan gets too hot, reduce the heat or remove it from the heat temporarily. Then, sear the skin of the salmon fillets: One at a time, press the skin against the hot frying pan‘s surface for 15 seconds before laying it skin side (or presentation side) down in the pan. Repeat with the remaining salmon. Tip: The presentation side (skin side) should go down into the pan first because you will get the best browning on the first side that hits the clean pan.
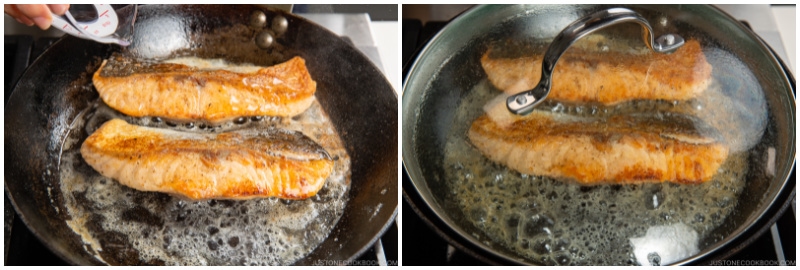
- Cook the salmon for 3 minutes, or until the bottom is golden brown, and then flip.
- To the pan, add 1–2 Tbsp sake—1 Tbsp for thin fillets and no more than 2 Tbsp for thicker fillets. Cover the pan with a lid and reduce the stove‘s heat to low. Steam the salmon for about 3–5 minutes, depending on the fillet thickness. If the sake has evaporated but the salmon isn‘t cooked through yet, add another tablespoon of sake and continue steaming.
- Cook the salmon until it registers an internal temperature of 125–130°F (52–54ºC) at the thickest part of the fillet (I use a Thermapen instant-read thermometer). Then, transfer the salmon to a tray or plate. These fillets were about ¾–1 inch (2–2.5 cm) in thickness and took roughly 4 minutes to cook. Tip: The USDA recommends cooking fish to an internal temperature of 145°F (63ºC); however, the residual heat will continue to cook the salmon, so you must remove the fillets at 125–130°F (52–54ºC) to avoid overcooking.
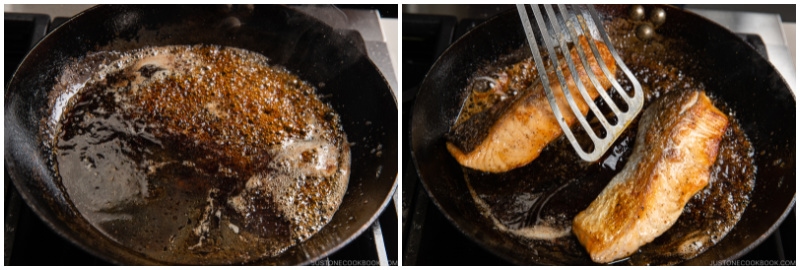
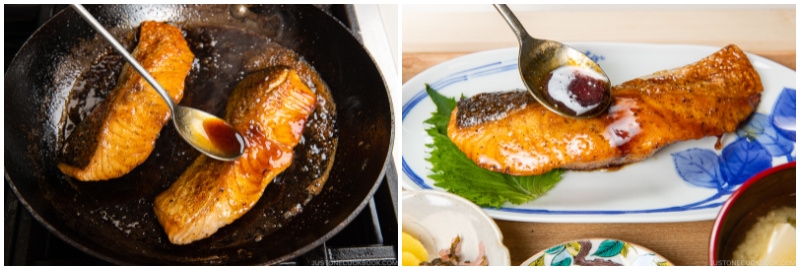
- Add the teriyaki sauce ingredients to the pan and increase the heat a bit. When the sauce starts to boil, add the salmon back to the pan.
- Spoon the sauce over the salmon. When the sauce thickens, turn off the heat. Transfer the salmon to a plate and drizzle the sauce on top.
To Serve
- Serve immediately. I like to serve my Teriyaki Salmon as part of a Japanese-style meal with Green Bean Gomaae (Sesame Dressing) or pan-seared asparagus, Tamagoyaki, Homemade Miso Soup, and Steamed Rice. Other side dishes that pair well with this savory-and-sweet salmon include Spinach with Sesame Miso Sauce, Japanese Potato Salad, Blanched Broccoli with Sesame Oil, Green Bean with Crumbled Tofu and Sesame, Brussels Sprouts with Bacon, and Roasted Cauliflower Kale Salad.
To Store
- You can keep the leftovers in an airtight container and store in the refrigerator for up to 3 days and in the freezer for 2 weeks.
Nutrition
Editor’s Note: This post was originally published on April 25, 2013. New step-by-step images and final images were added in March 2022. It’s been republished with a new video and new content on October 13, 2023.


Made this tonight and it was great. My husband loved it. The sauce was very tasty and not to strong. I have been wanting to try it for some time. Salmon was very moist but fully cooked.
Hi Jay!
We are so happy to hear it tuned out great, and you and your husband enjoyed it.
Thank you very much for trying this recipe and for your kind feedback.
Incredibly delicious and perfect! Kampeki!
Hi Carolyn,
We are so glad to hear you enjoyed this Teriyaki Salmon!
Thank you very much for trying this recipe.😊
Nami, I am just beginning to try Japanese cooking and I simply love your site. After much internet surfing and a huge amount of recipes I’ve read and endless chefs’ explanations, I found that yours is the real Japanese cooking. A huge bonus is the combination of the clear step by step and photo explanation and your gentle and loving personality. So, I’m hooked. I have made your Miso soup already and will prepare the teriyaki sauce and cook the salmon as per the recipe. I really appreciate the effort you make to turn our cooking into a great experience. Thank you so much for sharing.
I have one question about the dashi made with kombu. I understand I must remove the kombu just before the water boils, so does it mean a very very short cooking time? How long can/should I cook the kombu? Once removed and dried, can the kombu be used again to make dashi?
Hi Nany,
You have no idea how much your kind words meant to us! Thank you very much!
Regarding your question about Kombu, we have a perfect post for you, please check this post:
https://www.justonecookbook.com/how-to-make-kombu-dashi-vegetarian-dashi/
We hope this is helpful! Happy Cooking!😊
I tried the recipe. OMG I’ve never tasted a salmon so heavenly before.
This going to be my favorite recipe and I am going to love salmon from now on.
Thank you!
Hi Yoke Lee!
Yay! We are so happy to hear you found the new taste! And now it’s your favorite!
Thank you very much for trying this recipe and for writing to us.☺️
Thanks for the recipe, I love it! I made it for my boyfriend and paired it with brown rice, pan fried asparagus, and miso soup. I thought I got the right cut from the store but ended up with off cuts! Even with the wrong cuts, it was exceptionally delicious. I only regret not picking up more nori to make salmon onigirazu for lunch tomorrow. I would love to make this a weekly recipe since I live in area where salmon is plentiful and fresh.
Hi Haley!
Wow! You cooked a completed Japanese meal!👏🏻 And have a plan to make Salmon Onigirazu for lunch tomorrow! Awesome!
Thank you very much for trying many recipes and for your kind feedback. We are glad to hear everyone enjoyed it!
Hi Nami…….I am going to be making this tomorrow (it looks fantastic), the one question I have is that I will be using salmon steaks (organic) which I find much more flavorful than the filet due to the central bone. Do you have any suggestions …..or just cook the same way as you did with your filets? Thanks
Hi Gary,
Thank you very much for your kind feedback!
To cook salmon steaks, you may cook the same way as here in the recipe. Please adjust your cooking time depend on the thickness of your steak cut.
Love your cooking and love Japanese food.
Hi Rica,
Thank you very much for your kind feedback! 🙂
Just watched your video! I’ll try to make it tonight. May I ask you for a link of that All Clad flat lid? That looks like it’s so useful for a variety of pans!
Hi Akiko! Hope you enjoy this recipe! I bought it off All-Clad website but currently not available.
https://www.williams-sonoma.com/products/all-clad-tk-d5-brushed-stainless-steel-universal-lid/
Honestly… we don’t use it much. I thought we can use it for different pan-sizes etc, but the handle is too big for the dish washer and I can’t see inside… so we end up using different brand’s glass lid more often. I just wanted to share my honest feedback on this product. 🙂
This was a delicious recipe! I also added sliced onions just before adding the sauce and OMG it was so good. Thank you!
Hi Susan! So happy to hear that. Thank you so much for your kind feedback! 🙂
I made this recipe using Tanrei Junmai Sake and Yamasa soy sauce and it was absolutely delectable. A real winner Nami! So quick, easy and delicious, thank you for sharing.
Hi Lois! I’m so happy to hear you enjoyed this recipe! Thank you so much for your kind feedback. 🙂
This was the BEST Teriyaki sauce I’ve had in a long time. Easy to make. I didn’t have Sake so I used the Dry Sherry. So good. And my salmon was yummy. Thank you so much for this wonderful recipe.
Hi Beth! Thank you so much for trying this recipe and for your kind feedback. Dry sherry substitution is okay. I’m happy you enjoyed this dish! 🙂
Has anyone tried this recipe on a grill?
Hi Nami,
To prepare salmon without overcooking it is an art. And your recipe has managed to create that wonderful juicy non-dry salmon. For the first time, I was complimented by my family members that this is the best salmon I have ever cooked. Thanks to your brilliant technique. 😃
Hi Carel! Thank you so much for trying this recipe! I’m so happy to hear your family enjoyed it! Thank you for your kind feedback. 🙂
Hi Nami,
This is my family’s favorite salmon teriyaki recipe! It’s very easy to make and so delicious. Thank you for sharing.
Hi Lilian! Thank you so much for trying this recipe and for your kind feedback. So happy you enjoyed the dish! 🙂
This was so delicious!! It is a special moment when the teriyaki sauce thickens and is drizzled onto the salmon for ultimate umami deliciousness. It was my first try, but this recipe was very straightforward. I will make it many more times. Highly recommended!
Hi Ando! I’m so glad you enjoyed this recipe and thank you for your kind review! And I know what you mean about that moment when the sauce gets thicken… so delicious!