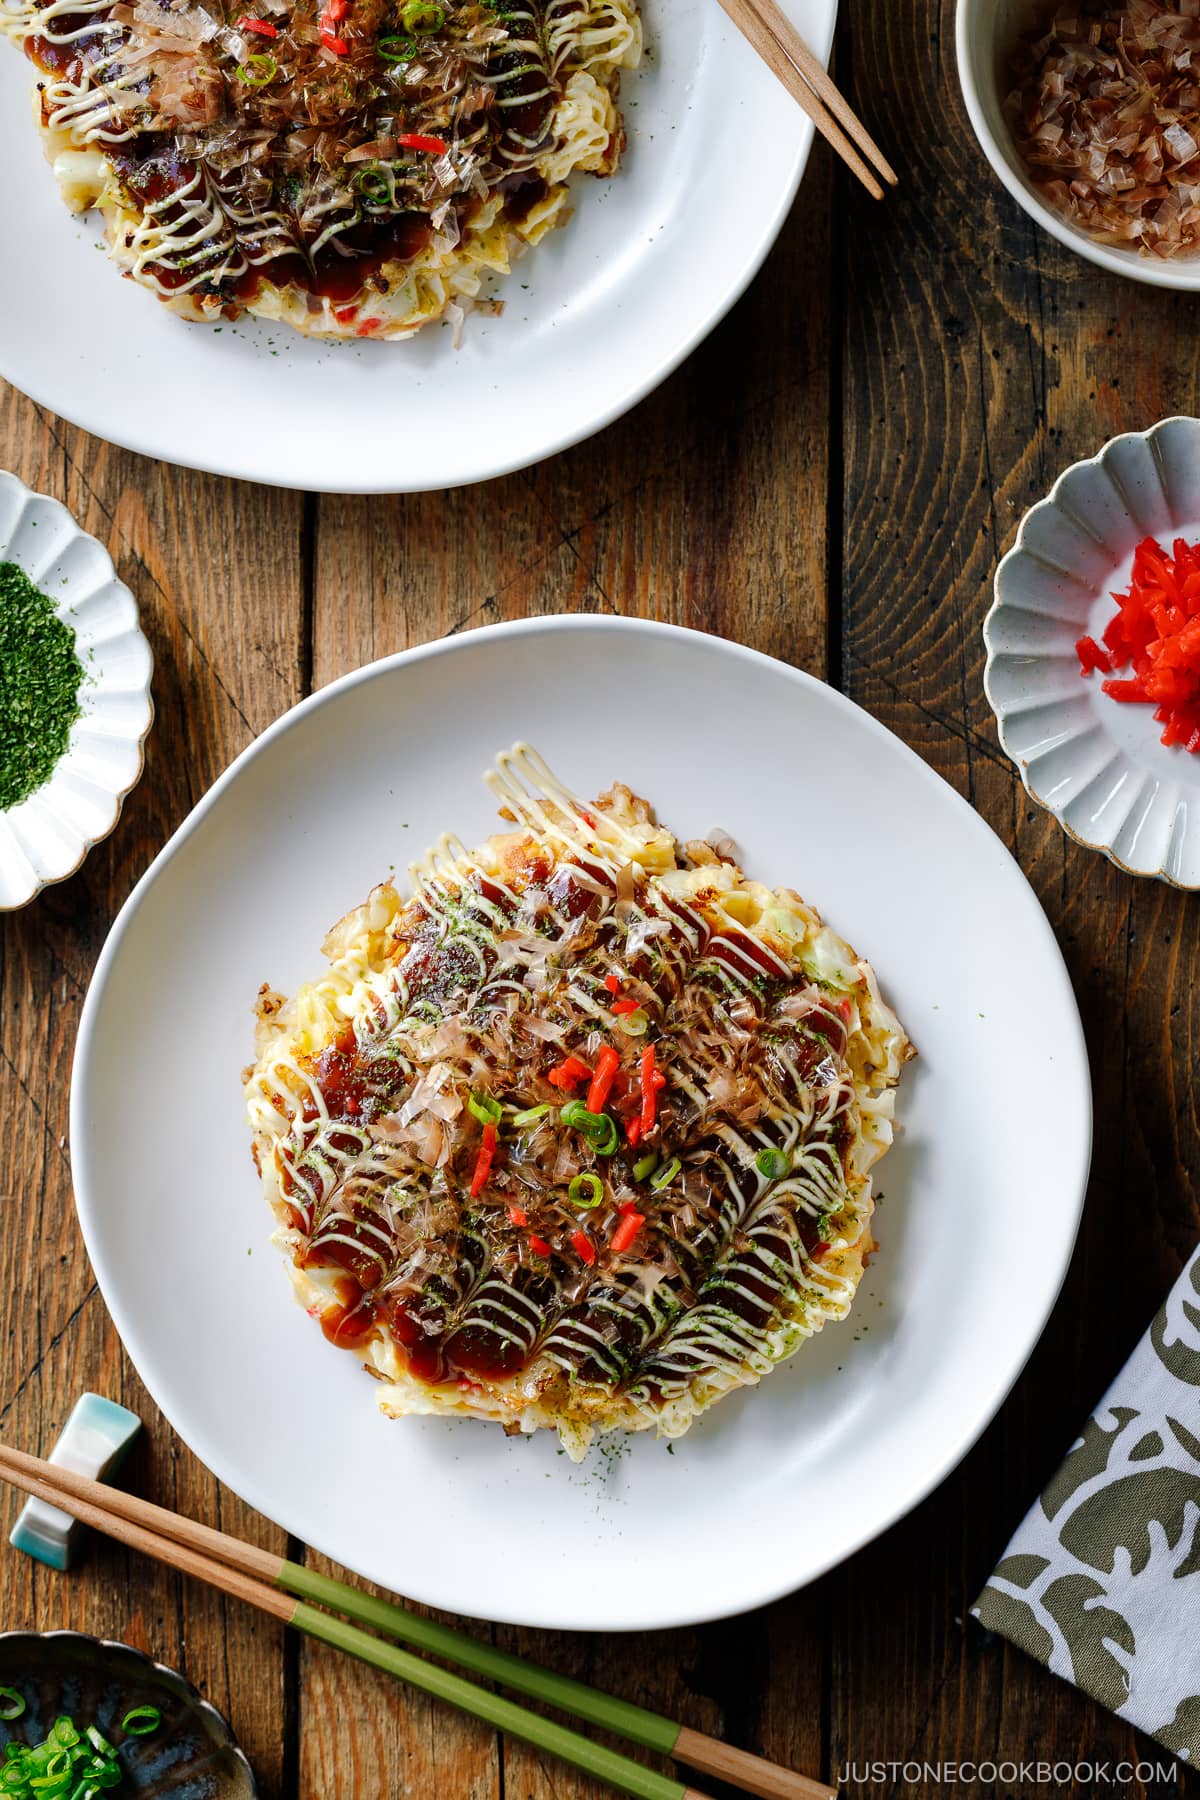
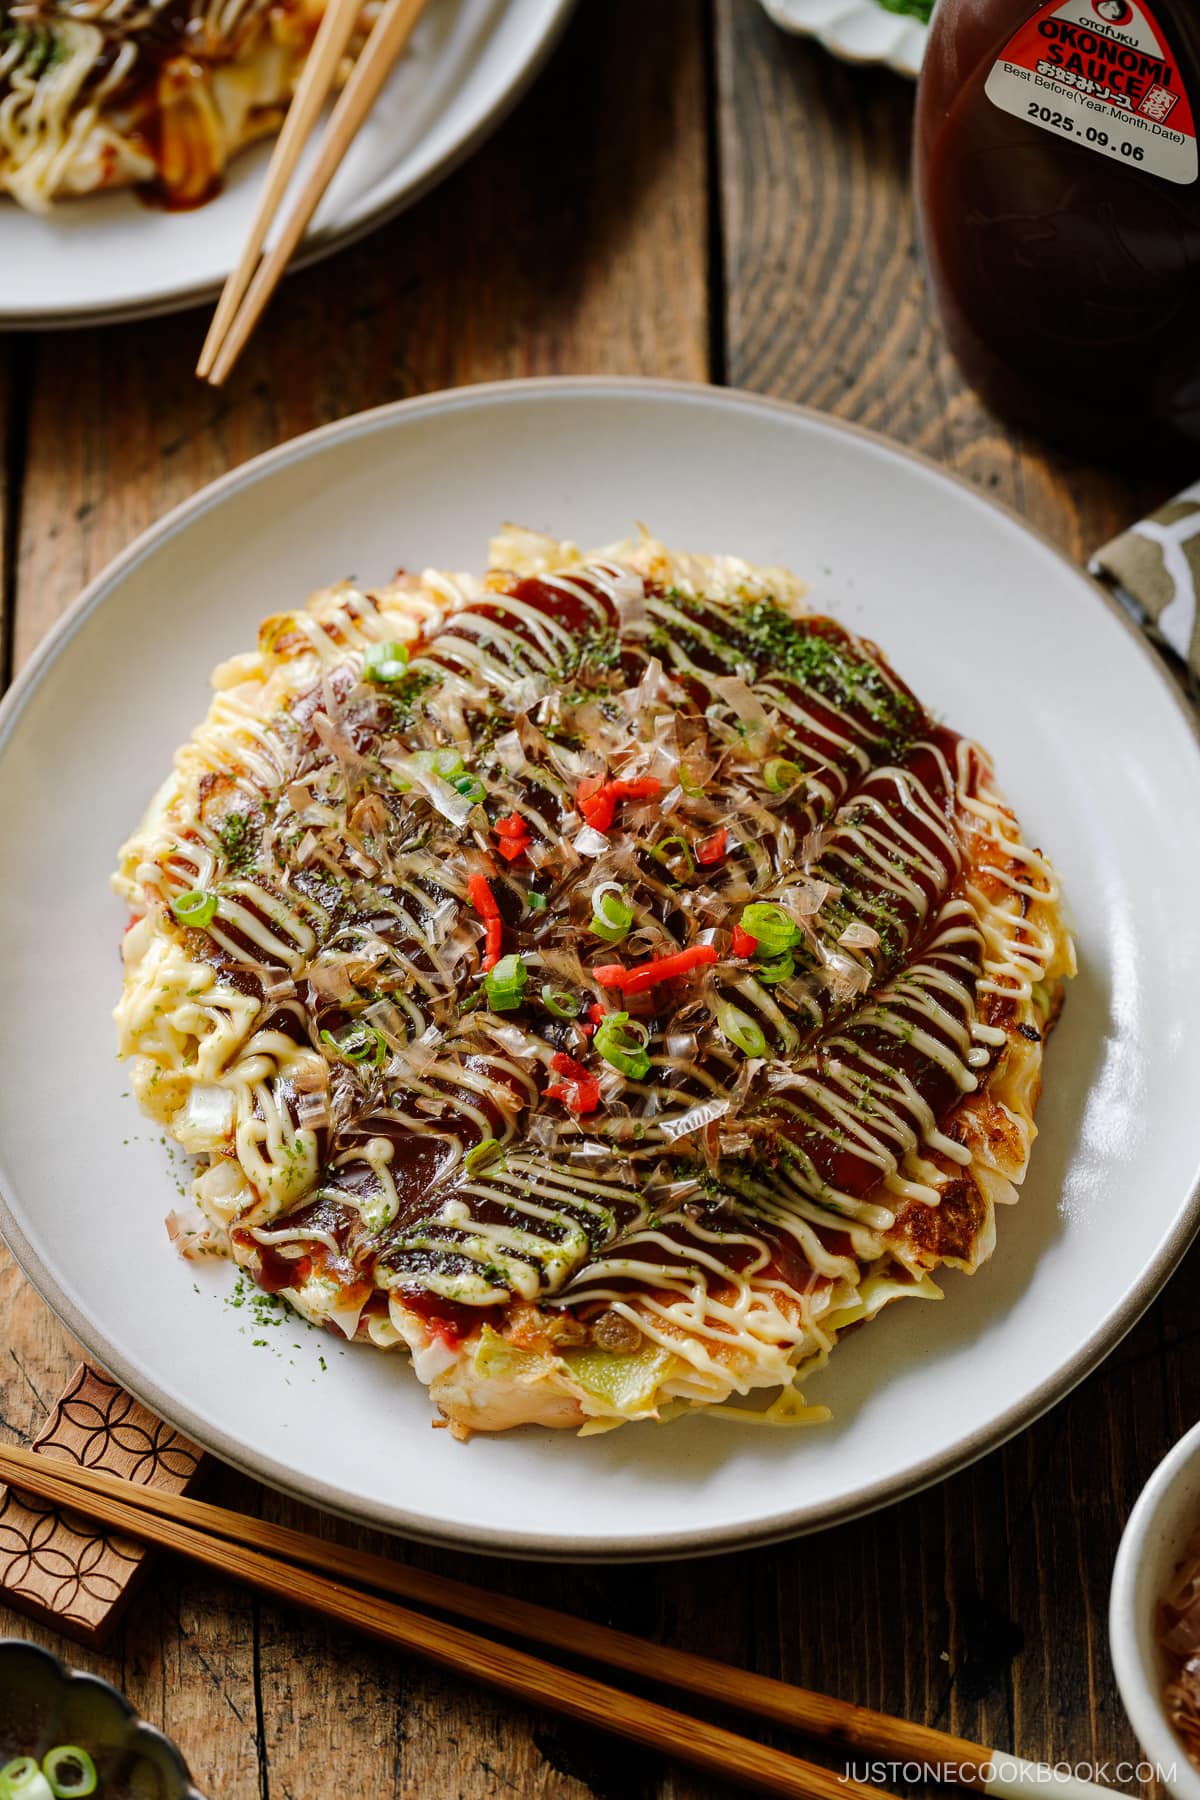
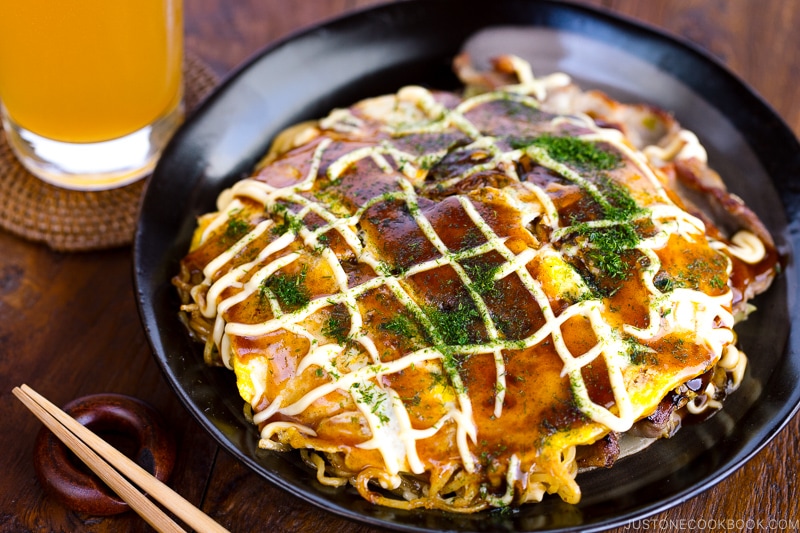
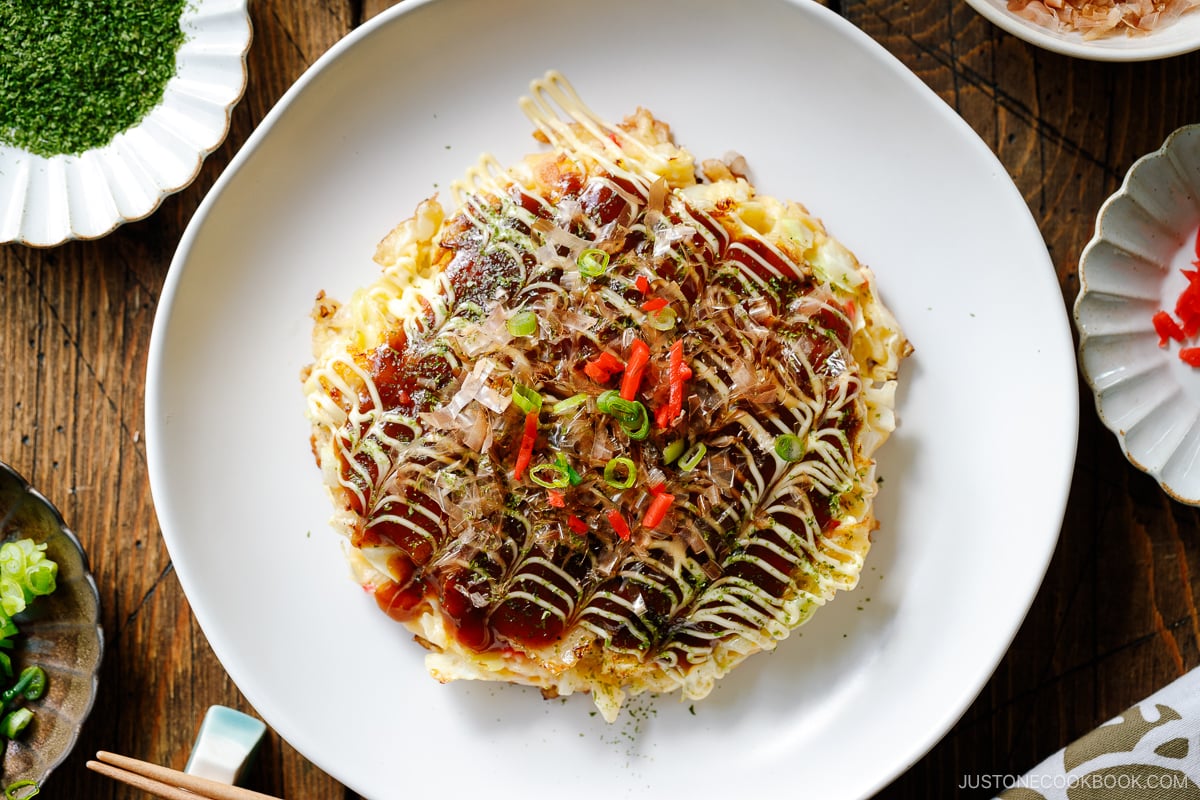
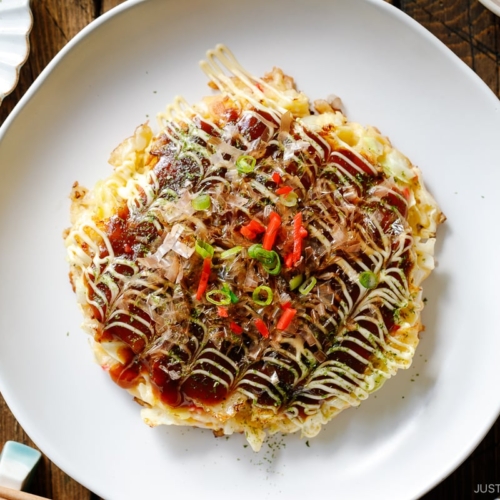
Okonomiyaki is a savory Japanese cabbage pancake “grilled as you like it“ with your choice of protein and tasty condiments and toppings. My recipe for this popular Osaka street food includes the 3 key ingredients that give it a truly authentic taste.
Among all the Osaka specialties, Takoyaki (たこ焼き) and Okonomiyaki (お好み焼き) are the most well-known. Today I’m sharing my favorite Okonomiyaki recipe with you so you can make this popular street food at home!
Table of Contents
What is Okonomiyaki?
Okonomiyaki (お好み焼き) is a savory Japanese cabbage pancake. I’ve seen okonomiyaki referred to as a “Japanese pizza” or “Japanese frittata” in the U.S.
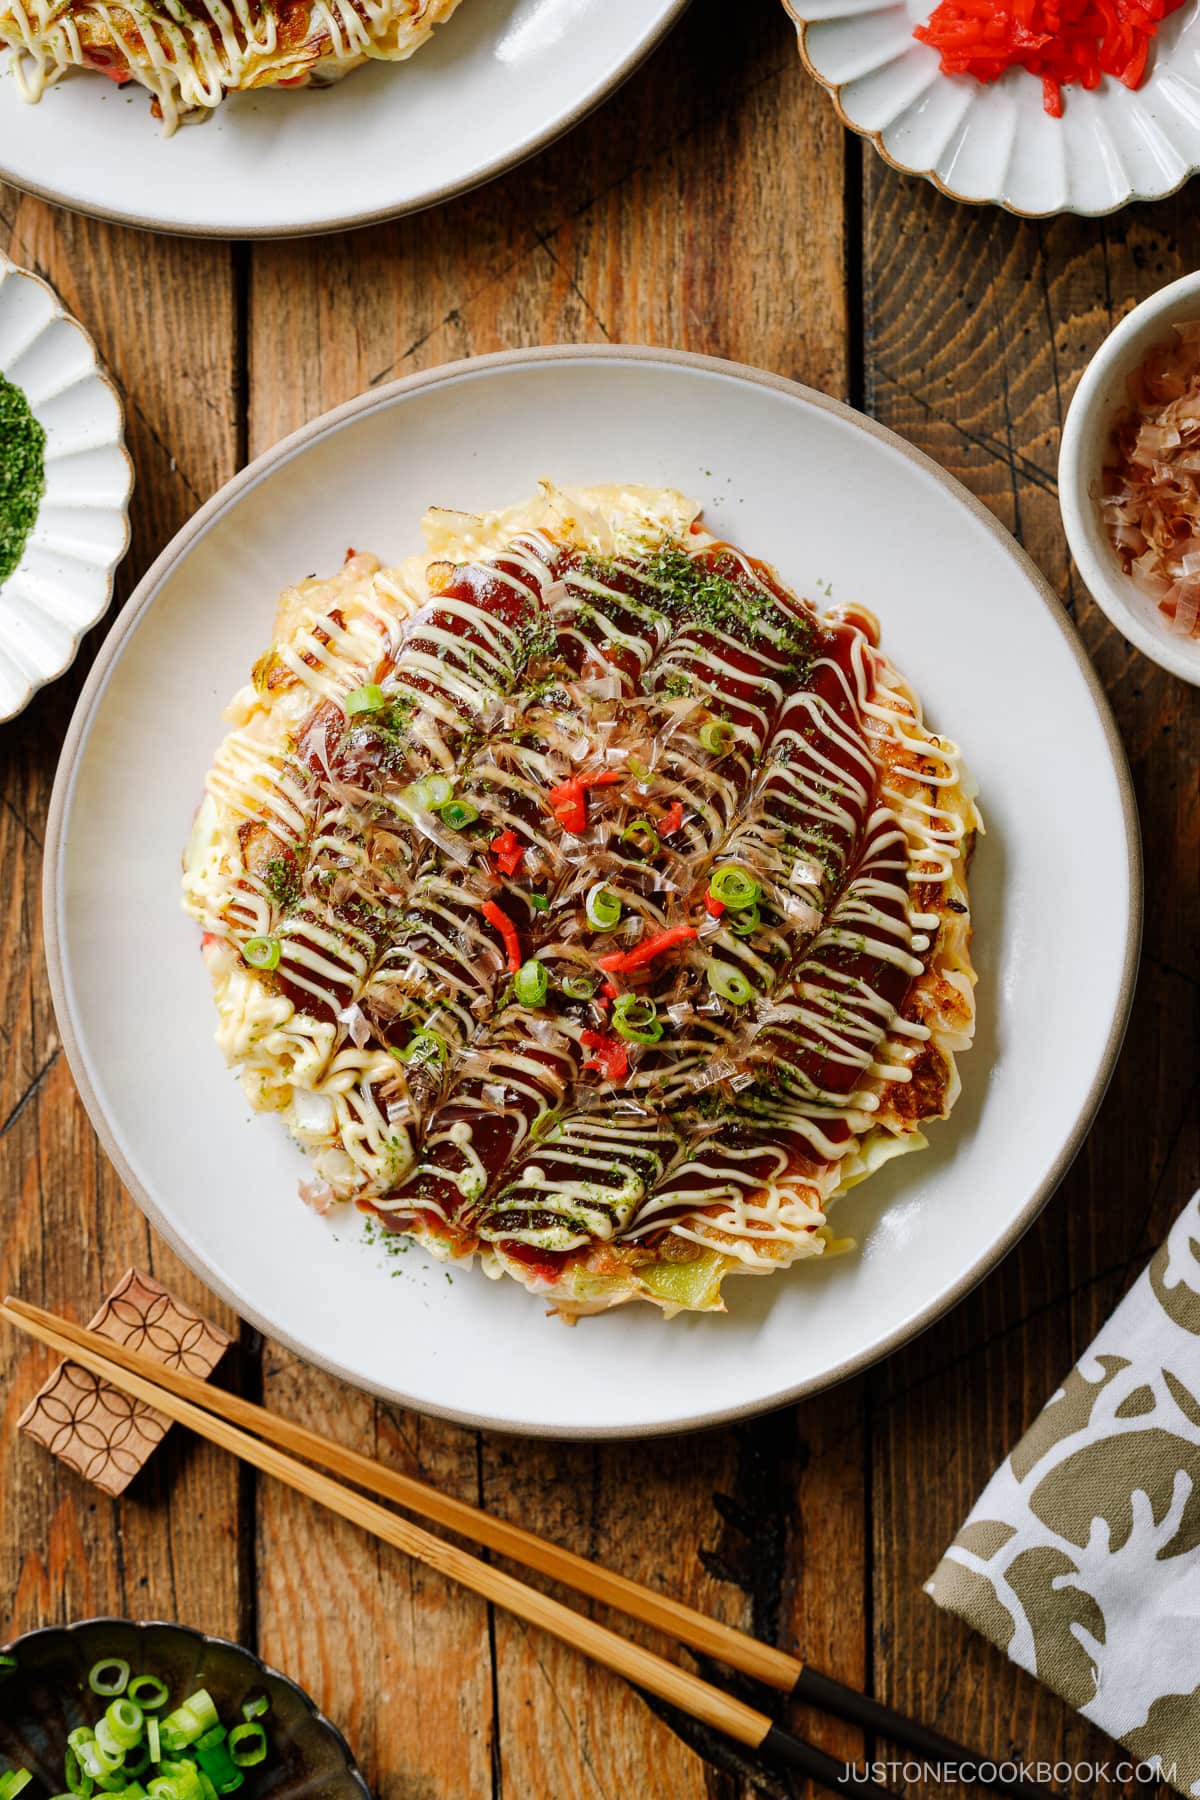
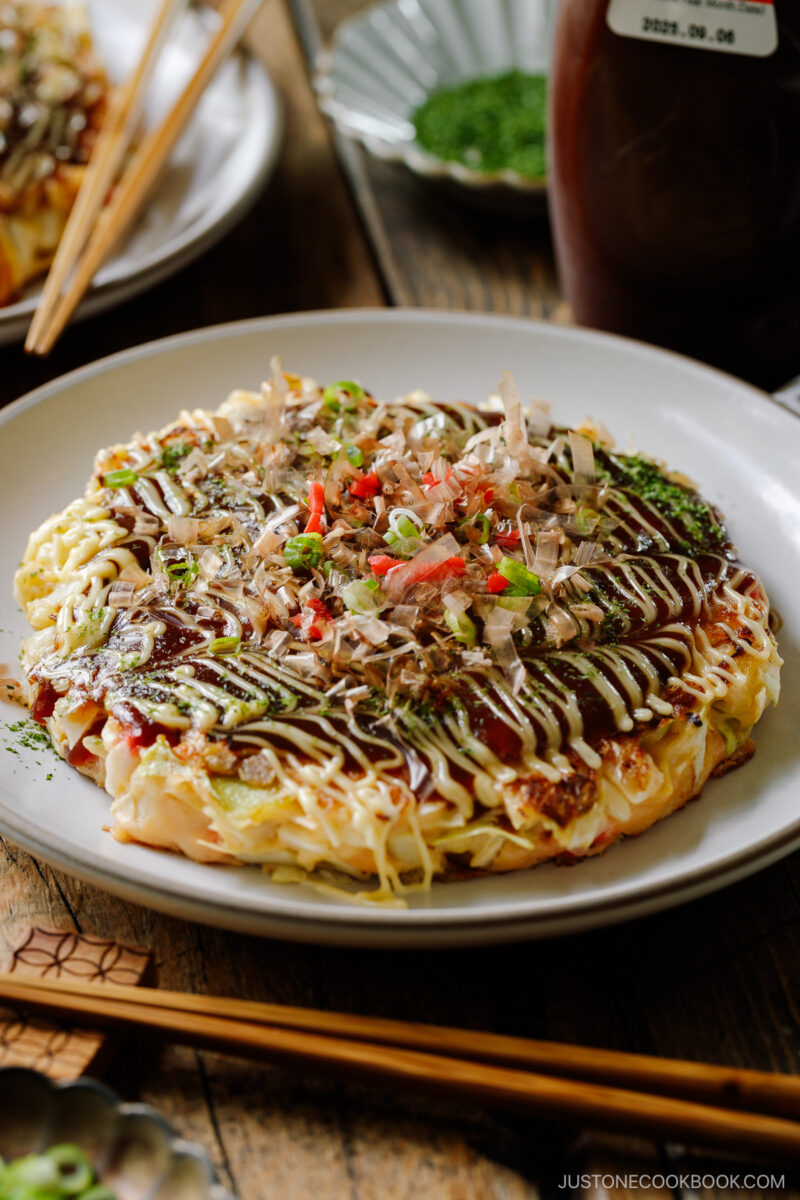
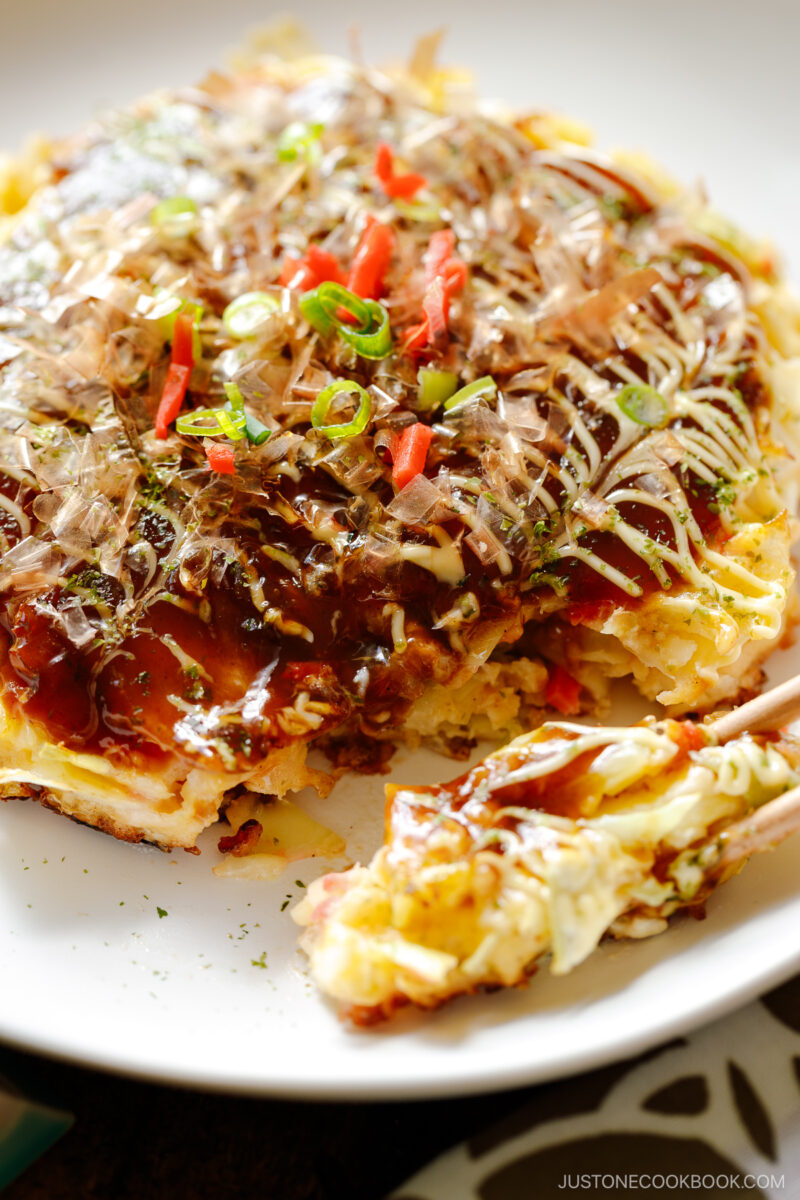
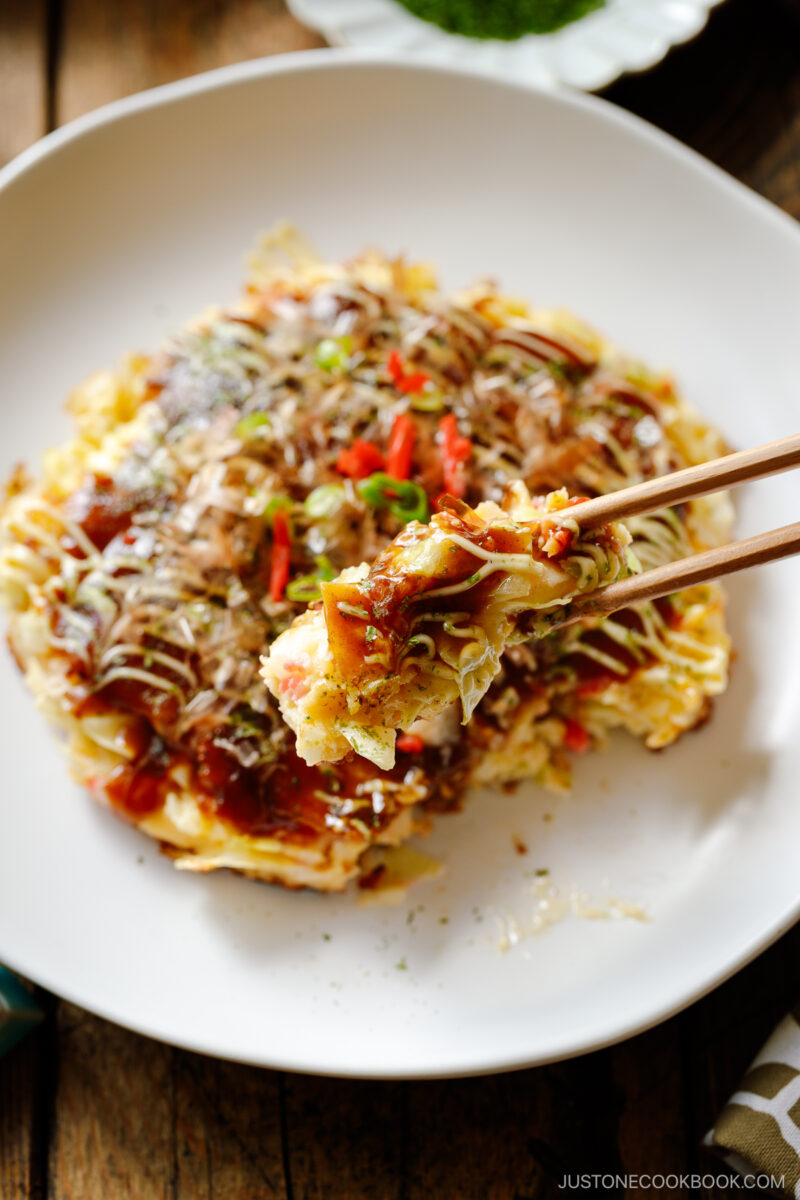
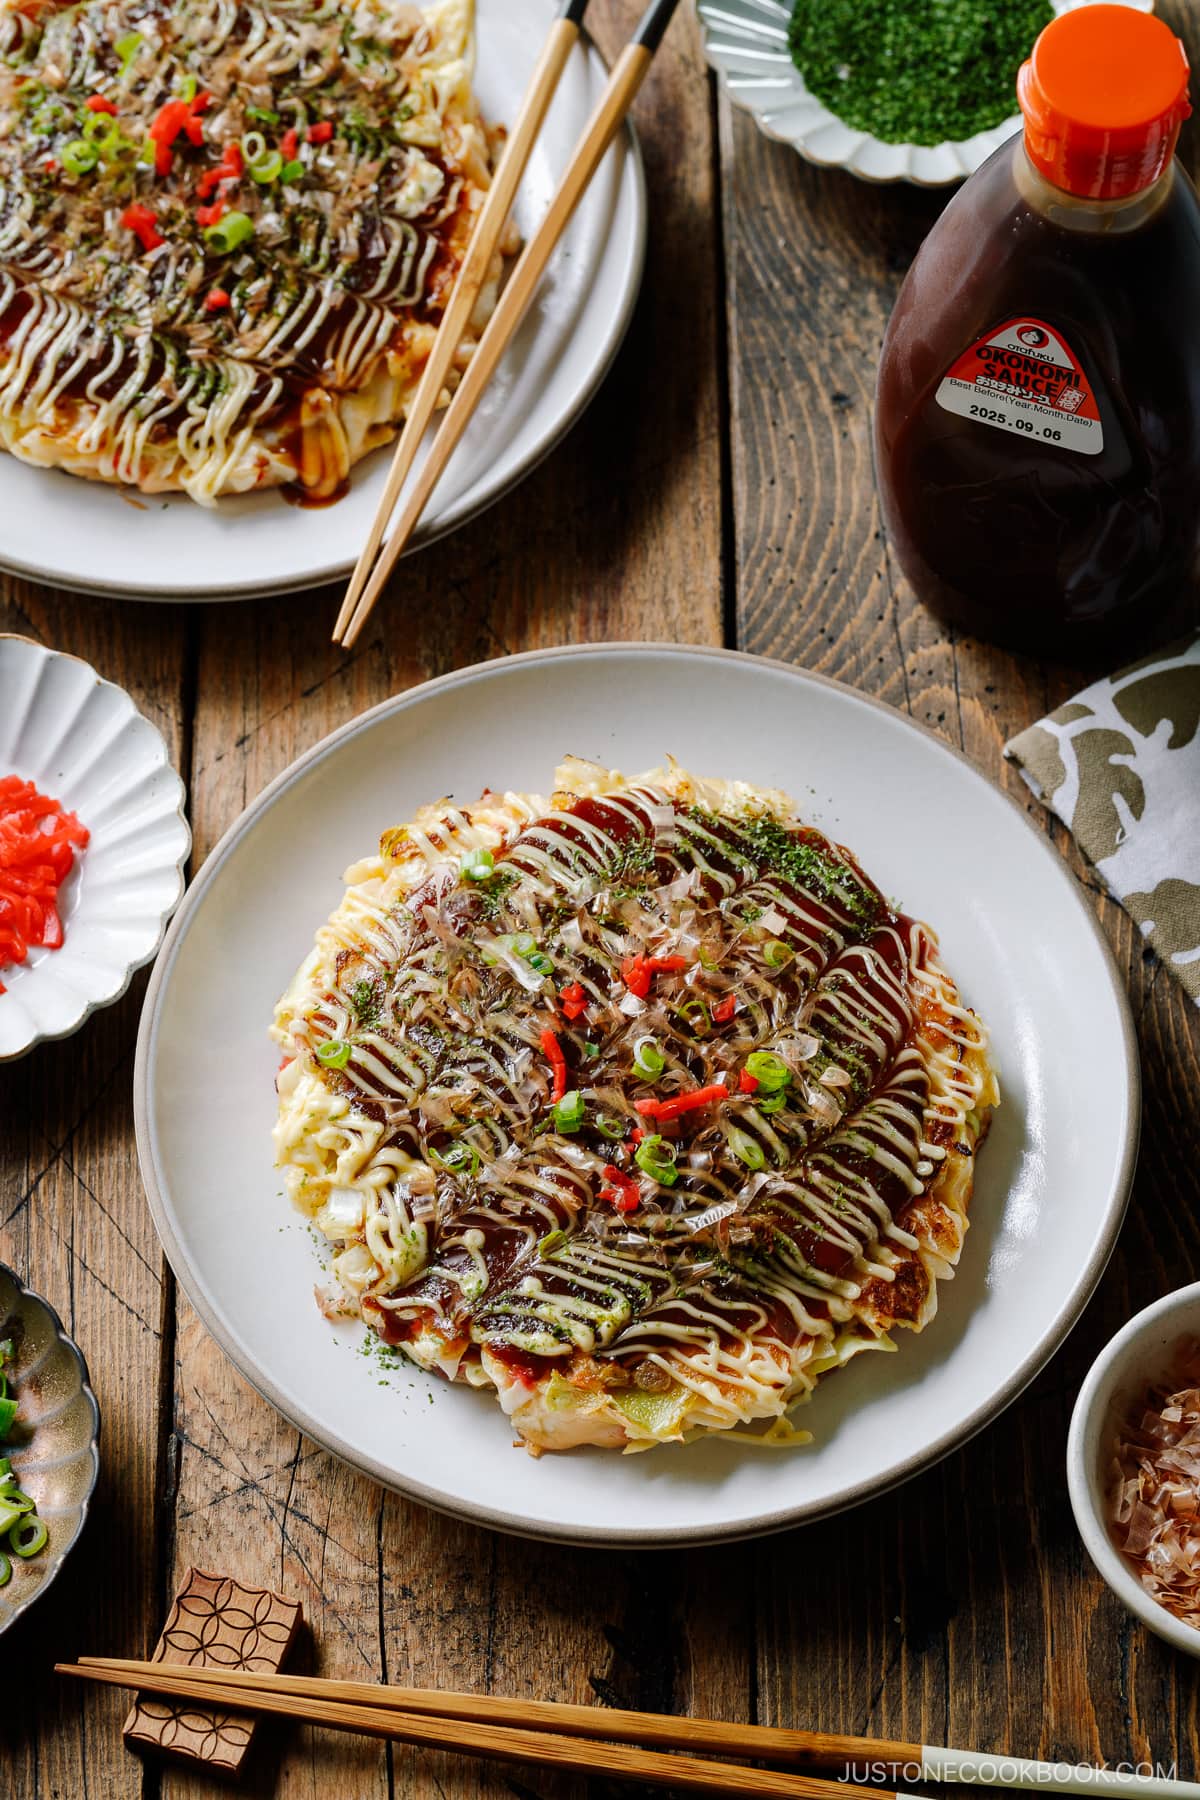
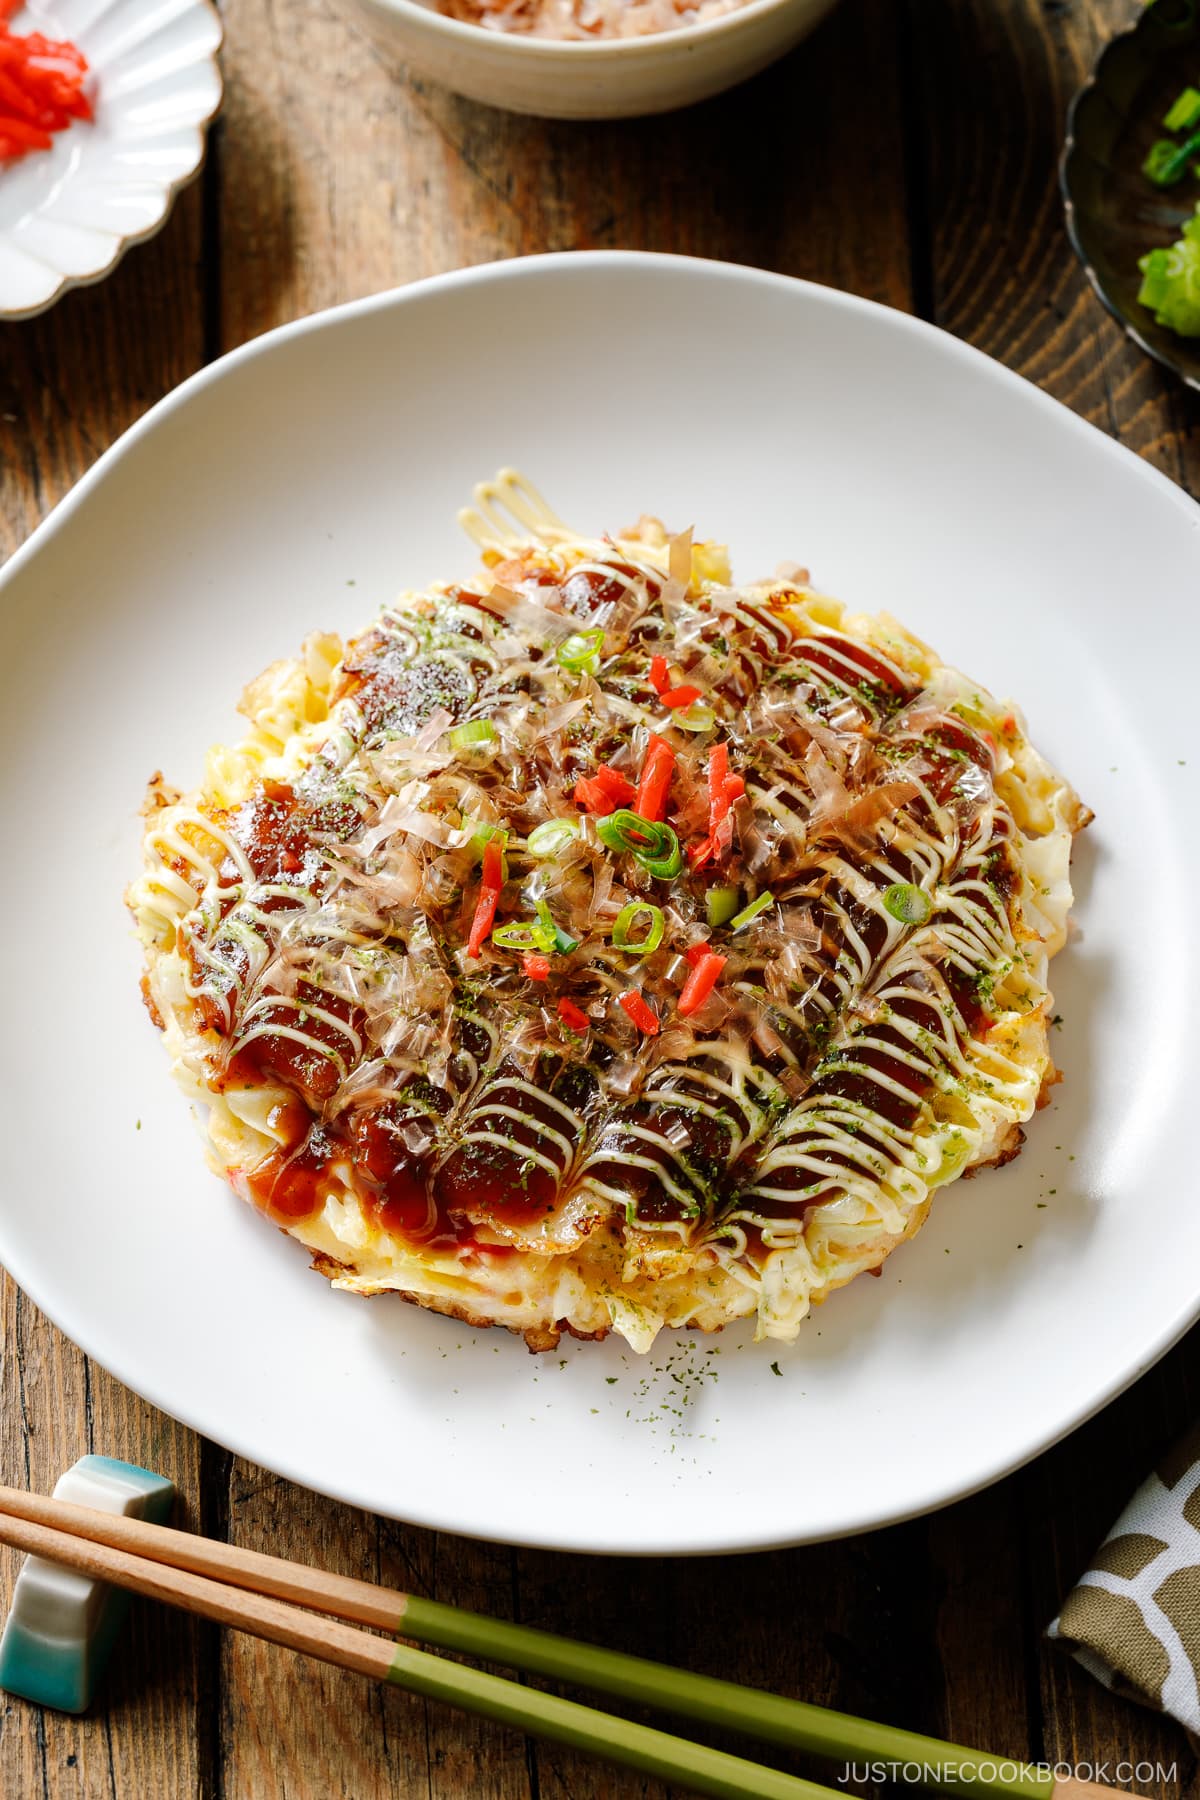
The batter is made with flour, tempura scraps (tenkasu), grated yam (nagaimo or yamaimo), and eggs. It’s then mixed with shredded cabbage and sometimes additional ingredients like shrimp and squid. A classic topping is pork belly slices, placed on top of the savory pancake while grilling. Once cooked, okonomiyaki is topped with a variety of condiments such as okonomiyaki sauce, Japanese Kewpie mayonnaise, dried seaweed, and dried bonito flakes.
This dish is highly adaptable even if you don’t eat pork or prefer another protein choice. The possibility for the filling and topping choices are endless, which is why this dish in Japanese translates to “grilled as you like it” – Okonomi (as you like it) Yaki (grill).
Why This Recipe Works
I’ve been making this recipe for my family and friends for over a decade, and everyone loves it.
- Easy and quick to make – Mix all the ingredients and cook!
- Budget-friendly – It’s a satisfying dish with economical ingredients.
- Family and kid-friendly – Okonomiyaki is customizable, and it’s fun to cook with family and friends at the table.
- Freezes and reheats well – I make ahead for future busy evenings. It’s a great meal prep dish!
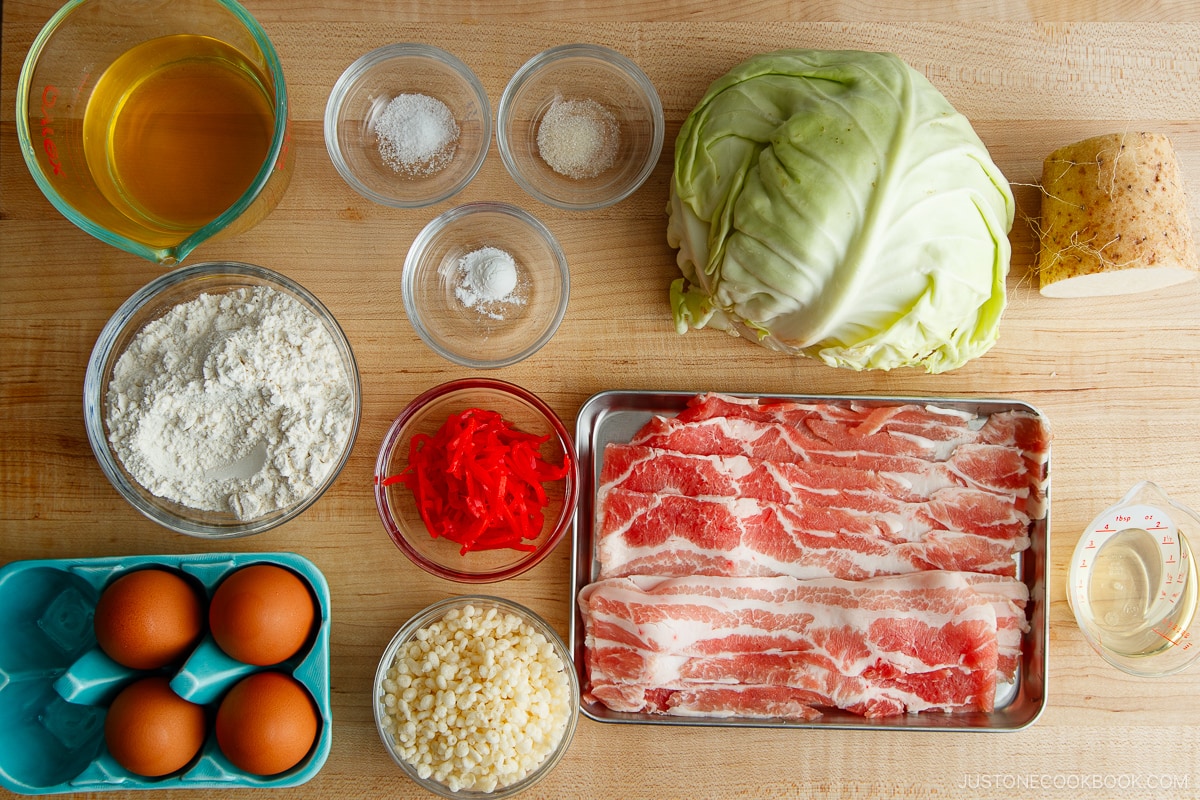
Ingredients for Okonomiyaki
To make really good authentic okonomiyaki, certain ingredients are necessary. Okonomiyaki tastes much better compared to versions that omit them. Read below for vegan/vegetarian options.
For the base batter
- All-purpose flour (plain flour)
- Salt
- Sugar
- Baking powder – Use aluminum-free baking powder like this.
- Grated mountain yam (nagaimo/yamaimo) – Can’t find it? Check out the substitutions below.
- Dashi (Japanese soup stock) – Never made this before? Read more about this topic in the section below. Use Vegan Dashi for vegan/vegetarian.
For the Okonomiyaki
- Eggs – Use JUST Egg for vegan.
- Tenkasu (tempura scraps) – Read more about this in the section below.
- Pickled red ginger (kizami shoga)
- Green cabbage
- Sliced pork belly (skip for vegan/vegetarian) – This is the most popular and classic topping, but check out other options I listed in the section below.
How to Make the Best Okonomiyaki
Check out the recipe card below for the full step-by-step tutorials, but here is a quick overview:
- Make the base batter. It’s said that making the base batter ahead of time improves the flavor and fluffiness of the okonomiyaki. It’s up to you. You can at least rest the batter a little while you prep other ingredients.
- Prep the ingredients. Cut all the ingredients. Make sure to drain the cabbage well so the moisture won’t dilute the batter. The salad spinner comes in handy!
- Make the okonomiyaki batter. Add eggs, tempura scraps, chopped red pickled ginger, then finely chopped cabbage. Mix them all together.
- Cook the okonomiyaki batter in frying pans or an electric griddle. I said pans (plural) so that you can cook two savory pancakes at a time.
- Add condiments and toppings. Enjoy!
3 Key Ingredients and Their Substitutes
Let’s deep dive into the most important ingredients for okonomiyaki.
1. Nagaimo (Yamaimo)
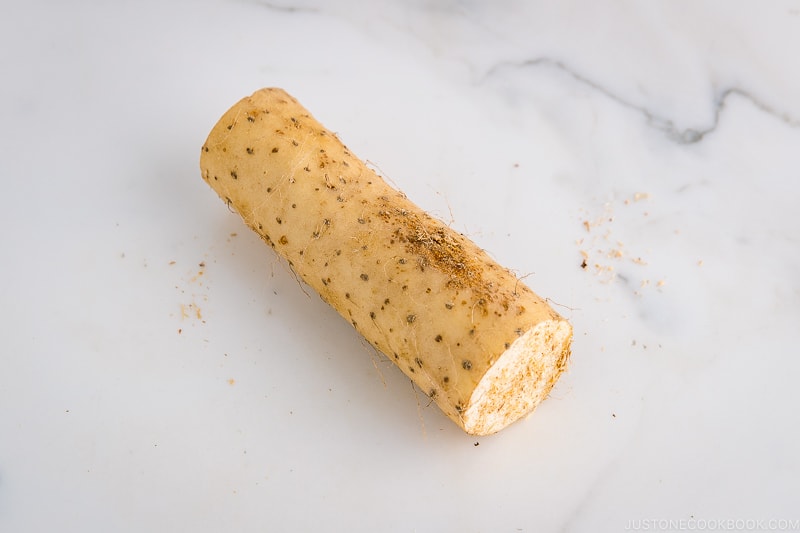
This is Japanese long yam (nagaimo) and it’s the most important ingredient to yield a non-doughy, fluffy okonomiyaki. Grated nagaimo yields a slimy, slippery, thick liquid, akin to lightly beaten egg whites. When cooked, it adds volume to the batter and creates a fluffy okonomiyaki.
Alternatively, you can use Japanese mountain yam (yamaimo) instead of nagaimo, but yamaimo is a thick and paste-like texture while nagaimo is a loose and liquid texture.
Some people may get an allergic reaction (like itching), so you can wear a kitchen glove to grate or wash your hands quickly.
You can purchase nagaimo/yamaimo at Japanese and most Asian grocery stores.
Nagaimo Substitute
After I tested a few substitute options I found on the internet, I think the combination of baking powder and beaten egg whites works the best.
- Baking powder — It’s a good substitute. Since we already add baking powder to this recipe, you’re just increasing it a little. I would double the amount in the recipe.
- Beaten egg whites — Another good substitute. Fluffy egg whites add volume to the savory pancake. Beat 2 egg whites for this recipe.
- Grated taro — I haven’t tried this, but it’s another “slimy and gooey” texture slightly similar to nagaimo. I will need to try this one day.
- Well-drained tofu — I don’t think it will work as well, but tofu gives a texture that is not dense. It might be an okay substitute, but be careful with moisture released by the tofu, as it dilutes the batter.
- Grated potatoes — NEVER use this as a substitute! The grainy texture of grated potatoes does not have any effect on the okonomiyaki except for adding cooked potato texture. We’re not making potato pancakes!
- Grated lotus root — I haven’t tried this, but I assume it has a similar texture as grated potato, so I don’t think it would add fluffiness to okonomiyaki.
2. Tenkasu (Tempura Bits/Scraps)
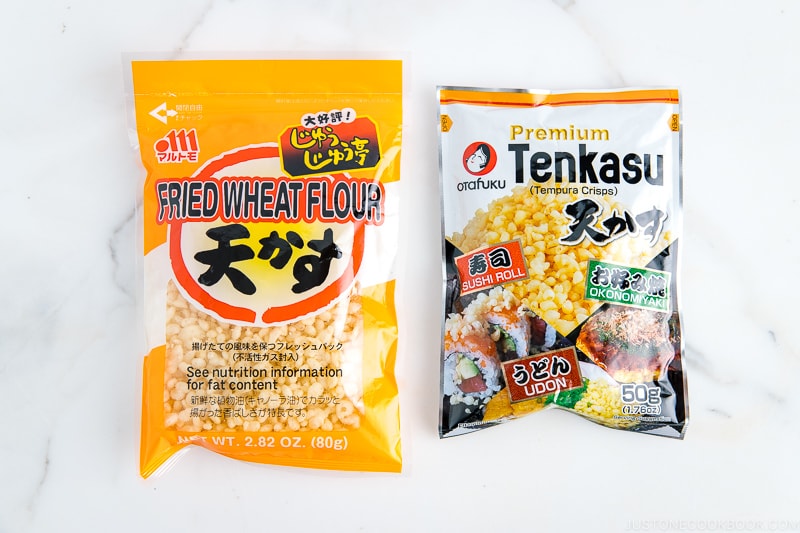
This is another ingredient to make the batter fluffier. When you see ‘tempura scraps,’ you might wonder if you can avoid it. Well, I understand it is not a healthy ingredient; however, many people in Osaka claim this is one of the most important ingredients, next to nagaimo/yamaimo. Fried food adds rich flavor, depth, and complexity to the dish.
You can buy a bag of tenkasu from Amazon or Japanese grocery stores.
Tenkasu Substitute
You can make your tempura scraps using the leftover batter. All you need is to drop the batter into hot oil and scoop it up when golden brown.
Some people online suggest substituting tenkasu with Asian shrimp chimps (Kappa Ebisen, かっぱえびせん). I haven’t tried that, but it sort of has a similar texture and flavor.
3. Dashi (Japanese soup stock)
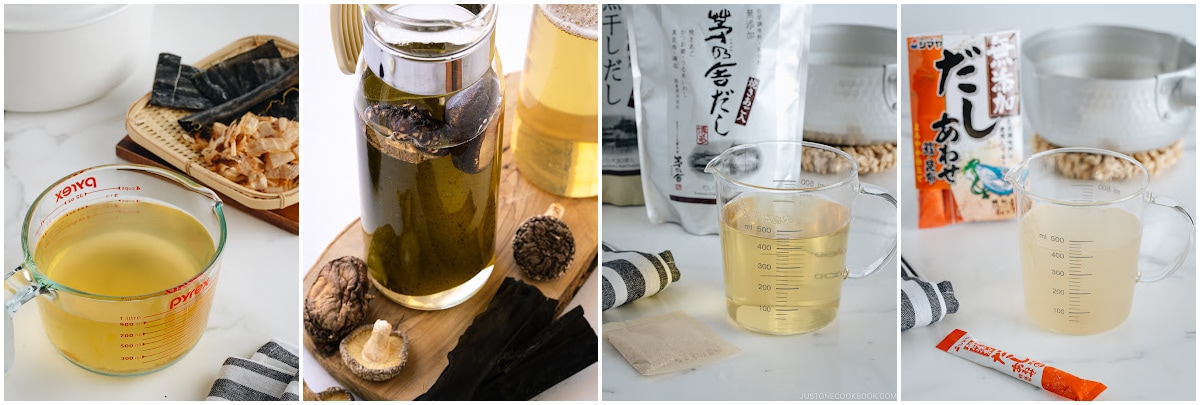
Dashi, or Japanese soup stock, is the key ingredient for most Japanese foods. It’s what makes Japanese food authentic. Without dashi, it’s not a true okonomiyaki!
The best part is that it’s super quick and easy to make! Please do not substitute dashi with water, vegetable stock, or chicken stock.
There are three ways to make dashi.
- Homemade dashi — You can make a basic Awase Dashi from scratch by steeping kombu (edible kelp) and katsuobushi (dried bonito flakes) in water. If you’re vegetarian/vegan, use Kombu Dashi or make Vegan Dashi with kombu and dried shiitake mushrooms.
- Dashi packet — The dashi packet is the best shortcut method that I use often. Similar to making tea, you steep the dashi packet in water and cook for a couple of minutes. Despite its quick method, the flavor of dashi is good.
- Dashi powder — Dashi powder (dashi granules) is my least favorite method due to its lack of flavor. The flavor and fragrance do not last long. But you can make a quick dashi with just dashi powder and hot water.
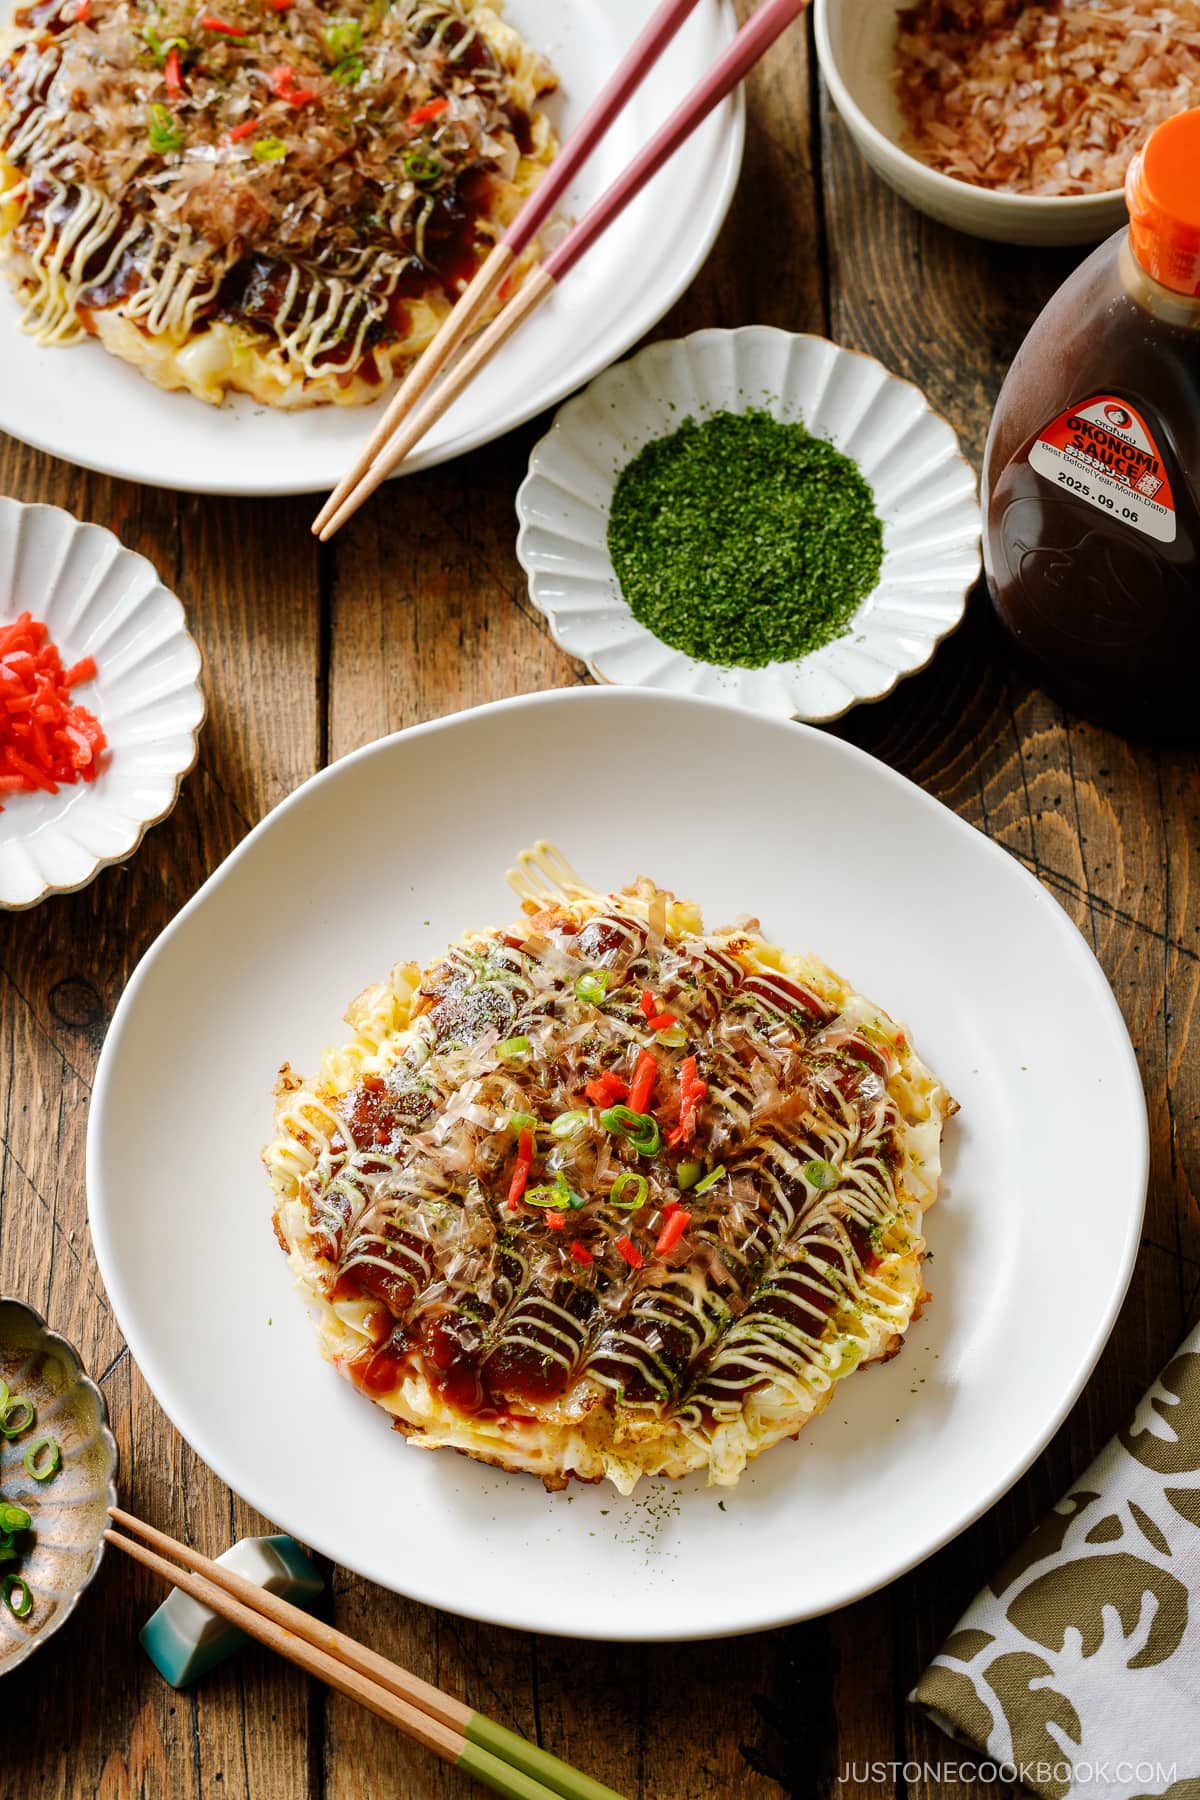
Condiments and Toppings
Thanks to online shops like Amazon, we can get all these Japanese condiments and toppings easily these days. Make your okonomiyaki authentic with the following items!
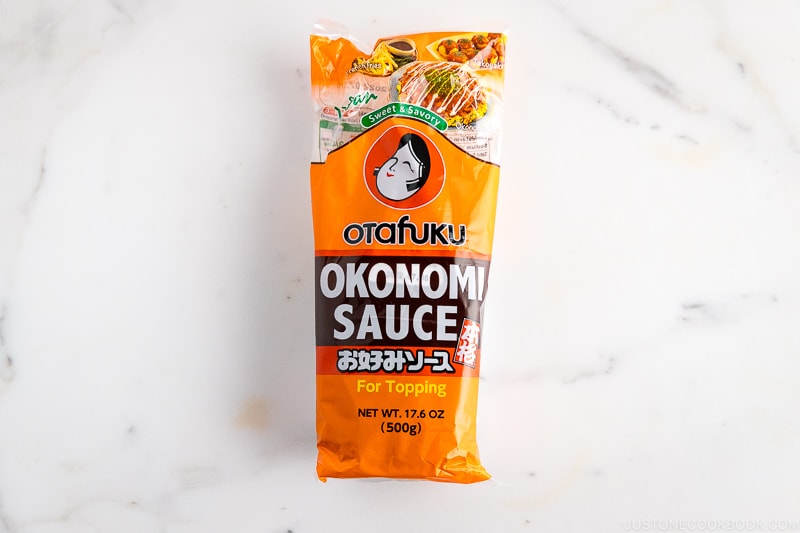

- Okonomiyaki sauce – The taste of the okonomiyaki strongly relies on the okonomiyaki sauce. I love the Otafuku brand’s Okonomi Sauce, which you can get from Amazon or Japanese/Asian grocery stores. For those who can’t get this sauce, I made a homemade version using just four ingredients. This homemade version tastes good, similar to Otafuku sauce!
- Japanese Kewpie mayonnaise – Osaka’s specialty, both Takoyaki and Okonomiyaki, has squirts of mayonnaise along with the sweet-savory takoyaki/okonomi sauce. But this is optional even for locals. I love the combination of flavors from both sweet savory okonomi sauce and creamy and tangy mayo. You can purchase a Kewpie brand from Amazon and Japanese/Asian grocery stores or you can make Homemade Japanese Mayonnaise.
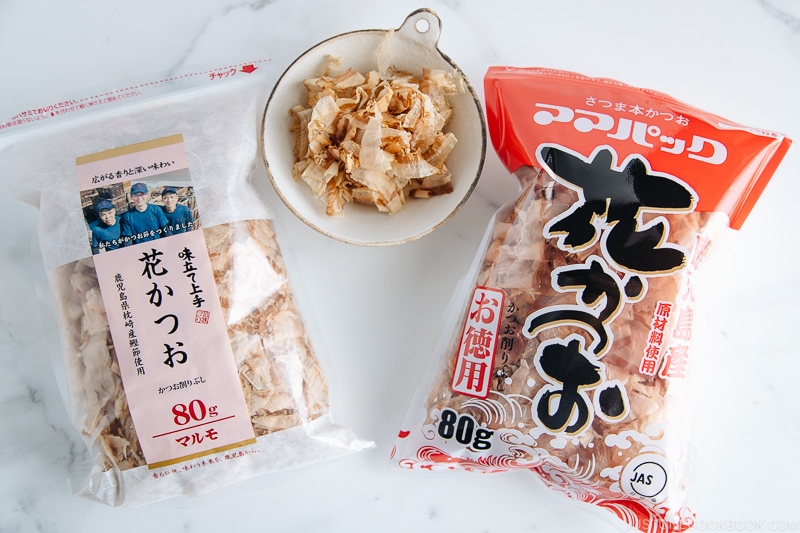
- Katsuobushi (Dried Bonito Flakes) – Katsuobushi is shaved flakes of fermented and smoked bonito and these flakes are super paper-thin! It’s a super umami-rich ingredient that’s used for making dashi (Japanese soup stock). When you sprinkle them on top of the okonomiyaki, they dance along with the steam! You can buy it from Amazon and Japanese/Asian grocery stores. You can omit this ingredient if you dislike the fishy smell.
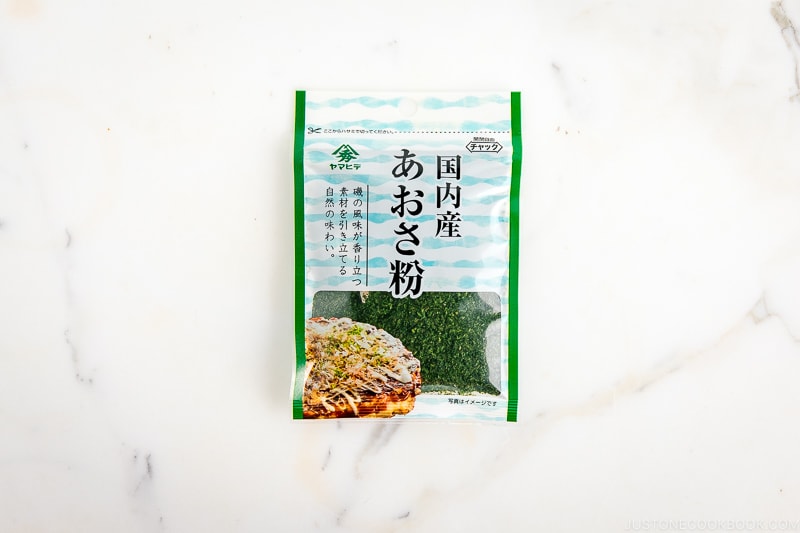
- Aonori (Dried Green Seaweed) – It is dried green (ao) seaweed (nori) flakes/powder. This umami-rich seaweed has a bright, intense green color and a unique fragrance. You can buy aonori from Amazon and Japanese/Asian grocery stores. Or you can substitute with regular nori if you can’t find it. Interesting fact: In ancient Japan, ao (pronounced as [ah-o]) means green in the traditional Japanese language. There were 4 colors; white, black, red, and green. These days, ao means blue in contemporary Japanese.
Optional Add-On Ingredients for Okonomiyaki
Besides the key ingredients above, there are other ingredients that you can add to the batter.
- Seafood – calamari/squid (my favorite), shrimp, scallops, octopus, or dried small shrimp (sakura ebi)
- Yakisoba noodles – Noodle-included okonomiyaki is called Modern Yaki (モダン焼き).
- Rice cakes (kiri mochi) – This is my favorite! You can get it on Amazon. Cut the mochi into small cubes and place them on the pan before pouring the batter over them.
- Shredded cheese
- Shiso leaves (Ooba) – My favorite!
- Mentaiko or tarako (spicy or non-spicy cod/pollack roe)
- Fish cakes (chikuwa)
- Vegetables – Parboiled potatoes, bean sprouts, sweet corn, garlic chives,
- Kimchi
- Mushrooms – I haven’t tried, but it’s a great vegetarian topping option.
Can We Use Okonomiyaki Flour (Mix)?
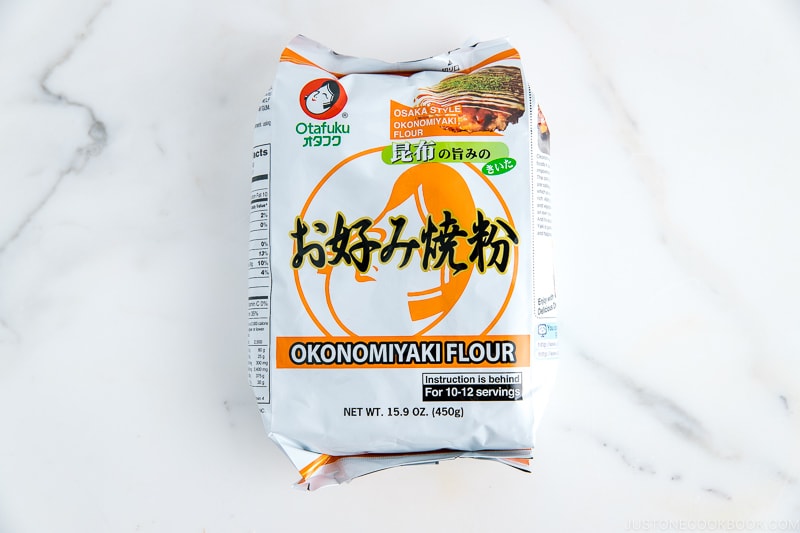
You can find a bag of Okonomiyaki Flour (Mix) at Japanese/Asian grocery stores. Just like pancake mix, all you need to do is add the egg(s) and water to the flour. After making the okonomiyaki batter, add shredded cabbage and other ingredients, if you like. It’s easy and quick, but I still like to recommend making your own okonomiyaki batter from scratch at home!
Okonomiyaki Restaurants in Japan
You can enjoy this dish at okonomiyaki restaurants (Okonomiyaki-ya お好み焼き屋) throughout Japan. There are usually 3 dining options:
- At a counter in front of a huge teppan (iron griddle), the chefs make them right in front of you.
- At a table that has built-in teppan (iron griddle), you can cook your own, but the staff will help you make it if you ask.
- The okonomiyaki is prepared and made in the kitchen, and they place it on a teppan (iron griddle) in front of you to keep it warm.
Besides restaurants, you can also purchase steaming hot okonomiyaki from street vendors during festivals (matsuri).
It’s not easy to replicate the food made on a hot iron griddle at home, and okonomiyaki made on the iron griddle simply tastes better. This is why sometimes I still choose to go to a restaurant even though I can make it easily at home.
Hiroshima-style Okonomiyaki
Hiroshima-style okonomiyaki uses almost the same ingredients, but they are layered rather than mixed in with the batter like Osaka-style. Not only that, fried egg and yakisoba noodles (or sometimes udon noodles) are used as toppings.
If you prefer the Hiroshima-style Okonomiyaki recipe, click here.
What to Serve with Okonomiyaki
Okonomiyaki is made with cabbage, eggs, and flour, so I recommend serving it with various vegetable and protein-packed side dishes.
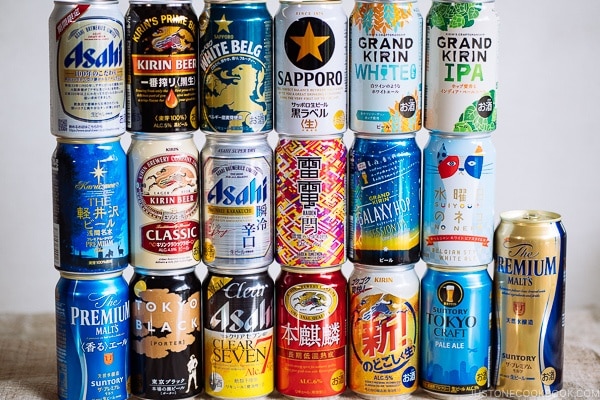
- Japanese beer
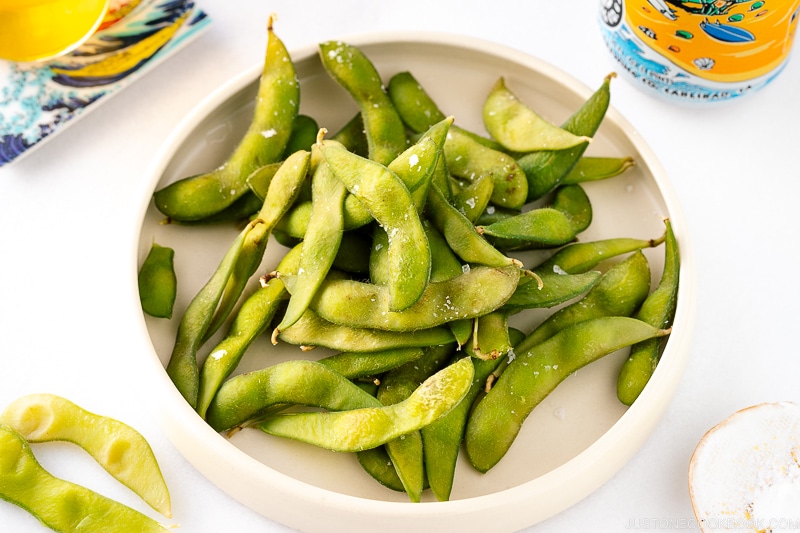
- Edamame or Spicy Edamame
- Harusame Salad
- Spinach Namul and Bean Sprout Namul
- Tomato Salad
- Hiyayakko (Cold Tofu)
- Teba Shio (Salted Chicken Wings)
- Japanese Fried Chicken (Karaage)
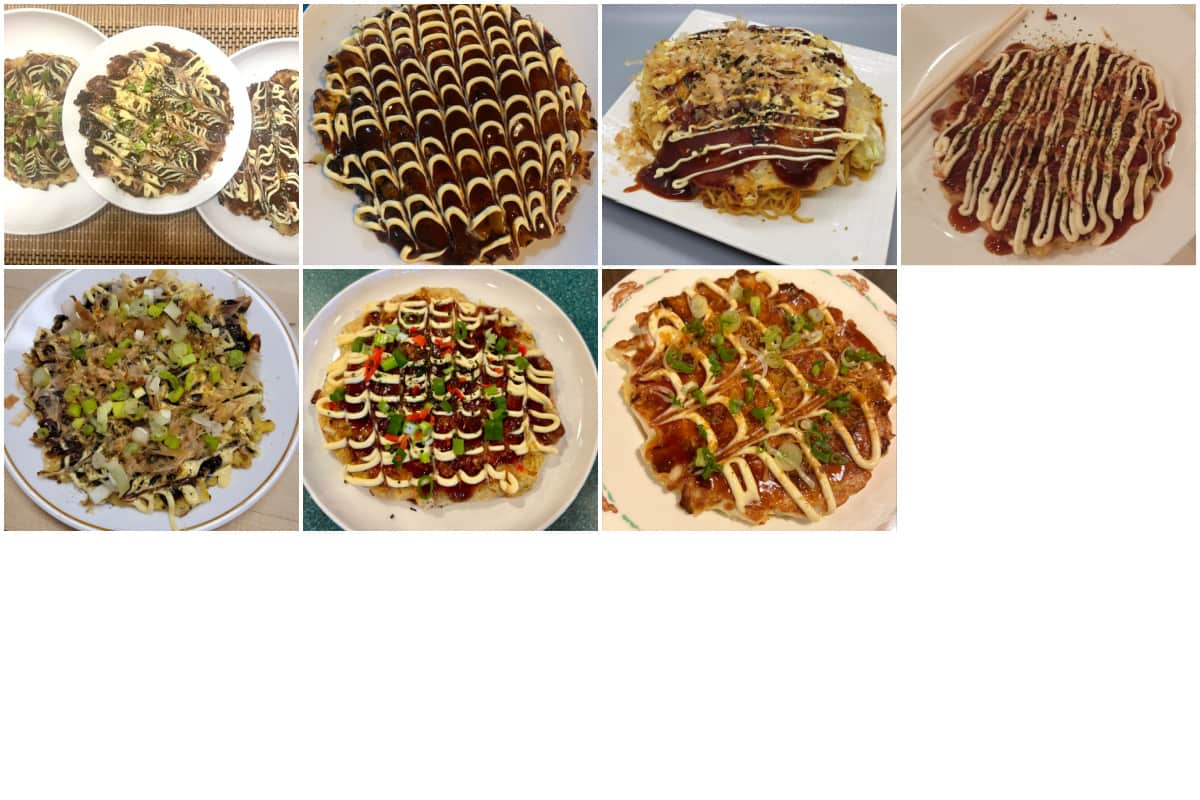
Readers’ Okonomiyaki Recipes
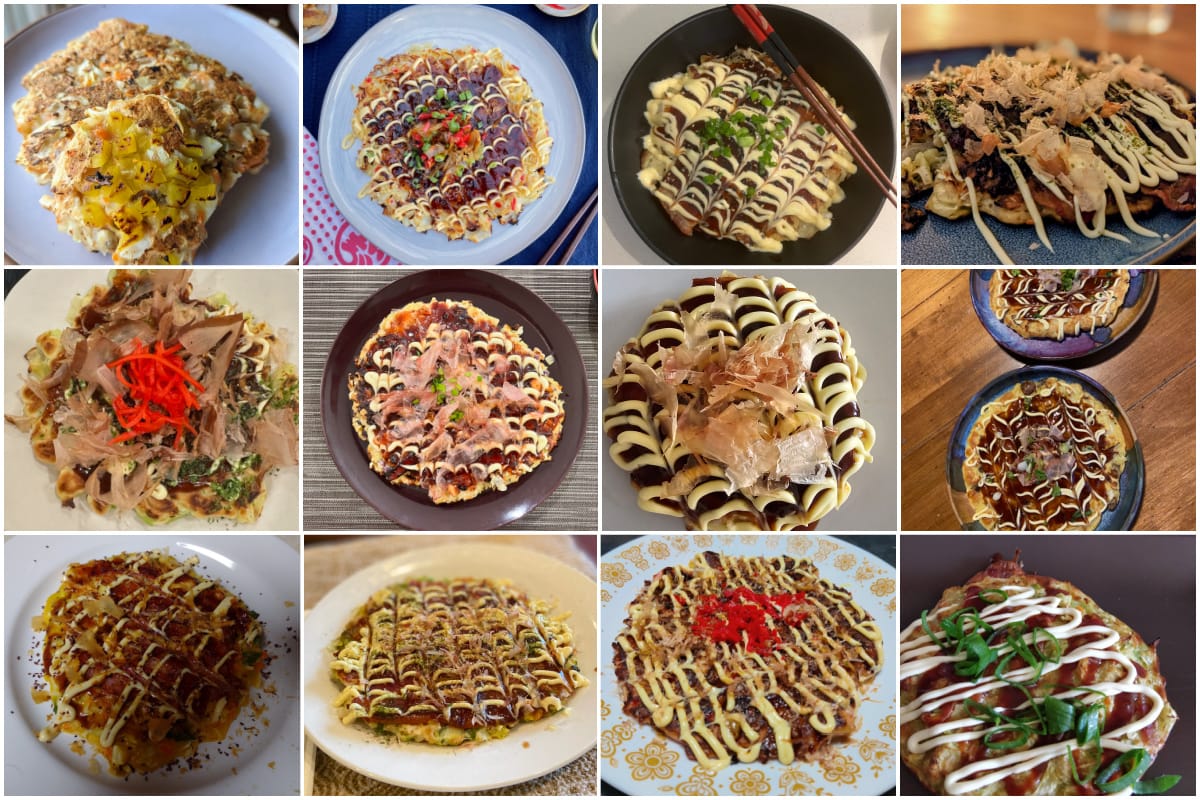
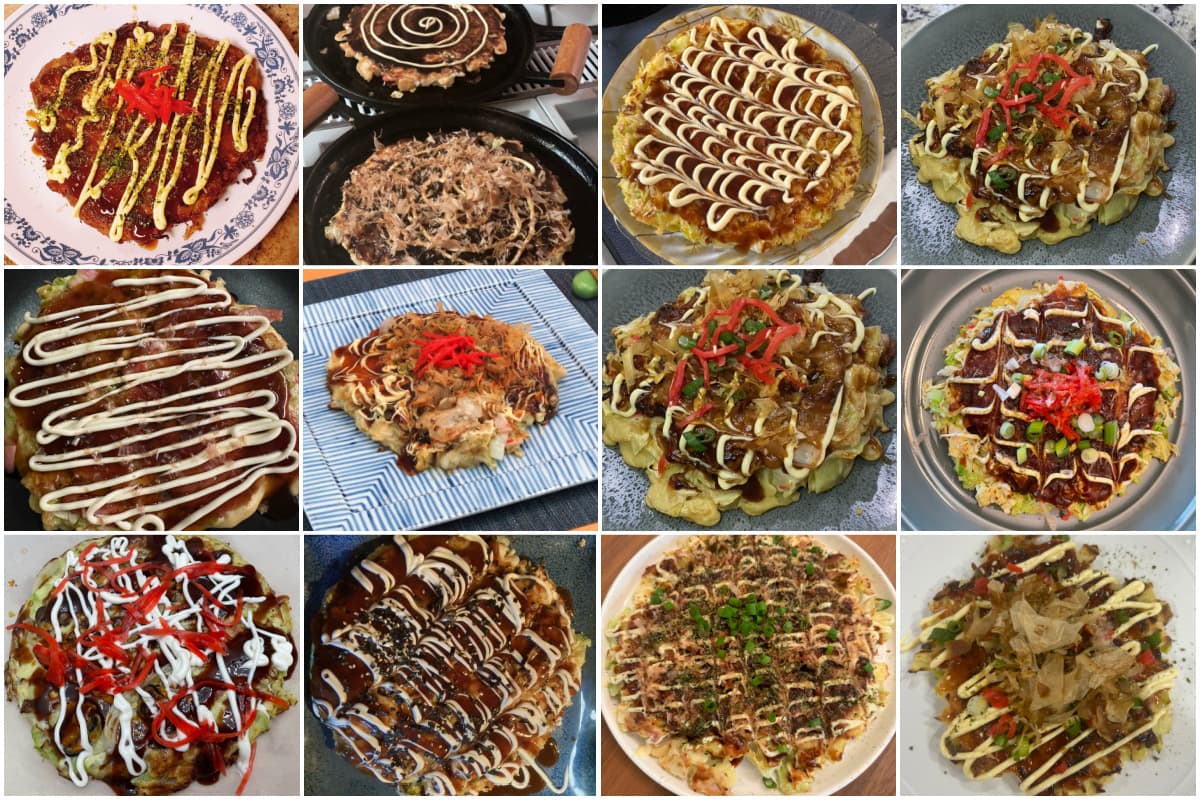
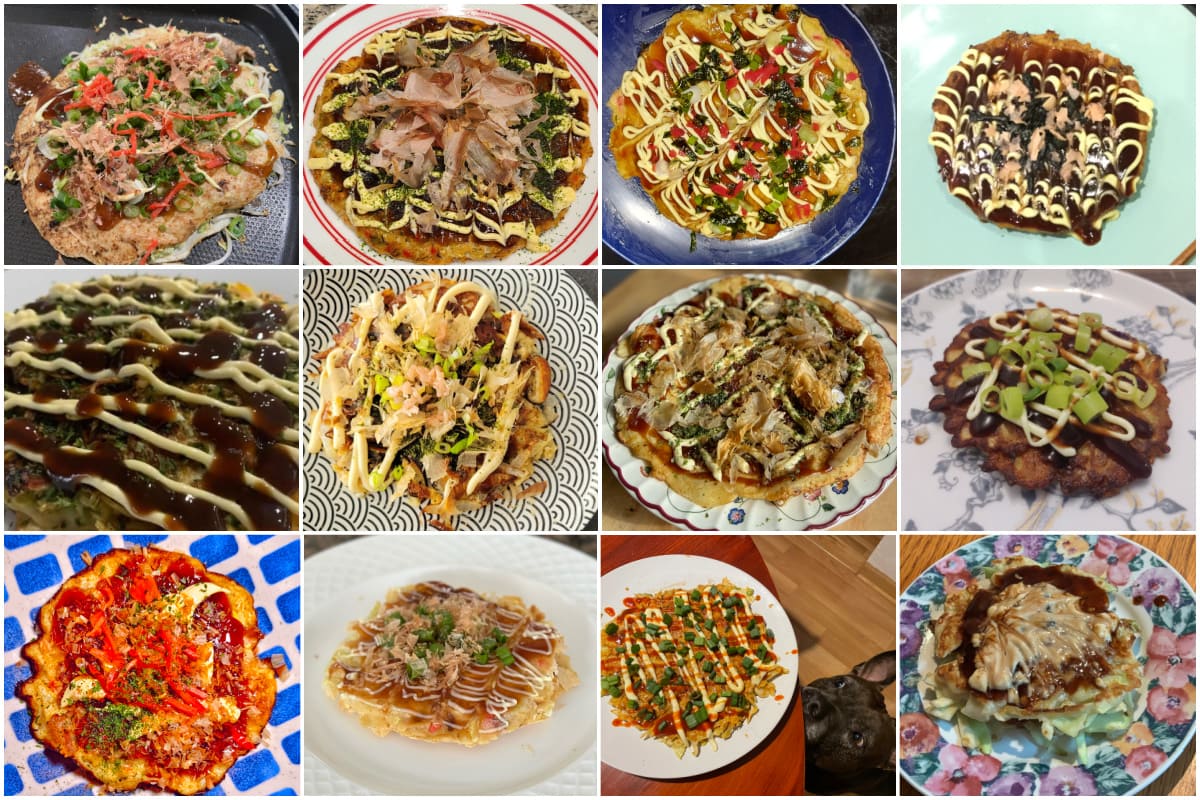
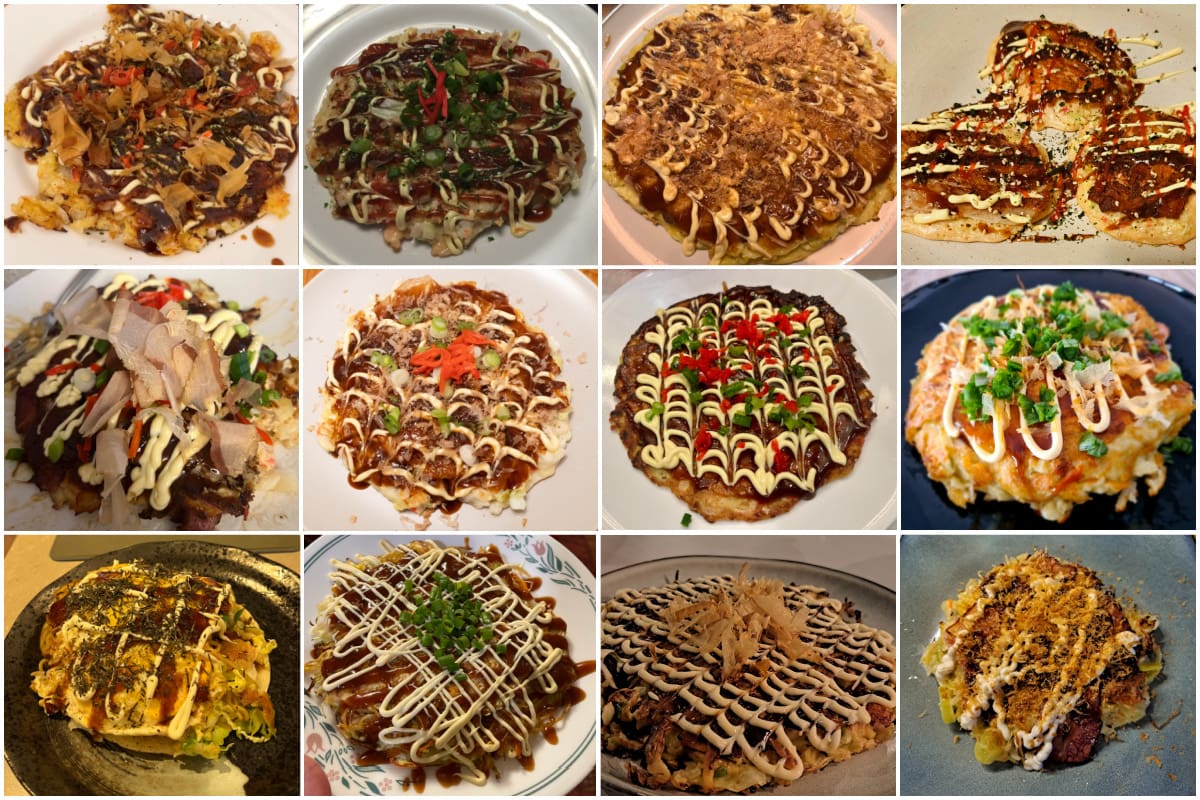
Okonomiyaki was the challenge recipe for the JOC Cooking Challenge March 2024. Check out the beautiful chocolate gateau created by JOC readers!


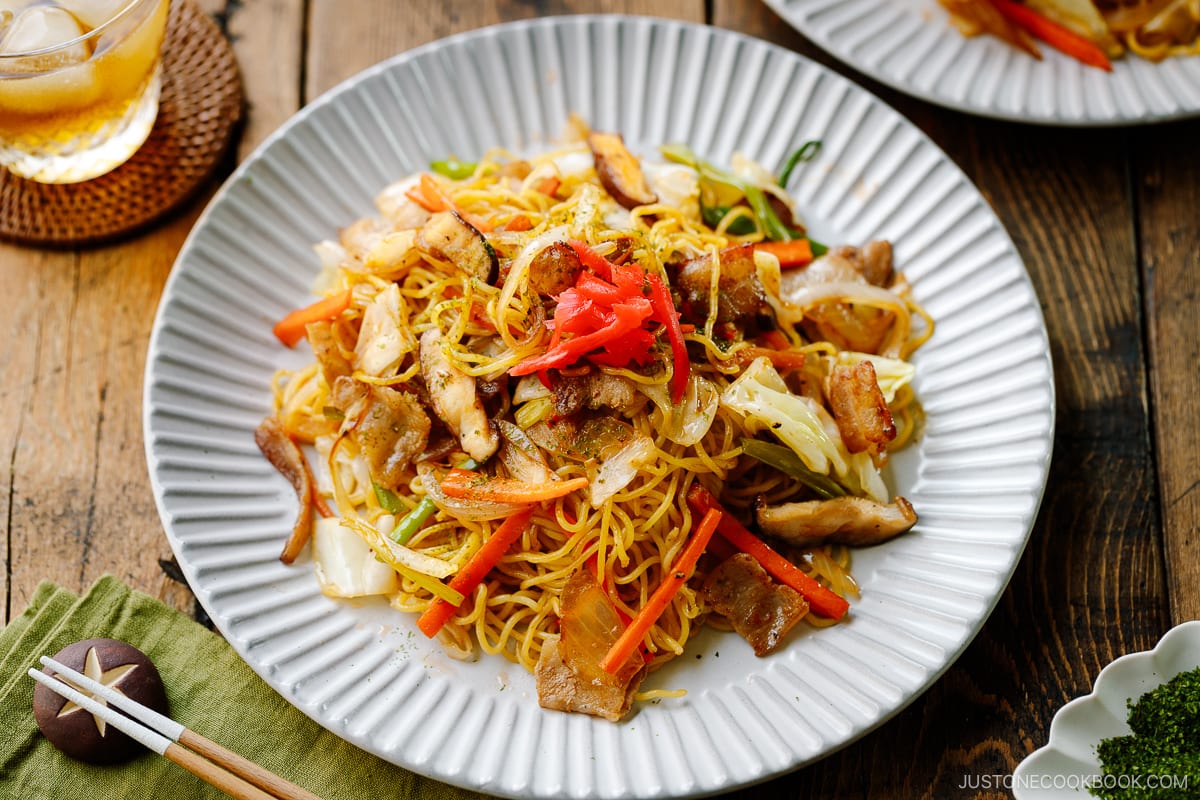
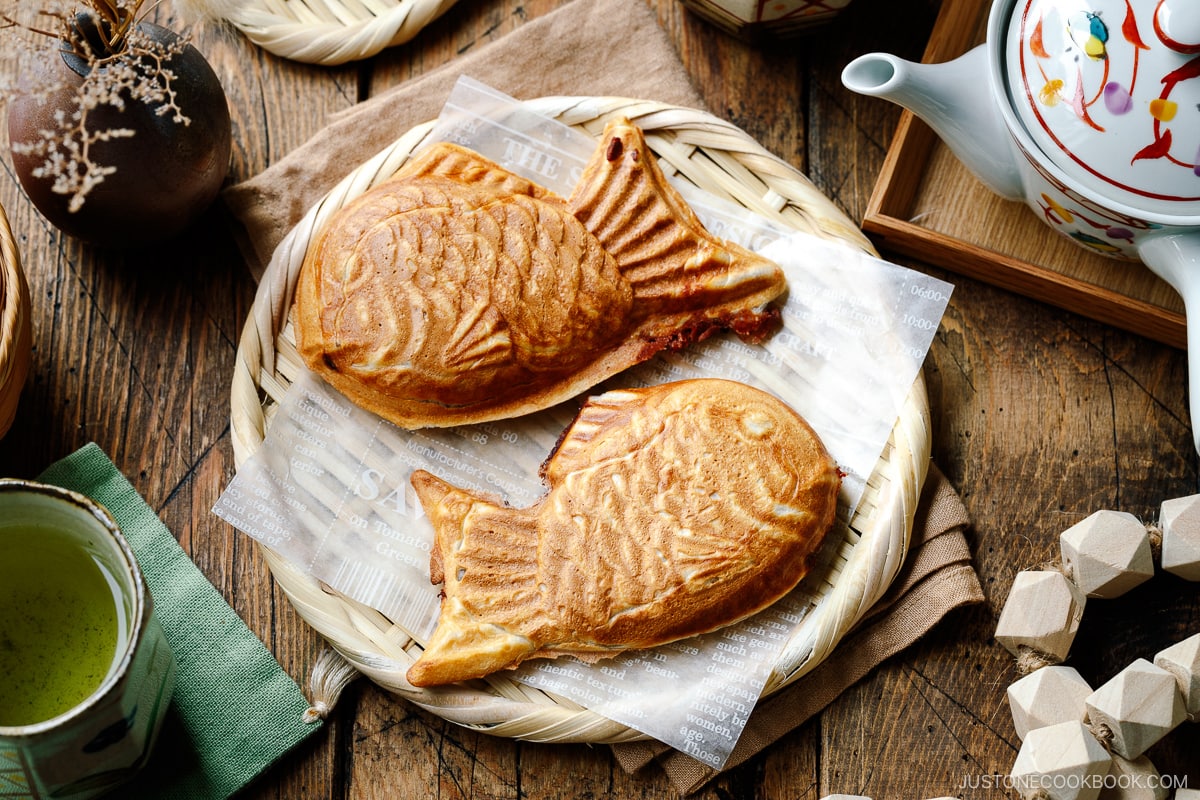
More Popular Japanese Street Food Recipes
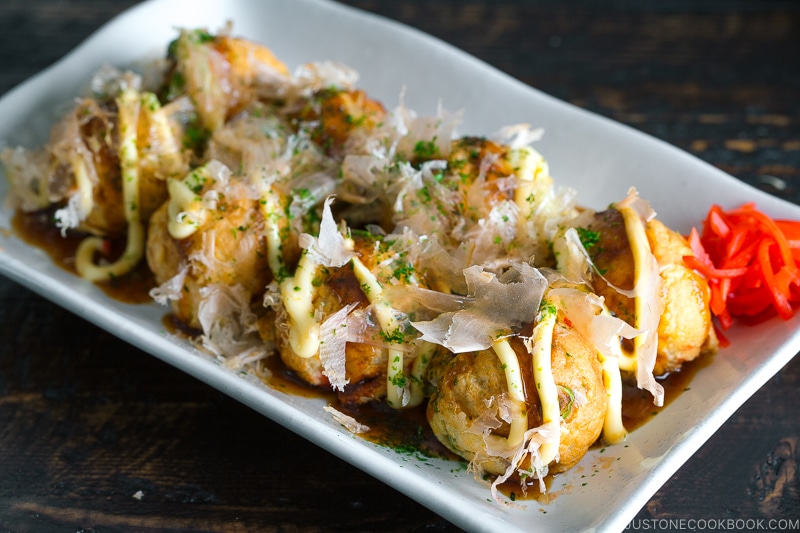
- Takoyaki (Octopus Balls)
- Yakisoba (Japanese Stir-Fried Noodles)
- Taiyaki (fish-shape cake with red bean filling)
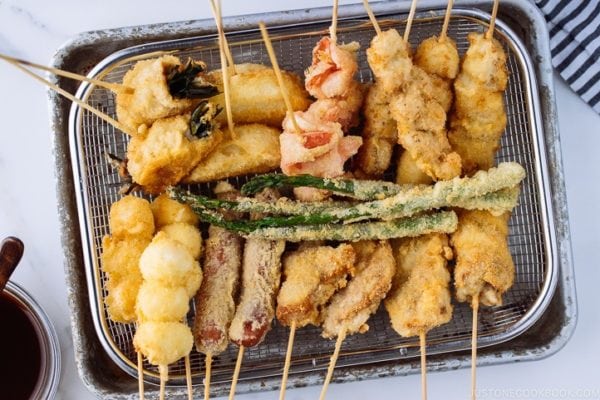
- Kushikatsu (Kushiage)
Wish to learn more about Japanese cooking? Sign up for our free newsletter to receive cooking tips & recipe updates! And stay in touch with me on Facebook, Pinterest, YouTube, and Instagram.
Okonomiyaki
Video
Ingredients
For the Base Batter
- 1 cup all-purpose flour (plain flour) (weigh your flour; for weights, click the Metric button; or use the “fluff and sprinkle“ method and level it off)
- ¼ tsp Diamond Crystal kosher salt
- ¼ tsp sugar
- ¼ tsp baking powder
- 5.6 oz nagaimo/yamaimo (mountain yam) (2–3 inches, 5–8 cm)
- ¾ cup dashi (Japanese soup stock) (use standard Awase Dashi, dashi packet or powder, or Vegan Dashi)
For the Okonomiyaki
- ½ head green cabbage (large; 1.4 lb, 640 g)
- ¼ cup pickled red ginger (beni shoga or kizami beni shoga)
- ½ lb sliced pork belly (8 slices; you can slice your own; or substitute shrimp, squid, or mushrooms)
- 4 large eggs (50 g each w/o shell)
- ½ cup tenkasu/agedama (tempura scraps) (get from Amazon)
- neutral oil (for cooking the okonomiyaki)
For Serving
- okonomiyaki sauce (store-bought or make my quick okonomiyaki sauce recipe with sugar, oyster sauce, ketchup, and Worcestershire sauce; see the instructions below)
- toppings of your choice (typically Japanese Kewpie mayonnaise, katsuobushi (dried bonito flakes), aonori (dried green laver seaweed), pickled red ginger (beni shoga or kizami beni shoga), and chopped green onions/scallions)
Instructions
- Before You Start: If time allows, let the batter rest for at least one hour (and up to overnight) for a fluffier okonomiyaki. Now, gather all the ingredients.

To Prepare the Base Batter
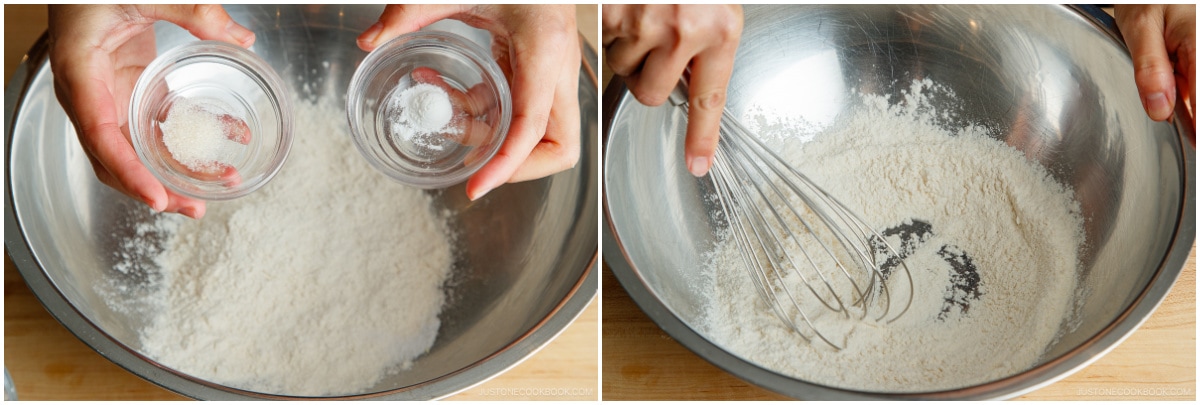
- In a large bowl, combine 1 cup all-purpose flour (plain flour), ¼ tsp Diamond Crystal kosher salt, ¼ tsp sugar, and ¼ tsp baking powder. Mix all together.

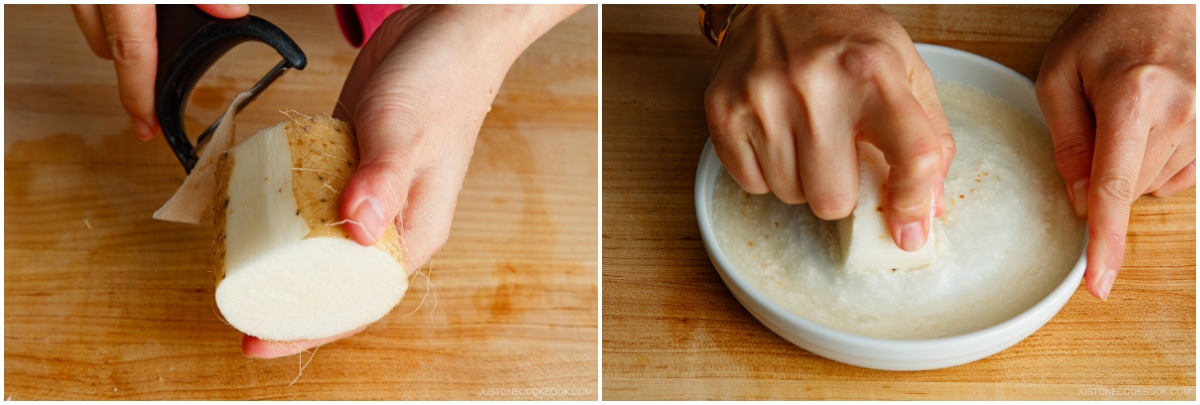
- Peel and grate 5.6 oz nagaimo/yamaimo (mountain yam) in a small bowl (I use a ceramic grater that I love). Note: The nagaimo may irritate your skin and cause itchiness. Work quickly and rinse your hands immediately after touching the nagaimo. It is very slimy and slippery, so make sure you have a good grip on the nagaimo if you wear kitchen gloves.
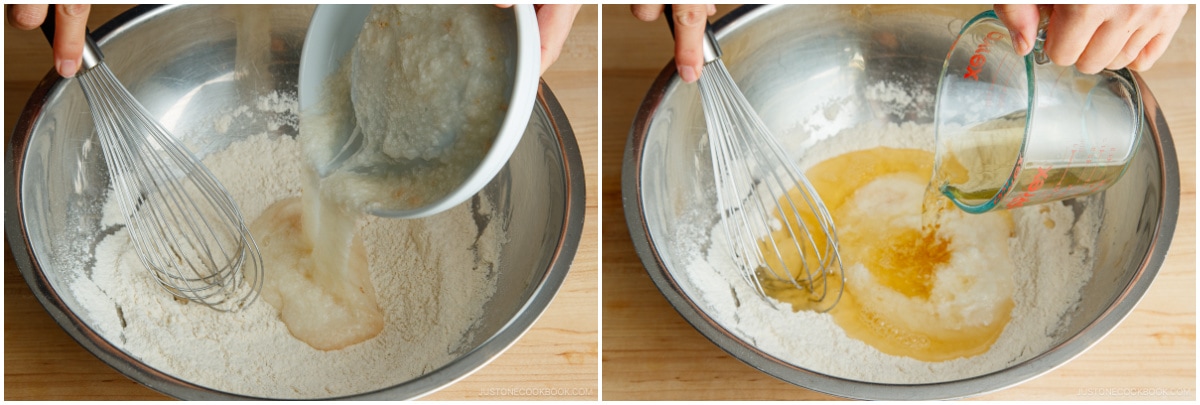
- Add the grated nagaimo and ¾ cup dashi (Japanese soup stock) to the bowl.
- Mix it all together until combined and set aside while you prepare the ingredients. If time allows, cover the bowl with plastic wrap, put it in the refrigerator, and let the batter rest for at least one hour (and up to overnight). Tip: Resting the batter relaxes the gluten, improves the flavor, and makes the okonomiyaki fluffier. Some okonomiyaki shops refrigerate the batter overnight.
To Prepare the Ingredients
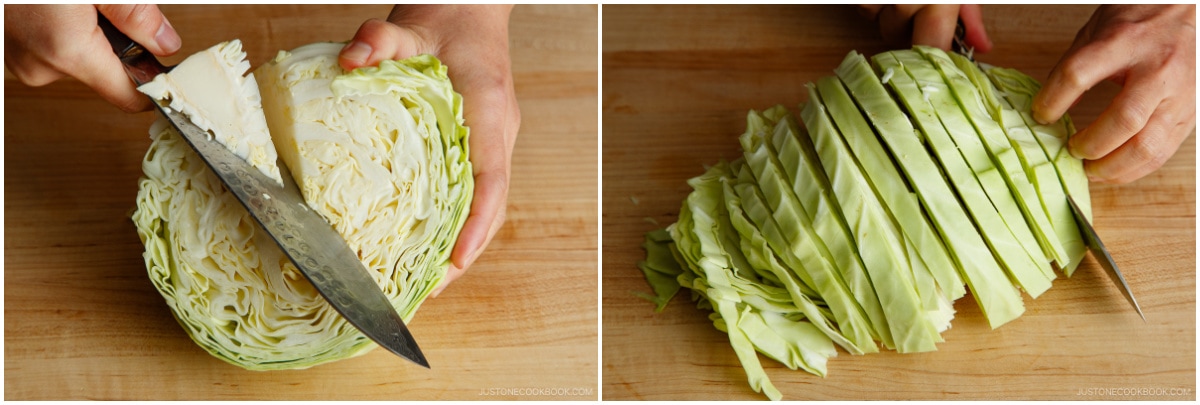
- Discard the core of ½ head green cabbage and cut into ½-inch (1.3-cm) slices.
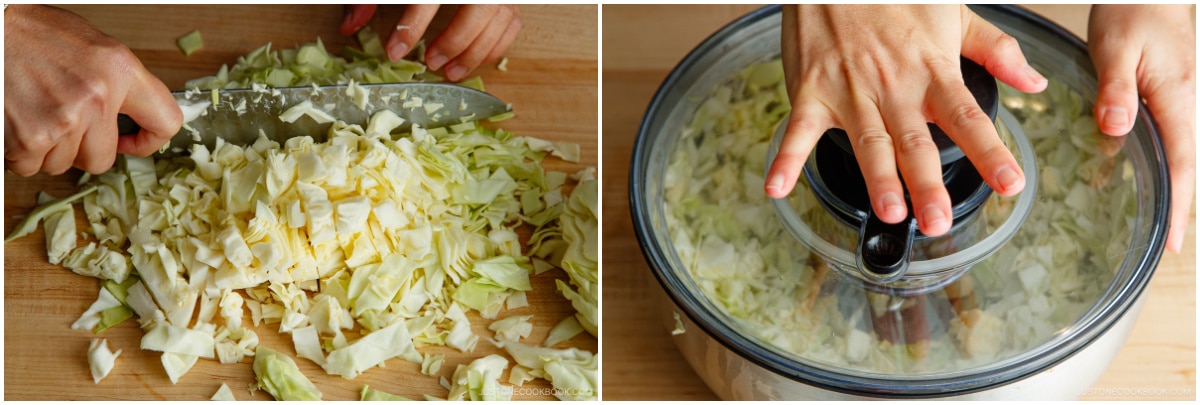
- Then, mince the cabbage strips. Wash the cabbage and drain well (I use a salad spinner) to remove excess moisture that could potentially dilute the batter.
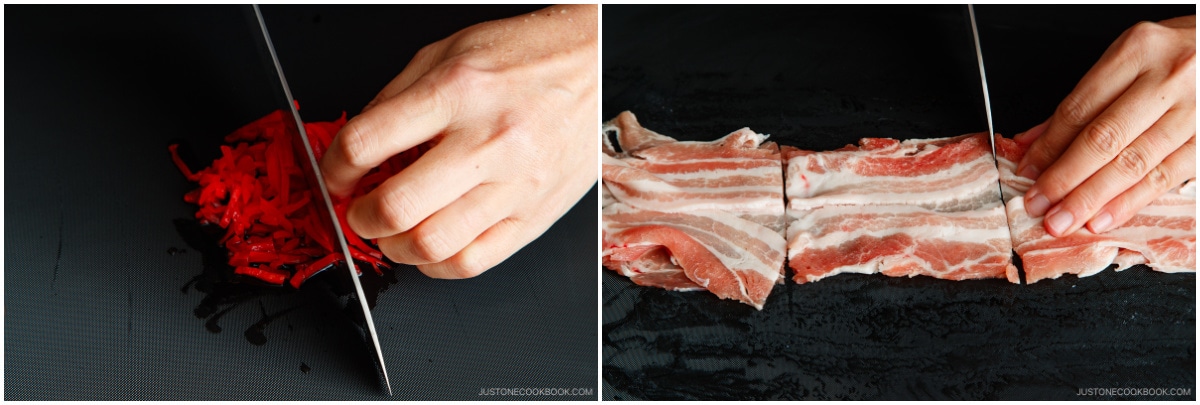
- Chop ¼ cup pickled red ginger (beni shoga or kizami beni shoga). Cut ½ lb sliced pork belly into 4-inch (10-cm) pieces and set aside.
To Prepare the Okonomiyaki Batter
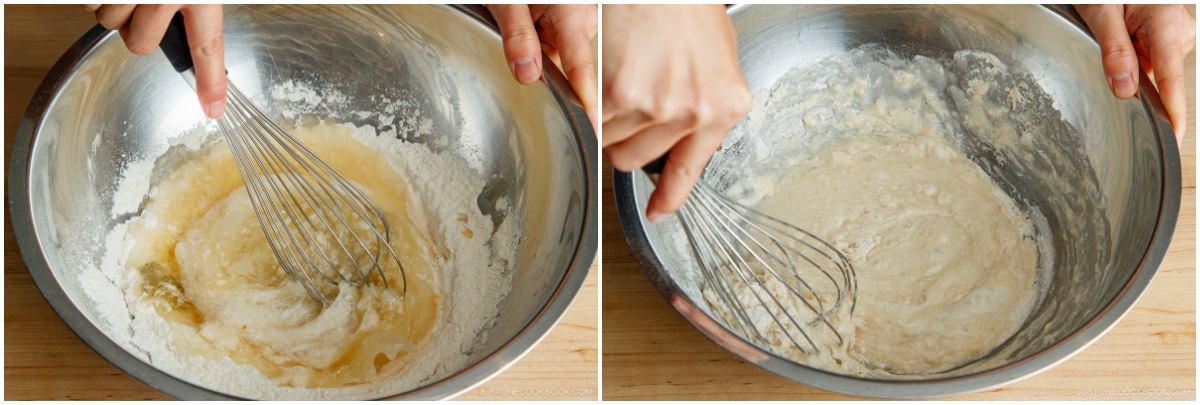
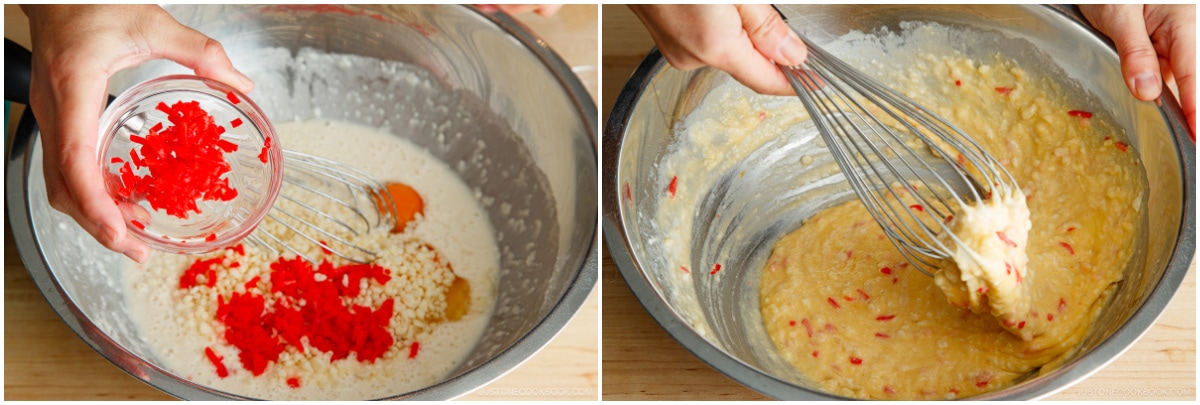
- If you rested the base batter for an hour or longer, take it out from the refrigerator. Add 4 large eggs (50 g each w/o shell), ½ cup tenkasu/agedama (tempura scraps), and two-thirds of the pickled red ginger to the bowl. Mix until combined.
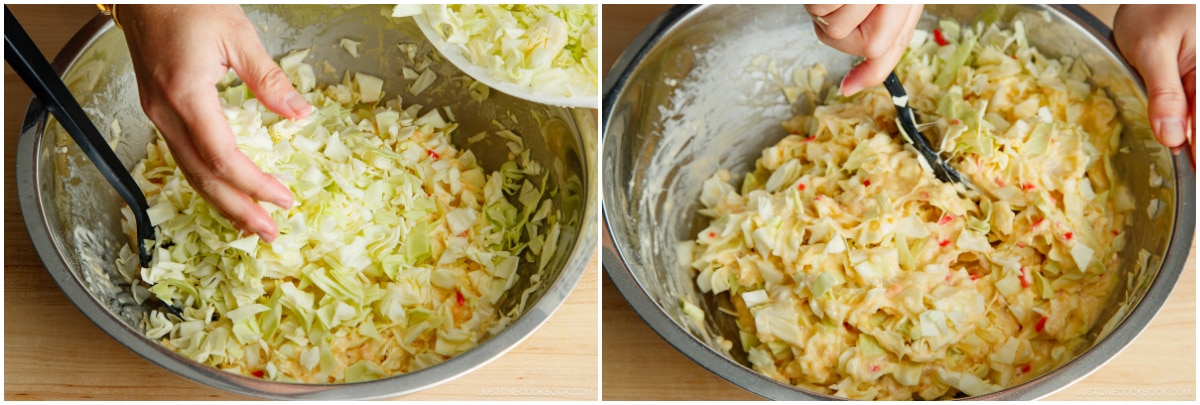
- Add the minced cabbage to the batter, one-third of it at a time. Mix well before each addition.
- Check the consistency of the okonomiyaki batter. Make sure the cabbage is coated well in the batter. You do not need to use all the minced cabbage if it is overpowering the batter.

To Cook the Okonomiyaki
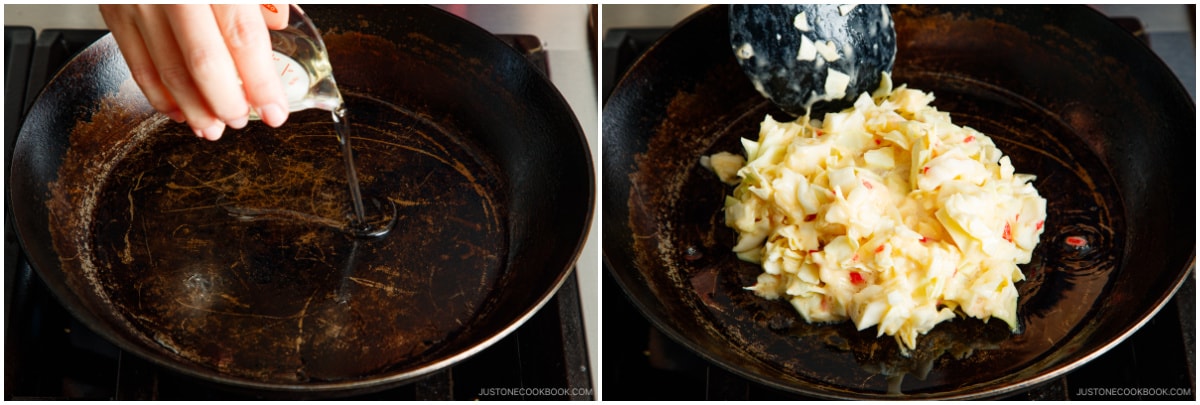
- Prepare a large griddle or two large frying pans with lids to cook two savory pancakes at a time. In the pans, heat a bit of neutral oil on medium heat. When it‘s hot (400ºF or 200ºC), add one portion of the batter to each pan.
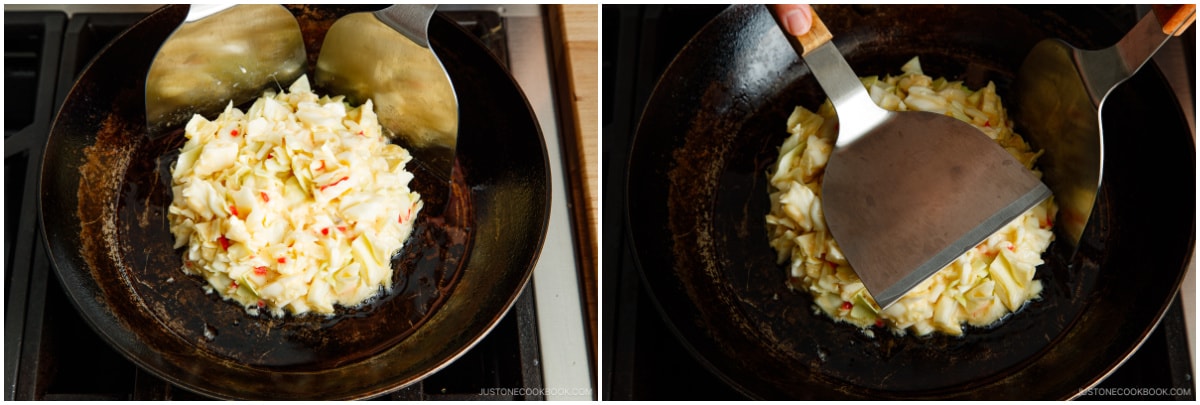
- Using spatulas, spread and shape the batter in a circle about 6 inches (15 cm) in diameter. We like thicker okonomiyaki (the final thickness is ¾ inches or 2 cm). If you’re new to making okonomiyaki, make it smaller and thinner so it’s easier to flip.
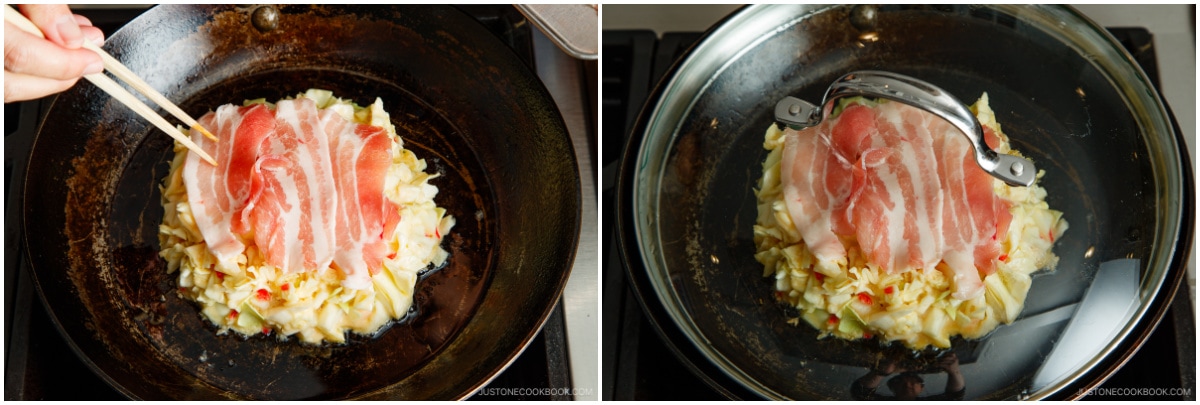
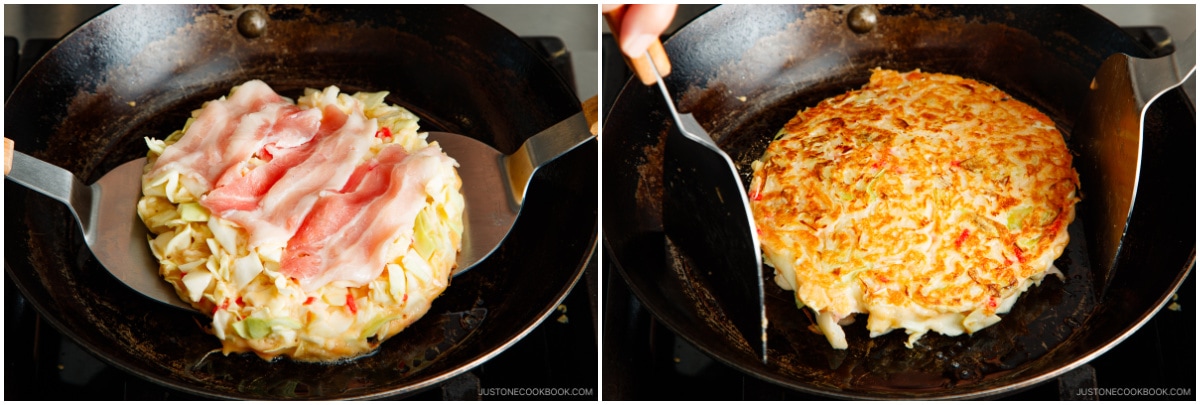
- Place 3 slices of pork belly on top of each okonomiyaki and cook, covered, on medium-low heat for 5 minutes.
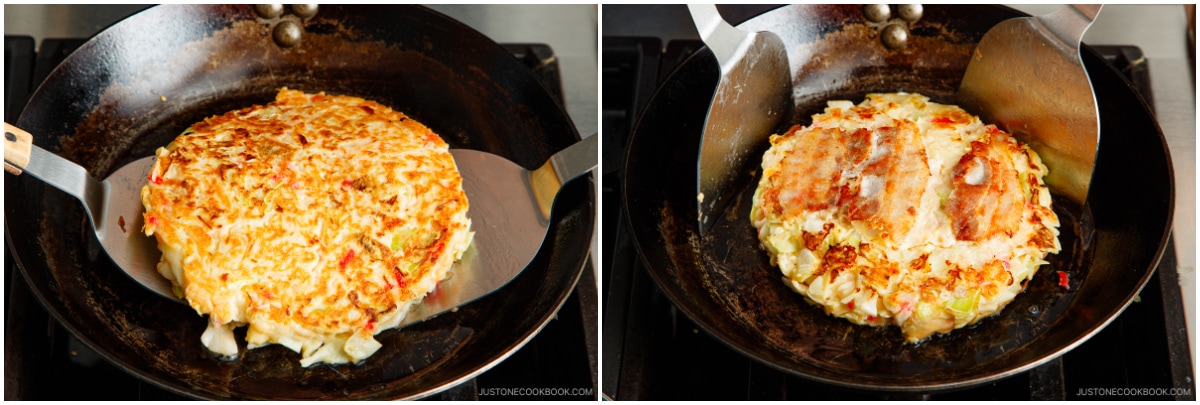
- When the bottom side is nicely browned, flip them over.
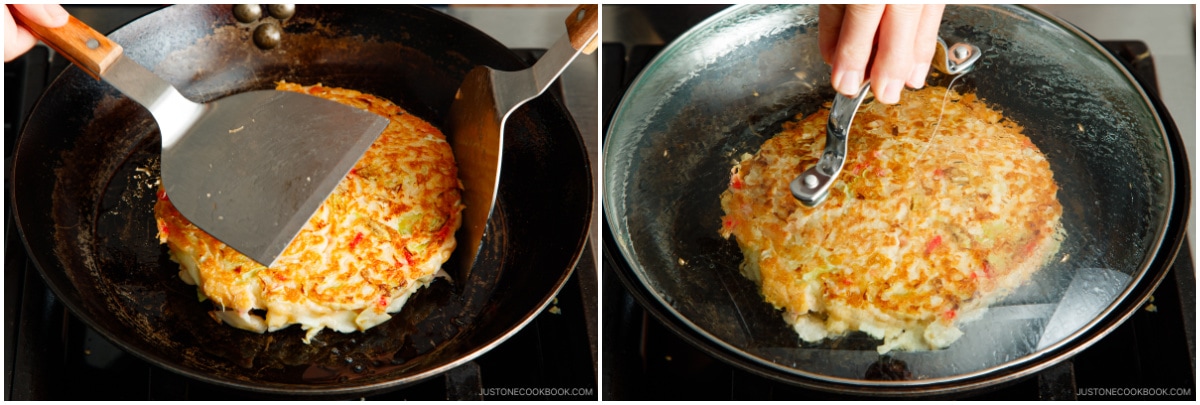
- Gently press the okonomiyaki to fix their shape and keep them together. Cook, covered, for another 5 minutes.
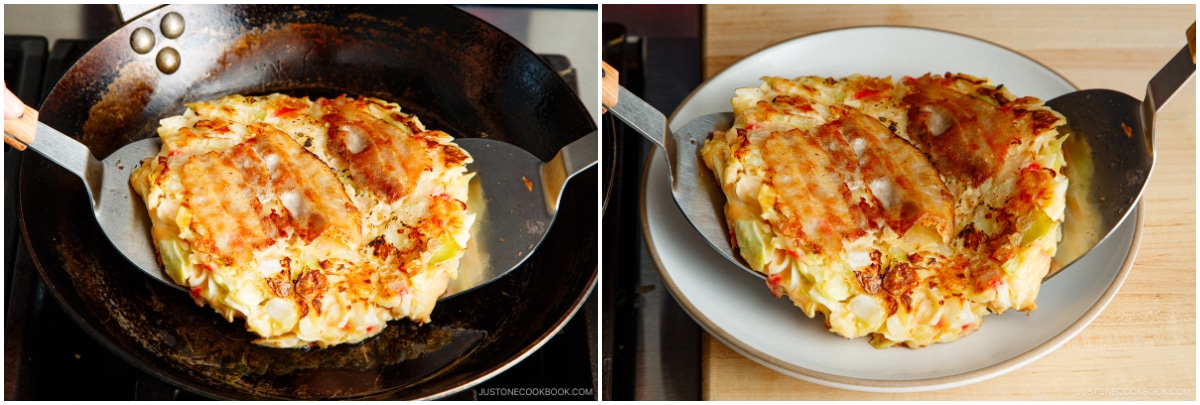
- Flip them over one last time and fix their shape. Then cook, uncovered, for 2 minutes.
- Transfer the cooked okonomiyaki to individual plates. Continue cooking the rest of the okonomiyaki.
To Make the Quick Okonomiyaki Sauce (optional)
- Combine 3 Tbsp sugar, ¼ cup (4 Tbsp) oyster sauce, ½ cup (8 Tbsp) ketchup, and 7 Tbsp Worcestershire sauce in a small bowl. Mix all together until the sugar is completely dissolved.

To Serve
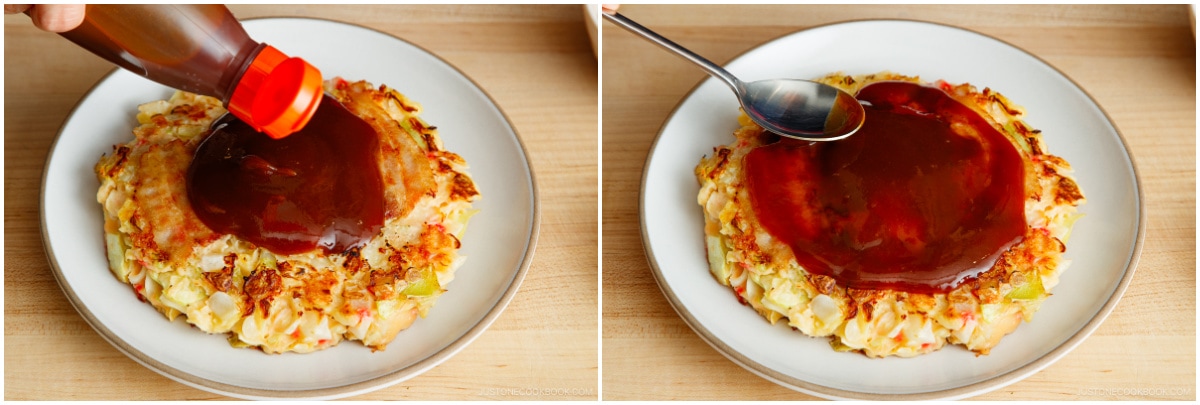
- Now, it‘s time to customize your okonomiyaki with the condiments and toppings of your choice. In Japan, we spread okonomiyaki sauce on top with a brush or spoon.
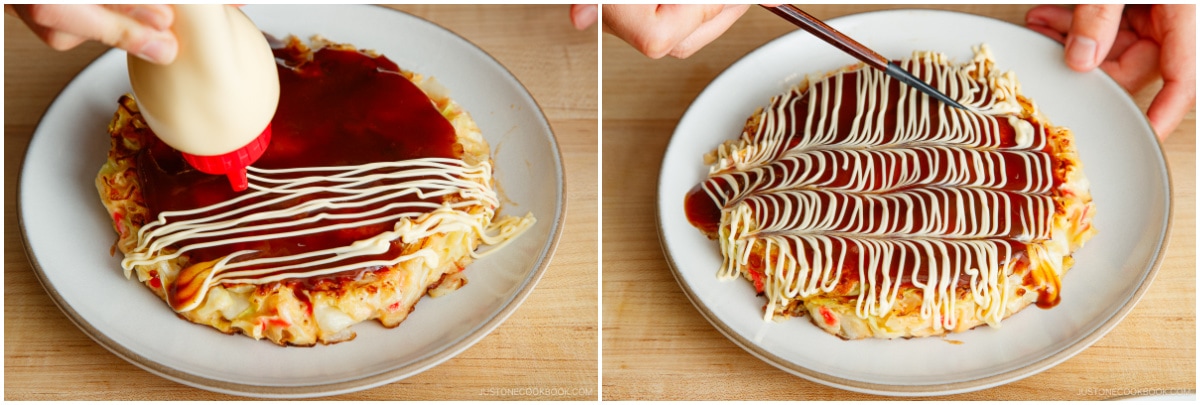
- Then, drizzle Japanese Kewpie mayonnaise (you can make my homemade recipe) in a zigzag pattern. Drag a chopstick tip through the mayo every ½ inch (1.3 cm) to create the iconic look.
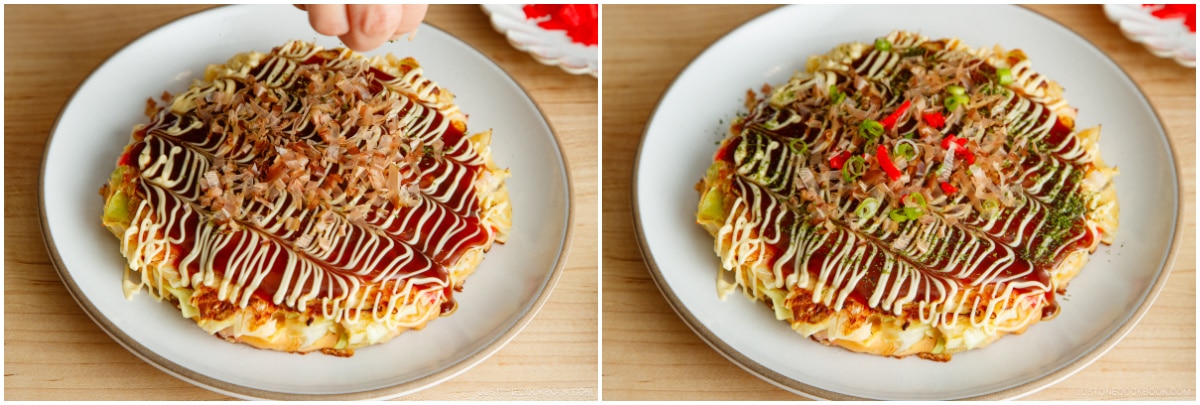
- We like to sprinkle the top with katsuobushi (dried bonito flakes), aonori (dried green laver seaweed), and chopped green onions/scallions. Finally, garnish with the remaining pickled red ginger (you can make my homemade beni shoga recipe).
To Store
- Wrap each okonomiyaki (without the sauce or toppings) in aluminum foil and put it in a freezer bag. Store in the refrigerator for up to 3 days and in the freezer for a month.
To Reheat
- For the okonomiyaki from the refrigerator, reheat it in a toaster oven or oven at 350°F (180°C) for 10–15 minutes. For the okonomiyaki from the freezer, you can defrost it overnight in the refrigerator or reheat the frozen okonomiyaki in the oven for 25–30 minutes. It‘s a great quick meal!
To Cook Several Okonomiyaki at Once
- If you have a Japanese griddle with a lid (we call it a hot plate), you can cook several pieces of okonomiyaki at once. Otherwise, I recommend cooking one okonomiyaki at a time in a frying pan.

Nutrition
Editor’s Note: The post was originally published on Mar 2, 2011. It was republished with a new video, more helpful content, and new images on March 1, 2024.


Hi Nami
Made this for the first time. I always thought okonomiyaki is really difficult to make – now i know better. Its quite hard to find mountain yam even in Singapore (and expensive!) but i substituted with potato starch (which i had handy – does not taste as yummy but it still works.
Loving your recipes , and thank you so much for sharing them.
Hi Lizzie! Thank you for trying this recipe! It’s always a myth when the food is something you never cooked before. 🙂 Glad you gave it a try and liked this recipe! Thank you for the potato starch trick! I”m so happy to hear you enjoy my recipes. Thank you for following my blog!
Hi Nami! I love this recipe and have made it a few times, I love how it freezes so well. I do run into one issue over and over again, during step 1-3, when I use 3/4 cups dashi /liquid to 1 cup flour (and a tsp or so other things), I always end up with a dough rather than batter, in the times I made it I often double the dashi to ensure we get to a thick batter. Is there something I’m doing wrong or reading wrong?
Hi Carol! Yeah I make a lot too, and pack into individual package and freeze for my lunch. 😀
Maybe your 1 cup is more than 120 g. When you measure a cup, you need to fluff the flour first, then scoop flour with a spoon into a measuring cup. If you do that, weight should be 120 g. But if you scoop with a measuring cup, it ways more than 120. You might have more flour than you need. I also use large eggs. I always use this recipe too for my own okonomiyaki and I don’t have the issue. I thought it could be the flour amount. 🙂
Hello Nami, i would need al little advice;
Since Aonori is not available anywhere in my city I orderd some online. However these people send me Aonori that will expire very soon, so that I am not able to use it up 🙁
So my question; can you maybe freeze Aonori? Liek you would freeze some herbs or chive?
They also send me Shiratamako+Joshinko which expires next month. I really do not not know how to use it up so quickly, but I guess flour is usable longer than the expire date if stored dry.
Hi Melanie! This company is horrible! If it’s Amazon you should write a feedback. If not, I would complain. Both should at least last 6 months or more, and it’s obvious this company is not doing well trying to get rid of their almost expired stuff. Very dishonest company… You can freeze them, but still, it should have been frozen 6 months or a year ago when it was fresh. Sorry you had this bad experience. 🙁
Hi
Thank you for your reply. It was a german online shop 🙁
I will try to freeze it, it is still better than throwing it away. I was really angry when I got the parcel.
Is it possible to make Aonori by myself? Out of Nori sheets maybe?
Hi Melanie! I see. They seem like they have a lot of inventory especially if it’s not as popular… 🙁
We don’t make aonori from scratch. Usually fisherman gets the seaweed/plant and dried, then make into powder.
Hello Nami,
I’m in Australia and have 2 daughters who study Japanese; one in high school the other at University. I’ve found your website to be extremely accessible to help me compliment their interest by producing some Japanese meals. I have struggled to source some ingredients, but it hasn’t mattered. I made Okonomiyaki tonight and added grated carrot and zucchini to the batter. We had Chicken Katsu Donburi last night, and last week I made the Mille Fieulle. All fantastic and we will be trying more of your recipes !! Thankyou so much :))
Hi Sally! How wonderful that your daughters are both studying Japanese! And you’re cooking Japanese foods! I’m super happy to hear that three of you are enjoying Japanese culture. Thank you for trying out my recipes! There are quite a bit of Japanese (expats and students) live in Australia and I have heard that there are pretty good Japanese supermarkets there. Hope you can find ingredients you need. 🙂 Thanks so much for your kind feedback!
I’ve tried this recipe with a friend and found it scrumptious! As a personal variation I’ve added shrimp instead of squid. It’s sad I couldn’t find the red ginger anywhere, because it does have a distinctive taste. Surprisingly, I didn’t miss the bonito that much, as the dashi inside guaranteed the “fishy” taste.
Hi Eleonora! I’m glad to hear you enjoyed this recipe! Thanks so much for letting me know. 🙂
Thank you so much Nami for the recipe, tried for continuous 2 days, just so good that hv to share with more friends during Christmas, can i prepare in advance for 20 persons and heat up just before serving? preferably pan fried or oven? if oven what temperature and how long should i bake
thank you
Hi Angie! Wow I’m so happy to hear you enjoyed this recipe! Yay! Yes, it’s possible. But please understand that Okonomiyaki is best when it’s made fresh. However, I understand your situation. And I always feel even leftover tastes good, so I think you can make like all the okonomiyaki ahead (40-50 okonomiyaki? 2-3 per person?). Or make half and make half fresh etc…. If you make ahead, please use oven or oven toaster to reheat. Don’t use a microwave to heat up, it will be soggy and soft. Since it’s a lot, you might want to pan fry some of them to speed up process too. It’s already cooked, so you just need to make it crispy – maybe 400F (200C) for a few minutes (if not frozen). Just check and see – you don’t want to burn it or inside is cold. Hope this helps!
hello Nami, thanks very much for your reply, will start to do some planning, hopefully wont 手忙脚乱
Merry Christmas and happy new year
Good luck, Angie! Thanks, Merry Christmas and HNY to you too!
HI Nami,
Thanks for this easy to follow Okonomiyaki (and sauce) recipe. It took us back to our wonderful time in Hiroshima-Ken. I plan on making this for the kids this weekend while we watch Japanese dramas on the computer.
Regards,
Edgar
Hi Edgar! I’m so happy to hear that! Thank you for your kind feedback! I used to watch Japanese dramas too but got too busy with blogging and no time to watch dramas anymore. Enjoy watching them for me too! 🙂
Hi, I was just wondering if you could use regular or egg Mayo if you can’t get Japanese Mayo?
Hi Kira! I highly recommend Japanese mayonnaise because it has more egg flavor and it really goes well with Okonomiyaki / Tonkatsu sauce… American mayo is too creamy and too bland and no taste (in my opinion) for Okonomiyaki.
It’s not the same, but you can turn American mayo to Japanese mayo.
https://www.justonecookbook.com/pantry_items/japanese-mayonnaise/
Also, in case you don’t have Tonkatsu sauce or Okonomiyaki Sauce here’s a recipe.
https://www.justonecookbook.com/how_to/tonkatsu-sauce-recipe/
Hope this helps!
Hello Nami,
Your okonomiyaki recipe is one of our family favourites now! Amongst many other recipes from http://www.justonecookbook.com. 🙂 It’s a great way to get my children to eat cabbage! I initially used grated zucchini for this recipe because it has a softer texture. Then just last night, I mixed in pre-steamed shredded cabbage, and it worked really well! My children called it “veggie pancakes”; and they even asked for more!!
Thank you 🙂
Hi Elvina! Awesome! I’m so happy to hear you and your children enjoy this dish! Yeah we use a lot o cabbage for Okonomiyaki night. 🙂 You made me want to eat Okonomiiyaki now…. I’m so happy to hear your kids liked this recipe! Thank you for your kind feedback!
If you can’t get mountain yam, add 1/4 cup cornstarch per 1 cup all purpose flour, gives it lift, body, and acts as a binder. Just don’t over mix and use the batter asap or the bubbles in the cornstarch and baking powder will disappear.
Made some for dinner and was expecting leftovers for tomorrow’s breakfast, not a single one left.
Hi Hondo! Thanks for your substitute tip for Nagaimo! It’s hard to find if you don’t have a Japanese or Asian grocery store, so your information is very valuable. Thank you!
Hello again Nami,
I hope you and your family are enjoying your visit to Japan and your home renovation goes well and is completed in a timely manner.
I have enjoyed preparing quite few of you recipes so far on your blog and look forward to enjoying many more as time permits.
I find your instructions to be very clear to follow and your excellent photographs are a great bonus.
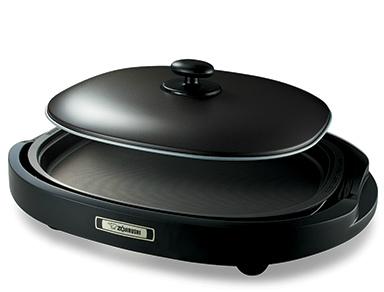
I have wanted to make Okonomiyaki for quite a few years since I have enjoyed it many times in Japan and your great blog has inspired me to give it a try. I even bought a new Zojirushi rectangular griddle today so that I can make lots at one time when we have company.
Our friends who own a Japanese sushi restaurant here in Toronto Canada coincidently requested it last night.
I made them your Sukiyaki last time they we over for diner and they loved it so I’m sure this dish will also be a success.
So my question is how can I print your photographs and instruction paragraphs with the recipe without all the other on screen background graphics as the page reformats when I try to print it.
Best regards,
Ken
Hi Ken! Thank you so much for your well wishes. We’re having a great time in Japan and will miss every moment once we go back to California… and the kitchen won’t be ready! Ahhh! >_< Anyhow, thank you so much for trying my recipes! Glad to hear my instructions are clear. I sometimes feel my instructions are too long, but I feel it's nice to have extra tips in case for those who are not familiar with the process. So thank you for your kind feedback. 🙂 You will enjoy the griddle pan! I use it all the time to make Okonomiyaki and pancakes. 🙂 I'm sure new ones are nicer... mine is probably 20 years old! Happy to hear your friend enjoyed the sukiyaki recipe! Regarding the print option. I tested for a while to see which print option my readers like. 1) instructions with pictures or 2) instructions without pictures. When I turn on images to be included to the recipe, a lot of people complained that it's waste of ink... therefore I had decided to turn off the image option. Hence, you will only see the words when you print out. These days a lot of people use iPad and tablets so they don't print out - so I thought it's okay to keep print option the way it is (just words only). I am sorry my recipe doesn't include the images. Most of my recipes are LONG and each step has an image. It can easily be 2-3 pages when you print out... What you could do is to highlight the recipe area (including pictures) and paste into Word. Then you can print it out without ads etc. It's an extra step, but that's the only way to show instructions and pictures. So sorry for the inconvenience.... Hope that helps!
Oishii-desu-de !!
Arigato, Richard! 🙂
Tried your okonomiyaki recipe today . Comes out perfect! Thank you for all the wonderful and fool-proof recipes, saves me a lot from searching from one recipe to another.
Hi Darrell! Awesome! So happy to hear your okonomiyaki came out well! Thank you so much for trying this recipe and I hope you enjoy other recipes as well! 🙂
Hi it’s look very delicious nami. What is nagaimo? And how to make to sauce ur self? Thx
Hi Lidy! Nagaimo (or sometimes called Yamaimo) is this: http://en.wikipedia.org/wiki/Dioscorea_opposita
It’s slimy and help bind the batter together.
For the sauce, please follow this recipe: https://www.justonecookbook.com/how-to/tonkatsu-sauce-recipe/
Hope you enjoy this recipe! 🙂
Finally a recipe with instructions to cook the okonomiyaki all the way through. Nothing worst than raw in the middle. This is now my go-to recipe. Thank you
Awesome! Thank you so much for your kind feedback!